今天学习下JWT,遇到了两个坑爹问题,这里记录下。在 ASP.NET Core 中,授权的设置方式有两种,可以使用角色,也可以使用策略,这里也将简单举例角色、策略的使用。
JWT这里不做介绍,如果想了解更多,请看https://www.jianshu.com/p/a12fc67c9e05,https://www.cnblogs.com/CreateMyself/p/11123023.html ,这两篇都讲解的很好,这里只写实际的使用和遇到的问题。
1. JWT的SecretKey必须16位以上
jwt中key必须16位以上,否则长度不够会抛出异常,异常代码如下
System.ArgumentOutOfRangeException
  HResult=0x80131502
  Message=IDX10603: Decryption failed. Keys tried: '[PII is hidden. For more details, see https://aka.ms/IdentityModel/PII.]'.
Exceptions caught:
 '[PII is hidden. For more details, see https://aka.ms/IdentityModel/PII.]'.
token: '[PII is hidden. For more details, see https://aka.ms/IdentityModel/PII.]'
  Source=Microsoft.IdentityModel.Tokens
  StackTrace:
   at Microsoft.IdentityModel.Tokens.SymmetricSignatureProvider..ctor(SecurityKey key, String algorithm, Boolean willCreateSignatures)
....................
2.获取token之后,一直401Unauthorized
在Startup.cs中的Configure中添加app.UseAuthentication();新创建.net core项目的时候,会自动添加授权app.UseAuthorization();但是JWT其实是一种认证,准确;来说是登录的过程,需要用户名和密码的认证。
例如:你要登陆论坛,输入用户名张三,密码1234,密码正确,证明你张三确实是张三,这就是 认证authentication;那么是否有删除添加等的操作,这就是授权authorization
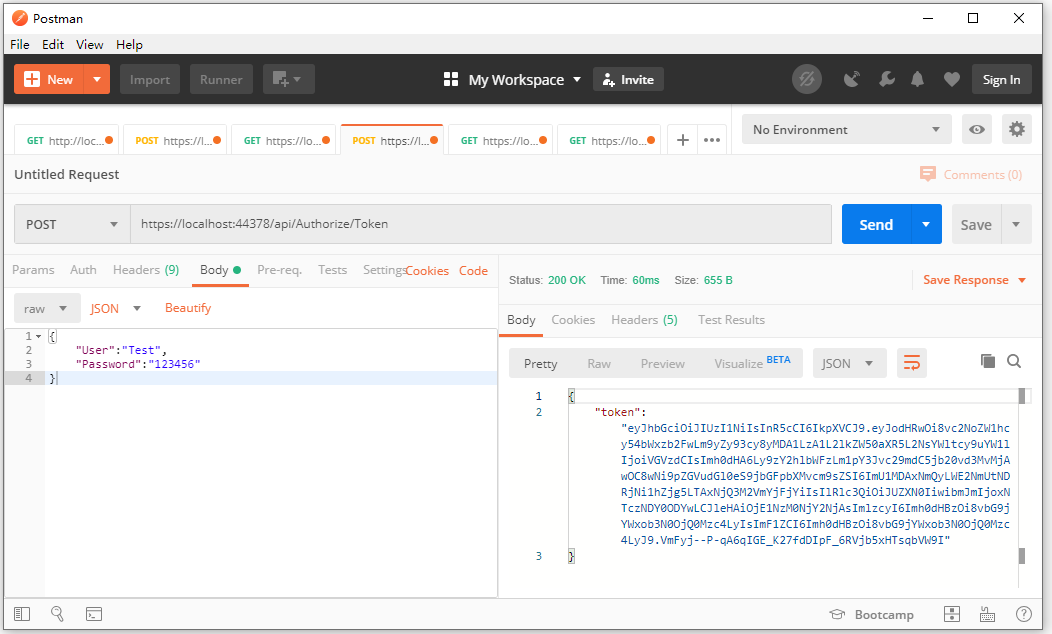
3.JWTtoken的获取

//appsettings.json中增加配置信息
"JwtSettings": {
    "Issuer": "https://localhost:44378/",
    "Audience": "https://localhost:44378/",
    "SecretKey": "1234567890123456"
  }

// Startup.cs中增加JWT的设置
            services.AddAuthentication(options =>
            {
                //认证middleware配置
                options.DefaultAuthenticateScheme = JwtBearerDefaults.AuthenticationScheme;
                options.DefaultChallengeScheme = JwtBearerDefaults.AuthenticationScheme;
            })
            .AddJwtBearer(o =>
            {
                //主要是jwt  token参数设置
                o.TokenValidationParameters = new TokenValidationParameters
                {
                    //Token颁发机构
                    ValidIssuer = jwtSettings.Issuer,
                    //颁发给谁
                    ValidAudience = jwtSettings.Audience,
                    //这里的key要进行加密,需要引用Microsoft.IdentityModel.Tokens
                    IssuerSigningKey = new SymmetricSecurityKey(Encoding.UTF8.GetBytes(jwtSettings.SecretKey)),
                    ValidateIssuerSigningKey = true,
                    //是否验证Token有效期,使用当前时间与Token的Claims中的NotBefore和Expires对比
                    ValidateLifetime = true,
                    //允许的服务器时间偏移量
                    ClockSkew = TimeSpan.Zero

                };
            });

// Controller中获取token
        [HttpPost]
        public IActionResult Token(LoginModel login)
        {
            _logger.LogInformation($"获取Token:User:{login.User}");
            if (string.IsNullOrEmpty(login.User) || string.IsNullOrEmpty(login.Password))//判断账号密码是否正确
            {
                return BadRequest();
            }


            var claim = new List<Claim>{
                    new Claim(ClaimTypes.Name,login.User),
                    new Claim(ClaimTypes.Role,"Test")
                };

            //建立增加策略的授权
            if (login.User == "Test") claim.Add(new Claim("Test", "Test"));
            if (login.User == "Test1") claim.Add(new Claim("Test", "Test1"));
            if (login.User == "Test2") claim.Add(new Claim("Test", "Test2"));
            if (login.User == "Test3") claim.Add(new Claim("Test", "Test3"));

            //对称秘钥
            var key = new SymmetricSecurityKey(Encoding.UTF8.GetBytes(_jwtSettings.SecretKey));
            //签名证书(秘钥,加密算法)
            var creds = new SigningCredentials(key, SecurityAlgorithms.HmacSha256);

            //生成token  [注意]需要nuget添加Microsoft.AspNetCore.Authentication.JwtBearer包,并引用System.IdentityModel.Tokens.Jwt命名空间
            var token = new JwtSecurityToken(_jwtSettings.Issuer, _jwtSettings.Audience, claim, DateTime.Now, DateTime.Now.AddMinutes(30), creds);

            return Ok(new { token = new JwtSecurityTokenHandler().WriteToken(token) });
        }
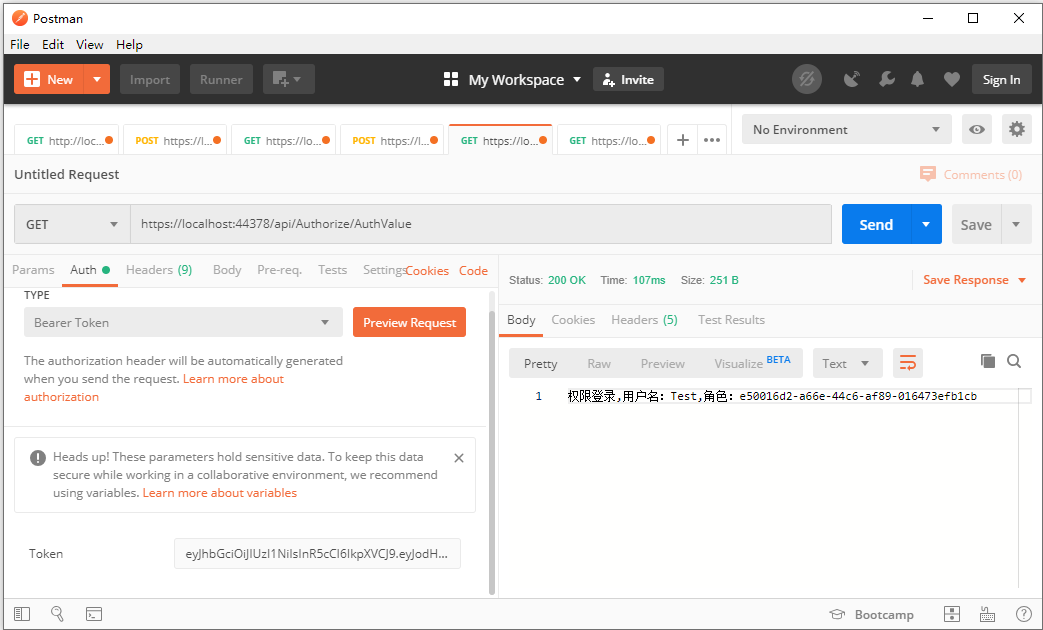
4.基于角色的授权
        [HttpGet]
        [Authorize(Roles ="Test")]
        public ActionResult<string> AuthValue()
        {
            var name = User.FindFirst(ClaimTypes.Name)?.Value;
            var role = User.FindFirst(ClaimTypes.Role)?.Value;
            _logger.LogInformation($"权限登录,用户名:{name},角色:{role}");

            return $"权限登录,用户名:{name},角色:{role}";
        }
Roles角色如果有多个,可以以逗号隔开。
5.基于策略的授权
//Startup.cs中添加策略
services.AddAuthorization(options => {
                options.AddPolicy("OnlyTestAccess", policy => policy.RequireClaim("Test", new string[] { "Test1", "Test2" }));
                options.AddPolicy("DepartmentAccess", policy => policy.RequireClaim("Department"));
            });
        // 方法上增加策略
        [HttpGet]
        [Authorize(Policy = "OnlyTestAccess")]
        public ActionResult<string> AuthExtensionValue()
        {
            var name = User.FindFirst(ClaimTypes.Name)?.Value;
            var role = User.FindFirst(ClaimTypes.Role)?.Value;
            _logger.LogInformation($"基于策略的登录,用户名:{name},角色:{role}");

            return $"基于策略的登录,用户名:{name},角色:{role}";
        }
6.运行的截图


7.Github上的源码
https://github.com/jasonhua95/samll-project/tree/master/JwtApiDemo


