Riemann monitors distributed systems.
具体介绍就不多说了,一个分布式的监控系统。可以接收各种event上报,然后通过强大的脚本和插件,展示曲线,柱状,饼图等来对系统进行监控。
一、riemann安装
这里主要说ubuntu的安装:

首先,需要java、ruby环境:
sudo apt-get -y install default-jre ruby-dev build-essential
然后下载riemann的包:
wget https://aphyr.com/riemann/riemann_0.2.8_all.deb然后直接安装就OK了:
sudo dpkg -i riemann_0.2.8_all.deb
采用命令就可以启动服务了: sudo service riemann start 二、riemann配置
配置文件在
/etc/riemann/riemann.config
默认配置如下
; -*- mode: clojure; -*-
; vim: filetype=clojure

(logging/init {:file "/var/log/riemann/riemann.log"})

; Listen on the local interface over TCP (5555), UDP (5555), and websockets
; (5556)
(let [host "127.0.0.1"]
(tcp-server {:host host})
(udp-server {:host host})
(ws-server  {:host host}))

; Expire old events from the index every 5 seconds.
(periodically-expire 5)

(let [index (index)]
; Inbound events will be passed to these streams:
(streams
  (default :ttl 60
    ; Index all events immediately.
    index

    ; Log expired events.
    (expired
      (fn [event] (info "expired" event))))))
可以使用go的client进行event的发送:
package main

import (
    "github.com/bigdatadev/goryman"
    //"fmt"
    "time"
    "math/rand"
)

func main(){
c := goryman.NewGorymanClient("localhost:5555")
err := c.Connect()
if err != nil {
    panic(err)
}

defer c.Close()

for {
rd := rand.New(rand.NewSource(time.Now().UnixNano()))

err = c.SendEvent(&goryman.Event{
    Host : "box1",
    Service: "foo",
    Metric:  rd.Intn(1000),
    Tags: []string{"meter","dev"},
})
if err != nil {
    panic(err)
}

rd = rand.New(rand.NewSource(time.Now().UnixNano()))

err = c.SendEvent(&goryman.Event{
    Host : "box2",
    Service: "bar",
    Metric:  rd.Intn(1000),
    Tags: []string{"meter","dev"},
})
if err != nil {
    panic(err)
}
}
}
三、把riemann数据使用graphite来进行画图
由于riemann本身提供的数据图形化比较难弄,但是它可以方便的只想graphite进行处理。
所以,我们装一下graphite。
#安装启动graphite
pip install carbonpip install whisperpip install graphite-web
pip install Django
pip install django-tagging

#默认安装路径在 /opt/graphite/目录下

#初始化配置
PYTHONPATH=`pwd`/webapp:`pwd`/whisper python ./webapp/graphite/manage.py syncdbecho DEBUG = True > webapp/graphite/local_settings.py

#启动web服务,web访问界面
PYTHONPATH=`pwd`/whisper ./bin/run-graphite-devel-server.py --libs=`pwd`/webapp/ /opt/graphite/

#启动接收数据的后台进程
puchd config cp carbon/conf/carbon.conf.example carbon/conf/carbon.confPYTHONPATH=`pwd`/whisper ./carbon/bin/carbon-cache.py --debug start
在riemann的配置中增加一行:
; -*- mode: clojure; -*-
; vim: filetype=clojure

(logging/init {:file "/var/log/riemann/riemann.log"})

; Listen on the local interface over TCP (5555), UDP (5555), and websockets
; (5556)
(let [host "127.0.0.1"]
(tcp-server {:host host})
(udp-server {:host host})
(ws-server  {:host host}))

; Expire old events from the index every 5 seconds.
(periodically-expire 5)

(let [index (index)]
; Inbound events will be passed to these streams:
(streams
  (default :ttl 60
    ; Index all events immediately.
    index

    ; Log expired events.
    (expired
      (fn [event] (info "expired" event))))))

#定义graph绘图的host,这里是部署在一台机器上面的
(def graph (graphite {:host "localhost"}))

;所有的event数据都发给graph进行绘图

(streams  graph)
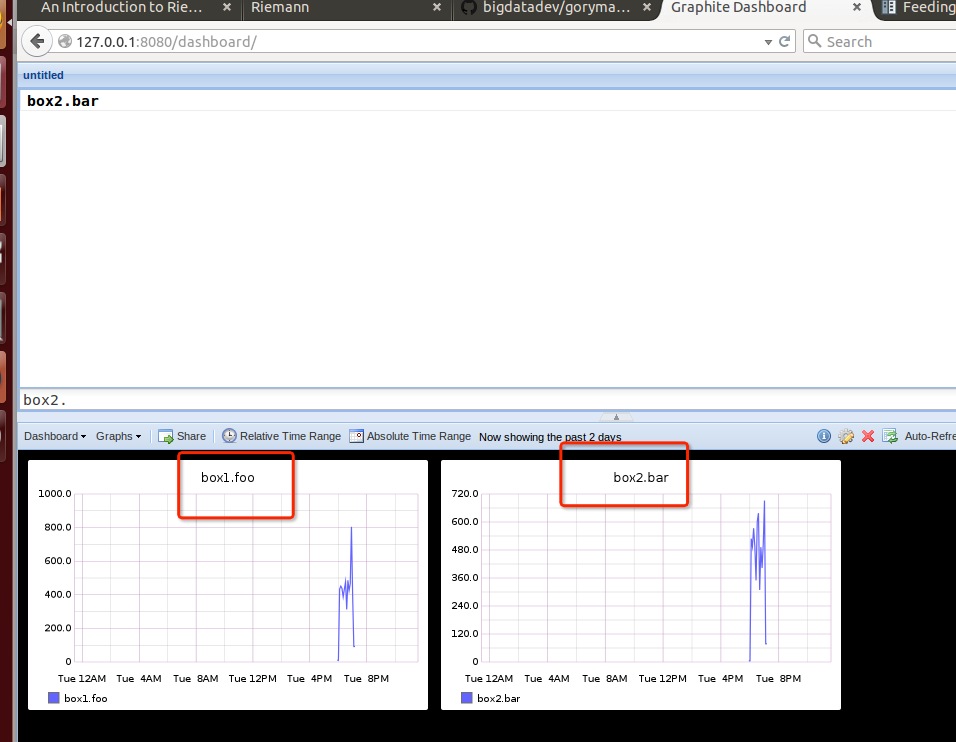
然后启动go的test程序进行发送数据,就能在graphite上面看到数据了:

总结:
riemann非常灵活,但灵活的同时是学习成本的增加。你必须要学会他的配置,而且要熟悉对应的配置语言的语法和函数(当然学会之后,就非常流弊了)。
具体可以参考它官网的howto介绍。 这里就浅尝辄止了,后面项目有需要再好好研究。
参考连接:
http://kartar.net/2014/12/an-introduction-to-riemann/
#如何配置
http://labs.amara.org/2012-07-16-metrics.html#riemann
#streams配置最重要
http://riemann.io/howto.html#running-riemann


