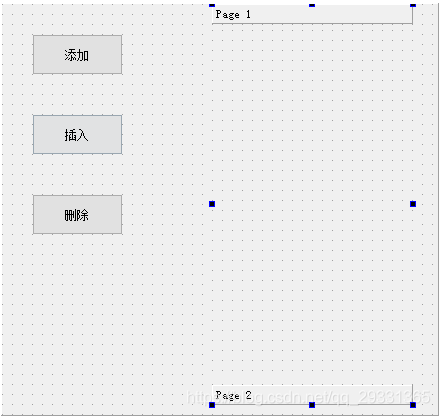
在界面上拉一个 Tool Box 控件,和三个按钮控件:
代码如下:
1 #include "widget.h"
2 #include "ui_widget.h"
3 #include <QGroupBox>
4 #include <QDebug>
5 #include <QMessageBox>
6 #include <QToolButton>
7 #include <QVBoxLayout>
8 #include <QToolBox>
9 #include <QLabel>
10 #include <QHBoxLayout>
11 #include <QPixmap>
12
13 Widget::Widget(QWidget *parent) :
14 QWidget(parent),
15 ui(new Ui::Widget)
16 {
17 ui->setupUi(this);
18
19 // 设置边框样式
20 ui->toolBox->setFrameStyle(QFrame::Panel);
21
22 // 设置图标和文本信息
23 ui->toolBox->setItemIcon(0, QIcon(":/Image/OnePiece.png"));
24 ui->toolBox->setItemText(0, "海贼王");
25
26 // 获取控件上 toolbox 的第一个子页
27 QWidget *widget = ui->toolBox->widget(0);
28
29 // QGroupBox 一般用于分组,作为容器部件使用,在其中可以布置各种窗口部件;
30 // 但是需要注意的是,内部必须使用布局控件进行布局
31 QGroupBox *groupBox = new QGroupBox(this);
32
33 // 创建两个 QToolButton 对象
34 QToolButton *btn1 = CreateToolButton("路飞一号", ":/Image/Luffy.png");
35 QToolButton *btn2 = CreateToolButton("路飞二号", ":/Image/LuffyQ.png");
36
37 // 创建一个垂直布局控件
38 QVBoxLayout *pLayout = new QVBoxLayout(groupBox);
39 pLayout->addWidget(btn1);
40 pLayout->addWidget(btn2);
41 pLayout->addStretch(); // 添加一个可拉伸的空间
42 pLayout->setAlignment(Qt::AlignHCenter);// 设置居中显示
43
44 // 为控件上 toolbox 的第一个子页设置内容(内容是一个布局)
45 widget->setLayout(pLayout);
46 }
47
48 Widget::~Widget()
49 {
50 delete ui;
51 }
52
53 // 创建 QToolButton 控件对象
54 QToolButton *Widget::CreateToolButton(QString text, QString icon)
55 {
56 QToolButton *toolBtn = new QToolButton(this);
57 toolBtn->setText(text); // 设置文本
58 toolBtn->setIcon(QIcon(icon)); // 设置图标
59 toolBtn->setIconSize(QSize(50, 50)); // 设置图标大小
60 toolBtn->setAutoRaise(true); // 设置自动提升
61 toolBtn->setToolButtonStyle(Qt::ToolButtonTextUnderIcon); // 设置文本在图标下面显示
62 return toolBtn;
63 }
64
65 // 添加
66 void Widget::on_btnAdd_clicked()
67 {
68 // QGroupBox 一般用于分组,作为容器部件使用,在其中可以布置各种窗口部件;
69 // 但是需要注意的是,内部必须使用布局控件进行布局
70 QGroupBox *groupBox = new QGroupBox(this);
71
72 // 创建几个 QToolButton 对象
73 QToolButton *btn1 = CreateToolButton("蝴蝶一号", ":/Image/butterfly.png");
74 QToolButton *btn2 = CreateToolButton("蝴蝶二号", ":/Image/down.png");
75 QToolButton *btn3 = CreateToolButton("蝴蝶三号", ":/Image/up.png");
76
77 // 创建一个垂直布局控件
78 QVBoxLayout *pLayout = new QVBoxLayout(groupBox);
79 pLayout->addWidget(btn1);
80 pLayout->addWidget(btn2); // 将 QToolButton 对象添加到布局中
81 pLayout->addWidget(btn3);
82 pLayout->addStretch(); // 添加一个可拉伸的空间
83 pLayout->setAlignment(Qt::AlignHCenter);// 设置居中显示
84
85 // 将分组好的部件添加到 toolBox 中
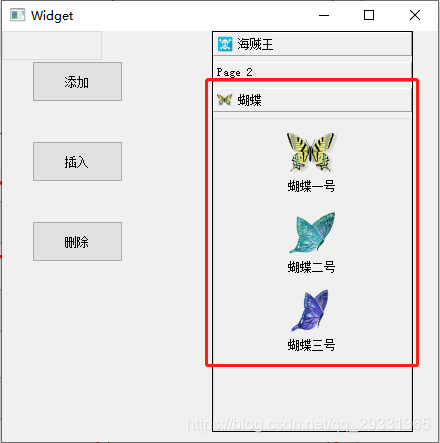
86 ui->toolBox->addItem(groupBox, QIcon(":/Image/butterfly.png"), "蝴蝶");
87 }
88
89 // 插入:多层布局
90 void Widget::on_btnInsert_clicked()
91 {
92 // QGroupBox 一般用于分组,作为容器部件使用,在其中可以布置各种窗口部件;
93 // 但是需要注意的是,内部必须使用布局控件进行布局;
94 QGroupBox *groupBox = new QGroupBox(this);
95
96 // 创建一个用于显示图片的 QLabel
97 // QLabel *labImage = new QLabel(this);
98 // labImage->resize(50, 50);
99 // labImage->setPixmap(QPixmap(":/Image/Luffy.png"));
100 // labImage->setScaledContents(true); // 设置图片自动拉伸,以适应控件大小
101
102 // 注意:上面用 QLabel 显示图片,当图片较大时,没有找到方法让图片缩小
103 // 以适应 label 控件大小,上面的方法单独使用有效,但是放到布局中就无效了;
104 // 所以还是使用 QToolButton 控件吧;
105 QToolButton *btnImage = CreateToolButton("万里阳光号", ":/Image/sunny.png");
106
107 // 创建一个用于显示文字的 QLabel
108 QLabel *labName = new QLabel(this);
109 labName->setText("船长:路飞");
110 labName->setFont(QFont("宋体", 16));
111
112 // 创建一个用于显示文字的 QLabel
113 QLabel *labDesc = new QLabel(this);
114 labDesc->setText("口号:我是要成为海贼王的男人!");
115 labDesc->setFont(QFont("宋体", 12));
116
117 // 先创建一个垂直布局控件:将两个显示文字的 QLabel 放入垂直布局中
118 QVBoxLayout *vLayout = new QVBoxLayout();
119 vLayout->addWidget(labName);
120 vLayout->addWidget(labDesc);
121
122 // 再创建一个水平布局控件:将显示图片的 QToolButton 和上面的 垂直布局控件 一起放入水平布局中
123 QHBoxLayout *hLayout = new QHBoxLayout();
124 hLayout->addWidget(btnImage);
125 hLayout->addLayout(vLayout);
126
127 // 最后再创建一个垂直布局控件:作为 groupBox 中的整体布局
128 QVBoxLayout *pvLayout = new QVBoxLayout(groupBox);
129 pvLayout->addLayout(hLayout);
130 pvLayout->addStretch();
131 pvLayout->setAlignment(Qt::AlignLeft);
132
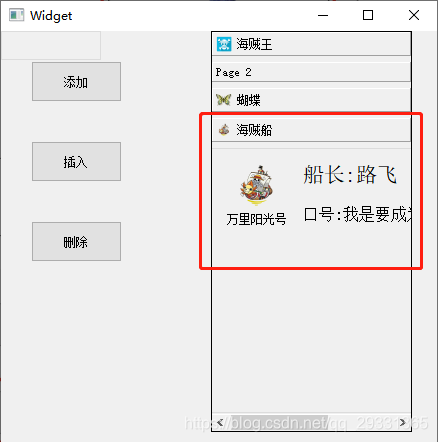
133 // 将分组好的部件插入到 toolBox 中
134 ui->toolBox->insertItem(ui->toolBox->count(), groupBox, QIcon(":/Image/sunny.png"), "海贼船");
135 }
136
137 // 删除
138 void Widget::on_btnDelete_clicked()
139 {
140 // 程序一启动时默认选中的是就 第一项
141 int index = ui->toolBox->currentIndex();
142 qDebug() << QString::number(index);
143 if (index == -1)
144 {
145 QMessageBox::warning(this, "系统提示", "请选择需要删除的项!");
146 }
147 else
148 {
149 if (QMessageBox::question(this, "系统提示", QString("是否要删除第 %1 项?").arg(QString::number(index + 1))) == QMessageBox::Yes)
150 {
151 ui->toolBox->removeItem(index);
152 }
153 }
154 }
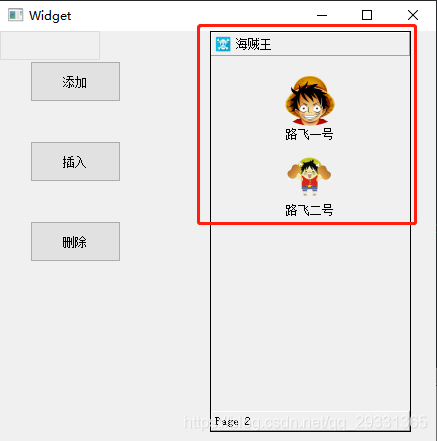
程序一启动的时候,就修改 Page 1,并为其添加数据,效果如下:
点击 “添加” 按钮,效果如下:
点击 “插入” 按钮,效果如下: