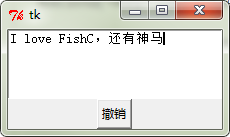
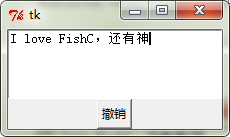
实例1:添加Tags
 1 from tkinter import *
 2
 3 root = Tk()
 4 text = Text(root,width=30,height=5)
 5 text.pack()
 6
 7 #INSERT索引表示插入光标当前的位置
 8 text.insert(INSERT,"I love FishC.com!")#光标当前的位置插入
 9 #注意,行号从1开始,列号则从0开始
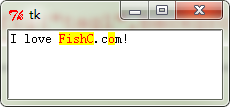
10 text.tag_add("tag1","1.7","1.12","1.14")#1.7(第一行第八列)到1.12,,与1.14设置Tag样式
11 text.tag_config("tag1",background ="yellow",foreground="red")
12
13 mainloop()
实例2:Tags覆盖
 1 from tkinter import *
 2
 3 root = Tk()
 4 text = Text(root,width=30,height=5)
 5 text.pack()
 6
 7 #INSERT索引表示插入光标当前的位置
 8 text.insert(INSERT,"I love FishC.com!")#光标当前的位置插入
 9 #注意,行号从1开始,列号则从0开始
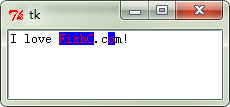
10 text.tag_add("tag1","1.7","1.12","1.14")#1.7(第一行第八列)到1.12,,与1.14设置Tag样式
11 text.tag_add("tag2","1.7","1.12","1.14")#1.7(第一行第八列)到1.12,,与1.14设置Tag样式
12
13 text.tag_config("tag1",background ="yellow",foreground="red")
14 text.tag_config("tag2",background ="blue")
15
16 mainloop()
实例2:降低Tag优先级
 1 from tkinter import *
 2
 3 root = Tk()
 4 text = Text(root,width=30,height=5)
 5 text.pack()
 6
 7 #INSERT索引表示插入光标当前的位置
 8 text.insert(INSERT,"I love FishC.com!")#光标当前的位置插入
 9 #注意,行号从1开始,列号则从0开始
10 text.tag_add("tag1","1.7","1.12","1.14")#1.7(第一行第八列)到1.12,,与1.14设置Tag样式
11 text.tag_add("tag2","1.7","1.12","1.14")#1.7(第一行第八列)到1.12,,与1.14设置Tag样式
12
13 text.tag_config("tag1",background ="yellow",foreground="red")
14 text.tag_config("tag2",background ="blue")
15
16 text.tag_lower("tag2")#降低tag2的优先级
17
18 mainloop()

实例3:Tags事件绑定
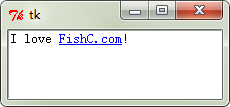
 1 from tkinter import *
 2 import webbrowser#导入网页模块
 3
 4 def show_hand_cursor(event):
 5     text.config(cursor="arrow")
 6
 7 def show_arrow_cursor(event):
 8     text.config(cursor="xterm")
 9
10 def click(event):
11     webbrowser.open("http://www.fishc.com")
12
13 root = Tk()
14 text = Text(root,width=30,height=5)
15 text.pack()
16
17 #INSERT索引表示插入光标当前的位置
18 text.insert(INSERT,"I love FishC.com!")#光标当前的位置插入
19 #注意,行号从1开始,列号则从0开始
20 text.tag_add("link","1.7","1.16")#1.7(第一行第八列)到1.16
21 #设置蓝色前景色并底部划线
22 text.tag_config("link",foreground="blue",underline=True)
23
24 #当进入绑定文本段时,鼠标样式切换为“arrow"形态
25 text.tag_bind("link","<Enter>",show_hand_cursor)
26 #当离开绑定文本段时,鼠标样式切换为“xterm"形态
27 text.tag_bind("link","<Leave>",show_arrow_cursor)
28 #当触发鼠标“左键单击”时,使用默认浏览器打开鱼C网址
29 text.tag_bind("link","<Button-1>",click)
30
31 mainloop()

实例4:判断内容是否发生改变
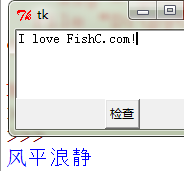
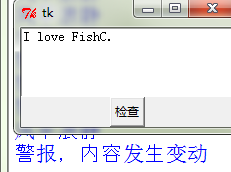
 1 from tkinter import *
 2 import hashlib
 3
 4 def getSig(contents):
 5     m = hashlib.md5(contents.encode())
 6     return m.digest()
 7
 8 def check():#检查
 9     contents = text.get(1.0,END)
10     if sig!=getSig(contents):
11         print("警报,内容发生变动")
12     else:
13         print("风平浪静")
14
15 root = Tk()
16 text = Text(root,width=30,height=5)
17 text.pack()
18
19 #INSERT索引表示插入光标当前的位置
20 text.insert(INSERT,"I love FishC.com!")#光标当前的位置插入
21 #注意,行号从1开始,列号则从0开始
22 #获取文本内容
23 contents=text.get(1.0,END)
24
25 sig = getSig(contents)
26
27 Button(root,text="检查",command=check).pack()
28
29 mainloop()
实例5:查找操作(使用search()方法可以搜索Text组件中的内容)
 1 from tkinter import *
 2 import hashlib
 3
 4 #将任何格式的索引号统一为元组(行,列)的格式输出
 5 def getIndex(text,index):
 6     #split这里以"."拆分字符串,将1.3拆分为字符1和3,然后通过map将字符转换为整型
 7     return tuple(map(int,str.split(text.index(index),".")))
 8
 9 root = Tk()
10 text = Text(root,width=30,height=5)
11 text.pack()
12
13 #INSERT索引表示插入光标当前的位置
14 text.insert(INSERT,"I love FishC.com!")#光标当前的位置插入
15
16 #将任何格式的索引号统一为元组(行、列)的格式输出
17 start = 1.0
18 while True:
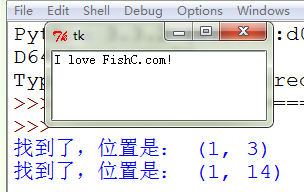
19     pos = text.search("o",start,stopindex=END)#从开始到结束全文搜索
20     if not pos:
21         break
22     print("找到了,位置是:",getIndex(text,pos))
23     start = pos + "+1c"#将start指向找到的字符位置的下一个字符,以便进行下一次搜索
24
25 mainloop()
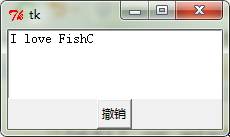
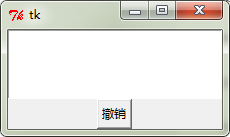
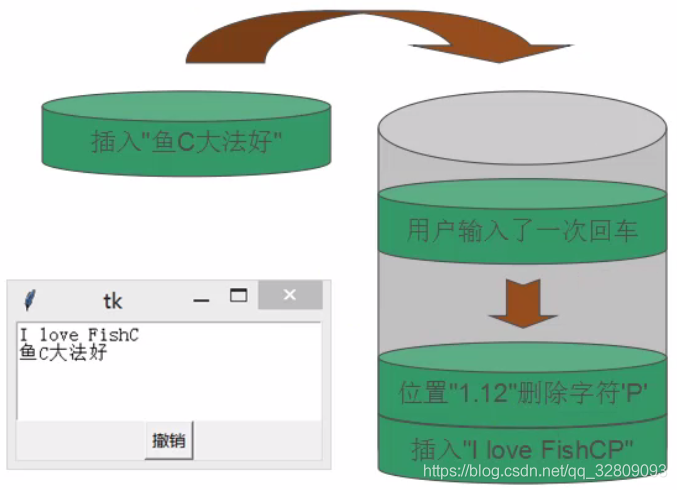
Text组件内部有一个栈专门用于记录内容的每次变动,所以每次“撤销”操作就是一次弹栈操作,“恢复”就是再次压栈。
实例6:撤销
 1 from tkinter import *
 2
 3 #将任何格式的索引号统一为元组(行,列)的格式输出
 4 def show():
 5     text.edit_undo()
 6
 7 root = Tk()
 8 text = Text(root,width=30,height=5,undo=True)
 9 text.pack()
10 text.insert(INSERT,"I love FishC")
11
12 Button(root,text="撤销",command=show).pack()
13
14 mainloop()
实例7:每次撤销一个字符
 1 from tkinter import *
 2
 3 def callback(event):
 4     text.edit_separator()
 5
 6 def show():
 7     text.edit_undo()#执行撤回操作
 8
 9 root = Tk()
10
11 #autoseparators表示一次完整的操作结束后自动插入“分隔符”,此处设置为False
12 text = Text(root,width=30,height=5,autoseparators=False,undo=True,maxundo=10)
13 text.pack()
14
15 text.insert(INSERT,"I love FishC!")
16 text.bind('<Key>',callback)#每次有输入就插入一个“分隔符”
17
18 Button(root,text="撤销",command=show).pack()
19
20 mainloop()
