


tomcat和Apache关系:
1. Apache HTTPD Server 与Apache Tomcat同属于Apache的开源项目。俩个都可以单独作为web server使用,但是又都有各自的特性。Apache HTTPD一般也就简称为Apache 了。
2. Apache是比较老的用来支撑静态web 项目的server。 而Tomcat主要是用来支撑动态web项目的,与数据库交互的系统。当然,Tomcat也可以用来开发静态web系统,只是性能上比着Httpd差些。
3 Apache 当然也可以支持动态web,因为从Apache的modules下,我们可以看到大量的modules以“mod_*.so”的命名。这些modules扩展了Apache的功能。从而可以让它能服务于采用PHP,CGI等server端开发语言。
4. Tomcat本身就是典型的Java Servlet引擎。它被用来作为Java Servlet的容器,管理Servlet的生命周期,从来处理动态页面请求等操作。
她们虽然在web系统上又各自的优势,但是他俩不是互斥的。可以结合使用。从网上找了个配置实例。
http://www.ntu.edu.sg/home/ehchua/programming/howto/apacheplustomcat_howto.html
Tomcat用来负责处理JSP或者java Servlet的,Apache httpd用来负责静态页面以及server-side functions such as CGI, PHP, SSI, etc
关于为什么如果又必要的话,最好是tomcat跟httpd配合使用,这个有个不错的解释:
https://wiki.apache.org/tomcat/FAQ/Connectors#Q3
Why should I integrate Apache with Tomcat? (or not)
There are many reasons to integrate Tomcat with Apache. And there are reasons why it should not be done too. Needless to say, everyone will disagree with the opinions here. With the performance of Tomcat 5 and 6, performance reasons become harder to justify. So here are the issues to discuss in integrating vs not.
- Clustering. By using Apache as a front end you can let Apache act as a front door to your content to multiple Tomcat instances. If one of your Tomcats fails, Apache ignores it and your Sysadmin can sleep through the night. This point could be ignored if you use a hardware loadbalancer and Tomcat's clustering capabilities.
- Clustering/Security. You can also use Apache as a front door to different Tomcats for different URL namespaces (/app1/, /app2/, /app3/, or virtual hosts). The Tomcats can then be each in a protected area and from a security point of view, you only need to worry about the Apache server. Essentially, Apache becomes a smart proxy server.
- Security. This topic can sway one either way. Java has the security manager while Apache has a larger mindshare and more tricks with respect to security. I won't go into this in more detail, but let Google be your friend. Depending on your scenario, one might be better than the other. But also keep in mind, if you run Apache with Tomcat - you have two systems to defend, not one.
- Add-ons. Adding on CGI, perl, PHP is very natural to Apache. Its slower and more of a kludge for Tomcat. Apache also has hundreds of modules that can be plugged in at will. Tomcat can have this ability, but the code hasn't been written yet.
- Decorators! With Apache in front of Tomcat, you can perform any number of decorators that Tomcat doesn't support or doesn't have the immediate code support. For example, mod_headers, mod_rewrite, and mod_alias could be written for Tomcat, but why reinvent the wheel when Apache has done it so well?
-
Speed. Apache is faster at serving static content than Tomcat. But unless you have a high traffic site, this point is useless. But in some scenarios, tomcat can be faster than Apache httpd. So benchmark YOUR site. Tomcat can perform at httpd speeds when using the proper connector (APR with sendFile enabled). Speed should not be considered a factor when choosing between Apache httpd and Tomcat
- Socket handling/system stability. Apache has better socket handling with respect to error conditions than Tomcat. The main reason is Tomcat must perform all its socket handling via the JVM which needs to be cross platform. The problem is socket optimization is a platform specific ordeal. Most of the time the java code is fine, but when you are also bombarded with dropped connections, invalid packets, invalid requests from invalid IP's, Apache does a better job at dropping these error conditions than JVM based program. (YMMV)
总而是从性能以及安全性来考虑的,当然要根据具体的应用场景来说。 Tomcat在形态页面处理上比Apache还是逊色的。而Tomcat对于动态页面的处理,以及java本身的security涉及,还是优于Apache的。
1.红帽系列(centos、redhat)
Apache
安装;yum install httpd -y
配置;
find / -type f -name httpd.conf 查找文件
httpd.conf文件修改,ServerName去掉前面#,后面去掉改为localhost:80
启动;systemctl start httpd
验证;浏览器输入http;//主机IP
若验证失败,防火墙问题service firewalld stop
systemctl status httpd查看状态
mysql
安装
1.下载mysql源:wget http://repo.mysql.com/mysql80-community-release-el7-1.noar
ch.rpm
或者无网络访问http://repo.mysql.com手动下载
ls查看安装包
2.安装mysql源
yum -y install mysql80-community-release-el7-1.norch.rpm
//yum install 和rpm -ivh都可进行安装,此时两者实质是一样的
3.安装mysql数据库
yum -y install mysql-community-server
service mysqld stop
service mysqld start
systemctl start/stop mysqld.service
设置密码
mysql -uroot -p 不用输入密码进入mysql
一般情况下默认无需密码即可进入,进入数据库修改密码
use mysql;
update user set password=password('123456') where user='root' and host='localhost';
flush privileges;
要加分号,
密码不能太过简单,否则会报错 ,包括字母数字大小写符号
quit或\q退出数据库,\c退出当前
若要忽略密码:编辑my.cnf,在[mysqld]下添加skip-grant-tables,保存立即生效。
配置
1.设置认证方式
先find / -type f -name my.cnf
mysql配置文件:vi /etc/my.cnf 或gedit /etc/my.cnf
在mysqld下面加添加:default_authentication_plugin=mysql_native_password。
可能不会生效,可以update user set plugin= 'mysql_native_password' where user= 'root';
或alter user test identified with mysql_native_password by 'xxx';
flush privileges;
保证数据库管理工具连接成功,因为某些管理工具不支持MySQL8的caching_sha2_password默认加密方式。若要连接成功,可以将数据库的用户加密改为mysql_native_password方式。
2.配置MySQL远程登录
有时候,为了开发方便,我们需要使用本地电脑远程访问和管理MySQL数据库。默认情况下,为了安全MySQL只允许本地登录,如果要开启远程连接,则需要修改/etc/mysql/mysql.conf.d/mysqld.cnf配置文件。
打开配置文件,找到bind-address = 127.0.0.1这一行
改为bind-address = 0.0.0.0即可或简单一点注释掉也行
修改完成保存后,需要重启MySQL服务才会生效
3.为用户赋予远程登录的权限
修改user表,授权root用户远程登录
mysql>use mysql;
mysql>select Host,User,Authentication_string,plugin from user;
mysql>update user set host='%' where user='root';
或者grant all privilege on *.* to dba1@'%'identified by "dbapasswd";
为用户dba1赋予所有数据库的所有权限,并且允许所有ip远程连接
mysql>flush privileges;//刷新
修改数据库编码格式
gedit /etc/my.cnf
[mysqld]下面添加character-set-server=utf8
重启数据库,重新登录
查看是否设置成功:show variables like “%char%”;
Php
1.安装;yum install php -y
2.配置;php.ini文件修改,date.timezone = Asia/Shanghai
3.启动:systemctl restart httpd
4.php和mysql搭桥;yum install php-mysql -y,重启apache
5.验证:info.php文件,放到apache目录下(/var/www/html/),
浏览器输入:http://linux的ip/inf.php
2.Debian系列(debian、ubuntu)
安装apache
apache作为web服务,像win下面的IIS一样;apache2以上版本改称为httpd。
httpd和apache关系,简单理解就是apache2以上版本改称为httpd。
Ubuntu 中 Apache2 安装、配置、卸载
两种安装方法
软件包安装
源码安装
一、软件包安装
安装
命令:
1.sudo apt-get update
2.sudo apt-get install apache2
配置
(1)apache2 默认的几个配置文件:
/etc/apache2/apache2.conf 是主要配置文件(这个文件的末尾可以看到,include了其它所有的配置文件)。
/etc/apache2/ports.conf 始终包含在主配置文件中。它用于确定传入连接的侦听端口,默认为80,我们一般都会重新配置新的端口。
其它配置文件在 /etc/apache2/sites-enabled,/etc/apache2/conf-enabled,/etc/apache2/mods-enabled 目录下。
apache2的默认web目录:/var/www/html。(在/etc/apache2/sites-enabled/000-default.conf 里可以看到这个 DocumentRoot /var/www/html 配置)
apache2 的默认用户是 www-data,定义在 /etc/apache2/envvars 文件中。
设置默认主页的配置文件/etc/apache2/mods-enabled/dir.conf
(2)修改端口,这里我修改为8099
修改它的监听端口
sudo vim /etc/apache2/ports.conf
修改它的主机端口
sudo vim /etc/apache2/sites-available/000-default.conf
(3)apache2 的几个简单命令:启动、停止、重启、状态
sudo /etc/init.d/apache2 [ start | stop | restart | status ]
service apache2 [ start | stop | restart | status ]
(4)重启apache2 并查看状态
sudo /etc/init.d/apache2 start
sudo /etc/init.d/apache2 status
访问测试
(1)测试apache2主页
使用浏览器输入IP地址加端口号8099
二、源码安装
检查编译环境
首先查看系统有木有安装gcc/gcc-c++(要确保系统上有编译环境 C ),没有安装的话必须先安装:
apt-get install gcc-c++
下载下面几依赖包
apr https://apr.apache.org/download.cgi
apr-utilhttps://apr.apache.org/download.cgi
pcre https://sourceforge.net/projects/pcre/
httpd https://httpd.apache.org/download.cgi#apache24
解压下载的压缩包
(1) 在 /usr/local/下新建几个文件夹
sudo mkdir /usr/local/apr
sudo mkdir /usr/local/apr-util
sudo mkdir /usr/local/pcre
sudo mkdir /usr/local/httpd
(2) 将下载的依赖包分别解压到其中:
tar -zxvf apr-1.6.3.tar.gz -C /usr/local/apr
tar -zxvf apr-util-1.6.1.tar.gz -C /usr/local/apr-util
tar -zxvf pcre-8.32.tar.gz -C /usr/local/pcre
tar -zxvf httpd-2.4.29.tar.gz -C /usr/local/httpd
依次安装
(1) apr:
cd apr-1.6.3
./configure –prefix=/usr/local/apr
make
make install
(2) apr-util:
cd /usr/local/apr-util-1.6.1
./configure –prefix=/usr/local/apr-util –with-apr=/usr/local/apr/bin/apr-1-config
make
make install
(3) pcre:
cd /usr/local/pcre-8.32
./configure –prefix=/usr/local/pcre –with-apr=/usr/local/apr/bin/apr-1-config
make
make install
(4)httpd:
cd /usr/local/httpd-2.4.29
–prefix=/usr/local/apache2 –sysconfdir=/etc/httpd –enable-so –enable-rewirte –enable-ssl –enable-cgi –enable-cgid –enable-modules=most –enable-mods-shared=most –enable-mpms-shared=all –with-apr=/usr/local/apr –with-apr-util=/usr/local/apr-util
make
make install
这里是把配置文件httpd.conf放在/etc/httpd下面的。
启动:/usr/local/apache2/bin/apachectl start
停止:/usr/local/apache2/bin/apachectl stop
重启:/usr/local/apache2/bin/apachectl restart
测试
浏览器访问 localhost:80,出现 It works! ,表示启动成功
配置多域名、端口映射
Listen 80
Listen 8080

<VirtualHost *:80>
DocumentRoot /var/www/html/项目1
ServerName http://www.域名1.com
</Virtualhost>
<Directory "/var/www/html/项目1">
Options Indexes FollowSymLinks
AllowOverride All
Order allow,deny
Allow from all
</Directory>

<VirtualHost *:80>
DocumentRoot /var/www/html/项目2
ServerName http://www.域名2.com
</Virtualhost>
<Directory "/var/www/html/项目2">
Options Indexes FollowSymLinks
AllowOverride All
Order allow,deny
Allow from all
</Directory>

<VirtualHost Ip:8080>
 DocumentRoot /var/www/html/项目3
 ServerName Ip:8080
</VirtualHost>
<Directory "/var/www/html/项目3">
    Options Indexes FollowSymLinks
    AllowOverride All
    Order allow,deny
    Allow from all
</Directory>
卸载
sudo apt-get –purge remove apache2
sudo apt-get –purge remove apache2-common
sudo apt-get –purge remove apache2-utils
sudo apt-get autoremove apache2
–purge 是不保留配置文件的意思
此种方法无法卸载时,使用dpkg remove
删掉/etc/apache2文件夹:
sudo rm -rf /etc/apache2
删掉/var/www文件夹:
sudo rm -rf /var/www
删掉/etc/init.d/apache2文件:
sudo rm -rf /etc/init.d/apache2
安装mysql
ubuntu查看服务:service mysql stop/start/status ubuntu不支持systemctl查看
一.首先卸载掉原来的mysql
第一步,依次执行下面的语句
sudo apt-get autoremove --purge mysql-server
sudo apt-get remove mysql-server
sudo apt-get autoremove mysql-server
sudo apt-get remove mysql-common
第2步 清理残留数据
dpkg -l |grep ^rc|awk '{print $2}' |sudo xargs dpkg -P
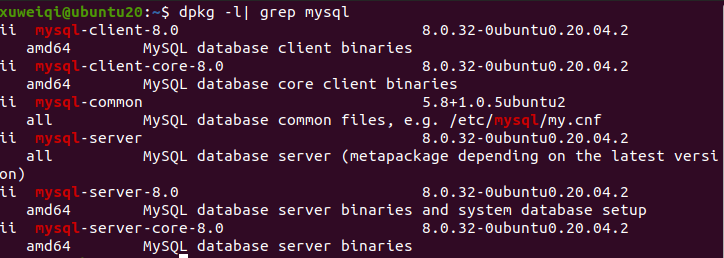
二.安装mysql
安装mysql教程
sudo aptitude search mysql
sudo apt install mysql-server
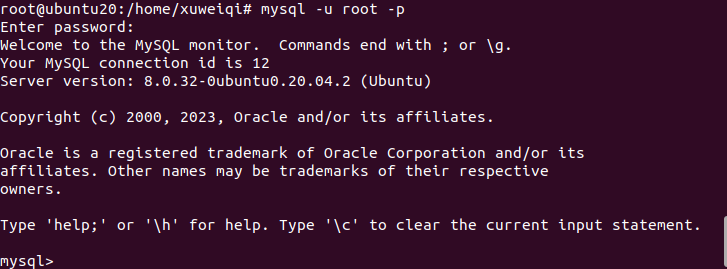
登录mysql
sudo mysql -u root -p
//此时mysql可能不用密码就能登录,参考下面第2个说明修改
报错问题:
1.修改密码报错

原因及解决方法:
MySQL 5.7 的版本,因为在user表中没有password字段,一直使用下边的方式来修改root密码
use mysql;
update user set authentication_string = password('root') where user = 'root';
现在要用MySQL8.0.11版本,装好MySQL后用上边方法修改密码,一直报错。
1064 - You have an error in your SQL syntax;
check the manual that corresponds to your MySQL server version
for the right syntax to use near 'password(123456)' at line 1
后来去掉password()函数后,没有报错,但是输入密码时不对。
查阅后才知道在mysql 5.7.9以后废弃了password字段和password()函数;authentication_string:字段表示用户密码,而authentication_string字段下只能是mysql加密后的41位字符串密码。所以需要用一下方式来修改root密码:
ALTER user 'root'@'localhost' IDENTIFIED BY 'newpassword';
MySql 从8.0开始修改密码有了变化,在user表加了字段authentication_string,修改密码前先检查authentication_string是否为空
1、如果不为空
use mysql;
update user set authentication_string='' where user='root';--将字段置为空
ALTER user 'root'@'localhost' IDENTIFIED BY 'root';--修改密码为root
2、如果为空,直接修改
ALTER user 'root'@'localhost' IDENTIFIED BY 'root';--修改密码为root
修改完之后需要执行
flush privileges;
2.不输入密码可以直接登录
解决方法:
1.修改root 用户密码为空并把plugin修改为mysql_native_password,可以使用select user,plugin from user查看
use mysql
然后 输入
update user set plugin='mysql_native_password',authentication_string='' where user='root';
2.修改配置文件
打开目录 /etc/mysql/mysql.conf.d ,编辑 mysqld.cnf 文件,将 skip-grant-tables 这行注释掉(前面加 #)
保存后,重启mysql, 输入
sudo service mysql restart
3.重新设置root 密码
然后 输入
mysql -uroot
按回车键,直接进入。
输入
ALTER user 'root'@'localhost' IDENTIFIED BY '123456';
退出mysql 后,尝试无密码或者-v 的方式进入,被禁止。
此问题备注:
mysql> use mysql
Reading table information for completion of table and column names
You can turn off this feature to get a quicker startup with -A

Database changed
mysql> select user,plugin from user;
+------------------+-----------------------+
| user             | plugin                |
+------------------+-----------------------+
| root             | auth_socket           |
| mysql.session    | mysql_native_password |
| mysql.sys        | mysql_native_password |
| debian-sys-maint | mysql_native_password |
+------------------+-----------------------+
4 rows in set (0.00 sec)
mysql> update user set plugin= 'mysql_native_password' where user= 'root';
mysql> select user,plugin from user;
+------------------+-----------------------+
| user             | plugin                |
+------------------+-----------------------+
| root             | mysql_native_password |
| mysql.session    | mysql_native_password |
| mysql.sys        | mysql_native_password |
| debian-sys-maint | mysql_native_password |
+------------------+-----------------------+
4 rows in set (0.00 sec)

mysql> flush privileges;
Query OK, 0 rows affected (0.00 sec)
查看到root的默认plugin的值是auth_socket
auth_socket: 如果您安装5.7或8.0并且没有为root用户提供密码,它将使用auth_socket插件。该插件不关心,也不需要密码。它只检查用户是否使用UNIX套接字进行连接,然后比较用户名。(PS:使用auth_socket,服务器本地登录的时候根本不需要密码,而其他主机无论如何都登不上去,除非配置文件设置skip-grant-tables)
需要修改为mysql_native_password 客户端支持的是mysql_native_password 这种加密方式;
Php
1.安装;apt install php -y
2.配置;php.ini文件修改,date.timezone = Asia/Shanghai
3.启动:/etc/init.d/apache2 restart
或service apache2 restart
4.php和mysql搭桥;apt install php-mysql -y,重启apache
5.验证:info.php文件,放到apache目录下(/var/www/html/),
浏览器输入:http://linux的ip/inf.php

