1.拉取镜像
docker pull mysql:latest
2.挂载运行
--name:容器命名为mysql8-p:将容器的3306端口映射到宿主机的13306端口-d: 后台运行--restart=always: docker重启后,容器也随之启动-v:目录挂载-e MYSQL_ROOT_PASSWORD:初始化root账号的密码为root
docker run --name mysql8 -p 13306:3306 -e MYSQL_ROOT_PASSWORD=root --restart=always -v /orisdom/mysql/conf.d:/etc/mysql/conf.d -v /orisdom/mysql/my.cnf:/etc/mysql/my.cnf -v /orisdom/mysql/data:/var/lib/mysql -d mysql:latest
3.在容器中登陆MySql
mysql -u root - p
默认密码: root
4.检查访问权限
use mysql

select user,host from user;
若权限不存在则设置:update user set host='%' where user='root';
5.设置密码
ALTER USER 'root'@'localhost' IDENTIFIED BY '新密码';

alter user 'root'@'%' identified with mysql_native_password BY '新密码';

flush privileges;
6.修改字符编码和MySql5.7以后分组问题
vim /etc/mysql/my.cnf
# Copyright (c) 2017, Oracle and/or its affiliates. All rights reserved.
#
# This program is free software; you can redistribute it and/or modify
# it under the terms of the GNU General Public License as published by
# the Free Software Foundation; version 2 of the License.
#
# This program is distributed in the hope that it will be useful,
# but WITHOUT ANY WARRANTY; without even the implied warranty of
# MERCHANTABILITY or FITNESS FOR A PARTICULAR PURPOSE. See the
# GNU General Public License for more details.
#
# You should have received a copy of the GNU General Public License
# along with this program; if not, write to the Free Software
# Foundation, Inc., 51 Franklin St, Fifth Floor, Boston, MA 02110-1301 USA
#
# The MySQL Server configuration file.
#
# For explanations see
# http://dev.mysql.com/doc/mysql/en/server-system-variables.html
[client]
default-character-set=utf8
[mysqld]
sql_mode = STRICT_TRANS_TABLES,NO_ZERO_IN_DATE,NO_ZERO_DATE,ERROR_FOR_DIVISION_BY_ZERO,NO_ENGINE_SUBSTITUTION
pid-file = /var/run/mysqld/mysqld.pid
socket = /var/run/mysqld/mysqld.sock
datadir = /var/lib/mysql
default-time_zone = +8:00
secure-file-priv= NULL
# 允许最大连接数
max_connections=1000
# ================= ↓↓↓ mysql主从同步配置start ↓↓↓ =================
# 同一局域网内注意要唯一
server-id=223
# 开启二进制日志功能,以备slave作为其它slave的master时使用
log-bin=mysql-slave-bin
# Slave_SQL_Running 为NO 日志中报错1032 ,只需要在slave中配置该项
# slave-skip-errors = 1032
# ================= ↑↑↑ mysql主从同步配置end ↑↑↑ =================
default-storage-engine=INNODB
character-set-server=utf8
collation-server=utf8_general_ci
skip-name-resolve
[mysql]
default-character-set=utf8
[mysqld_safe]
log-error =/orisdom/mysql/error
# Custom config should go here
!includedir /etc/mysql/conf.d/
建议从宿主机拷贝:docker cp ./my.cnf 容器ID:/etc/mysql/my.cnf
my.cnf链接:https://pan.baidu.com/s/1-huR9S9dyk2hKXZsd_fkSA 提取码:xpfr
重启登录验证:show variables like 'character%';
7.调整时区,保证数据库时间时间与系统一致
查看时区:show VARIABLES like '%time_zone%';
查看时间:select now();
set time_zone = '+8:00';
set global time_zone = '+8:00';
flush privileges;
查询时间验证:select now();
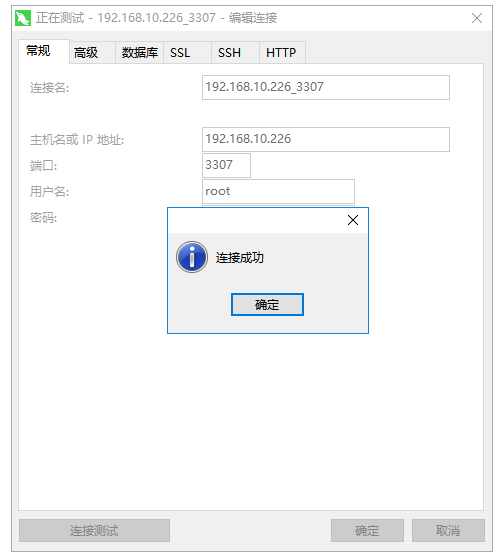
8.Navicat连接测试

9.pom依赖版本
驱动版本:<mysql.version>8.0.11</mysql.version>
连接池版本:<druid.version>1.1.10</druid.version>
连接属性设置:url:jdbc:mysql://192.168.10.226:3307/sewage_ls?useSSL=false&useUnicode=true&characterEncoding=UTF8&serverTimezone=GMT&allowPublicKeyRetrieval=true
10.项目启动测试


