
一、安装Nginx
1、下载安装包
2、解压:tar zxvf nginx-1.12.1.tar.gz
3、编译:
./configure --prefix=/usr/local/nginx
make
make install
4、编辑启动配置文件 vim/etc/init.d/nginx,具体内容可以从下面链接下载
https://files.cnblogs.com/files/wbjy123linux/nginx.zip
https://coding.net/u/aminglinux/p/aminglinux-book/git/tree/master/D15Z?public=true
5、设置开机启动
chmod 755 /etc/init.d/nginx
chkconfig --add /etc/init.d/nginx
chkconfig /etc/init.d/nginx on
6、编辑配置文件
1)先备份原有的nginx.conf文件
cp /usr/local/nginx/cong/nginx.cong /usr/local/nginc/nginx.conf.bak
2)编辑文件:vim /usr/local/nginx/conf/nginx.cong,内容可以从以下链接下载
https://coding.net/u/aminglinux/p/aminglinux-book/git/blob/master/D15Z/nginx.conf?public=true
https://files.cnblogs.com/files/wbjy123linux/nginx.conf.zip
7、查看配合文件是否正确 /usr/local/nginx/sbin/nginx -t

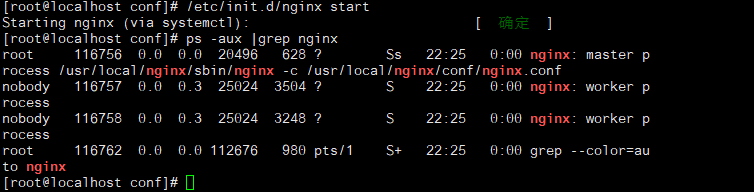
8、启动nginx服务 service nginx start 或/etc/init.d/nginx start
9、测试能否正确解析php,如下图说明正确解析。

二、默认虚拟主机
1、第一个被nginx加载的虚拟主机就是默认主机;也可以使用default_server标记来指定默认虚拟主机。
2、编辑配置文件。
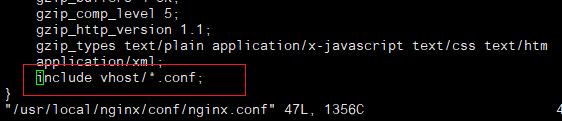
1)修改nginx.cong,在如下图的地方添加 include vhost/*.conf;
2)在创建 /usr/local/nginx/conf/vhost
3)编辑文件 vim /usr/local/nginx/conf/vhost/111.com.conf
server
{
listen 80 default_server;
server_name 111.com;
index index.html index.htm index.php;
root /data/testnginx/default/;
}
4)创建测试目录与文件
mkdir /data/testnginx/default
vim /data/testnginx/default/index.html
5)检查配置文件 /usr/local/nginx/sbin/nginx -t

6)重新加载 nginx
/usr/local/nginx/sbin/nginx -s reload
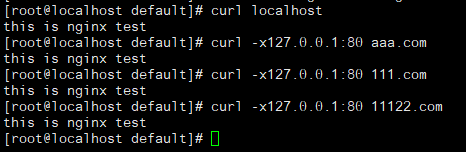
7)测试
三、用户认证
1、创建配置文件 vim /usr/local/nginx/conf/vhost/test.com.conf
server
{
listen 80;
server_name test.com;
index index.html index.htm index.php;
root /data/testnginx/default;
location /
{
auth_basic "Auth";
auth_basic_user_file /usr/local/nginx/conf/htpasswd;
}
}
2、生成密码文件
1)如果本机安装httpd,则可以直接使用httpd的密码生成工具
/usr/local/apache2.4/bin/htpasswd -c /usr/local/nginx/conf/htpasswd user11
2)如果没有安装httpd
yum install -y httpd
htpasswd -c /usr/local/nginx/conf/htpasswd user11
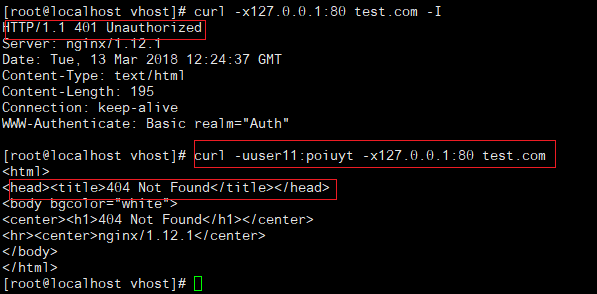
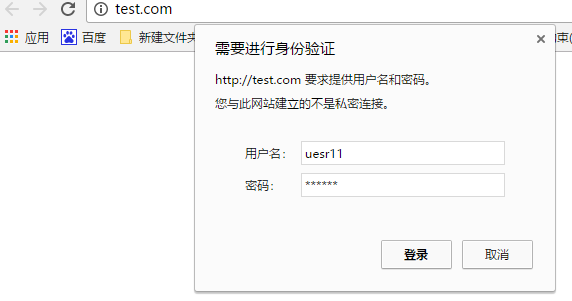
3、测试
1)当直接访问时为401,加上用户名和密码时可以访问,但是因为没有创建文件,所以报404
2)创建文件 mkdir /data/testnginx/test.com
vim //data/testnginx/test.com/index.html

4、针对目录认证
1)编辑配置文件
server
{
listen 80;
server_name test.com;
index index.html index.htm index.php;
root /data/testnginx/test.com;
location /admin/
{
auth_basic "Auth";
auth_basic_user_file /usr/local/nginx/conf/htpasswd;
}
}
2)测试
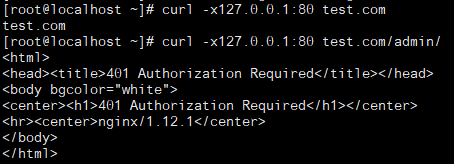
创建目录与文件测试

5、针对单个网站认证
1)编辑配置文件
server
{
listen 80;
server_name test.com;
index index.html index.htm index.php;
root /data/testnginx/test.com;
location ~ admin.php
{
auth_basic "Auth";
auth_basic_user_file /usr/local/nginx/conf/htpasswd;
}
}
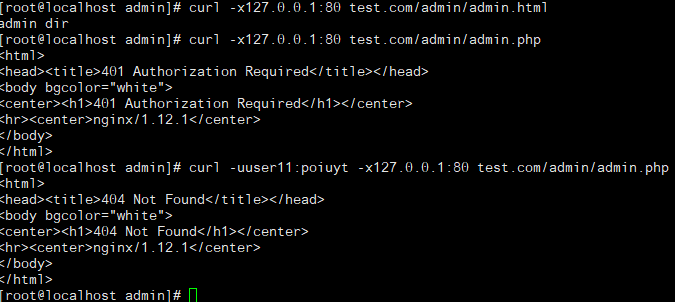
2)测试
此时可以发现访问admin目录不需要认证了,但访问admin.php需要认证。

四、域名重定向
1、编辑配置文件
server
{
listen 80;
server_name test.com test1.com test2.com test3.com;
index index.html index.htm index.php;
root /data/testnginx/test.com;
if ($host != 'test.com' ) {
rewrite ^/(.*)$ http://test.com/$1 permanent;
}
}
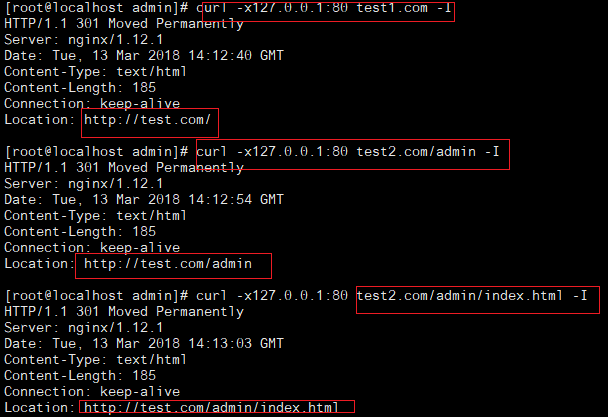
nginx中server_name 支持跟多个域名,而httpd不支持,需要alias;permanent 是永久重定向,相当于httpd的R=301。redirect相当于httpd的R=302。
2、测试

 浙公网安备 33010602011771号