Allure使用教程 - 官方文档汉化
Allure测试报告
安装
Linux
对于基于 debian 的存储库,提供了 PPA
sudo apt-add-repository ppa:qameta/allure
sudo apt-get update
sudo apt-get install allure
Mac OS X
对于 Mas OS,可通过 Homebrew 进行自动安装
brew install allure
Windows
对于Windows,Allure可以从Scoop命令行安装程序获得。
要安装 Allure,请下载并安装 Scoop,然后在 Powershell 中执行:
scoop install allure
此外,Scoop能够更新Allure分发装置。为此,请导航到 Scoop 安装目录并执行
\bin\checkver.ps1 allure -u
这将检查较新版本的 Allure,并更新清单文件。然后执行
scoop update allure
以安装较新版本。( 文档)
手动下载&安装
- 从Maven Central下载最新版本作为zip存档。
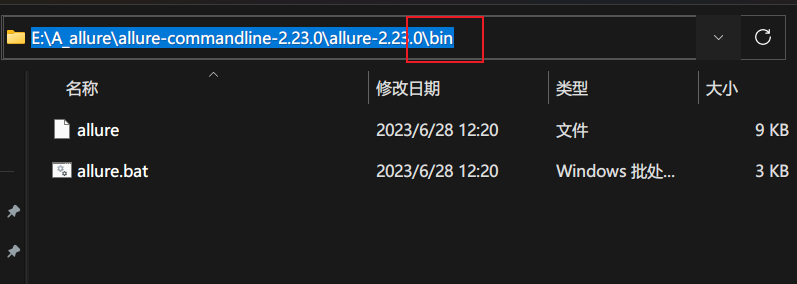
- 将归档文件解压到allure-commandline目录。
- 进入bin目录。
- 在Windows平台上使用allure.bat,在其他Unix平台上使用allure。
- 将allure 添加到系统PATH。
- 检查安装:allure --version

安装pytest-allure插件
pip3 install allure-pytest -i http://pypi.douban.com/simple/ --trusted-host pypi.douban.com
快速入门
Allure监听器在测试执行期间会自动收集结果,只需添加alluredir选项,并选择输出的文件路径即可。
# 运行测试用例
pytest --alluredir=path

测试完毕后,需要使用Allure命令行来让测试结果生成HTML报告:
# 方式1:在系统默认目录下生成测试报告,并打开
allure serve path

# 方式2:在指定目录下生成测试报告,使用open打开
allure generate “存储结果的path” -c -o  “在path生成html报告”
allure open “在path生成html报告”
实际栗子:
# 执行测试用例
>>> pytest -v --alluredir=C:\Users\houjingang\PycharmProjects\接口自动化测试\report\20230630
============================== test session starts ========================
platform win32 -- Python 3.7.4, pytest-6.2.5, py-1.11.0, pluggy-1.0.0 -- e:\a_python37\python.exe
cachedir: .pytest_cache
rootdir: C:\Users\houjingang\PycharmProjects\接口自动化测试
plugins: allure-pytest-2.9.45
collected 4 items

run_test.py::TestMain::test_cases[C:\\case\\demo.yaml] PASSED                                                                                          [ 25%]
run_test.py::TestMain::test_cases[C:\\case\\LS_login.yaml] PASSED                                                                                      [ 50%]
run_test.py::TestMain::test_cases[C:\\case\\LS_login_01.yaml] PASSED                                                                                   [ 75%]
run_test.py::TestMain::test_cases[C:\\case\\LS_uploadFile_01.yaml] PASSED                                                                              [100%]

================================= 4 passed in 5.93s =========================
# 根据allure数据,生成html测试报告
>>> allure generate C:\Users\houjingang\PycharmProjects\接口自动化测试\report\20230630 -c -o C:\Users\houjingang\PycharmProjects\接口自动化测试\report\20230630-report  --clean
Report successfully generated to C:\Users\houjingang\PycharmProjects\接口自动化测试\report\20230630-report

>>> allure open  C:\Users\houjingang\PycharmProjects\接口自动化测试\report\20230630-report
Starting web server...
2023-07-01 13:58:07.191:INFO::main: Logging initialized @271ms to org.eclipse.jetty.util.log.StdErrLog
Server started at <http://192.168.219.1:60088/>. Press <Ctrl+C> to exit
ps:下图所示,打开html报告是没有数据的。就需要注意generate 两个path参数,是不是使用错误了~

allure特性
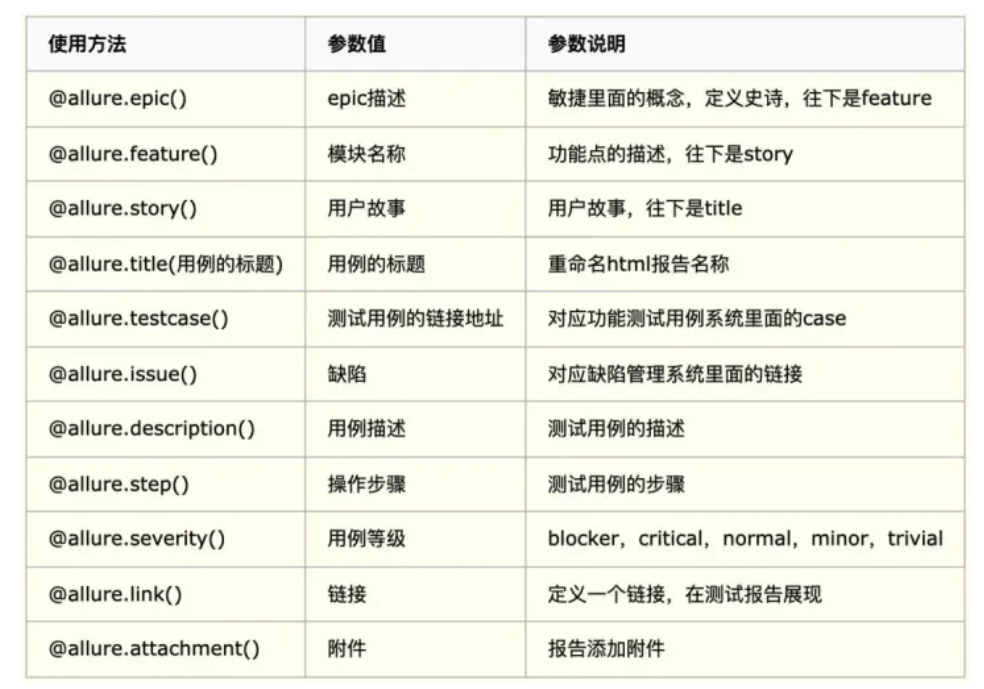
可以在html报告中,添加用例描述、附件等信息,比如:
1、@allure.feature(功能名称)
@allure.feature("功能名称")
def test_with_a_title():
    pass
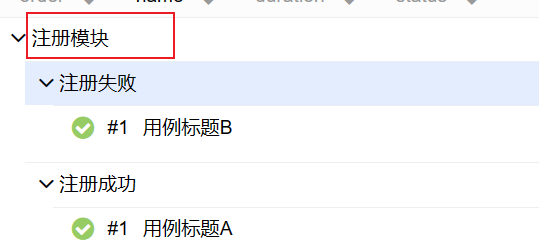
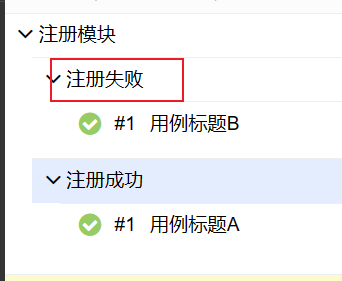
2、@allure.story(子功能名称 )
@allure.story(’子功能名称‘)
def test_with_a_title():
    pass
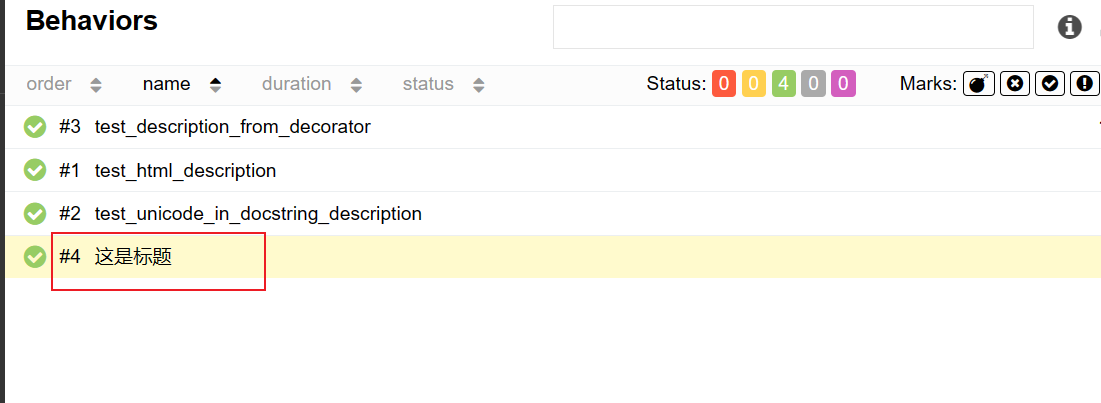
3、@allure.title(测试标题)
@allure.title("这是标题")
def test_with_a_title():
    pass
报告:
与@allure.step一样,也支持位置参数 关键字参数
@allure.title("Parameterized test title: adding {param1} with {param2}")
@pytest.mark.parametrize('param1,param2,expected', [
    (2, 2, 4),
    (1, 2, 5)
])
def test_with_parameterized_title(param1, param2, expected):
    assert param1 + param2 == expected
也支持在测试主体中,动态更新标题
@allure.title("This title will be replaced in a test body")
def test_with_dynamic_title():
    assert 2 + 2 == 4
    allure.dynamic.title('更新标题')
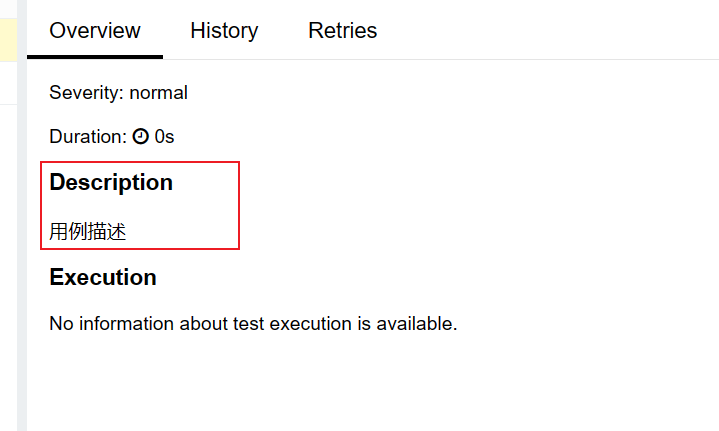
4、@allure.description(用例描述)
@allure.description("用例描述")
def test_description_from_decorator():
    assert 42 == int(6 * 7)
栗子:
另外,还可以在测试主体内部,动态更新描述。
@allure.description("用例描述")
def test_dynamic_description():
    assert 42 == int(6 * 7)
    allure.dynamic.description('更新了用例描述')
5、@allure.step(步骤)
# 方式1:

@allure.step(‘步骤’)
def test_step():
    pass
# 方式2
def test_step():
    with allure.step(“步骤”):
    	pass
# 方式3
@allure.step	# 测试步骤为def函数名称
def test_step():
    pass
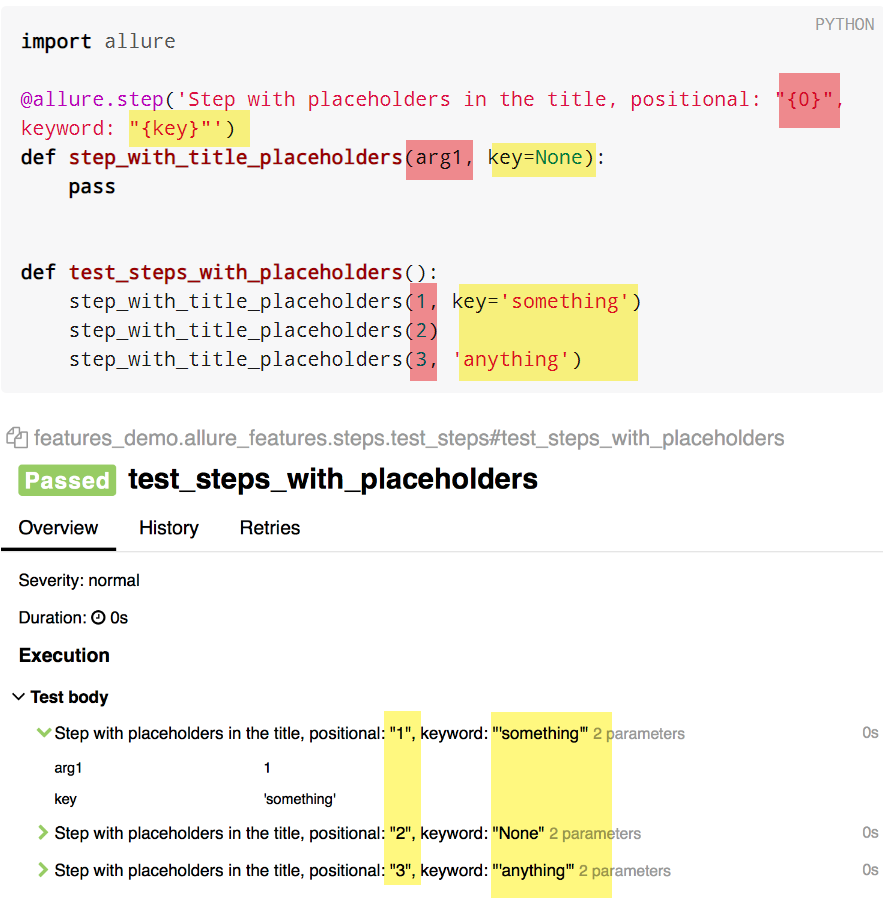
另外,step还支持形参的位置参数和关键字参数。关键字参数的默认参数也会被捕获。
@allure.step('positional: "{0}", keyword: "{key}"')
def step_with_title_placeholders(arg1, key=None):
    pass
栗子:
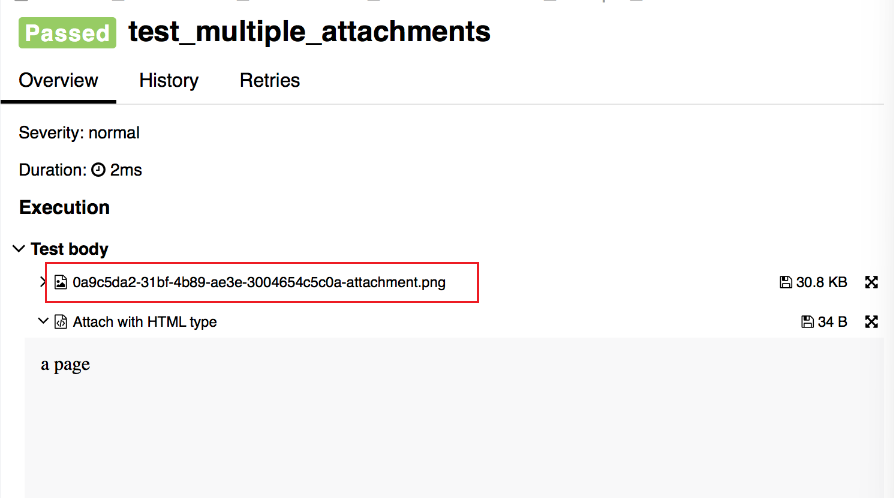
6、@allure.attach(‘附件’)
allure还可以显示许多不同类型的附件,这些附件可以补充测试、步骤或fixture的结果。
# 方式1:

allure.attach(body, name, attachment_type, extension)

# body : 要写入文件的原始内容。
# name : 字符串
# attachment_type : 值 (allure.attachment_type 之一)
# extension : 提供将用作创建文件的扩展名。
栗子:
# 1、将open的文件,作为boby
with open(文件.html) as file:
file_html = file.read()
allure.attach(file_html, "名字", attachment_type, extension)
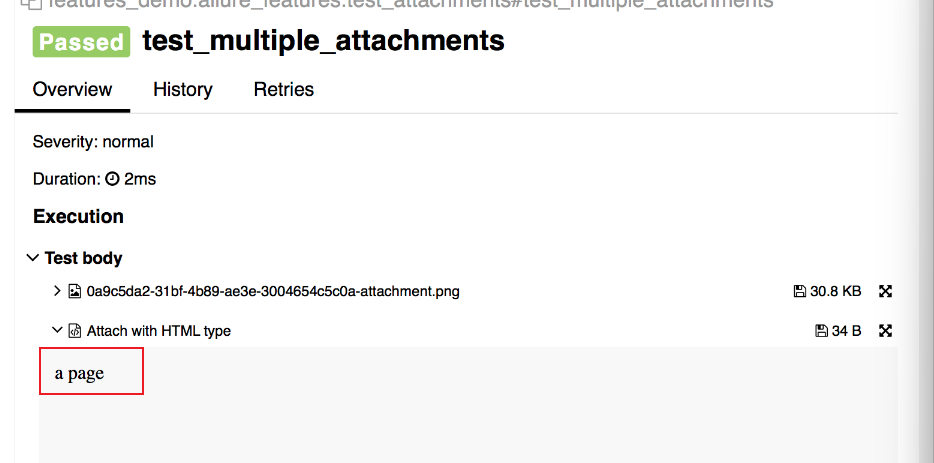
# 2、将原始内容,作为boby
allure.attach('<head></head><body> a page </body>', 'Attach with HTML type', allure.attachment_type.HTML)
# 方式2:
allure.attach.file(source, name, attachment_type, extension)

# source : 文件路径
# 其他参数与方式1相同
栗子:
def test_multiple_attachments():
    allure.attach.file('./data/totally_open_source_kitten.png', attachment_type=allure.attachment_type.PNG)
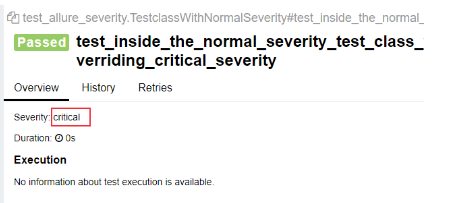
7、@allure.severity(用例等级)
@allure.severity(严重等级)
def test_with_trivial_severity():
    pass

# 严重等级:
# allure.severity_level.Blocker
# allure.severity_level.CRITICAL
# allure.severity_level.NORMAL
# allure.severity_level.Minor
# allure.severity_level.TRIVIAL
执行不同等级的用例:
pytest --allure-severities normal,critical
报告:
为了将报告与缺陷跟踪器或测试管理系统集成,Allure提供了@allure.link、@allure.issue和@allure.testcase描述符。
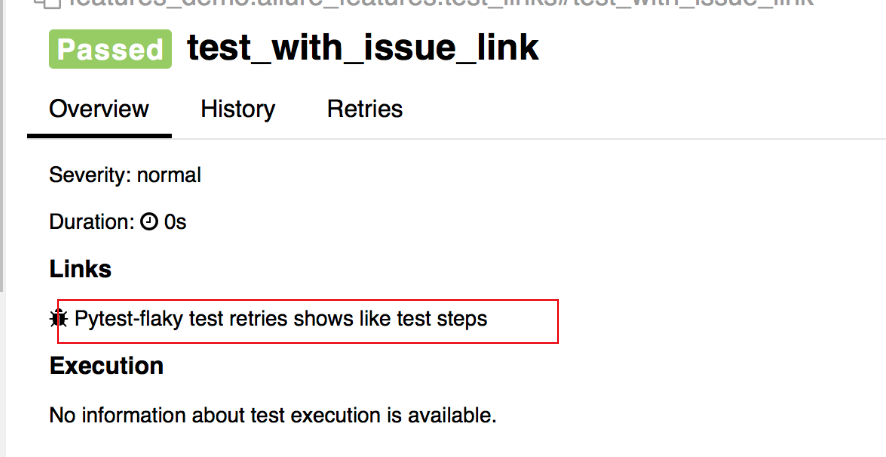
1、@allure.issue(缺陷链接)
将缺陷ID 作为输入参数,将其与问题链接类型的提供的链接模板一起使用。链接模板在 Pytest 的配置选项中 --allure-link-pattern 指定。链接模板和类型必须使用冒号指定:
# 1、当缺陷链接为:http://www.mytesttracker.com/issue/140

# 2、编写用例时,需要将issue id作为输入参数
@allure.issue('140', '缺陷描述')
def test_with_issue_link():
    pass

# 3、在执行pytest时,要携带参数
	--allure-link-pattern=issue:http://www.mytesttracker.com/issue/{}
同时类似的链接,也可以使用这种方式。
报告:
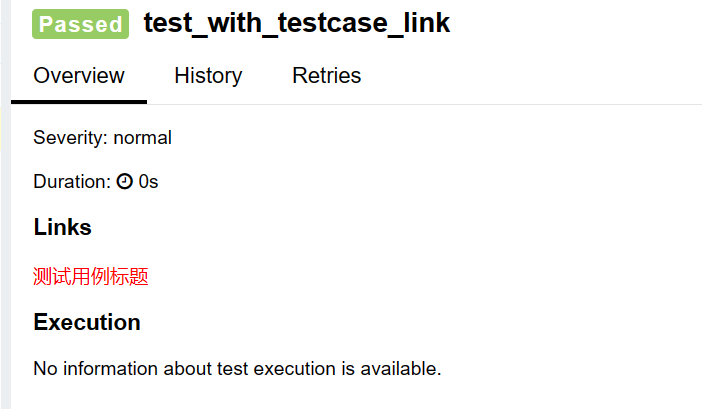
2、@allure.testcase(用例链接)
@allure.testcase("用例连接", '测试用例标题')
def test_with_testcase_link():
    pass
3、@allure.link(网址)
@allure.link("网址", name='Click me')
def test_with_named_link():
    pass
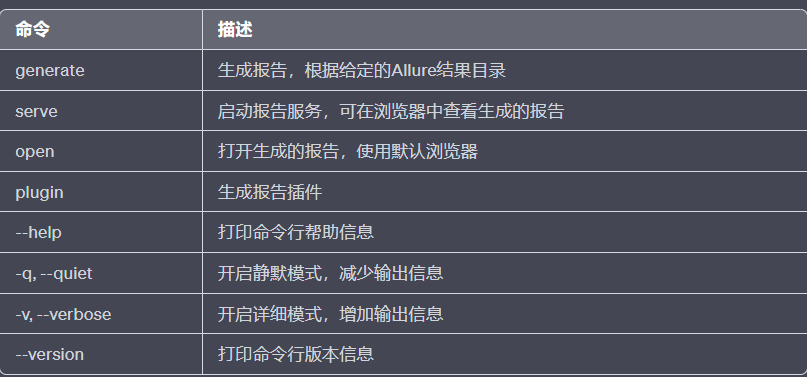
帮助 --help

Environment
环境变量参数,设置运行环境参数。没有实际的作用。

默认情况下,是空的。需要创建environment.properties文件,或者environment.xml文件,并把文件存放存储结果的path。
environment.properties
Browser=Chrome
Browser.Version=81.0.4044.92
Stand=Production
ApiUrl=127.0.0.1/login
python.Version=3.7.2
environment.xml
<environment>
    <parameter>
        <key>Browser</key>
        <value>Chrome</value>
    </parameter>
    <parameter>
        <key>Browser.Version</key>
        <value>81.0.4044.92</value>
    </parameter>
    <parameter>
        <key>Stand</key>
        <value>Production</value>
    </parameter>
        <parameter>
        <key>ApiUrl</key>
        <value>127.0.0.1/login</value>
    </parameter>
        <parameter>
        <key>python.Version</key>
        <value>3.7.2</value>
    </parameter>
</environment>
Categories
将测试用例结果进行分类
默认情况下,有两类缺陷:
- Product defects 产品缺陷(测试结果:failed)
- Test defects 测试缺陷(测试结果:error/broken)
我们是可以创建自定义缺陷分类的,将 categories.json 文件添加到allure-results目录即可(和上面environment.properties放同一个目录)
categories.json
[
  {
    "name": "Ignored tests",
    "matchedStatuses": ["skipped"]
  },
  {
    "name": "Infrastructure problems",
    "matchedStatuses": ["broken", "failed"],
    "messageRegex": ".*bye-bye.*"
  },
  {
    "name": "Outdated tests",
    "matchedStatuses": ["broken"],
    "traceRegex": ".*FileNotFoundException.*"
  },
  {
    "name": "Product defects",
    "matchedStatuses": ["failed"]
  },
  {
    "name": "Test defects",
    "matchedStatuses": ["broken"]
  }
]
讲下参数的含义
- name:分类名称,可以是中文
- matchedStatuses:测试用例的运行状态,默认["failed", "broken", "passed", "skipped", "unknown"]
- messageRegex:测试用例运行的错误信息,默认是 .* ,是通过正则去匹配的哦!
- traceRegex:测试用例运行的错误堆栈信息,默认是 .* ,也是通过正则去匹配的哦!

 浙公网安备 33010602011771号