由于小程序和Ios端的需要,公司的项目需要从原来的http协议扩展到https协议,因为项目本来就有采用nginx做了负载均衡,但是之前配置nginx的时候并没有配置关于https的内容,所以需要做这部分的内容。关于nginx实现动静分离和负载均衡可看我之前的博客。https://i.cnblogs.com/posts?categoryid=1026166
1.数字证书生成
证书的购买要看公司的具体需求,我这里选用的是阿里云,关于证书部分的官网是这个地址:https://help.aliyun.com/product/28533.html?spm=5176.video54216.3.1.JkjOas
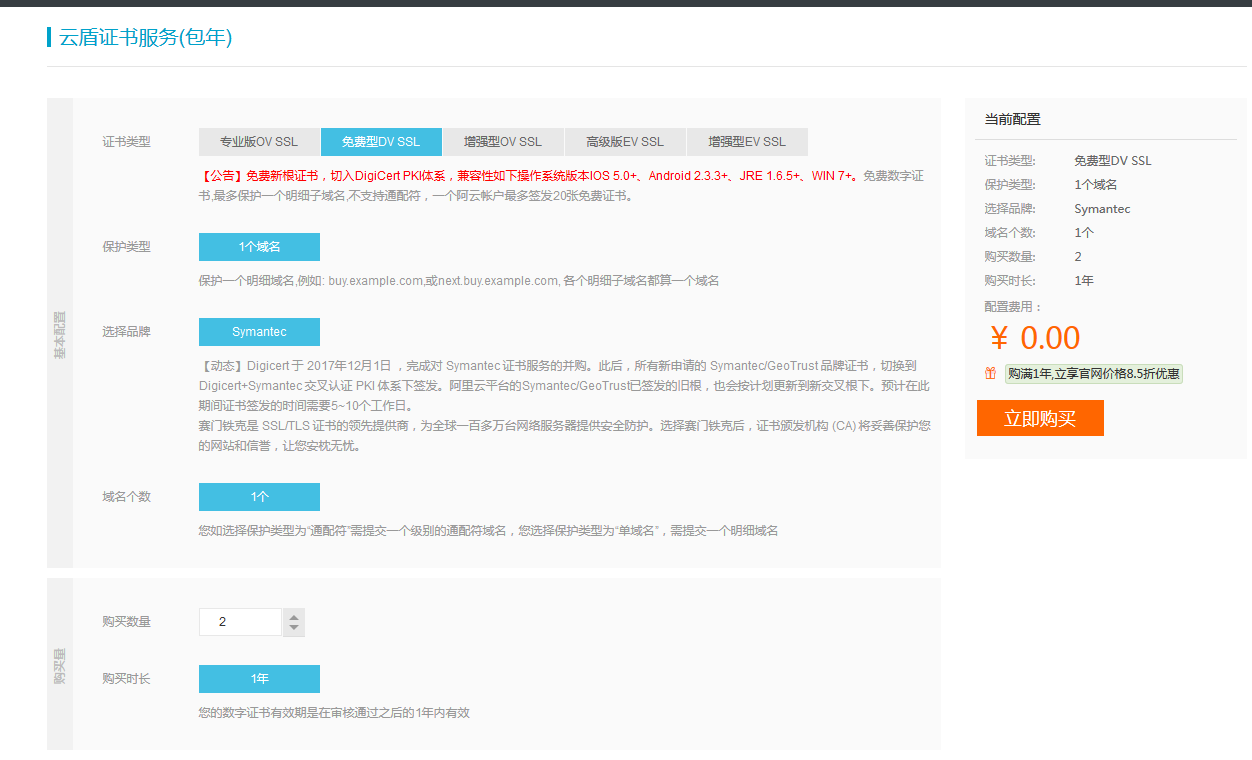
我选定的是最便宜的一款,不要钱,不过要找到它可能得费点时间哦,毕竟免费的东西嘛,阿里也把它隐藏的比较深。

它的缺点就是,只能保护一个域名,不支持通配符域名(意思就是说,比如你这个证书绑定的是baidu.com,它就只能保护www.baidu.com和baidu.com,而不能保护注入a.baidu.com这类子级域名),还有就是只能用一年。并且一个阿里云账户只能购买20个证书。
总的来说,对于我们搞测试来说,够用了,如果用作商业用途,那就最好建议花钱买。
购买过程我就不赘述了,购买完成以后,来到我的阿里云控制台,就可以看到刚才购买的证书了。

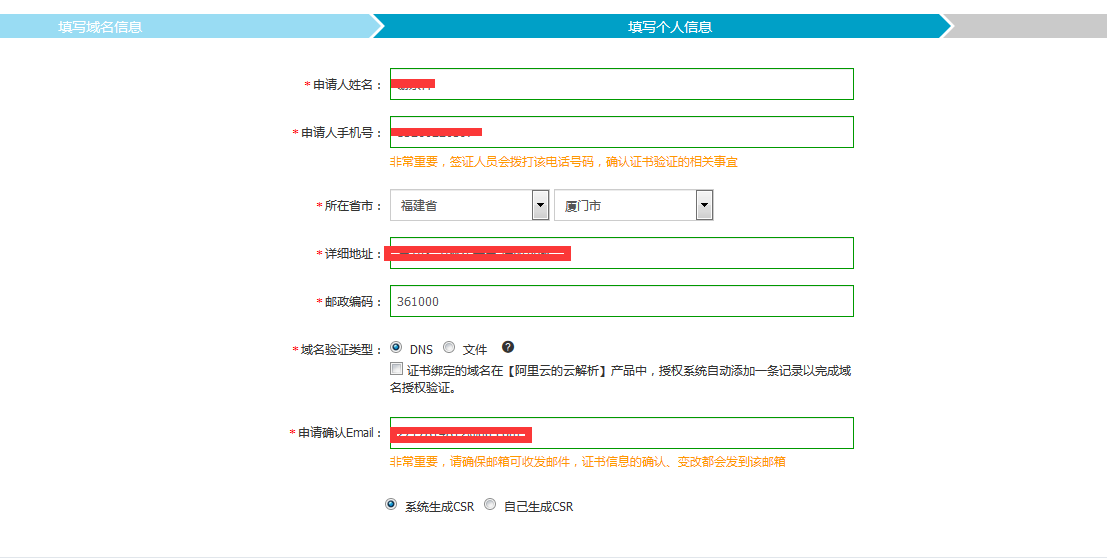
接下来一步是补全信息,主要是你想要绑定的域名和一些你的个人信息,如下图所示。

因为我选择的域名验证类型是DNS验证,所以还需要到dns配置一番,具体怎么配置在整个阿里云的平台上都有详实的记录。我就不赘述了。
审核很快,因为都是机器审核的,差不多也就10分钟就审核成功了。审核成功后的列表如下。以下是我申请的两个证书。

2.为nginx配置ssl证书
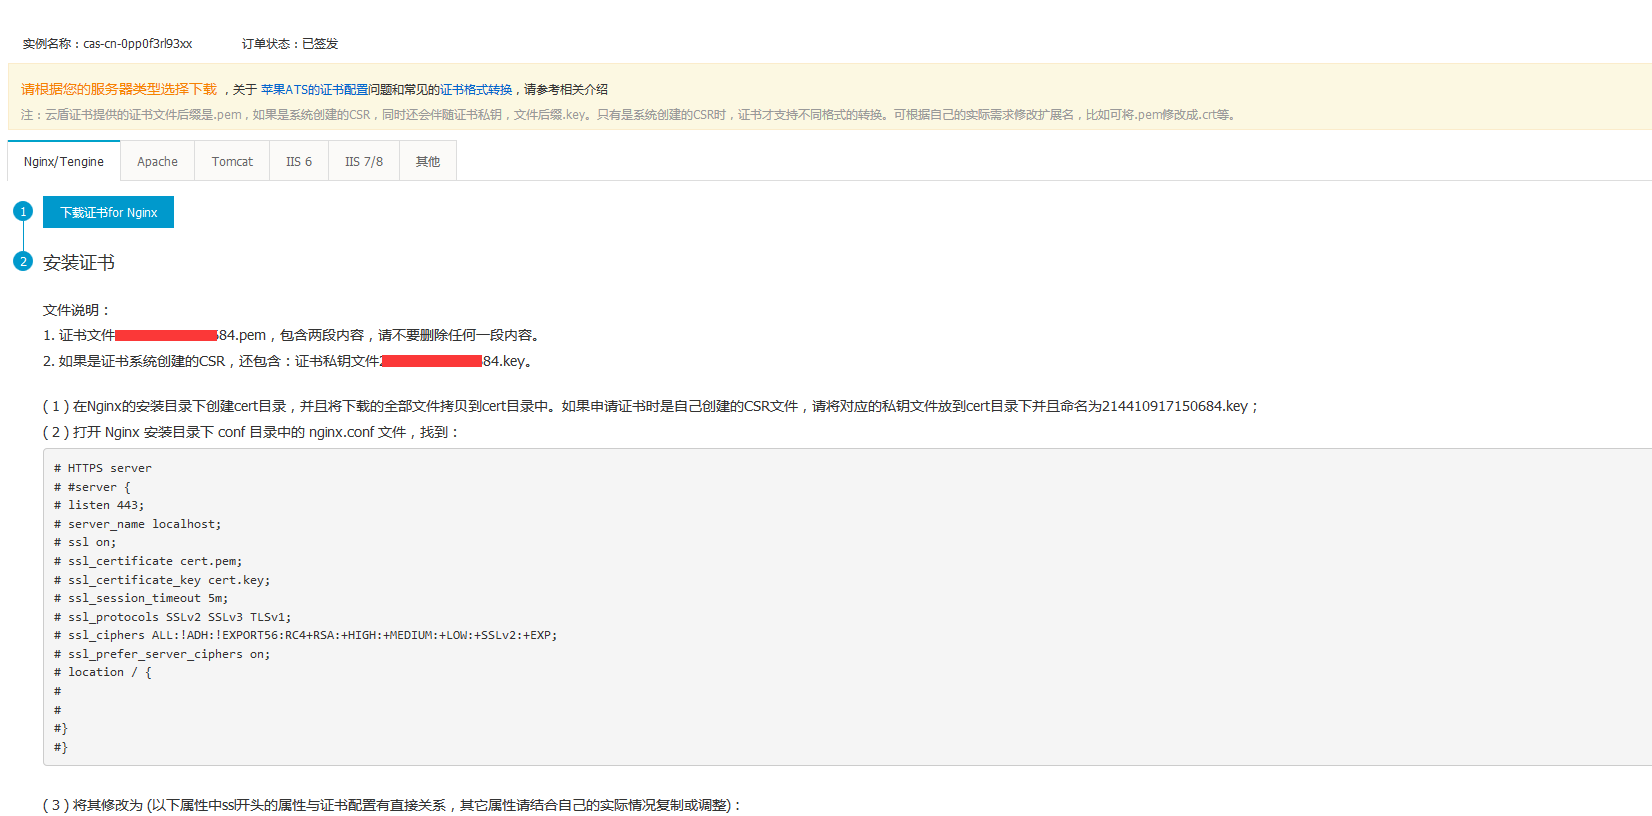
点击上述图片中的下载项,就进入如下页面。

其实这个页面把具体的操作说的十分清楚,并且还有视频教程。我简要地再总结一下。
第一步:下载证书for nginx
点击下载,就会得到一个证书文件夹,其中包含两个文件。

第二步:在nginx的conf目录下新建cert文件夹,将上述的两个文件放入该文件夹
第三步:修改nginx关于https部分的配置
我就直接贴我的配置吧:
 1  server {
 2         listen 443;
 3         server_name www.wonyen.com wonyen.com;
 4         ssl on;
 5         root html;
 6         index index.html index.htm;
 7         ssl_certificate   cert/xxxxxxxx684.pem;
 8         ssl_certificate_key  cert/xxxxxxxxxx0684.key;
 9         ssl_session_timeout 5m;
10         ssl_ciphers ECDHE-RSA-AES128-GCM-SHA256:ECDHE:ECDH:AES:HIGH:!NULL:!aNULL:!MD5:!ADH:!RC4;
11         ssl_protocols TLSv1 TLSv1.1 TLSv1.2;
12         ssl_prefer_server_ciphers on;
13         location ~ \.(gif|jpg|jpeg|png|bmp|swf|eot|svg|ttf|woff|mp3|mp4|wav|wmv|flv|f4v|icon)$ {
14             root    apache-tomcat-8.0.9-windows-x86-yipin-8081/apache-tomcat-8.0.9/webapps/ROOT;
15             expires 30d;
16         }
17         location ~ \.(json|txt)$ {
18             root    apache-tomcat-8.0.9-windows-x86-yipin-8081/apache-tomcat-8.0.9/webapps/ROOT;
19             expires 15d;
20         }
21         location ~ \.(css|js)$ {
22             root    apache-tomcat-8.0.9-windows-x86-yipin-8081/apache-tomcat-8.0.9/webapps/ROOT;
23             expires 1d;
24         }
25         location ~ ^/\w+Att{
26             proxy_pass http://xdxfile.com;
27         }
28         location ~ ^/\w+Fill{
29             proxy_pass http://xdxfile.com;
30         }
31         location = /crowdFundSave{
32             proxy_pass http://xdxfile.com;
33         }
34         location = /crowdFundRewardSave{
35             proxy_pass http://xdxfile.com;
36         }
37         location = /garbageCategorySave{
38             proxy_pass http://xdxfile.com;
39         }
40         location = /mailTestAjax{
41             proxy_pass http://xdx8082.com;
42         }
43         location = /mailSendAjax{
44             proxy_pass http://xdx8082.com;
45         }
46         location = /mailOldAjax{
47             proxy_pass http://xdx8082.com;
48         }
49         location = /wechatAuthority{
50             proxy_pass http://xdxall.com;
51         }
52         location = /compressImg{
53             proxy_pass http://xdxfile.com;
54         }
55         location = /compressImgAll{
56             proxy_pass http://xdxfile.com;
57         }
58         location = /lifeMenuHome{
59             proxy_pass http://xdxfile.com;
60         }
61         location = /lifeOrderHome{
62             proxy_pass http://xdxfile.com;
63         }
64         location = /lifeCenterAjax{
65             proxy_pass http://xdxfile.com;
66         }
67         location = /startBusiness{
68             proxy_pass http://xdxfile.com;
69         }
70         location ~ ^/ueditor1_4_3{
71             proxy_pass http://xdxfile.com;
72         }
73         location = /freightByIp{
74             proxy_pass http://xdx8082.com;
75             proxy_redirect    off;
76             proxy_set_header  Host             $host;
77             proxy_set_header  X-Real-IP        $remote_addr;
78             proxy_set_header  X-Forwarded-For  $proxy_add_x_forwarded_for;
79         }
80         location ~ .*$ {
81             index index;
82             proxy_pass http://xdx.com;
83          }
84         error_page  404              /Error404.jsp;
85         error_page   500 502 503 504  /Error404.jsp;
86         location = /Error404.jsp {
87          proxy_pass http://xdxfile.com;
88         }
89     }
有关于ssl的配置集中在7--12行,其他的配置就跟普通的http配置无二致。
第四步:重启nginx服务器
经过如上几个步骤,你的nginx服务器就既可以支持http,又可以支持https了,是不是很简单,赶紧试试吧。


