
第一种:文字和下划线颜色相同
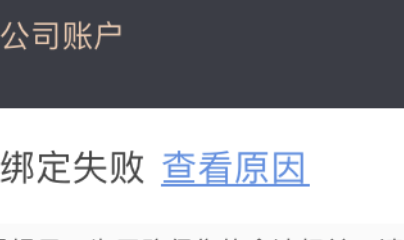
    private lazy var checkReasonBtn : UIButton = {
        let btn = JYUIModel.createBtn()
        btn.addTarget(self, action: #selector(clickCheckReasonBtn), for: UIControl.Event.touchUpInside)
        var attributedString = NSMutableAttributedString(string:"查看原因")
        var range = NSRange()
        range.location = 0
        range.length = attributedString.length
        attributedString.addAttributes([NSAttributedString.Key.underlineStyle : NSNumber(value: NSUnderlineStyle.single.rawValue),NSAttributedString.Key.foregroundColor:UIColor.init(hexString: "#4A90E2")], range: range)
        btn.setAttributedTitle(attributedString, for: UIControl.State.normal)
        return btn
    }()
第二种, 文字和下划线颜色不同

import UIKit

/// 带下划线的Button
class UnderlineButton: JYBaseButton {

    /// 下划线高度
    var underLineHeight:CGFloat = 2{
        didSet{
            //保护
            if (underLineHeight > self.bounds.size.height/2) || (underLineHeight < 0){
                underLineHeight = 2
            }
            self.draw(self.bounds)
        }
    }

    /// 默认下划线颜色
    var normalUnderColor:UIColor = UIColor.clear

    /// 选中下划线颜色
    var selectedUnderColor:UIColor = UIColor.init(hexString: "#FF8437")

    convenience init(normalUnderColor:UIColor,
                     selectedUnderColor:UIColor,
                     underLineHeight:CGFloat){
        self.init()
        self.normalUnderColor = normalUnderColor
        self.selectedUnderColor = selectedUnderColor
        self.underLineHeight = underLineHeight
    }

    override var isSelected: Bool{
        didSet{
            self.draw(self.bounds)
        }
    }

    override func draw(_ rect: CGRect) {
        let textRect : CGRect = self.titleLabel?.frame ?? CGRect.zero
        if let contect : CGContext = UIGraphicsGetCurrentContext(){

            switch isSelected {
            case true:
                contect.setStrokeColor((selectedUnderColor.cgColor))
            case false:
                contect.setStrokeColor((normalUnderColor.cgColor))
            }
            contect.move(to: CGPoint(x: textRect.origin.x, y: self.bounds.size.height - underLineHeight) )
            contect.addLine(to: CGPoint(x: textRect.origin.x + textRect.size.width, y: self.bounds.size.height - underLineHeight))
            contect.setLineWidth(underLineHeight)
            contect.closePath()
            contect.drawPath(using: CGPathDrawingMode.stroke)
        }
    }
}

 浙公网安备 33010602011771号