
背景:
操作系统:centOS 7.9.2009
1. 下载mysql安装包
https://dev.mysql.com/downloads/mysql/5.6.html
2. 卸载系统自带的mariadb
[root@gpap-prod-3 ~]# rpm -qa| grep mariadb
mariadb-libs-5.5.68-1.el7.x86_64
[root@gpap-prod-3 ~]# rpm -e --nodeps mariadb-libs-5.5.68-1.el7.x86_64
warning: /etc/my.cnf saved as /etc/my.cnf.rpmsave
删除/etc下的my.cnf文件
[root@gpap-prod-3 ~]# rm -rf /etc/my.cnf.rpmsave
[root@gpap-prod-3 ~]# rm -rf /etc/my.cnf
3. 创建mysql用户组,创建mysql用户,并将其加入mysql用户组
[root@gpap-prod-3 ~]# groupadd mysql
[root@gpap-prod-3 ~]# useradd -r -g mysql mysql
4. 将下载好的二进制包放到/usr/local目录下
mv mysql-5.6.48-linux-glibc2.12-x86_64.tar.gz /usr/local/
解压文件
tar xf mysql-5.6.48-linux-glibc2.12-x86_64.tar.gz
将其命名为mysql
mv mysql-5.6.48-linux-glibc2.12-x86_64 mysql
5. 在/etc目录下创建新的my.cnf文件
vim my.cnf
my.cnf文件内容如下:
[mysql]
# 设置mysql客户端默认字符集
default-character-set=utf8
socket=/var/lib/mysql/mysql.sock
[mysqld]
skip-name-resolve
#设置3306端口
port=3306
socket=/var/lib/mysql/mysql.sock
# 设置mysql的安装目录
basedir=/usr/local/mysql
# 设置mysql数据库的数据的存放目录
datadir=/usr/local/mysql/data
# 允许最大连接数
max_connections=200
# 服务端使用的字符集默认为8比特编码的latin1字符集
character-set-server=utf8
# 创建新表时将使用的默认存储引擎
default-storage-engine=INNODB
lower_case_table_names=1
max_allowed_packet=16M
创建my.cnf中涉及到的目录
[root@gpap-prod-3 mysql]# mkdir /var/lib/mysql
[root@gpap-prod-3 mysql]# mkdir /var/lib/mysql/mysql
[root@gpap-prod-3 mysql]# chown -R mysql:mysql /var/lib/mysql
[root@gpap-prod-3 mysql]# chown -R mysql:mysql /var/lib/mysql/mysql
[root@gpap-prod-3 mysql]# pwd
/usr/local/mysql
6. 进入mysql安装目录(/usr/local/mysql)安装autoconf库和libaio库文件
[root@gpap-prod-3 mysql]# yum -y install autoconf
[root@gpap-prod-3 mysql]# yum install libaio* -y
进行授权
chown -R mysql:mysql ./
./scripts/mysql_install_db --user=mysql
chown -R mysql:mysql data
7. 配置mysql
修改my.cnf文件权限
chmod 777 /etc/my.cnf
设置开机自动启动服务的脚本
cp ./support-files/mysql.server /etc/rc.d/init.d/mysqld
./scripts/mysql_install_db --user=mysql
增加mysqld服务控制脚本执行权限
chmod +x /etc/rc.d/init.d/mysqld
将mysql服务加入到系统服务中
chkconfig --add mysqld
检查服务是否生效
chkconfig --list mysqld
输出日志如下:
Note: This output shows SysV services only and does not include native
      systemd services. SysV configuration data might be overridden by native
      systemd configuration.

      If you want to list systemd services use 'systemctl list-unit-files'.
      To see services enabled on particular target use
      'systemctl list-dependencies [target]'.

mysqld             0:off    1:off    2:on    3:on    4:on    5:on    6:off
启动mysqld服务
systemctl restart mysqld.service
修改 /etc/profile 文件,将mysql的bin目录加入path环境变量
export MYSQL_HOME="/usr/local/mysql"
export PATH="$PATH:MYSQL_HOME/bin"
使profile文件的修改生效
source /etc/profile
8. 如果设置了防火墙,则需要开通3306和8080端口,依次执行以下命令
firewall-cmd --zone=public --add-port=3306/tcp --permanent
firewall-cmd --zone=public --add-port=3306/udp --permanent
firewall-cmd --zone=public --add-port=8080/tcp --permanent
firewall-cmd --zone=public --add-port=8080/udp --permanent
firewall-cmd --reload
9. 创建mysql软连接
ln -s /usr/local/mysql/bin/mysql /usr/bin/mysql
10. 修改mysql用户密码
./mysqld_safe --skip-grant-tables
日志输出如下
Warning: World-writable config file '/etc/my.cnf' is ignored
Warning: World-writable config file '/etc/my.cnf' is ignored
210811 14:53:29 mysqld_safe Logging to '/usr/local/mysql/data/gpap-prod-3.err'.
210811 14:53:29 mysqld_safe A mysqld process already exists
启动mysql客户端(密码为空,直接回车即可)
[root@gpap-prod-3 bin]# mysql -uroot -p
Warning: World-writable config file '/etc/my.cnf' is ignored
Enter password:
Welcome to the MySQL monitor.  Commands end with ; or \g.
Your MySQL connection id is 2
Server version: 5.6.42 MySQL Community Server (GPL)

Copyright (c) 2000, 2018, Oracle and/or its affiliates. All rights reserved.

Oracle is a registered trademark of Oracle Corporation and/or its
affiliates. Other names may be trademarks of their respective
owners.

Type 'help;' or '\h' for help. Type '\c' to clear the current input statement.

mysql>
输入sql,依次查看数据库列表、进入mysql数据库,查看user表相关信息
show databases;
use mysql;
show tables;
desc user;
select USER,HOST,password from user;
查到的用户列表如下所示
+------+-------------+----------+
| USER | HOST        | password |
+------+-------------+----------+
| root | localhost   |          |
| root | gpap-prod-3 |          |
| root | 127.0.0.1   |          |
| root | ::1         |          |
|      | localhost   |          |
|      | gpap-prod-3 |          |
+------+-------------+----------+
6 rows in set (0.00 sec)
将user为root,host为localhost的这条数据进行修改
update user set password=password("你的root账户的密码"), host="%" where user="root" and host="localhost";
再执行刷新sql
flush privileges;
11. 退出mysqld_safe,杀掉该进程
ps aux | grep mysqld
kill -9 mysqld_safe对应的进程ID
12. 重启mysqld服务
systemctl restart mysqld.service
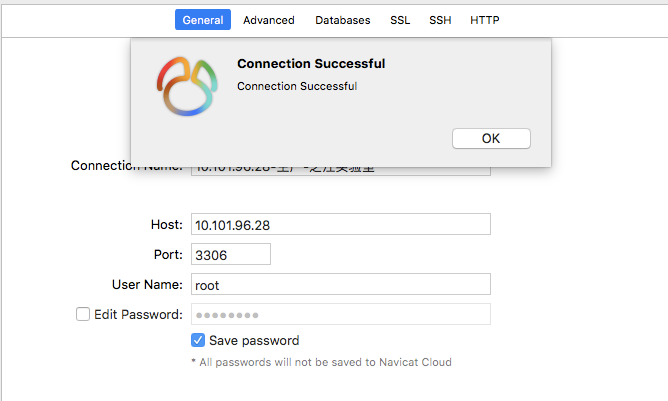
13. 本地使用navicat进行连接测试

 浙公网安备 33010602011771号