
1 Elasticsearch-6.4.3安装
1.1 前提条件:
1、JDK1.8环境
2、将所需文件上传到虚拟机的服务器
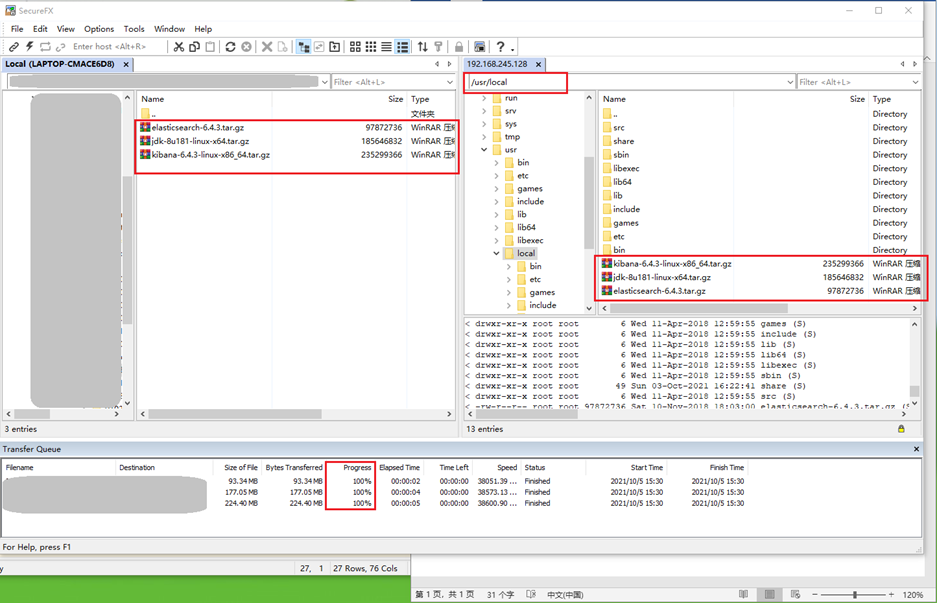
使用secureFX上传:
上传到/usr/local目录下:
3、开启防火墙:
查看防火墙状态:systemctl status firewalld.service
打开防火墙:systemctl start firewalld.service
查看防火墙状态:systemctl status firewalld.service
关闭防火墙:systemctl stop firewalld.service
1.2 开始安装Elasticsearch
在secureCRT上使用root登录:
1、打开上传的文件的目录:
cd /usr/local
2、解压elasticsearch-6.4.3文件:
tar -zxvf elasticsearch-6.4.3.tar.gz
3、打开elasticsearch-6.4.3目录:
cd elasticsearch-6.4.3
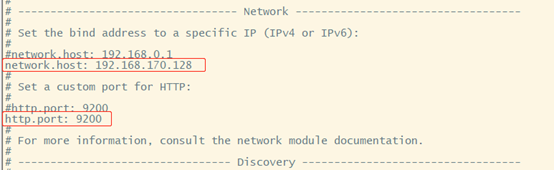
4、修改配置文件:
到此,ES安装完成。
1.3 启动Elasticsearch
1、启动elasticsearch
【1】cd /usr/loacl/elasticsearch-6.4.3/bin/
【2】./elasticsearch
2、报错及解决
报错1:

[root@localdomain bin]# ./elasticsearch
OpenJDK 64-Bit Server VM warning: If the number of processors is expected to increase from one, then you should configure the number of parallel GC threads appropriately using -XX:ParallelGCThreads=N
[2021-10-07T00:40:55,381][WARN ][o.e.b.ElasticsearchUncaughtExceptionHandler] [] uncaught exception in thread [main]
org.elasticsearch.bootstrap.StartupException: java.lang.RuntimeException: can not run elasticsearch as root
原因:不能使用root账号登录ES
解决:创建一个分组和用户用于启动es
groupadd esmayikt
useradd esyushengjun -g esmayikt -p 123456
chown -R esyushengjun:esmayikt elasticsearch-6.4.3
su esyushengjun 切换用户
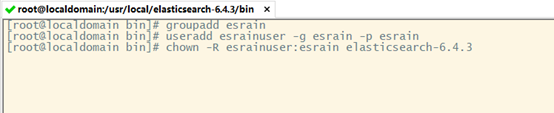
创建组:groupadd esrain
创建用户:useradd esrainuser -g esrain -p esrain
授权用户权限:chown -R esrainuser:esrain elasticsearch-6.4.3
切换用户:su esrainuser
报错2:
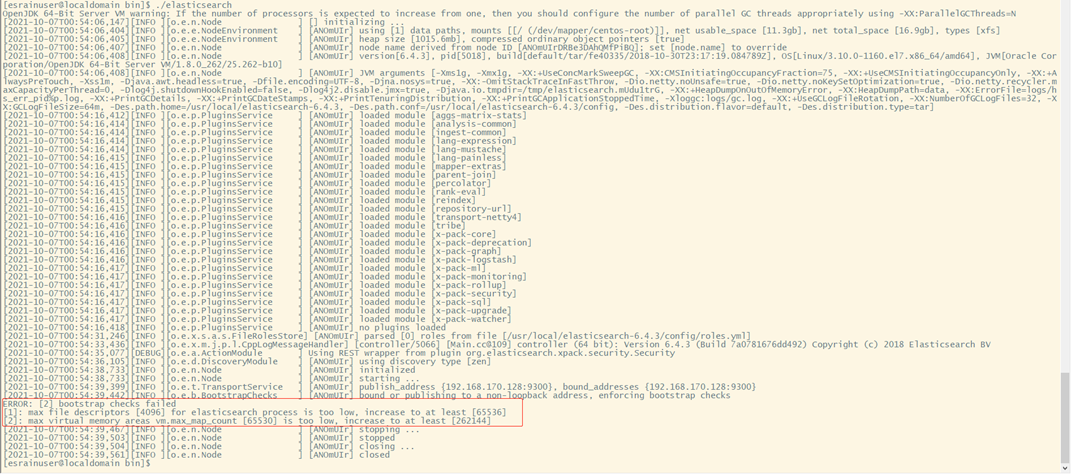
ERROR: [2] bootstrap checks failed
[1]: max file descriptors [4096] for elasticsearch process is too low, increase to at least [65536]
[2]: max virtual memory areas vm.max_map_count [65530] is too low, increase to at least [262144]
解决:
【1】
执行:vi /etc/sysctl.conf
增加一行:vm.max_map_count=655360
ESC+:wq保存
【2】
执行:cd /etc
执行:sysctl -p
结果:vm.max_map_count = 655360
报错3:

ERROR: [1] bootstrap checks failed
[1]: max file descriptors [4096] for elasticsearch process is too low, increase to at least [65536]
解决:
【1】
执行:vi /etc/security/limits.conf
增加内容:
* soft nofile 65536
* hard nofile 131072
* soft nproc 2048
* hard nproc 4096
再次启动,还会报错,需要重启服务器才可以。
重启后,再次执行./elasticsearch。成功
1.4 启动结果访问
访问地址:http://192.168.170.128:9200/
(如果访问不到,需要关闭服务器防火墙)
访问结果:
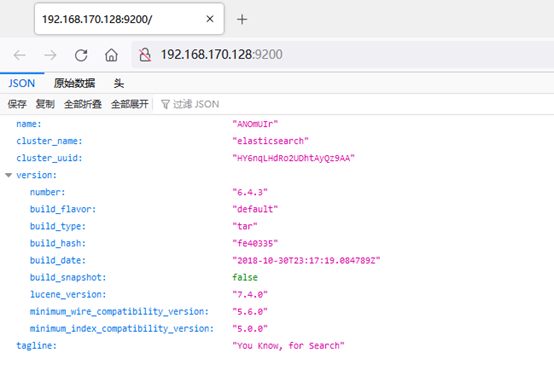
{
"name" : "ANOmUIr",
"cluster_name" : "elasticsearch",
"cluster_uuid" : "HY6nqLHdRo2UDhtAyQz9AA",
"version" : {
"number" : "6.4.3",
"build_flavor" : "default",
"build_type" : "tar",
"build_hash" : "fe40335",
"build_date" : "2018-10-30T23:17:19.084789Z",
"build_snapshot" : false,
"lucene_version" : "7.4.0",
"minimum_wire_compatibility_version" : "5.6.0",
"minimum_index_compatibility_version" : "5.0.0"
},
"tagline" : "You Know, for Search"
}
以上是9200端口暴露的接口,用于增删改查。

 浙公网安备 33010602011771号