

监听器的实现有两种方式:
1、实现ApplicationListener接口
2、加@EventListener
1、ApplicationListener用法
ApplicationListener通过监听容器中发布的一些事件,事件发生就会触发监听器的回调,就完成了事件驱动开发
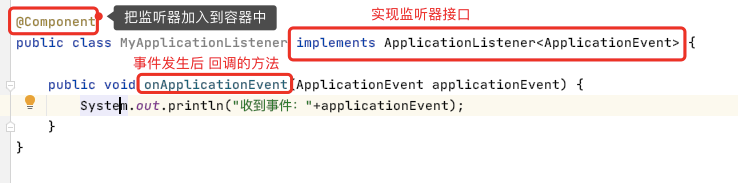
写一个监听器
- 写一个监听器监听某个事件
- 实现ApplicationListener
- 把监听器加入到容器中
只要容器中有相关事件发布,我们就能监听到这个事件
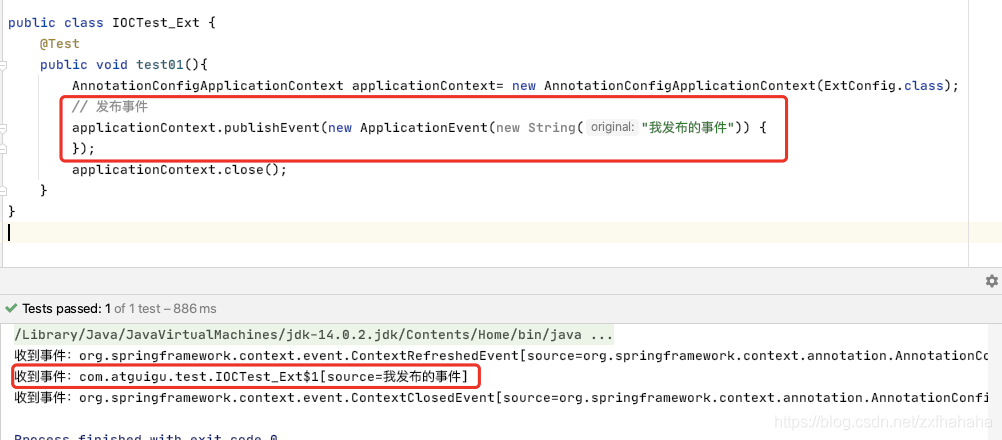
测试结果:
监听到的两个事件
发布事件
我们可以自己发布事件
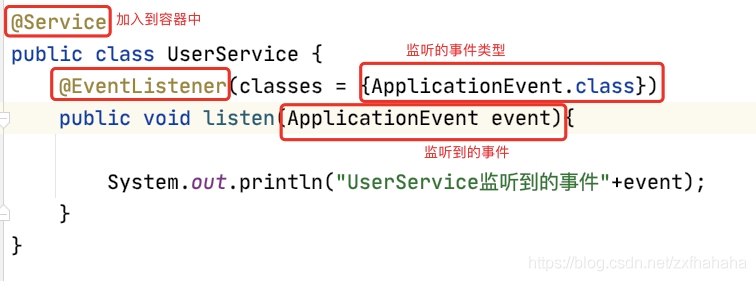
2、@EventListener用法
在想监听事件的方法上加上@EventListener注解,注解中指定要监听哪种类型的事件
然后在方法上写上参数,获得监听到的事件
3、项目应用:
3.1、自定义事件:
public class TestEvent extends ApplicationEvent {
private static final long serialVersionUID = -4661614214512524906L;
public TestEvent(Set<Long> source) {
super(source);
}
@Override
public Set<Long> getSource() {
return (Set<Long>)super.getSource();
}
}
3.2、自定义监听器:
@Slf4j
@Component
public class TestEventListerner {
@Autowired
private TestService testService;
@Async
@EventListener
public void onEvent(TestEvent event) {
log.debug("开始批量更新,id:{}", event.getSource());
for (Long id : event.getSource()) {
testService.limitChangeNotice(id);
}
log.debug("完成批量更新,id:{}", event.getSource());
}
}
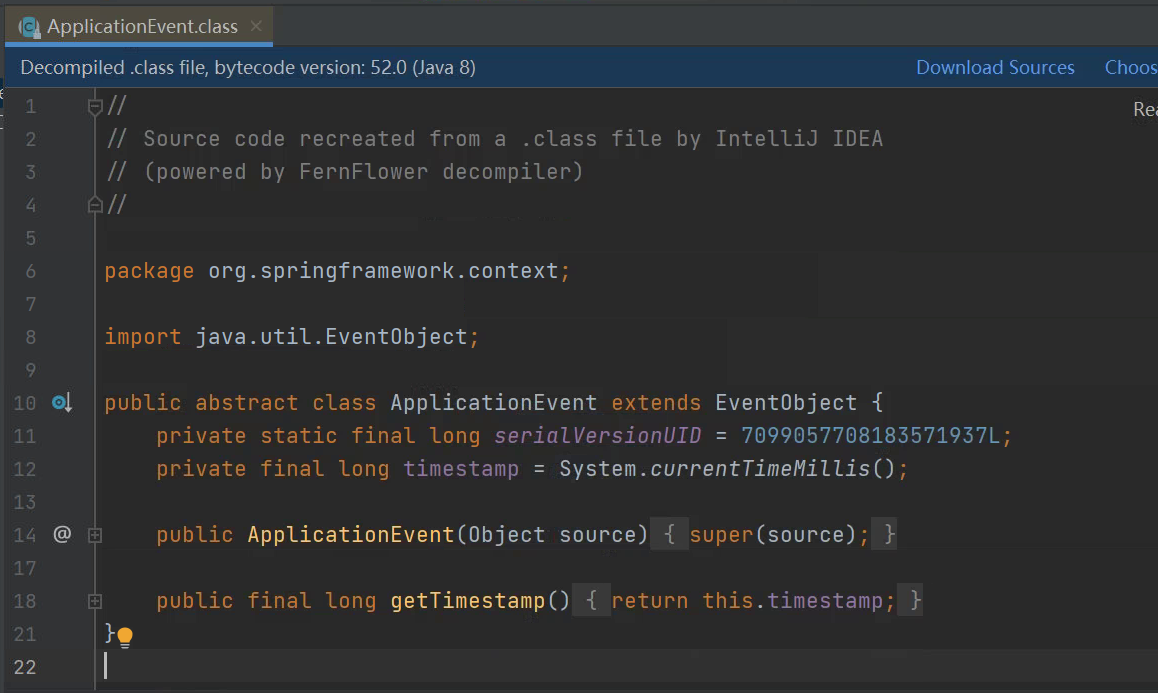
3.3、父类Event:ApplicationEvent 源码
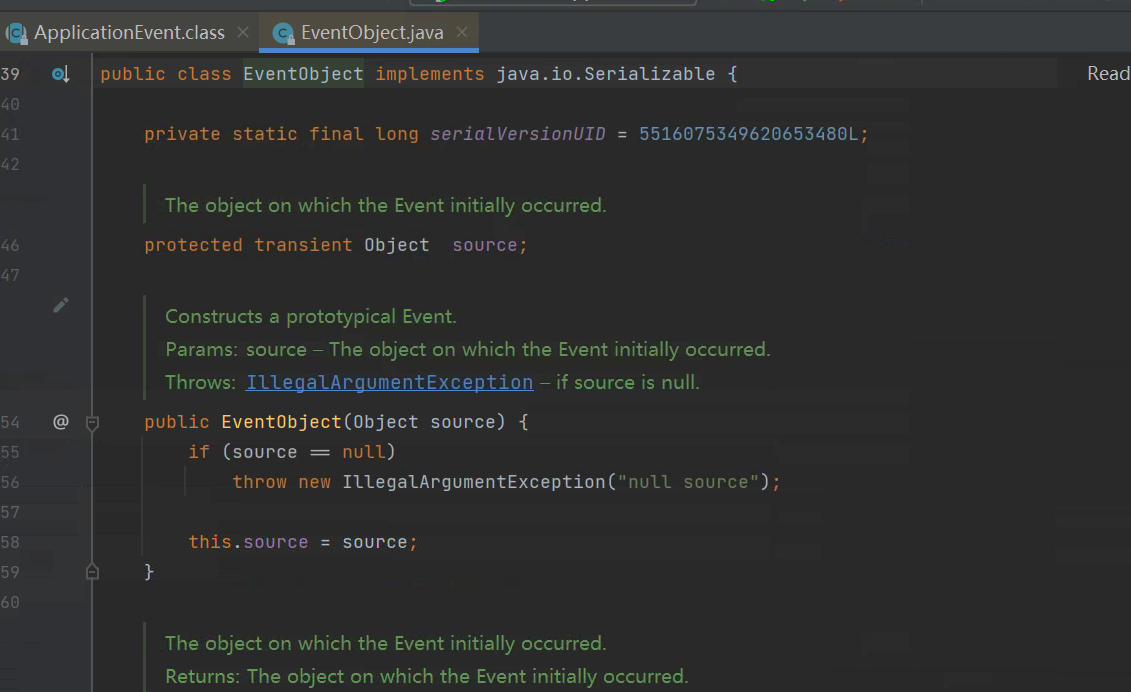
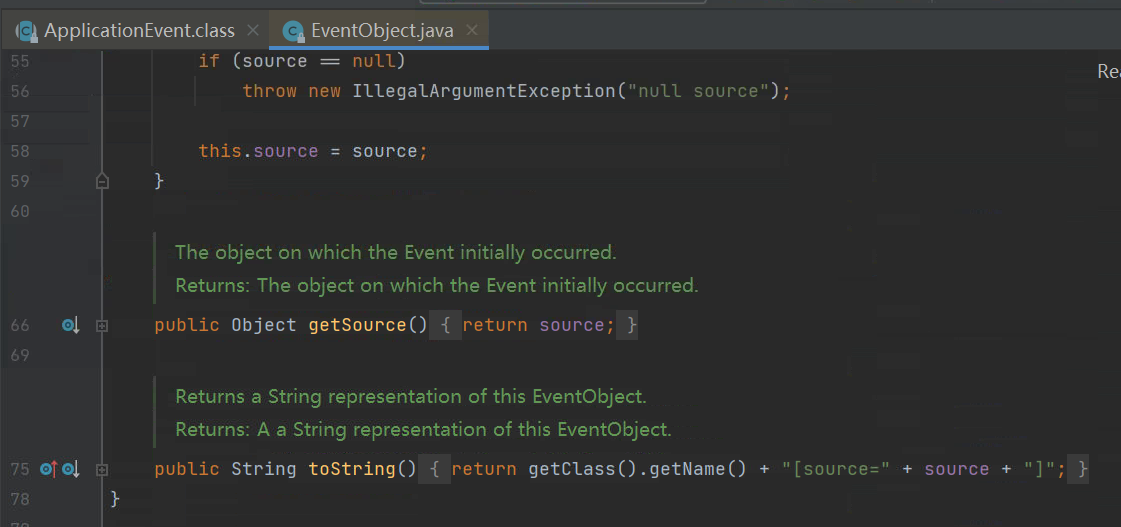
3.4、父类Event:EventObject 源码
3.5、事件发布:
public Class Test () {
@Autowired
private ConfigurableApplicationContext context;
public static void main(String[] args) {
Set<Long> set = new HashSet<>();
set.add(1L);
set.add(2L);
context.publishEvent(new TestEvent (set));
}
}
或者


【推荐】国内首个AI IDE,深度理解中文开发场景,立即下载体验Trae
【推荐】编程新体验,更懂你的AI,立即体验豆包MarsCode编程助手
【推荐】抖音旗下AI助手豆包,你的智能百科全书,全免费不限次数
【推荐】轻量又高性能的 SSH 工具 IShell:AI 加持,快人一步
· 震惊!C++程序真的从main开始吗?99%的程序员都答错了
· 【硬核科普】Trae如何「偷看」你的代码?零基础破解AI编程运行原理
· 单元测试从入门到精通
· 上周热点回顾(3.3-3.9)
· winform 绘制太阳,地球,月球 运作规律