


Zabbix Server端编译安装配置
PHP版本:php-7.4.29
NGINX版本:nginx-1.20.2
MYSQL版本:MySQL 5.7.36
zabbix版本:zabbix-5.0.0
- zabbix是一个基于WEB界面的提供分布式系统监视以及网络监视功能的企业级的开源解决方案
- zabbix由2部分构成,zabbix-server与可选组件zabbix-agent。
- zabbix-agent:zabbix-agent为客户端软件,用于采集各监控项目的数据,并把采集的数据传输给zabbix-proxy或zabbix-server。
- zabbix-server:可以通过SNMP,zabbix-agent,ping,端口监视等方法提供对远程服务器/网络状态的监视,数据收集等功能,它可以运行在Linux,Solaris,HP-UX,AIX,Free BSD,Open BSD,OS X等平台上。
 
一、依赖安装
yum install pcre* libevent-devel pcre-devel libxml2-devel net-snmp-devel gcc gcc-g++ libcurl-devel
二、MySQL安装
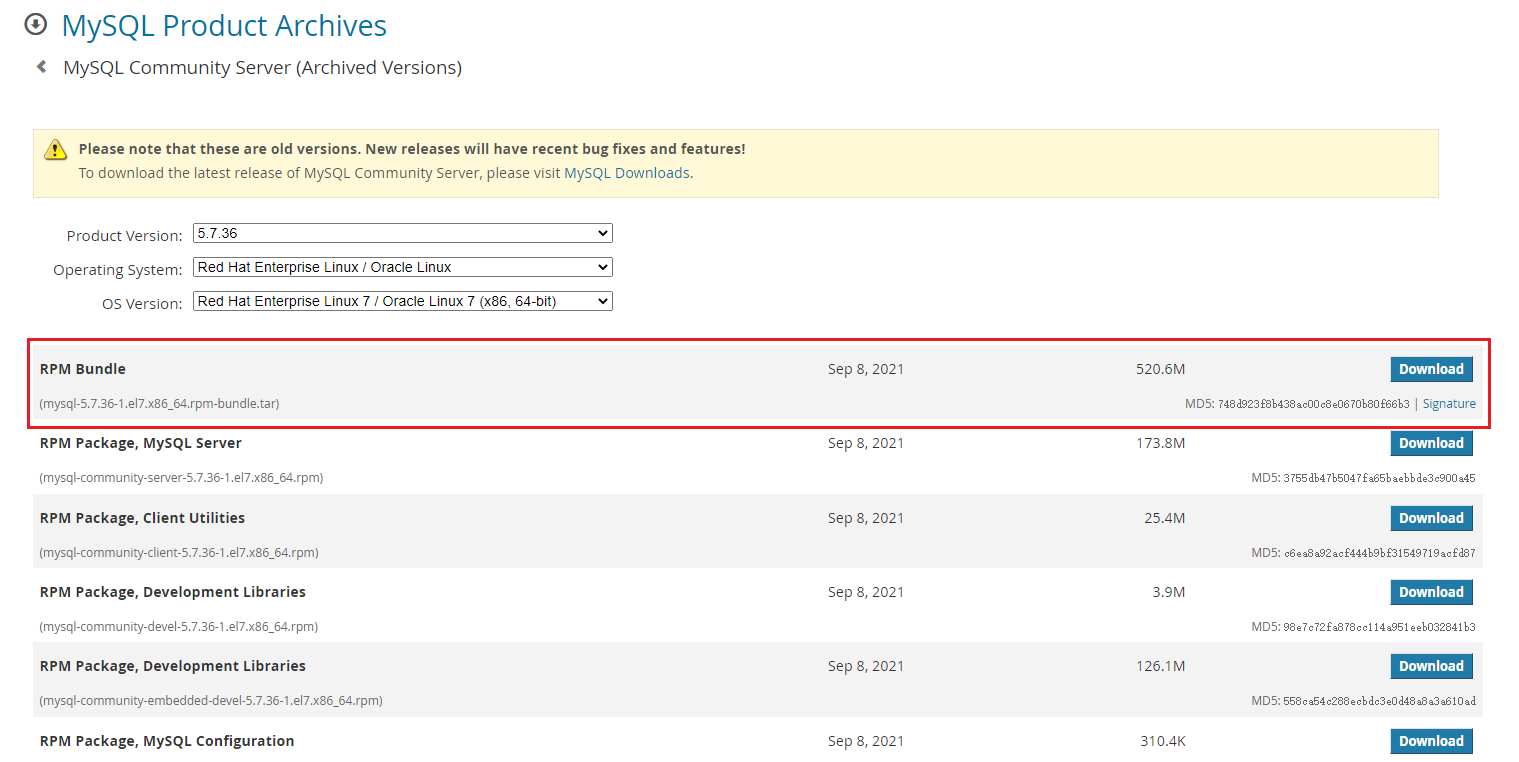
1、下载安装包
官网链接:https://downloads.mysql.com/archives/community/
官网缓慢,可通过其它镜像仓库下载
2、卸载自带的mariadb
# 查看自带的mariadb
rpm -qa|grep mariadb

# 卸载自带的mariadb
rpm -e --nodeps mariadb-libs-5.5.60-1.el7-5.x86_64
3、解压安装MySQL
1)解压
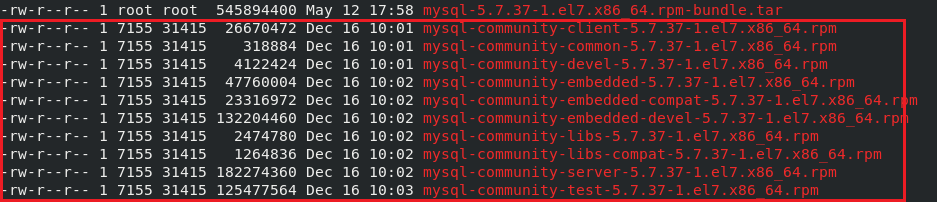
tar -zxvf mysql-5.7.37-1.el7.x86_64.rpm-bundle.tar
# 解压后得到以下几个rpm文件
2)安装
rpm -Uvh *.rpm --force --nodeps
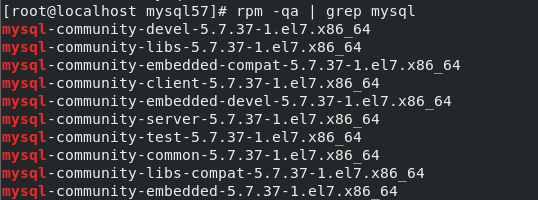
3)查看安装情况
rpm -qa | grep myql
4、启动MySQL
systemctl start mysqld.service
5、修改root密码
1)查看初始化密码
cat /var/log/mysqld.log | grep password

2)登录MySQL修改密码
mysql -uroot -p

# 修改密码策略
mysql> set global validate_password_length=1;
mysql> set global validate_password_policy=0;
mysql> flush privileges;

# 修改密码
mysql> alter user 'root'@'localhost' identified by '123456';

# (可选)开启远程连接
mysql> update user set host = '%' where user = 'root';
mysql> flush privileges;
3)设置编码
编辑/etc/my.cnf,在mysqld下添加,然后重启mysqld
init_connect='SET collation_connection = utf8_unicode_ci'
init_connect='SET NAMES utf8'
character-set-server=utf8
collation-server=utf8_unicode_ci
skip-character-set-client-handshake
4)(可选)支持中文编码
编辑/etc/my.cnf
character-set-server=utf8

[client]
default-character-set=utf8

[mysql]
default-character-set=utf8
三、Zabbix安装
官方文档:https://www.zabbix.com/documentation/5.0/en/manual/installation/install
1、编译安装
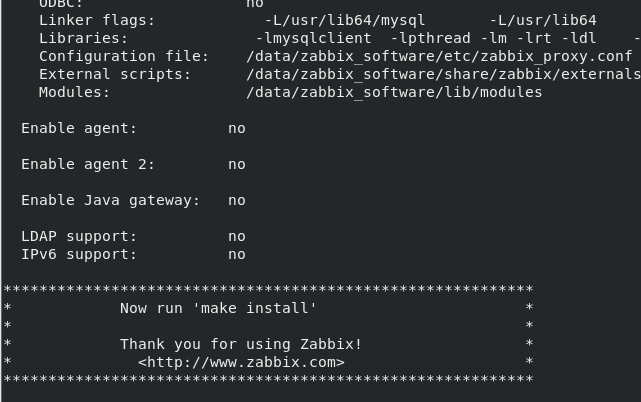
# 配置检查预编译
./configure --prefix=/data/zabbix_software --enable-server --enable-agent --with-mysql --enable-ipv6 --with-net-snmp --with-libcurl --with-libxml2
# Zabbix预编译完成后,直接安装即可
make install
2、配置环境变量
在`/etc/profile.d中新建一个sh文件, software.sh,添加以下内容
export PATH=/data/zabbix_software/bin/:$PATH
export PATH=/data/zabbix_software/sbin/:$PATH
四、Zabbix数据库导入
1、新建库
mysql> create databse zabbix character set utf8 collate utf8_bin;
mysql> grant all on zabbix.* to 'zabbix'@'localhost' identified by 'zabbix';
mysql> flush privileges;
2、导入数据
- 在zabbix的数据库文件在源码包下database目录中
mysql> source /data/zabbix_packages/zabbix-5.5.0/database/mysql/schema.sql
mysql> source /data/zabbix_packages/zabbix-5.5.0/database/mysql/images.sql
mysql> source /data/zabbix_packages/zabbix-5.5.0/database/mysql/data.sql

五、Zabbix配置
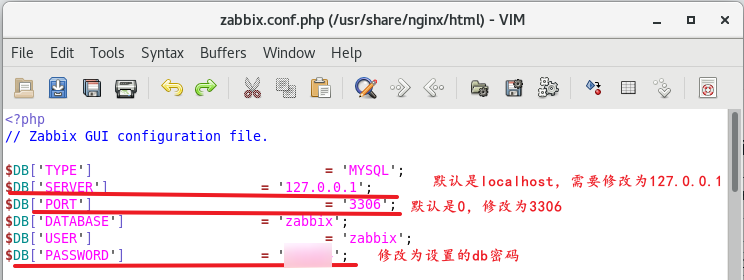
编辑安装目录下etc/zabbix_server.conf,修改DBHost(数据库设备)、DBName(zabbix使用的数据库名称)、DBUser(数据库用户)、DBPassword(数据库密码)和DBPort(数据库端口号)等

六、启动Zabbix
1、创建zabbix用户,否则会报错
groupadd --system zabbix
useradd --system -g zabbix -d /usr/lib/zabbix -s /sbin/nologin -c "Zabbix Monitoring System" zabbix
2、启动zabbix server
./zabbix_server -c /data/zabbix_software/etc/zabbix_server.conf
-
设置开机自启
vim /etc/systemd/system/zabbix.servicesystemctl enable zabbix.service[Unit] Description=zabbix [Service] Type=forking ExecStart=/data/zabbix_software/sbin/zabbix_server -c /data/zabbix_software/etc/zabbix_server.conf PrivateTmp=true [Install] WantedBy=multi-user.target
七、配置web
参考博客:https://www.cnblogs.com/charon2/p/10545088.html
1、Nginx安装
1)编译安装
# 下载Nginx
wget http://nginx.org/download/nginx-1.20.2.tar.gz

# 解压Nginx
tar -zxvf nginx-1.20.2.tar.gz

# 编译安装Nginx
cd nginx-1.20.2
mkdir -p /usr/local/nginx/
./configure --prefix=/usr/local/nginx/ --without-http_rewrite_module --without-http_gzip_module --with-pcre
make
make install
2)zabbix前端文件拷贝
cp /data/zabbix_packages/zabbix-5.0.0/ui/* /usr/local/nginx/html
cp /usr/local/nginx/html/conf/zabbix.conf.php.example /usr/local/nginx/html/conf/zabbix.conf.php

vim /usr/local/nginx/html/conf/zabbix.conf.php

chmod 777 /usr/local/nginx/html/conf/zabbix.conf.php   # 必须执行,否则在web中配置完成后,无法保覆盖在目录下
3)适应zabbix配置
vim /usr/local/nginx/etc/conf.d/zabbix.conf
server {
      listen   8888;

      access_log /home/up/ssl.access.log;

      error_log /home/up/ssl.error.log;

      location / {
          root html;
          index index.php index.html index.htm;
       }

       error_page 500 502 503 504 /50x.html;

       location = /50x.html {

             root  html;

       }

       location ~ \.php$ {
          root            /usr/share/nginx/html;
          fastcgi_buffer_size 128k;
          fastcgi_buffers 4 256k;
          fastcgi_busy_buffers_size 256k;
          fastcgi_pass  127.0.0.1:9000;
          fastcgi_index  index.php;
          fastcgi_param SCRIPT_FILENAME
          $document_root$fastcgi_script_name;
          include     fastcgi_params;

        }

}
4)制作为服务并设置开机自启
vim /etc/systemd/system/nginx.service
systemctl enable nginx.service
[Unit]
Description=nginx - high performance web server
After=network.target remote-fs.target nss-lookup.target

[Service]
Type=forking
ExecStart=/usr/local/nginx/sbin/nginx
ExecStop=/usr/local/nginx/sbin/nginx -s stop
ExecReload=/usr/local/nginx/sbin/nginx -s reload
PrivateTmp=true

[Install]
WantedBy=multi-user.target
# 此时便可通过systemctl来管理
systemctl status nginx
systemctl start nginx
systemctl restart nginx
systemctl stop nginx
2、PHP编译安装
1)编译中可能出现的确实包问题
yum -y install libxml2-devel
yum -y install sqlite-devel
yum -y install bzip2-devel
yum -y install libcurl-devel
yum -y install libpng-devel
yum -y install libjpeg-devel
yum -y install freetype-devel
yum -y install libicu-devel
yum -y install oniguruma-devel
yum -y install libxslt-devel
yum -y install libzip-devel
-
如果报错,libzip >= 0.11

yum remove libzip  libzip-devel -y

wget https://libzip.org/download/libzip-1.2.0.tar.gz --no-check-certificate

tar -zxvf libzip-1.2.0.tar.gz

cd libzip-1.2.0

./configure

make -j 4
make install

#还需要让PHP的configure程序知道安装的libzip在哪里,
export PKG_CONFIG_PATH="/usr/local/lib/pkgconfig/"
2)安装PHP 7
cd /data/php_package/php-7.4.29

./configure --prefix=/data/php_software --with-curl --with-freetype --enable-gd --with-jpeg --with-gettext --with-kerberos --with-libdir=lib64 --with-libxml --with-mysqli --with-openssl --with-pdo-mysql --with-pear --enable-sockets --with-mhash --with-ldap-sasl --with-xsl --with-zlib --enable-fpm --enable-bcmath --enable-mbregex --enable-mbstring --enable-opcache --enable-pcntl --enable-shmop --enable-soap --enable-sockets --enable-sysvsem --enable-xml --with-zip --with-config-file-path=/data/php_software/etc -with-bz2 --enable-sysvsem

make -j 4

make install
3)配置
cp /data/php_package/php-7.4.29/php.ini-production /data/php_software/etc/php.ini
cp /data/php_software/etc/php-fpm.conf.default /data/php_software/etc/php-fpm.conf

cp /data/php_software/etc/php-fpm.d/www.conf.default /data/php_software/etc/php-fpm.d/www.conf
4)适应zabbix配置
# vim /data/php_software/etc/php.ini

max_execution_time = 300
memory_limit = 128M
post_max_size = 16M
upload_max_filesize = 2M
max_input_time = 300
date.timezone = Asia/Shanghai
5)启动php-fpm
/data/php_software/sbin/php-fpm -c /data/php_software/etc/php.ini
6)查看启动
ss -lnt | grep 9000

7)设置开机自启
设置开机自启
vim /etc/systemd/system/php-fpm.service
systemctl enable php-fpm.service
[Unit]
Description=php-fpm

[Service]
Type=forking
ExecStart=/data/php_software/sbin/php-fpm -c /data/php_software/etc/php.ini
PrivateTmp=true

[Install]
WantedBy=multi-user.target
8)(可忽略)结合nginx测试
vim /usr/local/nginx/etc/conf.d/test_php.conf
    server {
        listen       8888;
        server_name  localhost;

        root   /var/www/html;

        index  index.htm index.html index.php;

        location / {
            try_files $uri $uri/ /index.php?$args;
        }

        location ~ .*\.(php)?$ {
            expires -1s;
            try_files $uri =404;
            fastcgi_split_path_info ^(.+\.php)(/.+)$;
            include fastcgi_params;
            fastcgi_param PATH_INFO $fastcgi_path_info;
            fastcgi_index index.php;
            fastcgi_param SCRIPT_FILENAME $document_root$fastcgi_script_name;
            fastcgi_pass 127.0.0.1:9000;
        }
        #charset koi8-r;

        #access_log  logs/host.access.log  main;

       # location / {
       #     root   html;
       #     index  index.html index.htm;
       # }

        #error_page  404              /404.html;

        # redirect server error pages to the static page /50x.html
        #
        error_page   500 502 503 504  /50x.html;
        location = /50x.html {
            root   html;
        }
    }
-
重启nginx
systemctl restart nginx # 具体命令视具体情况而定 -
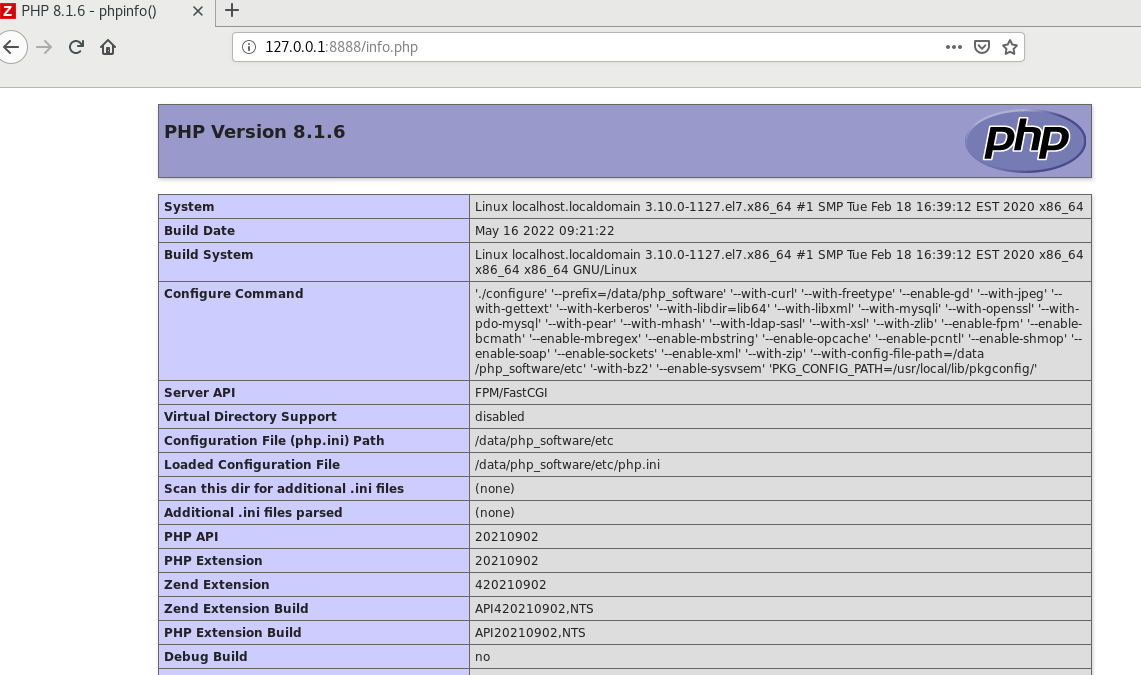
vim /var/www/html/info.php<?php phpinfo(); ?> -
访问网站:127.0.0.1:8888/info.php
八、Web配置zabbix
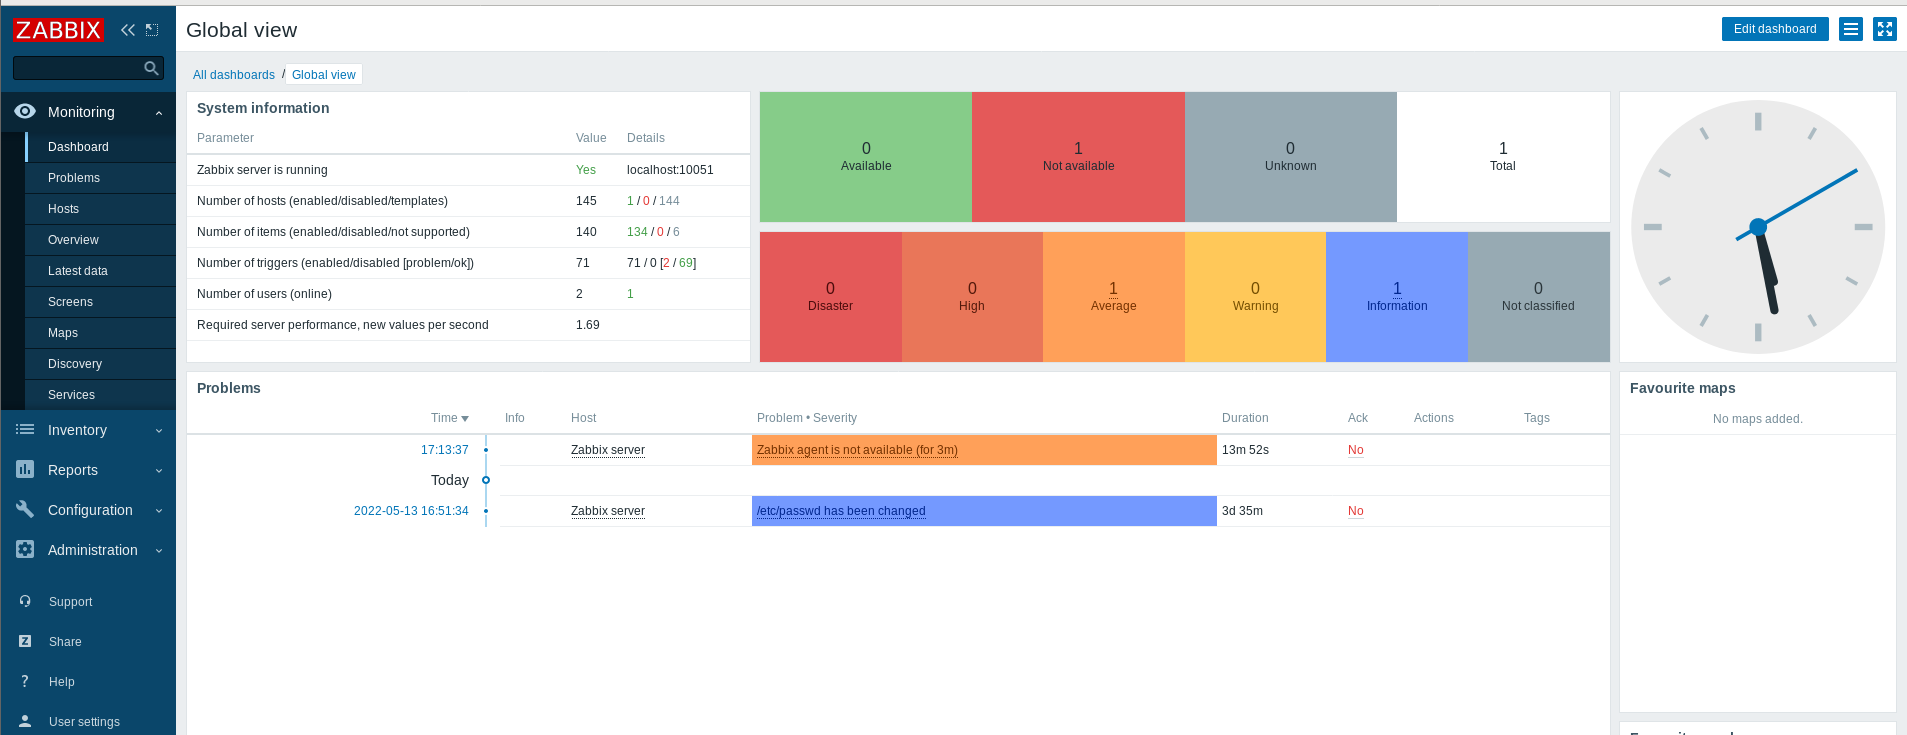
1、访问设置的地址
- 设置完成后登录用户名:Admin 密码:zabbix
由于上面手动创建修改了配置文件,所有可能无需下图的配置,直接进入登录界面

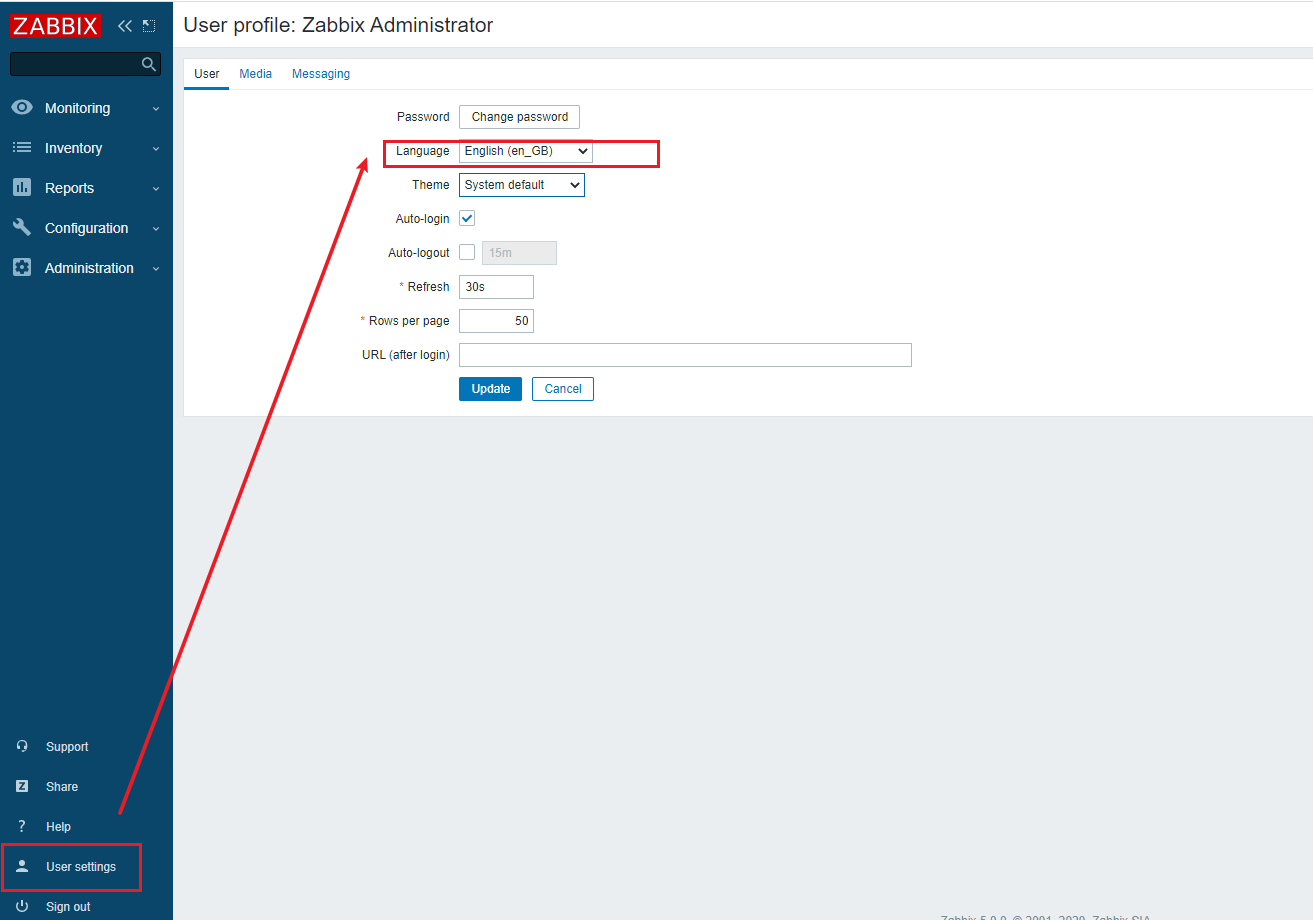
2、设置web中文显示
User Settings -> Language,先查看服务器是否支持中文,Chinese(zh_CN)处于灰色,代表不支持
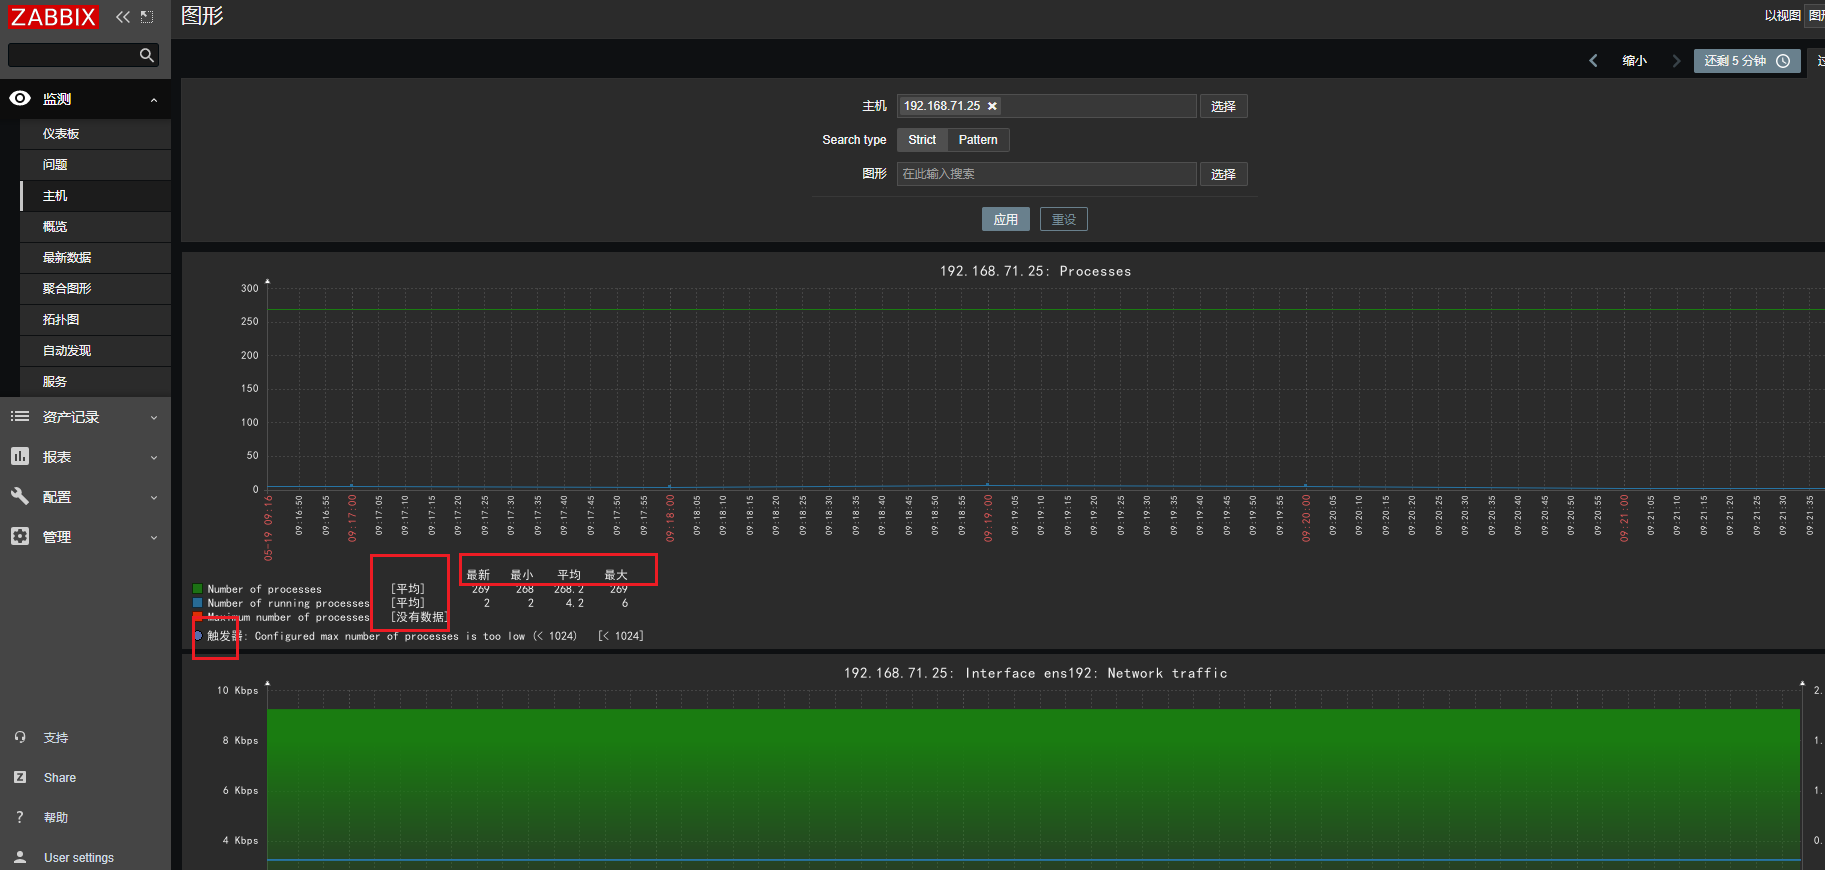
3、在设置显示中文后,仍然存在乱码问题

中文乱码解决方案:
-
在windows系统中,
控制面板-->字体--> 找到喜欢的字体 --> 上传服务器 -
查看默认字体是什么,
vim /usr/local/nginx/html/include/defines.inc.php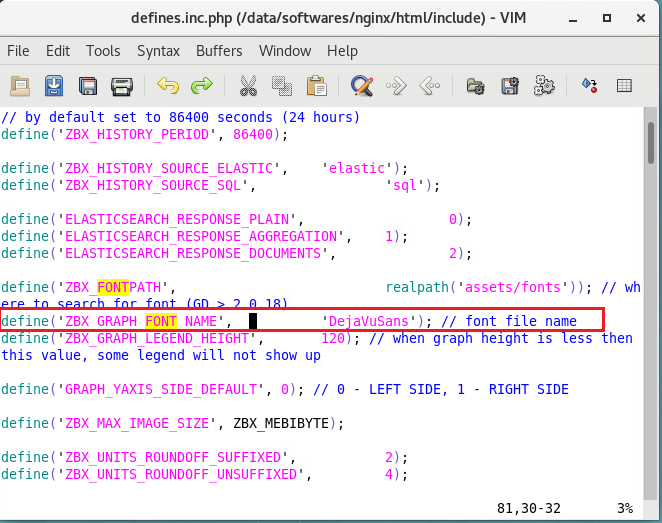
-
cp上传的字体文件到/usr/local/nginx/html/assets/fonts,将原来的字体文件改名字备份,将新字体文件改为默认字体文件名即可 -
刷新web页面,即可
九、服务端安装agent
由于编译的时候,将agent也编译生成了,所以,只需要修改agent的配置文件后,启动agent即可
1)修改agent配置文件
vim /data/zabbix_software/etc/zabbix_agentd.conf
- 日志文件:LogFile=/var/log/zabbix/zabbix_agentd.log
- Server端IP:Server=172.16.xx.xx
- ServerActive=172.16.xx.xx
- 主机名:Hostname=centos-cs-subsea (如果没配置过DNS则使用IP)
- 允许允许zabbix服务器远程zabbix_agentd执行命令:EnableRemoteCommands=1
- 允许开启远程执行命令日志:LogRemoteCommands=1
2)启动agent
/data/zabbix_software/sbin/zabbix_agentd -c /data/zabbix_software/etc/zabbix_agentd.conf
3)设置开机自启
vim /etc/systemd/system/zabbix-agent.service
systemctl enable zabbix-agent.service
[Unit]
Description=zabbix-agent
After=zabbix.service

[Service]
Type=forking
ExecStart=/data/php_software/sbin/php-fpm -c /data/php_software/etc/php.ini
PrivateTmp=true
Restart=always

[Install]
WantedBy=multi-user.target


【推荐】国内首个AI IDE,深度理解中文开发场景,立即下载体验Trae
【推荐】编程新体验,更懂你的AI,立即体验豆包MarsCode编程助手
【推荐】抖音旗下AI助手豆包,你的智能百科全书,全免费不限次数
【推荐】轻量又高性能的 SSH 工具 IShell:AI 加持,快人一步
· Manus重磅发布:全球首款通用AI代理技术深度解析与实战指南
· 被坑几百块钱后,我竟然真的恢复了删除的微信聊天记录!
· 没有Manus邀请码?试试免邀请码的MGX或者开源的OpenManus吧
· 园子的第一款AI主题卫衣上架——"HELLO! HOW CAN I ASSIST YOU TODAY
· 【自荐】一款简洁、开源的在线白板工具 Drawnix