
基于 Spring Tool Suit 搭建 Spring + Spring MVC + Thymeleaf(基于 Java 配置)
参考资料
1 环境准备
- spring tool suit 4.7.1.RELEASE
- thymeleaf eclipse 插件
- jdk 1.8
- tomcat 8.5
- apache maven 3.6
2 使用 maven 模板构建 war 工程
参见《Spring+SpringMVC+Thymeleaf 示例(基于 XML 配置)》博客的第 2 部分。
3 配置 Spring MVC
3.1 引入 Spring jar
  <properties>
		<project.build.sourceEncoding>UTF-8</project.build.sourceEncoding>
		<maven.compiler.source>1.8</maven.compiler.source>
		<maven.compiler.target>1.8</maven.compiler.target>
		<!-- spring jar 版本 -->
		<spring.version>5.3.8</spring.version>
		<!-- aspectj 版本 -->
		<aspectj.version>1.9.6</aspectj.version>
		<!-- jackson 版本 -->
		<jackson.version>2.12.7</jackson.version>
	</properties>


	<dependencies>
		<!-- spring jar -->
		<dependency>
			<groupId>org.springframework</groupId>
			<artifactId>spring-beans</artifactId>
			<version>${spring.version}</version>
		</dependency>
		<dependency>
			<groupId>org.springframework</groupId>
			<artifactId>spring-core</artifactId>
			<version>${spring.version}</version>
		</dependency>
		<dependency>
			<groupId>org.springframework</groupId>
			<artifactId>spring-context</artifactId>
			<version>${spring.version}</version>
		</dependency>
		<dependency>
			<groupId>org.springframework</groupId>
			<artifactId>spring-context-support</artifactId>
			<version>${spring.version}</version>
		</dependency>
		<dependency>
			<groupId>org.springframework</groupId>
			<artifactId>spring-expression</artifactId>
			<version>${spring.version}</version>
		</dependency>
		<dependency>
			<groupId>org.springframework</groupId>
			<artifactId>spring-web</artifactId>
			<version>${spring.version}</version>
		</dependency>
		<dependency>
			<groupId>org.springframework</groupId>
			<artifactId>spring-webmvc</artifactId>
			<version>${spring.version}</version>
		</dependency>
		<!-- spring 事务管理 -->
		<dependency>
			<groupId>org.springframework</groupId>
			<artifactId>spring-tx</artifactId>
			<version>${spring.version}</version>
		</dependency>
		<dependency>
			<groupId>org.springframework</groupId>
			<artifactId>spring-aop</artifactId>
			<version>${spring.version}</version>
		</dependency>
		<dependency>
			<groupId>org.springframework</groupId>
			<artifactId>spring-aspects</artifactId>
			<version>${spring.version}</version>
		</dependency>
		<dependency>
			<groupId>org.aspectj</groupId>
			<artifactId>aspectjweaver</artifactId>
			<version>${aspectj.version}</version>
			<scope>compile</scope>
		</dependency>
		<!-- spring jar -->

		<!-- json library -->
		<dependency>
			<groupId>com.fasterxml.jackson.core</groupId>
			<artifactId>jackson-core</artifactId>
			<version>2.12.7</version>
		</dependency>

		<dependency>
			<groupId>com.fasterxml.jackson.core</groupId>
			<artifactId>jackson-databind</artifactId>
			<version>2.12.7</version>
		</dependency>
		<dependency>
			<groupId>com.fasterxml.jackson.core</groupId>
			<artifactId>jackson-annotations</artifactId>
			<version>2.12.7</version>
		</dependency>

		<!-- javax.servlet api -->
		<dependency>
			<groupId>javax.servlet</groupId>
			<artifactId>javax.servlet-api</artifactId>
			<version>3.1.0</version>
			<scope>provided</scope>
		</dependency>
	</dependencies>
3.2 MVC 配置
3.2.1 开启 MVC 特性 & 组件扫描
package com.black.app.config;

import org.springframework.context.annotation.ComponentScan;
import org.springframework.context.annotation.Configuration;
import org.springframework.web.servlet.config.annotation.EnableWebMvc;
import org.springframework.web.servlet.config.annotation.WebMvcConfigurer;

/**
 * <p>Web MVC 定制化配置</p>
 * <p><code>@EnableWebMvc</code> 注解开启 Spring Web MVC 特性</p>
 * <p><code>@ComponentScan</code> 扫描 @Component Bean Definition</p>
 * @author limo
 * @since 1.0.0
 */

@Configuration
@EnableWebMvc
@ComponentScan(basePackages = {"com.black.app.controller"})
public class WebMvcConfig implements WebMvcConfigurer {
	// 可实现 WebMvcConfigurer 接口方法进行定制化 MVC 配置
}
@EnableWebMvc :开启 MVC 特性
@ComponentScan:扫描 @Component 注解(或派生注解)的 Bean,这里主要是扫描com.black.app.controller 包下的 Controller
3.2.2 配置 WebApplicationInitializer
这里通过继承 WebApplicationInitializer 接口的实现类AbstractAnnotationConfigDispatcherServletInitializer ,将 WebMvcConfig 中的 Bean 定义注册到 WebApplicationContext 中。
继承 AbstractAnnotationConfigDispatcherServletInitializer 配置 DispatcherServlet & 添加 Servlet 映射 :
package com.black.app.config;

import org.springframework.web.servlet.support.AbstractAnnotationConfigDispatcherServletInitializer;


/**
 * @description  Servlet 3.0标准提供了 ServletContainerInitializer#onStartup 能够编程式配置 Servlet等信息;<br/>
 *  Spring 提供 SpringServletContainerInitializer 类会在容器启动时加载此实现类中的 ServletConfig 配置。
 * @author limo
 * @since 1.0.0
 */
public class MyWebApplicationInitializer extends AbstractAnnotationConfigDispatcherServletInitializer {

	@Override
	protected Class<?>[] getRootConfigClasses() {
		// Root WebApplicationContext Java 配置类
		return null;
	}

	@Override
	protected Class<?>[] getServletConfigClasses() {
		// 1. Servlet WebApplicationContext Java 配置类
		return new Class[]{WebMvcConfig.class};
	}

	@Override
	protected String[] getServletMappings() {
		// 2. 配置 DispatcherServlet 映射
		String[] servletMappings = new String[] {"/"};
		return servletMappings;
	}
}
在 Servlet 容器启动时,会调用 SpringServletContainerInitializer#onStartup() 方法;
SpringServletContainerInitializer 会调用 WebApplicationInitializer 类的 onStartup进行编程式配置 Servlet。
将/src/main/webapp/index.jsp 重命名为 index.html。
3.3 新建 Controller
EchoController
package com.black.app.controller;

import org.springframework.stereotype.Controller;
import org.springframework.web.bind.annotation.PathVariable;
import org.springframework.web.bind.annotation.RequestBody;
import org.springframework.web.bind.annotation.RequestMapping;
import org.springframework.web.bind.annotation.RequestMethod;
import org.springframework.web.bind.annotation.ResponseBody;
import org.springframework.web.servlet.ModelAndView;

import com.black.app.response.Response;

/**
 * @description echo 服务
 * @author limo
 * @date 2023-7-22
 * @since 1.0.0
 */
@Controller
@RequestMapping("/echo")
public class EchoController {

	/**
	 * @description 将前端访问的 content,拼接“服务器收到:”后返回  echo.html 页面显示
	 * @param content
	 * @return
	 */
	@RequestMapping(method = RequestMethod.GET, path = "/{content}")
	public ModelAndView echo(@PathVariable("content") String content) {
		ModelAndView echoView = new ModelAndView();
		String message = "服务器收到:" + content;
		echoView.setViewName("echo");
		echoView.addObject("content", message);
		return echoView;
	}

	/**
	 * @description 返回 json view
	 * @param request
	 * @return
	 */
	@RequestMapping(path = "/body", method = RequestMethod.POST)
	@ResponseBody
	public Response<Object> body(@RequestBody Object request){
		return Response.success(request);
	}
}
UserController
package com.black.app.controller;

import java.util.Date;

import org.springframework.stereotype.Controller;
import org.springframework.web.bind.annotation.RequestBody;
import org.springframework.web.bind.annotation.RequestMapping;
import org.springframework.web.bind.annotation.RequestMethod;
import org.springframework.web.bind.annotation.ResponseBody;
import org.springframework.web.servlet.ModelAndView;

import com.black.app.response.Response;
import com.fasterxml.jackson.annotation.JsonFormat;

/**
 * @description user controller
 * @author limo
 *
 */
@Controller
public class UserController {

	/**
	 * @description 获取用户详情,返回 detail.html页面展示
	 * @return
	 */
	@RequestMapping(path = "/detail", method = RequestMethod.GET)
	public ModelAndView detail() {
		User user = new User();
		user.setName("black");
		user.setPhone("182XXXXXXXX");
		user.setAge(18);
		user.setAddress("xx市xx区xx小区");
		user.setBirthday(new Date());

		ModelAndView detailView = new ModelAndView();
		detailView.setViewName("detail");
		detailView.addObject("user", user);
		return detailView;
	}

	/**
	 * @description 注册用户,并返回json格式的成功响应
	 * @param user
	 * @return
	 */
	@RequestMapping(path = "/register", method = RequestMethod.POST)
	@ResponseBody
	public Response<User> register(@RequestBody User user) {
//		ModelAndView detailView = new ModelAndView();
//		detailView.setViewName("detail");
//		detailView.addObject("user", user);
		return Response.success(user);
	}
}

/**
 * @description  用户信息
 * @author limo
 *
 */

class User {

	private String name;

	private Integer age;

	private String phone;

	private String address;

	@JsonFormat(pattern = "yyyy-MM-dd HH:mm:ss")
	private Date birthday;

	public String getName() {
		return name;
	}

	public void setName(String name) {
		this.name = name;
	}

	public Integer getAge() {
		return age;
	}

	public void setAge(Integer age) {
		this.age = age;
	}

	public String getPhone() {
		return phone;
	}

	public void setPhone(String phone) {
		this.phone = phone;
	}

	public String getAddress() {
		return address;
	}

	public void setAddress(String address) {
		this.address = address;
	}

	public Date getBirthday() {
		return birthday;
	}

	public void setBirthday(Date birthday) {
		this.birthday = birthday;
	}
}
Response
package com.black.app.response;


/**
 * 响应实体
 * @author limo
 *
 * @param <T>
 */
public class Response<T> {

	private String code;

	private String message;

	private T data;

	public String getCode() {
		return code;
	}

	public void setCode(String code) {
		this.code = code;
	}

	public String getMessage() {
		return message;
	}

	public void setMessage(String message) {
		this.message = message;
	}

	public T getData() {
		return data;
	}

	public void setData(T data) {
		this.data = data;
	}


	public static <T> Response<T> success(T data){
		Response response = new Response();
		response.setCode("000000");
		response.setData(data);
		response.setMessage("成功");
		return response;

	}

}
3.4 集成 Thymeleaf
3.4.1 引入 Thymeleaf 相关 jar
pom.xml 引入 thymeleaf jar 包:
        <!-- 集成 thymeleaf  -->
        <dependency>
            <groupId>org.thymeleaf</groupId>
            <artifactId>thymeleaf-spring5</artifactId>
            <version>3.0.15.RELEASE</version>
        </dependency>
        <!-- https://mvnrepository.com/artifact/org.thymeleaf/thymeleaf -->
        <dependency>
            <groupId>org.thymeleaf</groupId>
            <artifactId>thymeleaf</artifactId>
            <version>3.0.15.RELEASE</version>
        </dependency>
        <!-- https://mvnrepository.com/artifact/ognl/ognl -->
        <dependency>
            <groupId>ognl</groupId>
            <artifactId>ognl</artifactId>
            <version>3.1.26</version>
        </dependency>
        <!-- https://mvnrepository.com/artifact/org.slf4j/slf4j-api -->
        <dependency>
            <groupId>org.slf4j</groupId>
            <artifactId>slf4j-api</artifactId>
            <version>1.7.25</version>
        </dependency>
        <!-- https://mvnrepository.com/artifact/org.attoparser/attoparser -->
        <dependency>
            <groupId>org.attoparser</groupId>
            <artifactId>attoparser</artifactId>
            <version>2.0.5.RELEASE</version>
        </dependency>
        <!-- https://mvnrepository.com/artifact/org.unbescape/unbescape -->
        <dependency>
            <groupId>org.unbescape</groupId>
            <artifactId>unbescape</artifactId>
            <version>1.1.6.RELEASE</version>
        </dependency>
3.4.2 配置 Thymeleaf 相关的 Bean
依次配置:
- ITemplateResolver
- ISpringTemplateEngine
- ViewResolver
package com.black.app.config;

import org.springframework.context.annotation.Bean;
import org.springframework.context.annotation.Configuration;
import org.springframework.web.servlet.ViewResolver;
import org.thymeleaf.spring5.ISpringTemplateEngine;
import org.thymeleaf.spring5.SpringTemplateEngine;
import org.thymeleaf.spring5.templateresolver.SpringResourceTemplateResolver;
import org.thymeleaf.spring5.view.ThymeleafViewResolver;
import org.thymeleaf.templatemode.TemplateMode;
import org.thymeleaf.templateresolver.ITemplateResolver;

/**
 * @description 集成  Thymeleaf
 * @author limo
 * @date 2023-7-22
 * @since 1.0.0
 */
@Configuration
public class ThymeleafConfig {

	// 1. 配置 templateResolver
	@Bean
	public ITemplateResolver templateResolver() {
		SpringResourceTemplateResolver templageResolver = new SpringResourceTemplateResolver();
		templageResolver.setPrefix("/WEB-INF/templates/");
		templageResolver.setSuffix(".html");
		templageResolver.setTemplateMode(TemplateMode.HTML);
		templageResolver.setCacheable(true);
		templageResolver.setCharacterEncoding("utf-8");
		return templageResolver;
	}

	// 2. 配置 templateEngine
	@Bean
	public ISpringTemplateEngine templateEngine(ITemplateResolver templateResolver) {
		SpringTemplateEngine templateEngine = new SpringTemplateEngine();
		templateEngine.setTemplateResolver(templateResolver);
		templateEngine.setEnableSpringELCompiler(true);
		return templateEngine;
	}

	// 3. 配置 ThymeleafViewResolver
	@Bean
	public ViewResolver viewResolver(ISpringTemplateEngine templateEngine) {
		ThymeleafViewResolver thymeleafViewResolver = new ThymeleafViewResolver();
		thymeleafViewResolver.setCharacterEncoding("utf-8");
		thymeleafViewResolver.setTemplateEngine(templateEngine);
		return thymeleafViewResolver;
	}
}
3.4.3 调整 com.black.app.config.WebMvcConfig
@Import 导入 ThymeleafConfig 中相关的 Bean 到 WebMvcConfig 类中:
package com.black.app.config;

import org.springframework.context.annotation.ComponentScan;
import org.springframework.context.annotation.Configuration;
import org.springframework.context.annotation.Import;
import org.springframework.web.servlet.config.annotation.EnableWebMvc;
import org.springframework.web.servlet.config.annotation.WebMvcConfigurer;

/**
 * <p>Web MVC 定制化配置</p>
 * <p><code>@EnableWebMvc</code> 注解开启 Spring Web MVC 特性</p>
 * <p><code>@ComponentScan</code> 扫描 @Component Bean Definition</p>
 * @author limo
 * @since 1.0.0
 */

@Configuration
@EnableWebMvc
@ComponentScan(basePackages = {"com.black.app.controller"})
@Import({ThymeleafConfig.class})
public class WebMvcConfig implements WebMvcConfigurer {
}
3.4.4 添加模板 echo.html & detail.html
在 /src/main/webapp/WEB-INF/templates 添加:
- echo.html
<!DOCTYPE html>
<html xmlns:th="http://www.thymeleaf.org">
<head>
<meta charset="UTF-8">
<title>echo page</title>
</head>
<body>
    <p th:text="${content}"></p>
</body>
</html>
- detail.html
<!DOCTYPE html>
<html xmlns:th="http://www.thymeleaf.org">
<head>
<meta charset="UTF-8">
<title>detail page</title>
</head>
<body>
    <p th:text="${user.name}"></p>
    <p th:text="${user.age}"></p>
    <p th:text="${user.phone}"></p>
    <p th:text="${user.address}"></p>
    <p th:text="${#dates.format(user.birthday,'yyyy-MM-dd HH:mm:ss')}"></p>
</body>
</html>
至此 Thymleaf 集成完成。
4 部署到 tomcat
4.1 使用 Maven build 打出 war 包
4.2 将 war 包放于 apache-tomcat-8.5.61\webapps 下
4.3 调整 apache-tomcat-8.5.61\conf\server.xml
<Host name="localhost"  appBase="webapps" unpackWARs="true" autoDeploy="true">
    ...
    <!-- docBase war报名或webapps下文件夹名;path:上下文path -->
    <Context docBase="war包名" path="/api"> </Context>
</Host>
4.4 启动 tomcat
双击 apache-tomcat-8.5.61\bin\startup.bat
   ...

org.springframework.web.servlet.DispatcherServlet - Detected org.springframework.web.servlet.support.SessionFlashMapManager@7d63fbe4
20:09:30.975 [localhost-startStop-1] DEBUG org.springframework.jndi.JndiTemplate - Looking up JNDI object with name [java:comp/env/spring.liveBeansView.mbeanDomain]
20:09:30.976 [localhost-startStop-1] DEBUG org.springframework.jndi.JndiLocatorDelegate - Converted JNDI name [java:comp/env/spring.liveBeansView.mbeanDomain] not found - trying original name [spring.liveBeansView.mbeanDomain]. javax.naming.NameNotFoundException: 名称[spring.liveBeansView.mbeanDomain]未在此上下文中绑定。找不到[spring.liveBeansView.mbeanDomain]。
20:09:30.976 [localhost-startStop-1] DEBUG org.springframework.jndi.JndiTemplate - Looking up JNDI object with name [spring.liveBeansView.mbeanDomain]
20:09:30.977 [localhost-startStop-1] DEBUG org.springframework.jndi.JndiPropertySource - JNDI lookup for name [spring.liveBeansView.mbeanDomain] threw NamingException with message: 名称[spring.liveBeansView.mbeanDomain]未在此上下文中绑定。找不到[spring.liveBeansView.mbeanDomain]。. Returning null.
20:09:30.980 [localhost-startStop-1] DEBUG org.springframework.web.servlet.DispatcherServlet - enableLoggingRequestDetails='false': request parameters and headers will be masked to prevent unsafe logging of potentially sensitive data
20:09:30.980 [localhost-startStop-1] INFO org.springframework.web.servlet.DispatcherServlet - Completed initialization in 1388 ms
23-Jul-2023 20:09:30.996 信息 [localhost-startStop-1] org.apache.catalina.startup.HostConfig.deployDirectory 把web 应用程序部署到目录 [C:\work\soft\apache-tomcat-8.5.61\webapps\docs]
23-Jul-2023 20:09:31.013 信息 [localhost-startStop-1] org.apache.catalina.startup.HostConfig.deployDirectory Web应用程序目录[C:\work\soft\apache-tomcat-8.5.61\webapps\docs]的部署已在[16]毫秒内完成
   ...
23-Jul-2023 20:09:31.345 信息 [main] org.apache.coyote.AbstractProtocol.start 开始协议处理句柄["http-nio-8080"]
23-Jul-2023 20:09:31.354 信息 [main] org.apache.catalina.startup.Catalina.start Server startup in 6736 ms
如果 CMD 窗口打印日志乱码,可编辑 apache-tomcat-8.5.61\conf\logging.properties 文件的 “java.util.logging.ConsoleHandler.encoding” 设置为 GBK
5 测试验证
5.1 首页
浏览器访问 : http://localhost:8080/api
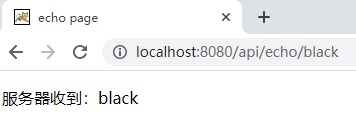
5.2 echo 页面(如果配置了 Thymeleaf)
浏览器访问 : http://localhost:8080/api/echo/black
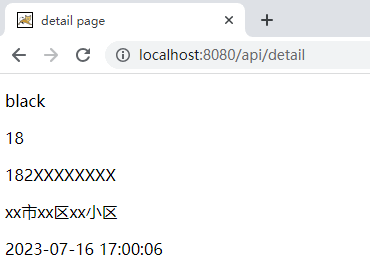
5.3 user 页面(如果配置了 Thymeleaf)
浏览器访问 : http://localhost:8080/api/detail
补充资料
1 基于 Java 类的 IOC 容器配置
基本概念
@Configuration注解(标注在类上,表示该类是 BeanDefinition 来源,类似于 applicationContext.xml)@Bean注解(标注在方法上,表示该方法将实例化、配置、初始化一个对象交给 Spring IOC 容器管理)
@Configuration 标注的类也是一个 Bean Definition,也会交给 Spring IOC 容器管理。
@Bean注解通常和 @Configuration 注解搭配使用:
@Configuration
public class AppConfig {

    @Bean
    public MyService myService() {
        return new MyServiceImpl();
    }

}
注意:
@Bean也可以和@Component注解搭配使用,被称为轻量级@Bean方法;同一个@Component标注的类中的,多个@Bean无法进行依赖注入。
使用 AnnotationConfigApplicationContext 实例化 Spring IOC 容器
AnnotationConfigApplicationContext 支持的配置类包括:
@Component标注的类@Configuration标注的类- jsr330 标准相关注解标注的类
public static void main(String[] args) {
    ApplicationContext ctx = new AnnotationConfigApplicationContext(MyServiceImpl.class, Dependency1.class, Dependency2.class);
    MyService myService = ctx.getBean(MyService.class);
    myService.doStuff();
}

public static void main(String[] args) {
    AnnotationConfigApplicationContext ctx = new AnnotationConfigApplicationContext();
    ctx.register(AppConfig.class, OtherConfig.class);
    ctx.register(AdditionalConfig.class);
    ctx.refresh();
    MyService myService = ctx.getBean(MyService.class);
    myService.doStuff();
}
@Configuration 使用
注入内部Bean 依赖
@Configuration
public class AppConfig {

    // 默认使用方法名作为 Bean 的名字
    @Bean
    public Foo foo() {
        // 通过本地方法调用注入 Bean
        return new Foo(bar());
    }

    @Bean
    public Bar bar() {
        return new Bar();
    }

}
组合基于 Java 配置
1 使用 @Import注解
@Import注解类似 XML 中的<import/>标签Spring 提供的 @Enable* 注解均采用了 @Import 方式
@Configuration
public class ConfigA {

     @Bean
    public A a() {
        return new A();
    }
}

// 使用 @Import 将 ConfigA中的 Bean Definition 导入到 ConfigB中
@Configuration
@Import(ConfigA.class)
public class ConfigB {

    @Bean
    public B b() {
        return new B();
    }
}
@Import注解支持导入的类:
- @Configuration
- ImportSelector
- ImportBeanDefinitionRegistrar
- @Component 类(从 4.2 开始)
复杂导入:
@Configuration
public class ServiceConfig {

    @Autowired
    private RepositoryConfig repositoryConfig;

    @Bean
    public TransferService transferService() {
        return new TransferServiceImpl(repositoryConfig.accountRepository());
    }
}

@Configuration
public interface RepositoryConfig {

    @Bean
    AccountRepository accountRepository();

}

@Configuration
public class DefaultRepositoryConfig implements RepositoryConfig {

    @Bean
    public AccountRepository accountRepository() {
        return new JdbcAccountRepository(...);
    }

}

@Configuration
@Import({ServiceConfig.class, DefaultRepositoryConfig.class}) // 导入具体的 DefaultRepositoryConfig!
public class SystemTestConfig {

    @Bean
    public DataSource dataSource() {
        // return DataSource
    }

}

public static void main(String[] args) {
    ApplicationContext ctx = new AnnotationConfigApplicationContext(SystemTestConfig.class);
    TransferService transferService = ctx.getBean(TransferService.class);
    transferService.transfer(100.00, "A123", "C456");
}
2 使用@Conditional 注解
@Profile 注解基于
@Conditional注解实现的。
在 @Bean 被注册前,@Conditional指示使用org.springframework.context.annotation.Condition的具体实现进行判定结果是否需要注册。
本文来自博客园,作者:不安分的黑娃,转载请注明原文链接:https://www.cnblogs.com/lihw-study/p/15037362.html

 浙公网安备 33010602011771号