关于FLASK框架的使用
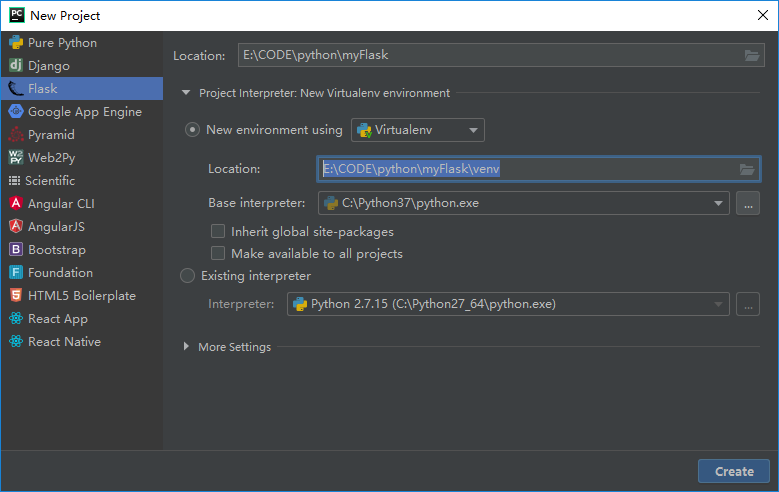
使用pycharm创建工程

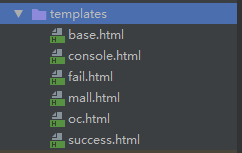
在默认的templates中新增模板页面

在默认的app.py中定义路由并引用模板
@app.route("/add", methods=["GET", "POST"])
def add():
    if request.method != 'POST':
        return render_template("login.html",info="请先登录系统")
    else:
     username = request.form.get('username')
        return render_template("add.html")
关于日志,可以使用FLASK自带的LOG模块
from flask import current_app

current_app.logger.info("登录用户名:" + account)
关于模板的使用
我创建了一个base.html基础模板用于继承
<!DOCTYPE html> <html lang="en"> <head> {% block head %} <meta charset="UTF-8"> <link rel="stylesheet" href="../static/css/page.css"/> <script type="text/javascript" src="../static/js/jquery.min.js"></script> <script type="text/javascript" src="../static/js/index.js"></script> <title>{% block title %}{% endblock %} - 操作平台</title> {% endblock %} </head> <body> <div class="left"> <div class="bigTitle">CA操作平台</div> <div class="lines"> {% for menu in menu_list %} {% if choice==loop.index0 %} <div onclick="pageClick(this,{{ loop.index0 }})" class="active"><img src="static/img/icon-{{ loop.index }}.png"/> {{ menu }} </div> {% else %} <div onclick="pageClick(this,{{ loop.index0 }})"><img src="static/img/icon-{{ loop.index }}.png"/> {{ menu }} </div> {% endif %} {% endfor %} </div> </div> <div class="top"> <div class="leftTitle" id="flTitle">{{ menu_list[choice] }}</div> <div class="thisUser">{{ user_info }}</div> </div> <div class="main"> <div class="mainForm"> {% block content %} {% with messages = get_flashed_messages(with_categories=true) %} {# 对应:flash("请选择商品类型!", 'error') #} {% if messages %} {% for category,message in messages %} <span class={{ category }}>{{ message }}</span> {% endfor %} {% else %} {% endif %} {% endwith %} {% endblock %} </div> </div> <!--<div id="footer">--> <!--{% block footer %}--> <!--© Copyright 2008 by <a href="http://domain.invalid/">Keyba</a>.--> <!--{% endblock %}--> <!--</div>--> </body> </html>
其它模板
 1 {% extends "base.html" %}
 2 {% block title %}
 3 {{ title }}
 4 {% endblock %}
 5 {% block content %}
 6 <div class="contentTitle">
 7     <span style="color: green; ">{{title}}</span>
 8     <table align="center">
 9         {% for row in rows %}
10         <tr>
11             {% for col in row %}
12             <td>{{col}}</td>
13             {% endfor %}
14         </tr>
15         {% endfor %}
16     </table>
17     <p align="center">
18         <input type="button" name="Submit" class="button button1" onclick="history.back();" value="返回">
19     </p>
20 </div>
21 {% endblock %}
关于FORM
建立MyForm类,这里使用了DataRequired, Email, Length三种校验方式,这里的role(下拉列表SelectField)没有设置choices属性值是为了后面可以动态from flask_wtf import FlaskFormfrom wtforms import StringField, TextAreaField, SubmitField, SelectFieldfrom wtforms.validators import DataRequired, Email, Length
class MyForm(FlaskForm):
    new_user = StringField(label='新账号:', validators=[DataRequired("请输入新的后台账号"), Length(6, 20, '账号长度为6到20位')],
                           description="请输入新的后台账号", render_kw={"required": "required"})
    email = StringField(label='邮箱:', validators=[DataRequired("请输入邮箱"), Email('邮箱格式错误')], description="请输入邮箱",
                        render_kw={"required": "required"})
    role = SelectField(label='角色:')
    label = '用户类型:'
    user_type = RadioField(label=label)
    submit = SubmitField('注册后台账号', render_kw={"class": "button button1"})
配置路由,并更新role下拉列表的值
from forms import MyForm
app.config['SECRET_KEY'] = 'string'  # 通过csrf
@app.route('/add/', methods=("GET", "POST"))
def add():
    form = MyForm()  # 这里的form只会进行一次赋值,POST请求过来时,不会更新,即可以重用。
    roles_list = [(str(d.get('roleId')), str(d.get("roleName"))) for d in all_roles]
    oc_form.role.choices = roles_list  # 这里我们对之前的role进行重新赋值
    form.user_type.choices = (['1', '11'], ['2', '22'])
    form.user_type.default = '1'
    form.process()  # 这里我们刷新form,以使用户类型这个radioButton更新
    if request.method == 'POST' and form.validate_on_submit():
        return render_template("success.html", title="新增用户成功")
        # return redirect(url_for('pageTo', page=1)
return render_template('add.html', form=form)
对于多个提交的判断,我们可以这样写
add_user = SubmitField('注册', render_kw={"class": "button button1"})
auth_user = SubmitField('认证', render_kw={"class": "button button1"})
add_something = SubmitField('发布', render_kw={"class": "button button1"})
form = MallUserForm()
    if request.method == 'POST':
        if form.add_user.data:
            return add_mall_user(form)
        elif form.auth_user.data:
            return auth_user(form)
        elif form.add_something.data:
            if form.mall_type.data != 'None':
                return add_goods(form)
            else:
                flash("请选择商品类型!", 'error')
                return redirect(url_for('mall_index'))
HTML模板
<form name="baseForm" action="" role="form" method="post">
    <div class="contentTitle">后台账号操作</div>
    {% for item in form %}
        {% if item!=form.submit %}
            {% if item!=form.role %}
                <div>
                    {{ item.label }}{{ item(size=20) }} <!-- 定义size -->
                </div>
            {% else %}
                    {{ item.label }}{{ item }} <!-- 下拉列表框 -->
            {% endif %}
        {% else %}
            <div class="center">
                {{ item }} <!-- 提交按钮 -->
            </div>
        {% endif %}
    {% endfor %}
</form>
liehen2046
如果,您希望更容易地发现我的新博客,不妨点击一下绿色通道的【关注我】。


