TensorFlow完整程序详解——构建并运行数据流图
作者:凯鲁嘎吉 - 博客园 http://www.cnblogs.com/kailugaji/
所用版本:python3.5.2,tensorflow1.8.0,tensorboard1.8.0
In [1]:
# 通过综合运用之前提过的所有组件——张量对象、Graph对象、Op、Variable对象、占位符、Session对象以及名称作用域的练习来结束TensorFlow的学习
In [2]:
# 导入tensorflow库
In [3]:
import tensorflow as tf
In [4]:
# 显示构建一个Graph对象并加以使用
In [5]:
graph = tf.Graph()
In [6]:
# 将上述新Graph对象设为默认Graph对象
In [7]:
with graph.as_default():
    # 名称作用域
    with tf.name_scope("variables"):
        # 记录数据流图运行次数的Variable对象
        # 初始值为0,数据类型int32,不允许Variable对象使用Optimizer类,而是手工修改,该对象起名为global_step
        global_step = tf.Variable(0, dtype=tf.int32, trainable=False, name="global_step")
        # 追踪该模型的所有输出随时间的累加和的Variable对象
        total_output = tf.Variable(0.0, dtype=tf.float32, name="total_output")
    # 创建模型的核心变换部分
    with tf.name_scope("transformation"):
        # 独立的输入层
        with tf.name_scope("input"):
            # 创建输出占位符,用于接收一个向量
            a = tf.placeholder(tf.float32, shape=[None], name="input_a")
        # 独立的中间层
        with tf.name_scope("intermediate_layer"):
            b = tf.reduce_prod(a, name="product_b")
            c = tf.reduce_sum(a, name="sum_c")
        # 独立的输出层
        with tf.name_scope("output"):
            output = tf.add(b, c, name="output")
    # 创建更新模型
    with tf.name_scope("update"):
        # 用罪行的输出更新Variable对象total_output
        update_total = total_output.assign_add(output)
        # 将前面的Variable对象global_step增加1,只要数据流图运行,该操作会在此基础上自动增1
        increment_step = global_step.assign_add(1)
    # 创建汇总数据模型
    with tf.name_scope("summary"):
        avg = tf.div(update_total, tf.cast(increment_step, tf.float32), name="average")
        # 为输出节点创建汇总数据
        tf.summary.scalar('Output', output)
        tf.summary.scalar('Sum_of_outputs_over_time', update_total)
        tf.summary.scalar('Average_of_outputs_over_time', avg)
    # 为完成数据流图的构建,需要创建Variable对象初始化Op和用于将所有汇总数据组织到一个Op的辅助节点
    with tf.name_scope("global_ops"):
        # 初始化Op
        init = tf.global_variables_initializer()
        # 将所有汇总数据合并到一个Op中
        merged_summary = tf.summary.merge_all()
In [8]:
# 创建会话
In [9]:
sess = tf.Session(graph=graph)
In [10]:
# 将图写入本地文件夹中
In [11]:
writer = tf.summary.FileWriter("./logs/end", graph)
In [12]:
# 初始化Variable对象
In [13]:
sess.run(init)
In [14]:
# 创建辅助函数,将输入向量传给该函数,运行数据流图,并将汇总数据保存下来,以便之后无需反复输入相同代码
In [15]:
def run_graph(input_tensor):
    # 可重写之前的数据流图中a的值
    output, summary, step = sess.run([update_total, merged_summary, increment_step], feed_dict={a: input_tensor})
    writer.add_summary(summary, global_step=step)
In [16]:
# 用不同的输入运行该数据流图
run_graph([2, 8])
run_graph([3, 1, 3, 3])
run_graph([8])
run_graph([1, 2, 3])
run_graph([11, 4])
run_graph([4, 1])
run_graph([7, 3, 1])
run_graph([6, 3])
run_graph([0, 2])
run_graph([4, 5, 6])
In [17]:
# 将汇总数据写入磁盘
In [18]:
writer.flush()
In [19]:
# 关闭SummaryWriter对象
In [21]:
writer.close()
In [22]:
# 关闭Session会话
In [23]:
sess.close()
打开Anaconda Prompt
(base) C:\Users\hp>activate tensorflow
(tensorflow) C:\Users\hp>cd..
(tensorflow) C:\Users>D:
(tensorflow) D:>cd ./Python code
(tensorflow) D:\Python code>tensorboard --logdir=./logs/end
在浏览器输入http://HP:6006 或者http://localhost:6006 即可看到对应的数据流图。
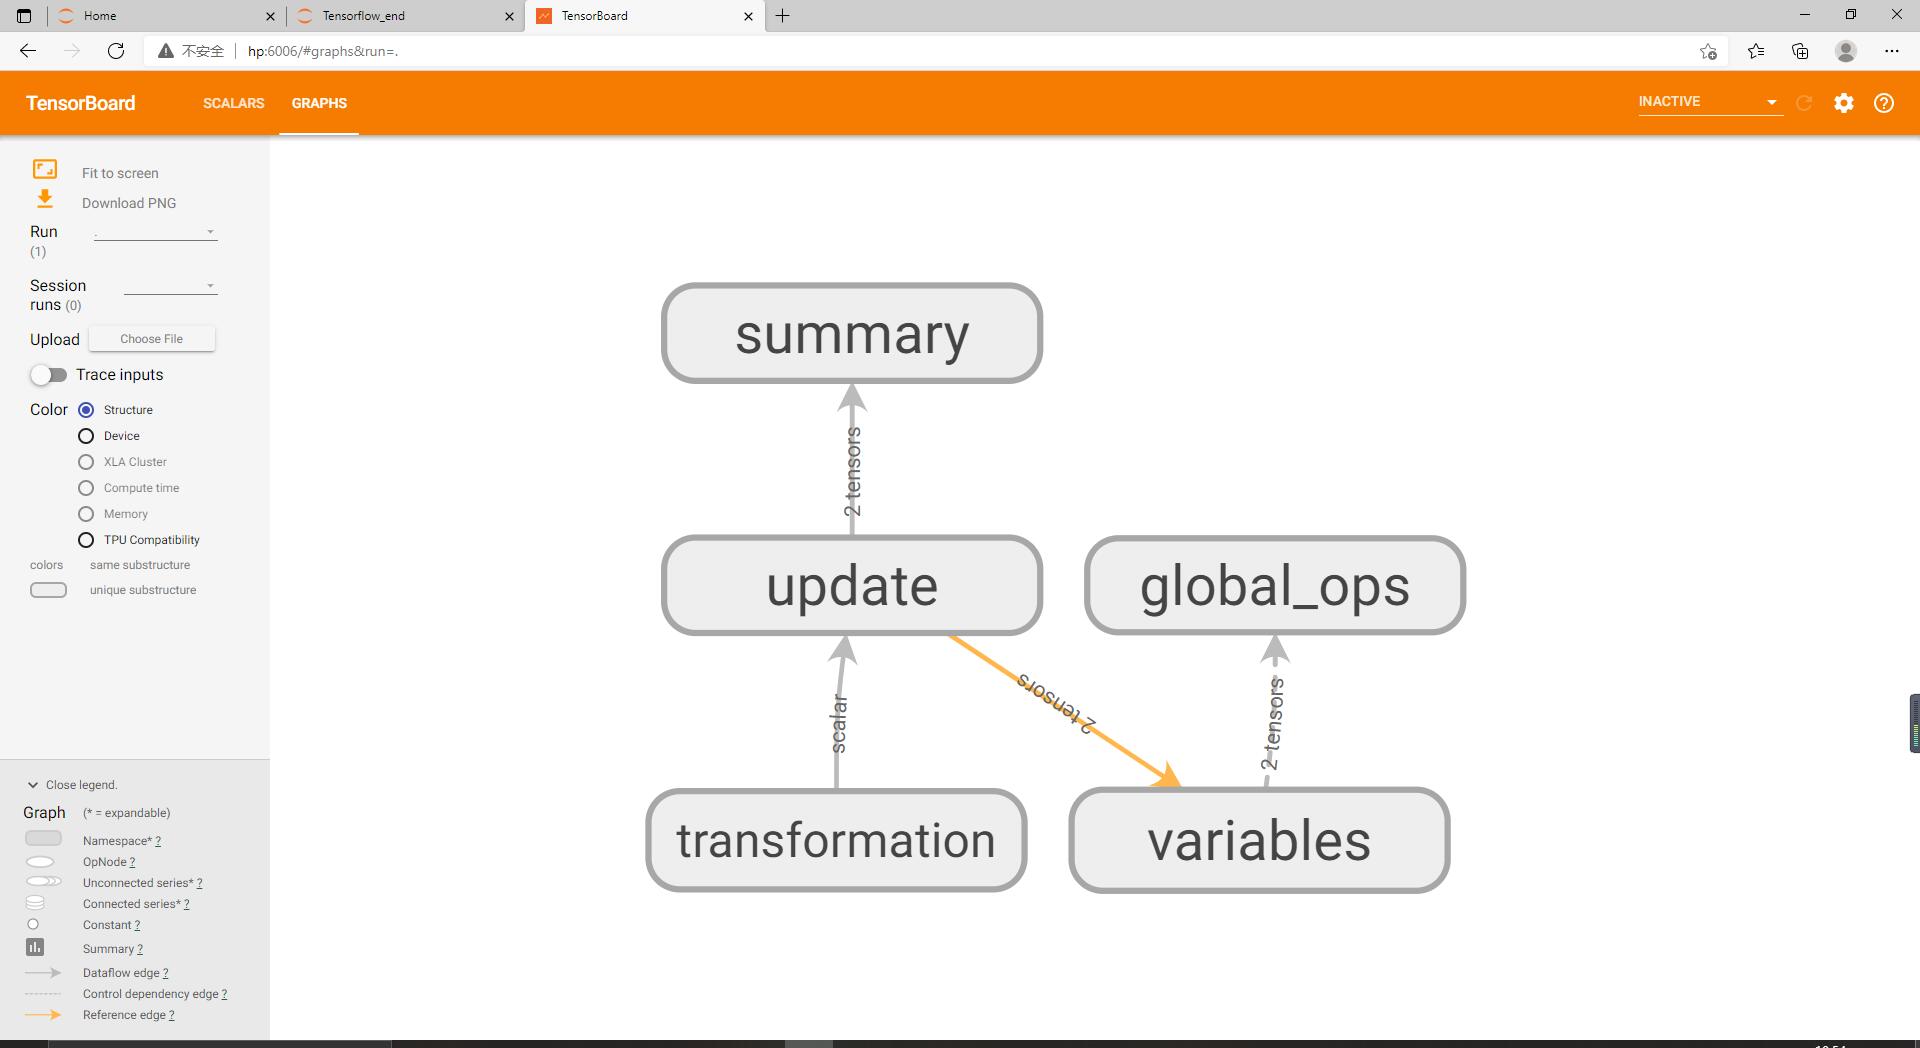
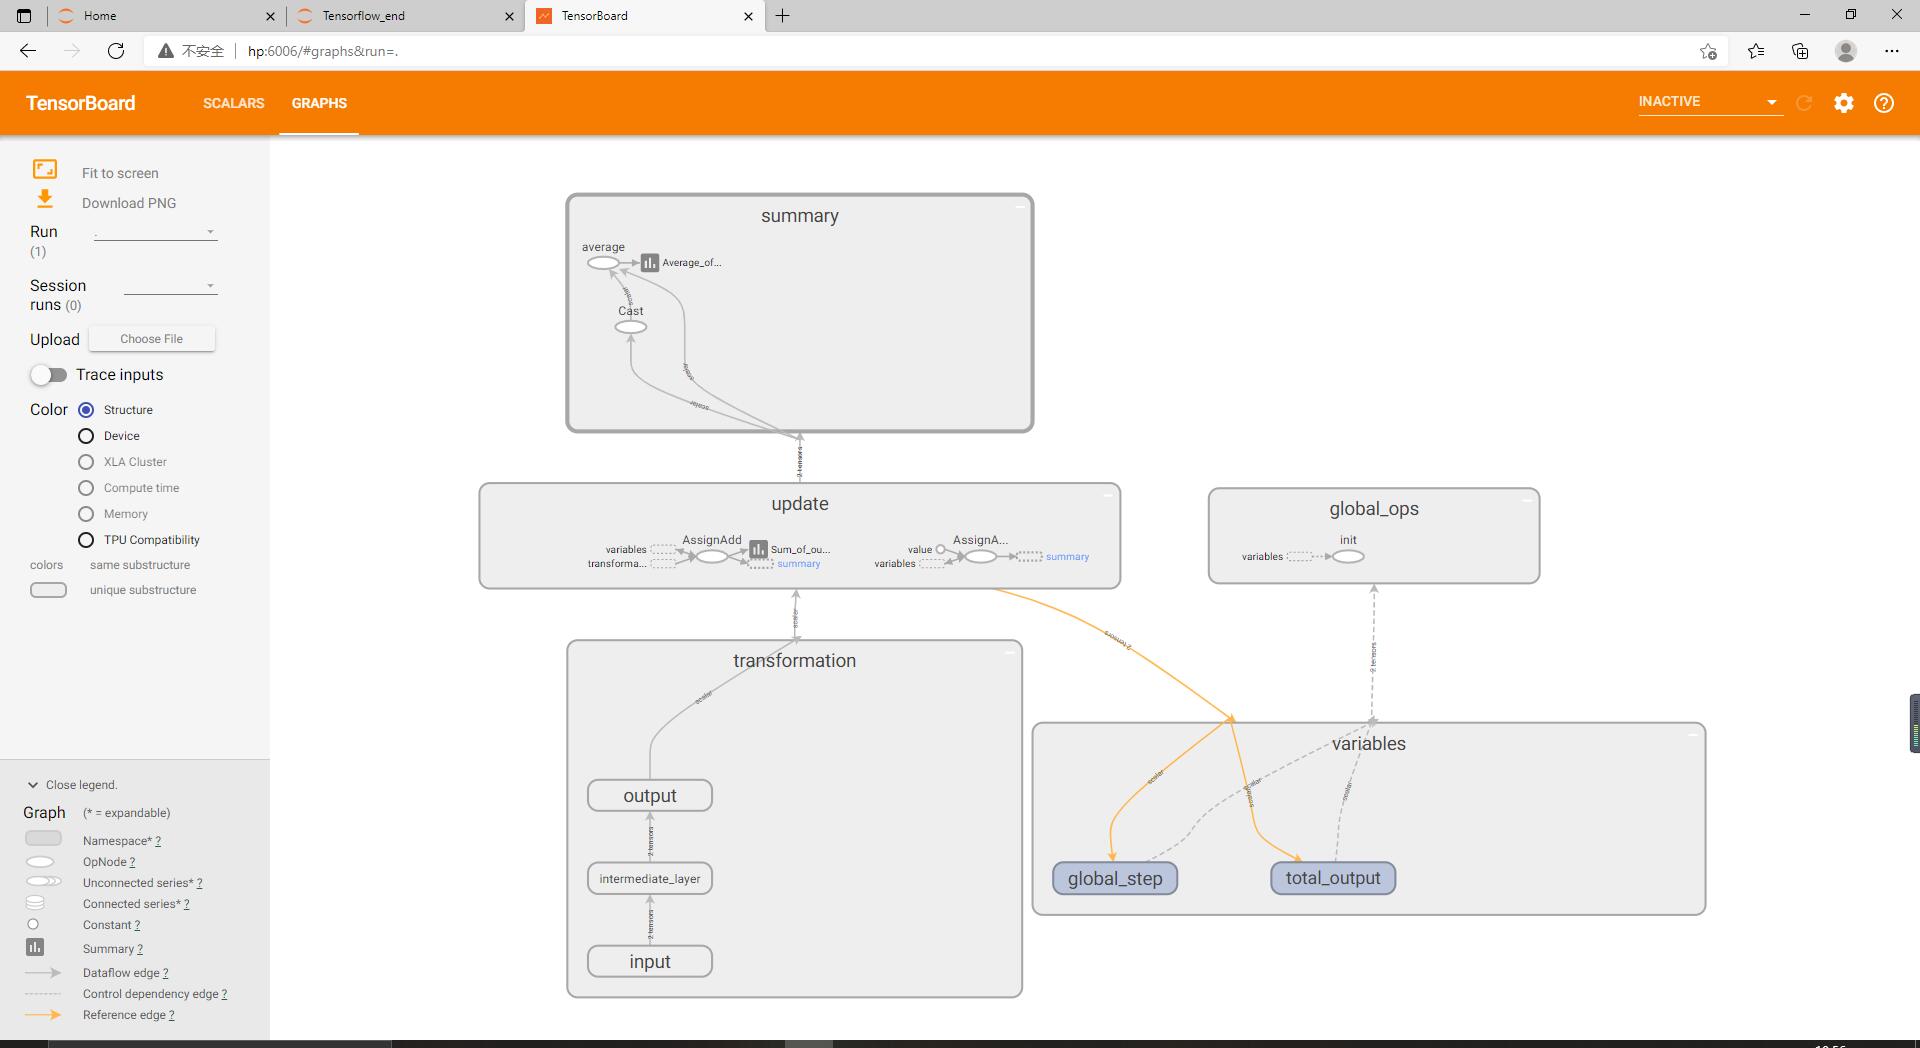
从图中可以看到,我们的变换运算流入transformation方框,后者又同时为summary与variables名称作用域提供输入,global_ops名称作用域中包含了一些对于主要的变换计算并不十分重要的运算。

将各个方框展开,可以更细粒度的观察它们的结构。可以看到transformation中输入层、中间层与输出层是彼此分离的。

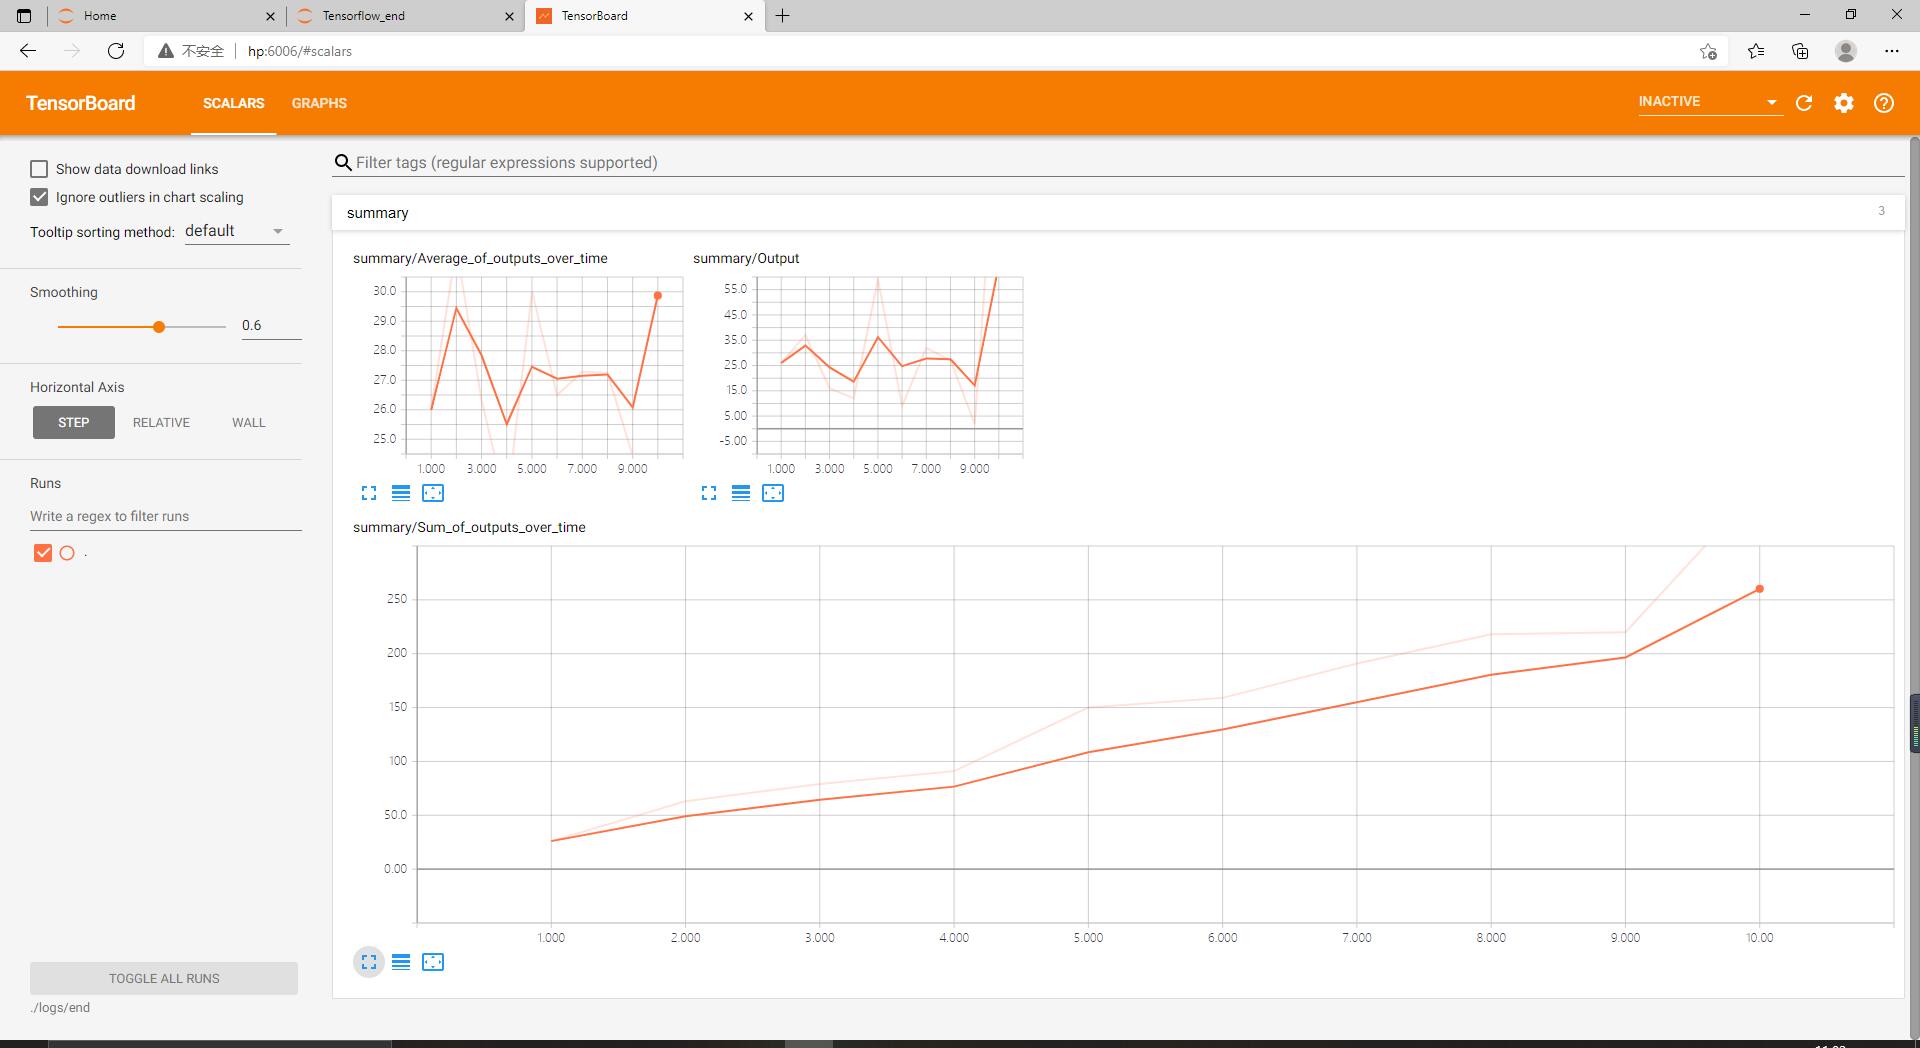
当切换到Scalars页面之后,看到三个依据我们赋予各summary.scalar对象的标签而命名的折叠的标签页。

单击任意标签页,都展示了不同时间点上数值的变化情况。


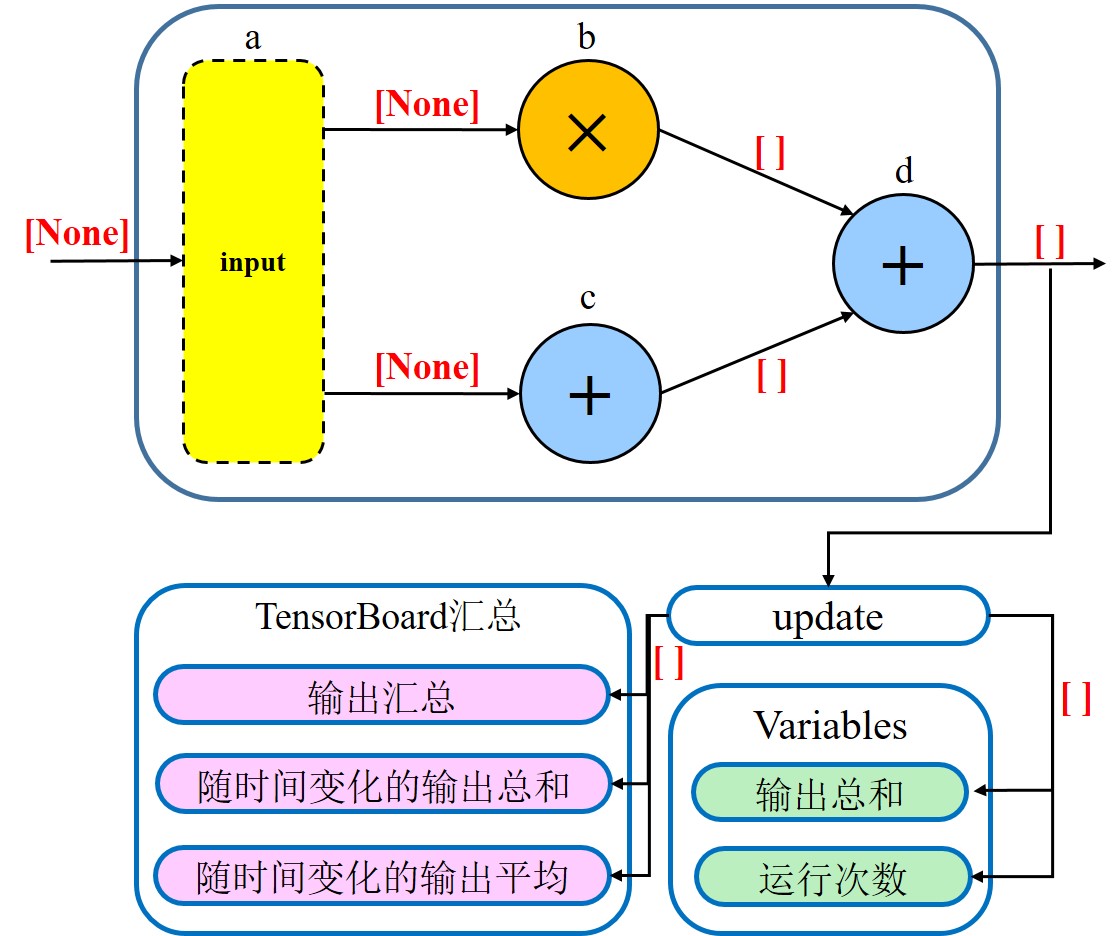
本练习的数据流图:

参考文献:人工智能原理与实践:基于Python语言和TensorFlow / 张明,何艳珊,杜永文编著. —— 北京:人民邮电出版社,2019.8.

