
整个页面的效果如下图所示
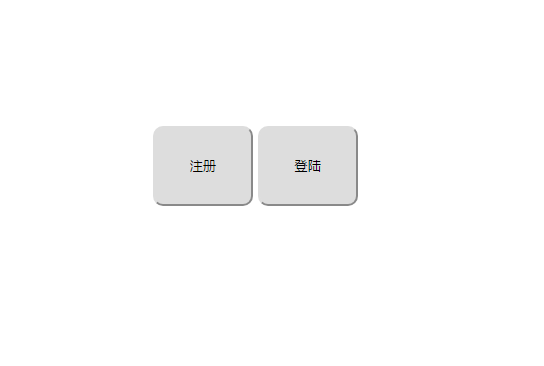
1、登陆注册页面
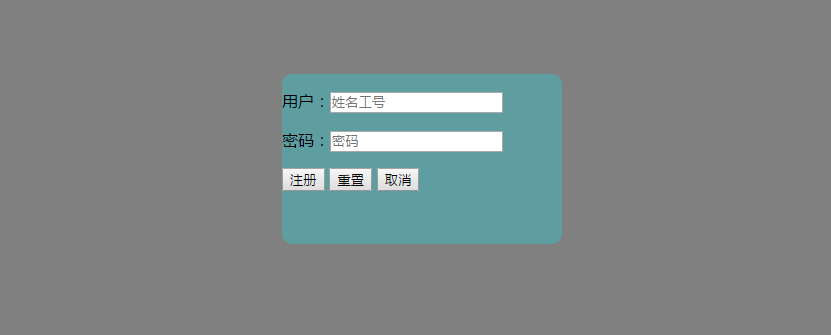
2、注册的页面
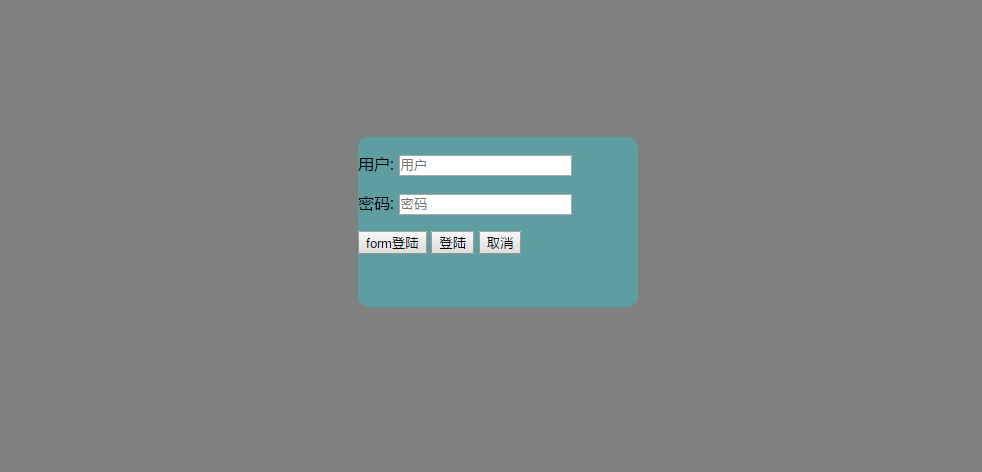
3、登陆页面
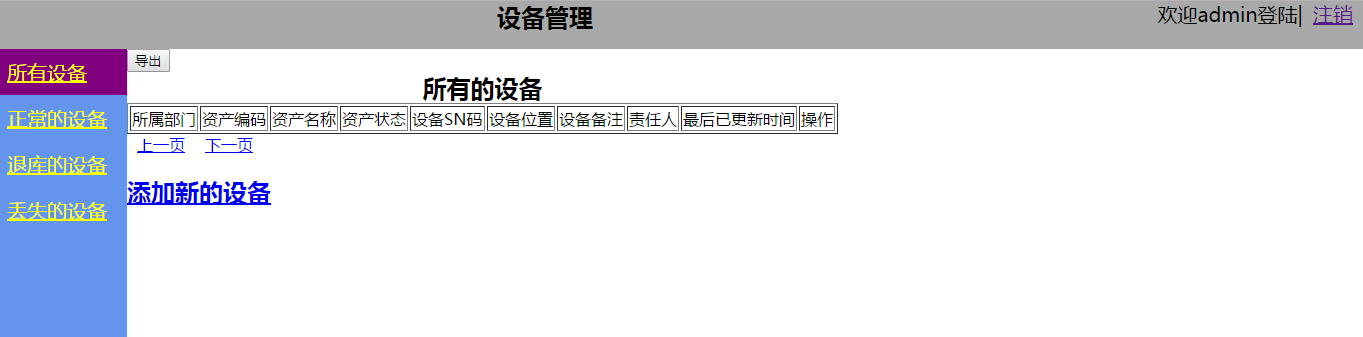
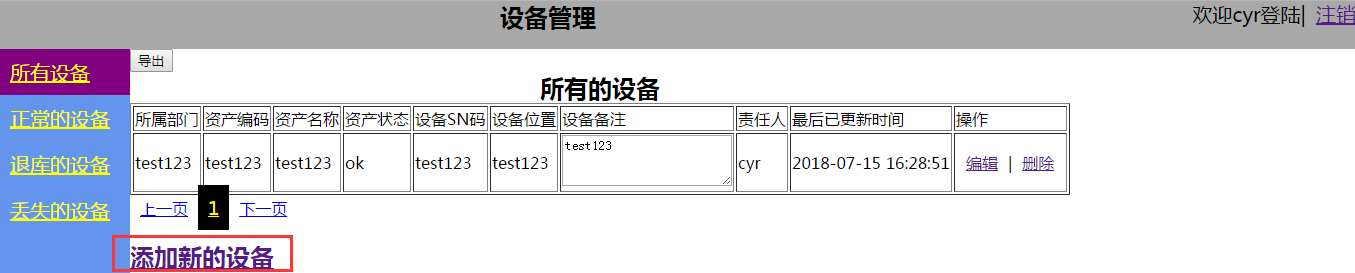
4、所有设备
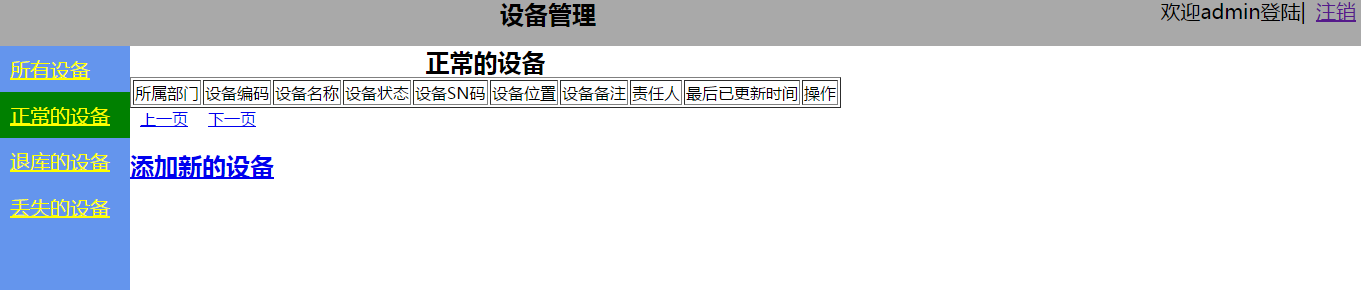
5、正常设备页面
6、退库设备页面

7、丢失设备页面

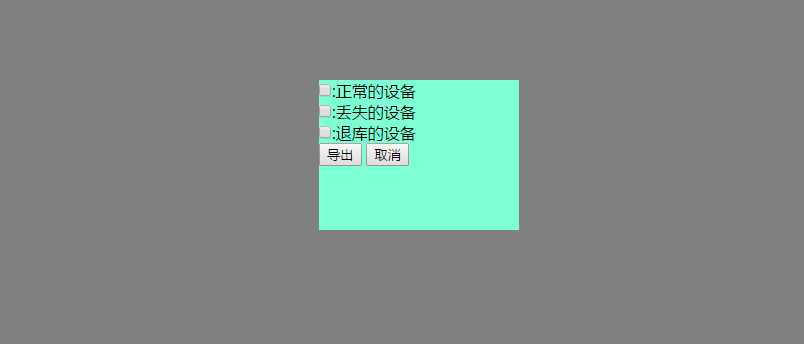
8、导出设备的页面,仅仅在所有设备页面才支持导出按钮
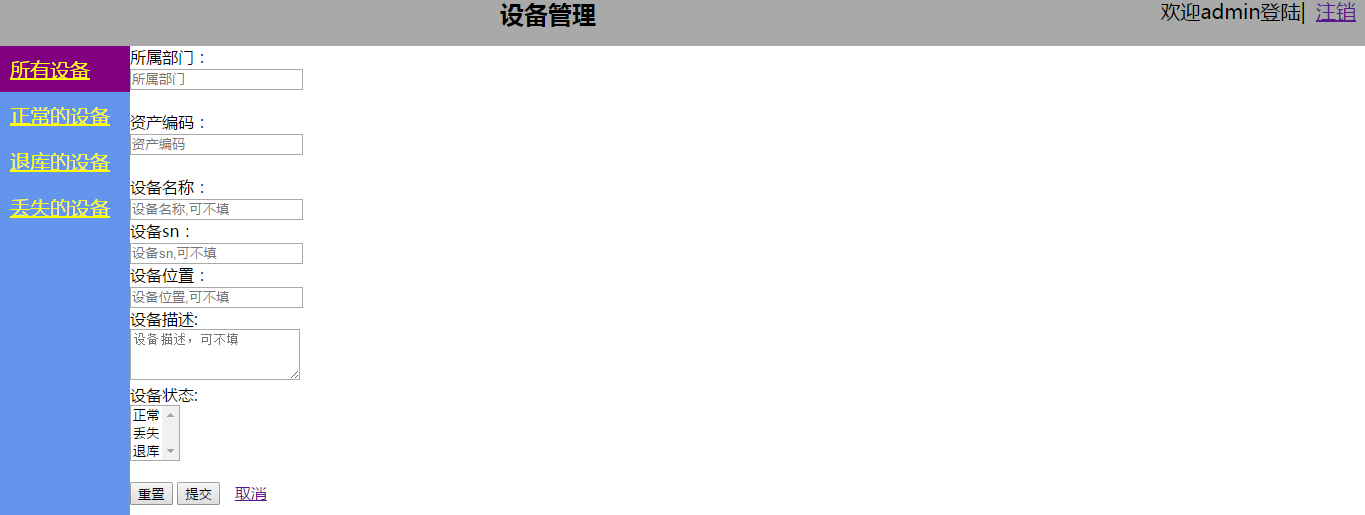
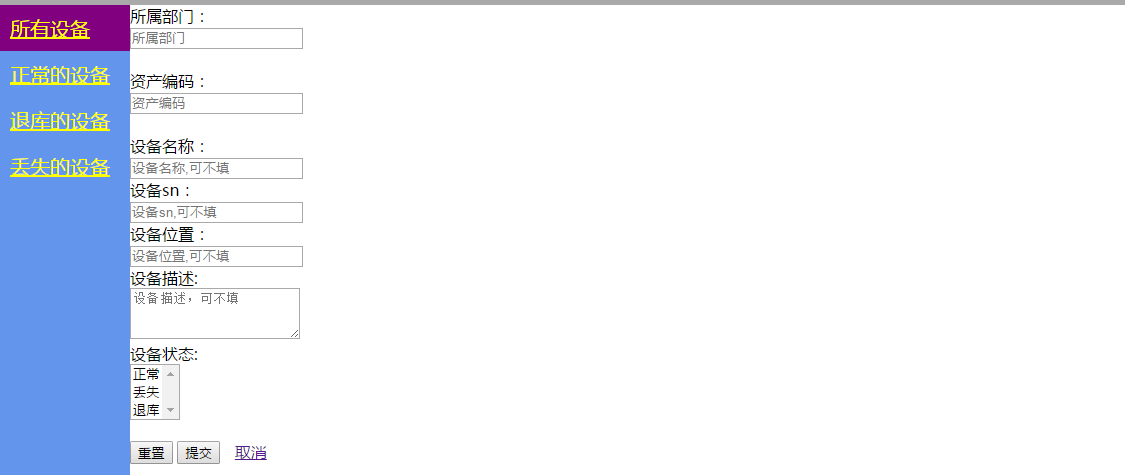
9、添加设备页面
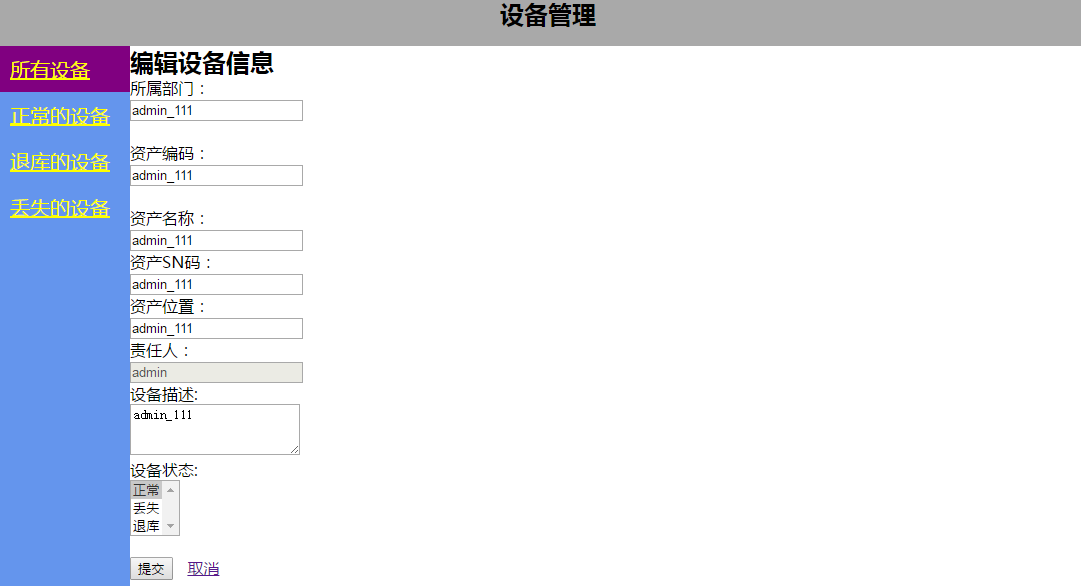
10、编辑设备的页面

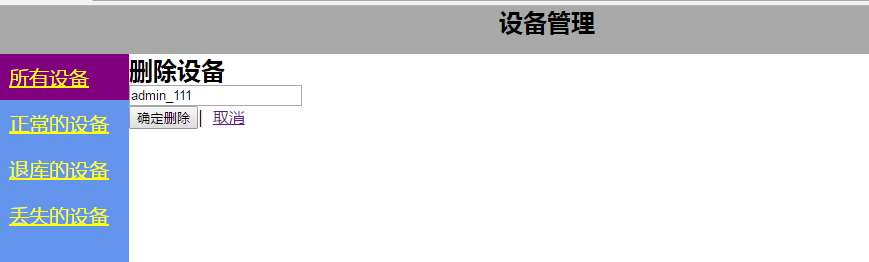
11、删除设备页面
上面就是我做的资产管理系统的所有的页面
下面我们按照页面来分析代码
一、登陆页面
页面的总体布局初始状态是2个框,一个用来登陆,一个用来注册,由于注册很简单,我们先把注册梳理一下
    <div id="home">
        <input type="button" value="注册" id="register">
        <input type="button" value="登陆" id="login">
    </div>
这个div的id是home,我们来看下home的css样式
        #home{
            position: fixed;
            left: 50%;
            top: 50%;
            width: 300px;
            height: 200px;
            margin-left: -150px;
            margin-top: -100px;
        }
设置为固定模式,为了让框居中,首先让整个div的距离左边50%,距离顶部50%,由于这个距离左边50%实现的效果是左边框距离左边的距离占整个屏幕的50%,为了让整个框居中,我们还需要让整个框向左边移动框的宽度的50%,也就是margin-left:-150px,通过样式上下的距离也是一样的,这里实现整个div标签居中显示
我们看到注册的input标签的id为register,我们为这个标签绑定了click事件,下面我们来看下这个jquery函数是怎么写的
     function bind_register_func() {
            $("#register").bind("click",function () {
                $("#error_register").html("");
                $("#register_form").removeClass("hide");
                $("#shade").removeClass("hide");
            })
        }
为id为register这个标签绑定了一个click事件,点击这个标签就会执行这个函数
这个函数有2个作用
作用1:
首先把id为error_register标签的值清空,因为如果是上次注册有报错的话,这次再次点击这里还是会显示错误信息,所以这里需要先把赋值清空,用html("")是清空内容,如果在括号中有值,则是赋值的意思
作用2:
这里我们又用到模态对话框,点击按钮,会把注册的框hide的class移除,用removeclass("hide")移除hide属性,这里我们看下hide的css属性是什么
        .hide{
            display: none;
        }
display:None就是这个标签不显示,我们移除这个属性,则标签就会显示出来,下面我们来看下显示出来的2个标签
    <div class="hide modal" id="register_form">
        <form action="/zhaoshebei/form_register/" method="post">
            <p><label for="register_username">用户:</label><input type="text" placeholder="姓名工号" name="user_name" id="register_username"></p>
            <p><label for="register_userpwd">密码:</label><input type="password" placeholder="密码" name="user_pwd" id="register_userpwd"></p>
            <p><span id="error_register"></span></p>
            <input type="button" value="注册" id="ajax_register">
            <input type="reset" value="重置">
            <input type="button" value="取消" class="del_register_form">
        </form>
    </div>
    <div class="hide shade" id="shade">

    </div>
shade主要是起遮罩的作用,放在下面,遮罩整个的页面,真正的页面是在register_form标签中,放在遮罩层的上面
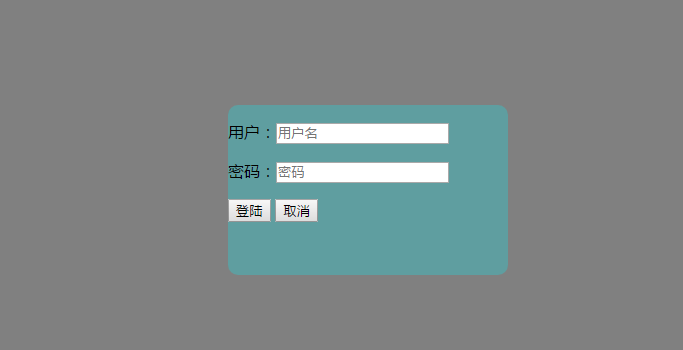
下面我们重点看下模态对话框的css样式该如何显示
        .shade{
            position: fixed;
            top: 0;
            bottom: 0;
            left: 0;
            right: 0;
            background-color: gray;
{#            opacity: 0.8;#}
            z-index: 100;
        }
        .modal{
            position: fixed;
            left: 50%;
            top: 50%;
            width: 280px;
            height: 170px;
            margin-left: -140px;
            margin-top: -85px;
            z-index: 101;
            background-color: cadetblue;
            border-radius: 10px;
        }
这里记住,两个postition都是fix,其中z-index越大,则越在上面
弹出的页面效果如下

重置按钮就是用input标签实现,type为reset,就会清空input输入框的值
取消按钮我们也绑定了click事件,把之前那2个去掉hide属性的标签的hide属性在加回去,找到标签用addclass方式对标签加class属性
        function del_register_form() {
            $(".del_register_form").bind("click",function () {
                $("#register_form").addClass("hide");
                $("#shade").addClass("hide");
            })
        }
我们重点看下注册按钮的如何实现的,因为我们用的模态对话框实现的注册效果,如果用模态对话框的方式,则往后台提交数据我们一般使用ajax的方式向后台提交数据
我们为注册的input的按钮也绑定了click事件,下面我们看下这个函数
function bind_ajax_register() {
            $("#ajax_register").bind("click",function () {
                var new_user_name = $("#register_username").val();
                var new_user_pwd = $("#register_userpwd").val();

                $.ajax(
                    {
                        url:"/zhaoshebei/form_register/",
                        type:"post",
                        data:{
                            user_name:new_user_name,
                            user_pwd:new_user_pwd
                        },
                        success:function (data) {
                                data = JSON.parse(data);
                                var statues = data["status"];
                                if (statues == "failed"){
                                    $("#error_register").html(data["error"])
                                }else {
                                    window.location.href = "/zhaoshebei/index/?uname="+new_user_name;
                                }
                        }
                    }
                )
            })
        }
这里了我们会和后台进行交互了,首先val()获取用户注册的用户名和密码,放在data中,然后通过post的方式传递给url指定的路径
这里我们实现的效果是注册后直接跳转到index页面,在ajax中,实现跳转到某个url使用方法windows.location.href = url路径就会跳转到指定的路径上,这里有一个点需要主要,如果我们在ajax跳转要传递一个变量的时候,要用下面的方式,+ 变量名

由于后台传递过来的是一个字段,且用json.dumps处理过,所以在ajax中如果想要拿到这个字典对象则需要使用JSON.parse处理,则就可以拿到后台传递过来的字典对象
success的意思,如果整个流程走通,就会执行的函数,而函数data的值就是后台通过HttpResponse传递过来的值
最后我们看下后端的函数是如何处理的
def form_register(request):
    method = request.method.lower()
    if method == "post":
        new_user_name = request.POST.get("user_name",None)
        new_user_pwd = request.POST.get("user_pwd",None)
        ret_dict = {"status":True,"error":None}
        if not(bool(new_user_name)) or not(bool(new_user_pwd)):
            state_dict = {"status": "failed", "error": "用户名或者密码不能为空"}
            return HttpResponse(json.dumps(state_dict))
        else:
            if models.user_table.objects.filter(user_name=new_user_name).exists():
                ret_dict["status"] = "failed"
                ret_dict["error"] = "当前用户已经存在"
                return HttpResponse(json.dumps(ret_dict))
            else:
                models.user_table.objects.create(
                    user_name = new_user_name,
                    user_pwd = new_user_pwd,
                )
                return HttpResponse(json.dumps(ret_dict))

    else:
        # return redirect("/zhaoshebei/login/")
        pass
这里需要注意的就是一点,如果前台是ajax的方式,则后端给前端返回数据,则要通过HttpResponse的方式
首先通过request.Post.get方式获取前端传递过来的数据,进行是否为空,是否已经存在的判断,然后通过HttpResponse的方式给后端返回,如果上述的判断均通过,则调用model的create的命令在数据库中增加数据
下面我们看下登陆是如何实现的
我们同样为id为login的input标签绑定了一个事件,下面我们看下事件的函数
        function bind_login_func() {
            $("#login").bind("click",function () {
                $(".error").html("");
                $("#login_form").removeClass("hide");
                $("#shade").removeClass("hide");
            })
        }
同样也是使用removeclass方式把模态对话框的hide属性移除掉
我们先看下取消按钮
    <div class="hide modal" id="login_form">
        <form action="/zhaoshebei/login/" method="post">

            <p><label for="login_username">用户:</label><input type="text" placeholder="用户名" name="user_name" id="login_username"></p>
            <p><label for="login_userpwd">密码:</label><input type="password" placeholder="密码" name="user_pwd" id="login_userpwd"></p>

            <p><span class="error"></span></p>
            <input type="button" value="登陆" id="ajax_login">
            <input type="button" value="取消" class="del_login_form">
        </form>
    </div>
取消按钮同样绑定了click事件,把模态对话框的hide属性加回去
        function del_login_form() {
            $(".del_login_form").bind("click",function () {
                $("#login_form").addClass("hide");
                $("#shade").addClass("hide");
            })
        }
重点看下登陆按钮,同样绑定了click事件,通过ajax的方式把数据传递给后台,因为我们这里同样适用模态对话框的方式,所以适用ajax的方式和后台进行交互
  function bind_ajax_login() {
            $("#ajax_login").bind("click",function () {
                var user_name = $("#login_username").val();
                var user_pwd = $("#login_userpwd").val();
{#                $(".error").val()#}
                $.ajax(
                    {
                        url:"/zhaoshebei/form_login/",
                        type:"post",
                        data:{
                            user_name:user_name,
                            user_pwd:user_pwd
                        },
                        success:function (data) {
                                data = JSON.parse(data);
                                var statues = data["status"];
                                if (statues == "failed"){

                                    $(".error").html(data["error"])
                                }else {
                                    window.location.href = "/zhaoshebei/index/?uname="+user_name;
                                }
                        }
                    }
                )
            })
        }
和注册的ajax的用法基本上一致
这里看下报错的信息适用$(".error").html("错误信息")来在页面显示报错
我们最后在登陆的后台的代码
def form_login(request):
    if request.method == "POST":
        username = request.POST.get("user_name",None)
        userpwd = request.POST.get("user_pwd",None)
        state_dict = {"status": True, "error": None}

        if not(bool(username)) or not(bool(userpwd)):
            state_dict = {"status": "failed", "error": "用户名或者密码不能为空"}
            return HttpResponse(json.dumps(state_dict))
        else:
            ret = models.user_table.objects.filter(user_name=username,user_pwd=userpwd).exists()
            if ret:
                request.session["username"] = username
                request.session["userpwd"] = userpwd
                state_dict = {"status": True, "error": None}
                return HttpResponse(json.dumps(state_dict))
            else:

                state_dict["status"] = "failed"
                state_dict["error"] = "用户或者密码错误"
                return HttpResponse(json.dumps(state_dict))
这里需要注意,和注册的函数有一点不同,这里如果登陆成功,我们要设置session

我们在访问其他的页面,不能每次都要求客户登陆,所以要把认证信息放在session后,用户的每次方法的request的请求都会有session信息,所有我们会把校验session的放在装饰器中,我们看下装饰器函数
def outer(func):
    def inner(request):
        session_uname = request.session.get("username",None)
        session_userpwd = request.session.get("userpwd",None)
        if models.user_table.objects.filter(user_name=session_uname,user_pwd=session_userpwd).exists():
            # print(session_userpwd,session_uname)
            ret = func(request)
            return ret
        else:
            return redirect("/zhaoshebei/login/")
    return inner
第一个页面讲解完了,明天讲解一下第二个页面
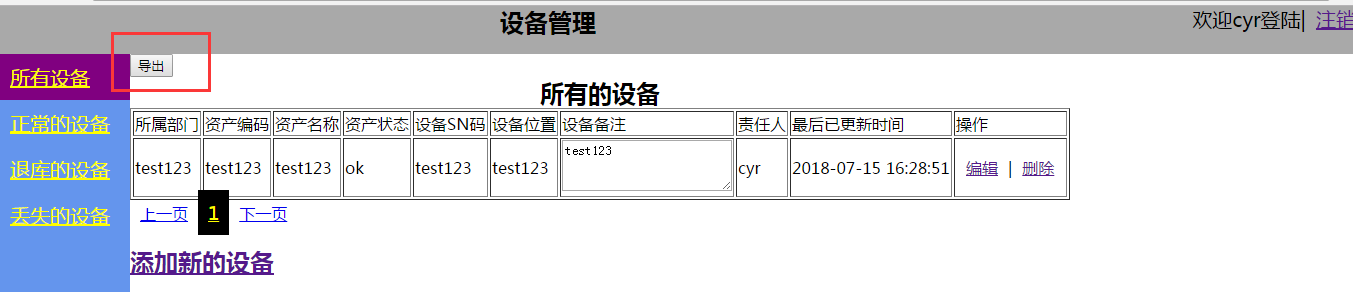
二、所有设备页面
由于我们的所有设备页面, 正常设备的页面,丢失设备的页面,退库设备的页面基本都是一样的,只有中间框的内容不一样,所以我们先写一个模板html,让其他页面都来继承这个页面即可
先看下基镜像的html代码
<!DOCTYPE html>
<html lang="en">
<head>
    <meta charset="UTF-8">
    <title>资产管理</title>
    <link rel="stylesheet" href="/static/cs/css1.css">
    <style>
        {% block css %}

        {% endblock %}
    </style>
</head>
<body>

    <div id="menu_head">
        <h2>设备管理</h2>
        <div>
            欢迎{{ username }}登陆|<a href="/zhaoshebei/logout/">注销</a>
        </div>
    </div>
    <div id="menu_left">
        <div>
            <a id="menu_all_device" href="/zhaoshebei/index/?uname={{ username }}">所有设备</a>
            <a id="menu_exist" href="/zhaoshebei/exist_device/?uname={{ username }}">正常的设备</a>
            <a id="menu_discard" href="/zhaoshebei/discard_device/?uname={{ username }}">退库的设备</a>
            <a id="menu_lost" href="/zhaoshebei/lost_device/?uname={{ username }}">丢失的设备</a>
        </div>
    </div>
    <div id="menu_right">

        {% block content %}

        {% endblock %}
    </div>

    <script src="/static/jq/jquery-3.3.1.min.js"></script>
    {% block jq %}

    {% endblock %}
</body>
</html>
我们看到在母版中的html引入了一个css文件,我们为什么可以引入css文件,因为我们在settings设置静态文件的路径
STATICFILES_DIRS = (
    os.path.join(BASE_DIR,"static"),
)
这个时候我们就可以把静态文件放在static路径下,童颜高可用创建子目录
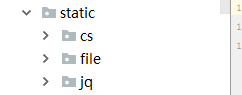
这样我们就可以引入css文件了,引入css文件的方式如下
<link rel="stylesheet" href="/static/cs/css1.css">
我们来看下这个css文件是怎么写的
*{
    margin: 0px;
}

#menu_head{
    width: 100%;
    height: 48px;
    background-color: darkgray;
    color: black;
}
#menu_head div{
    float: right;
    font-size: 20px;
}

#menu_head h2{
    padding-left: 500px;
    display: inline;
}
#menu_left div{
    position: absolute;
    top: 48px;
    width: 130px;
    left: 0px;
    bottom: 0px;
    background-color: cornflowerblue;
    /*min-height:1000px;*/

}


#menu_left a{
    display: block;
    padding-left: 10px;
    padding-bottom: 10px;
    border-left: 1px;
    color: yellow;
    font-size: 20px;
}

#menu_left a:hover{
    background-color: green;
}

.active{
    background-color: purple;
}


#menu_right{
    position: absolute;
    top: 48px;
    left: 130px;
    bottom: 0px;
    background-color: white;
    right: 0;

}

div a{
    padding: 10px;
}
这里我们重点下这个css的代码的意思
#menu_left a:hover{
    background-color: green;
}

.active{
    background-color: purple;
}
为左边的a标签设置了hover属性,设置了这个属性后,如果我们鼠标滑过a标签,则会为a标签赋予背景色为绿色的效果
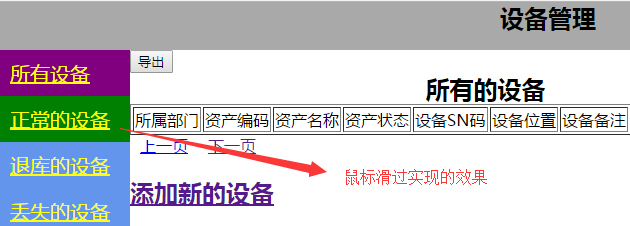
另外外面还定义了一个.active的css属性,意思就是如果选中的话,该a标签会显示这个css属性,背景色为purple

我们只需要重写block中的代码就可以了
下面我们正式看下所有设备的页面
{% extends "base.html" %}
{% block css %}
<style>
textarea{
overflow:scroll;
}
.active_page{
color: yellow;
font-size: larger;
background-color: black;
}
.shade{
position: fixed;
z-index: 100;
top: 0px;
left: 0px;
right: 0px;
bottom: 0px;
background-color: gray;
}
.modal{
position: fixed;
z-index: 101;
width: 200px;
height: 150px;
left: 50%;
top: 50%;
margin-left: -100px;
margin-top: -75px;
background-color: aquamarine;
}
.hide{
display: none;
}
</style>
{% endblock %}
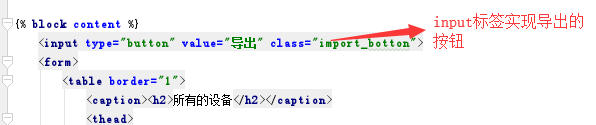
{% block content %}
<input type="button" value="导出" class="import_botton">
<form>
<table border="1">
<caption><h2>所有的设备</h2></caption>
<thead>
<tr>
<td>所属部门</td>
<td>资产编码</td>
<td>资产名称</td>
<td>资产状态</td>
<td>设备SN码</td>
<td>设备位置</td>
<td>设备备注</td>
<td>责任人</td>
<td>最后已更新时间</td>
<td>操作</td>
</tr>
</thead>
<tbody>
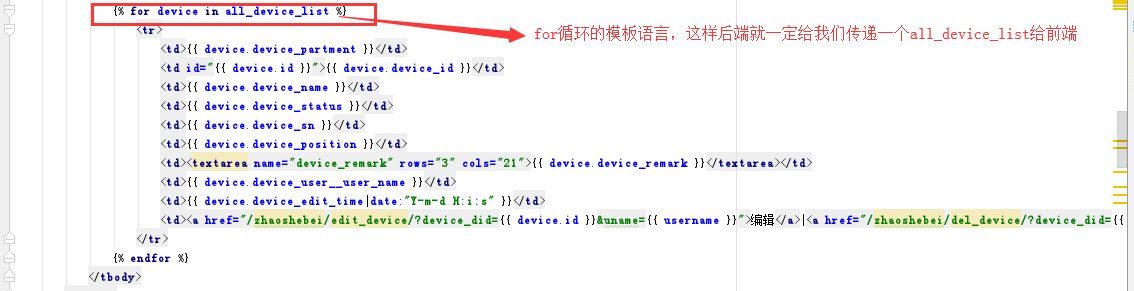
{% for device in all_device_list %}
<tr>
<td>{{ device.device_partment }}</td>
<td id="{{ device.id }}">{{ device.device_id }}</td>
<td>{{ device.device_name }}</td>
<td>{{ device.device_status }}</td>
<td>{{ device.device_sn }}</td>
<td>{{ device.device_position }}</td>
<td><textarea name="device_remark" rows="3" cols="21">{{ device.device_remark }}</textarea></td>
<td>{{ device.device_user__user_name }}</td>
<td>{{ device.device_edit_time|date:"Y-m-d H:i:s" }}</td>
<td><a href="/zhaoshebei/edit_device/?device_did={{ device.id }}&uname={{ username }}">编辑</a>|<a href="/zhaoshebei/del_device/?device_did={{ device.id }}&uname={{ username }}">删除</a></td>
</tr>
{% endfor %}
</tbody>
</table>
</form>
<div>
{{ page_spilt_str|safe }}
</div>
<a style="margin-top: 50px" href="/zhaoshebei/add_device/?uname={{ username }}"><h2>添加新的设备</h2></a>
<div class="hide shade" id="import_shade"></div>
<div class="hide modal" id="import_modal">
<form>
<p>
<input type="checkbox" value="ok" name="import_list">:正常的设备
</p>
<p>
<input type="checkbox" value="lost" name="import_list">:丢失的设备
</p>
<p>
<input type="checkbox" value="discard" name="import_list">:退库的设备
</p>
<input type="button" value="导出" id="confirm_import_data_new">
<input type="button" value="取消" class="delete_import">
</form>
</div>
{% endblock %}
{% block jq %}
<script src="/static/jq/jquery-3.3.1.min.js"></script>
<script>
$(function () {
$("#menu_all_device").addClass("active");
import_data_form();
import_data_again();
delete_import();
});
function import_data_form() {
$(".import_botton").bind("click",function () {
$("#import_shade").removeClass("hide");
$("#import_modal").removeClass("hide");
})
}
function delete_import() {
$(".delete_import").bind("click",function () {
$("#import_shade").addClass("hide");
$("#import_modal").addClass("hide");
})
}
function import_data_again() {
$("#confirm_import_data_new").bind("click",function () {
var check_id = [];
$("input[type='checkbox']:checked").each(function(i){
check_id[i] =$(this).val();
});
check_id = JSON.stringify(check_id)
$.ajax({
url:"/zhaoshebei/import_func/?p={{ username }}",
type:"post",
data:{
"import_select_list":check_id,
},
success:function (data) {
{# alert(data)#}
window.location.href = "/zhaoshebei/big_file_download/?file=" + data
}
})
})
}
</script>
{% endblock %}
所有设备的页面知识点很多,我们一一分解
1、首先是设备的列表是如何实现的,毫无疑问,我们使用table标签来实现
 <form>
        <table border="1">
            <caption><h2>所有的设备</h2></caption>
            <thead>
                <tr>
                    <td>所属部门</td>
                    <td>资产编码</td>
                    <td>资产名称</td>
                    <td>资产状态</td>
                    <td>设备SN码</td>
                    <td>设备位置</td>
                    <td>设备备注</td>
                    <td>责任人</td>
                    <td>最后已更新时间</td>
                    <td>操作</td>
                </tr>
            </thead>
            <tbody>
                {% for device in all_device_list %}
                    <tr>
                        <td>{{ device.device_partment }}</td>
                        <td id="{{ device.id }}">{{ device.device_id }}</td>
                        <td>{{ device.device_name }}</td>
                        <td>{{ device.device_status }}</td>
                        <td>{{ device.device_sn }}</td>
                        <td>{{ device.device_position }}</td>
                        <td><textarea name="device_remark" rows="3" cols="21">{{ device.device_remark }}</textarea></td>
                        <td>{{ device.device_user__user_name }}</td>
                        <td>{{ device.device_edit_time|date:"Y-m-d H:i:s" }}</td>
                        <td><a href="/zhaoshebei/edit_device/?device_did={{ device.id }}&uname={{ username }}">编辑</a>|<a href="/zhaoshebei/del_device/?device_did={{ device.id }}&uname={{ username }}">删除</a></td>
                    </tr>
                {% endfor %}
            </tbody>
        </table>
    </form>
这里我们梳理一下,我们首先使用了模板语言的循环,来接受后端传递来个设备列表信息
下面我们来看下后端是如何传递来的数据
@outer
def index(request):
    method = request.method.lower()
    if method == "get":
        username = request.GET.get("uname")
        obj = models.user_table.objects.get(user_name=username)
        all_device_list = obj.device_table_set.all().values("id","device_partment","device_id","device_name","device_status","device_sn","device_position","device_remark","device_user__user_name","device_edit_time")

        count = obj.device_table_set.all().count()
        current_page = int(request.GET.get("p","1"))

        base_url = request.path
        page_obj =page_split.page_helper(count=count,current_page=current_page,per_page_num=6,base_url=base_url,uname=username)
        all_device_list = obj.device_table_set.all()[page_obj.db_start():page_obj.db_end()].values("id","device_partment","device_id","device_name","device_status","device_sn","device_position","device_remark","device_user__user_name","device_edit_time")

        page_spilt_str = page_obj.page_list()

        return render(request,"index.html",locals())
    else:
        return redirect("/zhaoshebei/login/")
首先如果是get请求过来,我们要从数据库中拿数据,首先在我们需要拿到这个用户的id,然后从数据库中获取该用户的设备信息
username = request.GET.get("uname")
后端去获取用户信息,则前端就一定要传递过来,我们看下前端是如何传递过来的,我们可以看到,是通过url路径的方式,使用+传递过来的用户的名称

后端拿到用户名称后,因为我们的用户名称是唯一的,所以去数据库中通过用户id去拿到这个用户的所有的信息
        obj = models.user_table.objects.get(user_name=username)
        all_device_list = obj.device_table_set.all().values("id","device_partment","device_id","device_name","device_status","device_sn","device_position","device_remark","device_user__user_name","device_edit_time")
因为我们拿到的用户表中的信息,但是设备信息我们放在设备表中,因为用户表和设备表是一对多的关系,所以在valus中我们可以双下划线__去做跨表查询,拿到这个用户的设备信息
拿到数据后,因为我们前端需要分页显示,所以我们需要使用count方法获取这个用户的设备的数量,来进行分页显示

我们把分页的代码单独写在一个目录中

下面我们看下分页的代码,分页的代码这里就讲解了,可以自己看下
class page_helper():
    def __init__(self,count,current_page,per_page_num,base_url,uname):
        self.count = count
        self.current_page = current_page
        self.per_page_num = per_page_num
        self.base_url = base_url
        self.uname = uname
    def page_count(self):
        before, after = divmod(self.count, self.per_page_num)
        if after > 0:
            class_count = before + 1
        else:
            class_count = before
        return class_count

    def page_start(self):
        if self.page_count() <= 11:
            start_int = 1
            end_int = self.page_count()
        else:
            if self.current_page <= 6:
                start_int = 1
                end_int = 11
            elif self.current_page + 5 + 1 > self.page_count():
                start_int = self.page_count() - 10
                end_int = self.page_count() + 1
            else:
                start_int = self.current_page - 5
                end_int = self.current_page + 5 + 1
        return start_int
    def page_end(self):
        if self.page_count() <= 11:
            start_int = 1
            end_int = self.page_count()
        else:
            if self.current_page <= 6:
                start_int = 1
                end_int = 11
            elif self.current_page + 5 + 1 > self.page_count():
                start_int = self.page_count() - 10
                end_int = self.page_count() + 1
            else:
                start_int = self.current_page - 5
                end_int = self.current_page + 5 + 1

        return end_int

    def db_start(self):
        return (self.current_page - 1) * self.per_page_num

    def db_end(self):
        return self.current_page * self.per_page_num

    def page_list(self):
        if self.current_page == 1:
            before_page = """<a href="#">上一页</a>"""
        else:
            before_page = """<a href="{url}?p={num}&uname={uname}">上一页</a>""".format(url=self.base_url,num=self.current_page - 1,uname=self.uname)
        page_list = []
        page_list.append(before_page)

        for i in range(self.page_start(),self.page_end() + 1):
            if i == self.current_page:
                s = """<a href="{url}?p={num}&uname={uname}" class="active_page">{num}</a>""".format(url=self.base_url,num=i,uname=self.uname)
            else:
                s = """<a href="{url}?p={num}&uname={uname}">{num}</a>""".format(url=self.base_url,num=i,uname=self.uname)
            page_list.append(s)
        if self.current_page == self.page_count():
            after_page = """<a href="#">下一页</a>"""
        else:
            after_page = """<a href="{url}?p={num}&uname={uname}">下一页</a>""".format(url=self.base_url,num=self.current_page + 1,uname=self.uname)
        page_list.append(after_page)
        page_str = "".join(page_list)
        return page_str
我们在views中导入分页的代码就可以了,因为第一次用户登陆,他没有传递页数,所以我们需要给页数一个默认值,这里默认给一个1就可以了
        current_page = int(request.GET.get("p","1"))

        base_url = request.path
        page_obj =page_split.page_helper(count=count,current_page=current_page,per_page_num=6,base_url=base_url,uname=username)
        all_device_list = obj.device_table_set.all()[page_obj.db_start():page_obj.db_end()].values("id","device_partment","device_id","device_name","device_status","device_sn","device_position","device_remark","device_user__user_name","device_edit_time")

        page_spilt_str = page_obj.page_list()
然后通过render返回给前端
return render(request,"index.html",locals())
我们看到的所有设备的页面还有编辑和删除2个按钮,下面我们看下编辑和删除
先看编辑,由于用户的名称的对我们非常重要,所以我们在url务必要把用户信息传递给后端,方便后端处理

<td><a href="/zhaoshebei/edit_device/?device_did={{ device.id }}&uname={{ username }}">编辑</a>|<a href="/zhaoshebei/del_device/?device_did={{ device.id }}&uname={{ username }}">删除</a></td>
我们看下编辑的后端是如何处理的
@outer
def edit_device(request):
    from django.utils.safestring import mark_safe
    method = request.method.lower()
    if method == "get":
        username = request.GET.get("uname")
        device_did = request.GET.get("device_did")
        edit_obj = models.device_table.objects.get(id=device_did)
        device_partment = edit_obj.device_partment
        device_id = edit_obj.device_id
        device_name = edit_obj.device_name
        device_status = edit_obj.device_status
        device_sn = edit_obj.device_sn
        device_postion = edit_obj.device_position
        device_remark = edit_obj.device_remark
        device_user = edit_obj.device_user
        if device_status == "ok":
            device_status_str = """<select name = "device_status" size = "3"><option value = "ok" selected="selected"> 正常 </option><option value = "lost"> 丢失 </option><option value = "discard" > 退库 </option></select>"""
        elif device_status == "lost":
            device_status_str = """<select name = "device_status" size = "3"><option value = "ok" > 正常 </option><option value = "lost" selected="selected"> 丢失 </option><option value = "discard" > 退库 </option></select>"""
        elif device_status == "discard":
            device_status_str = """<select name = "device_status" size = "3"><option value = "ok" > 正常 </option><option value = "lost"> 丢失 </option><option value = "discard" selected="selected"> 退库 </option></select>"""
        else:
            device_status_str = """<select name = "device_status" size = "3"><option value = "ok" > 正常 </option><option value = "lost"> 丢失 </option><option value = "discard" > 退库 </option></select>"""
        return render(request,"edit_device.html",locals())

    else:
        device_edit_info_dict = request.POST
        username = device_edit_info_dict["username"]
        device_partment = request.POST.get("device_partment")
        if not device_edit_info_dict["device_partment"]:
            device_partment_error = "部门名称不允许为空"
            return render(request, "edit_device.html", locals())
        else:
            # device_id = request.POST.get("device_id")
            if not device_edit_info_dict["device_id"]:
                device_id_error = "该设备编码不允许为空"
                return render(request, "edit_device.html", locals())
            else:
                if not device_edit_info_dict["device_status"]:
                    device_status_error = "设备状态不允许为空"
                    return render(request, "edit_device.html", locals())
                else:
                    try:
                        models.device_table.objects.filter(id=int(device_edit_info_dict["id"])).update(
                            device_partment = request.POST.get("device_partment"),
                            device_id = request.POST.get("device_id"),
                            device_name = request.POST.get("device_name"),
                            device_status = request.POST.get("device_status"),
                            device_sn = request.POST.get("device_sn"),
                            device_position = request.POST.get("device_position"),
                            device_remark = request.POST.get("device_remark")
                        )

                        models.device_table.objects.filter(id=int(device_edit_info_dict["id"]))[0].save()
                    except Exception as e:
                        print(e,"-----------------------------------")
                    else:
                        return redirect(("/zhaoshebei/index/?uname={name}".format(name=username)))
编辑的后端代码需要处理get请求,同时也需要处理post请求,我们先看下get请求是如何处理的,拿到用户通过url方式传递过来的用户信息,然后从数据库中获取数据,然后render的方式渲染给前端
    if method == "get":
        username = request.GET.get("uname")
        device_did = request.GET.get("device_did")
        edit_obj = models.device_table.objects.get(id=device_did)
        device_partment = edit_obj.device_partment
        device_id = edit_obj.device_id
        device_name = edit_obj.device_name
        device_status = edit_obj.device_status
        device_sn = edit_obj.device_sn
        device_postion = edit_obj.device_position
        device_remark = edit_obj.device_remark
        device_user = edit_obj.device_user
        if device_status == "ok":
            device_status_str = """<select name = "device_status" size = "3"><option value = "ok" selected="selected"> 正常 </option><option value = "lost"> 丢失 </option><option value = "discard" > 退库 </option></select>"""
        elif device_status == "lost":
            device_status_str = """<select name = "device_status" size = "3"><option value = "ok" > 正常 </option><option value = "lost" selected="selected"> 丢失 </option><option value = "discard" > 退库 </option></select>"""
        elif device_status == "discard":
            device_status_str = """<select name = "device_status" size = "3"><option value = "ok" > 正常 </option><option value = "lost"> 丢失 </option><option value = "discard" selected="selected"> 退库 </option></select>"""
        else:
            device_status_str = """<select name = "device_status" size = "3"><option value = "ok" > 正常 </option><option value = "lost"> 丢失 </option><option value = "discard" > 退库 </option></select>"""
        return render(request,"edit_device.html",locals())
前端的代码
{% extends "base.html" %}
{% block css %}
<style>
textarea{
overflow:scroll;
}
span{
color: red;
}
</style>
{% endblock %}
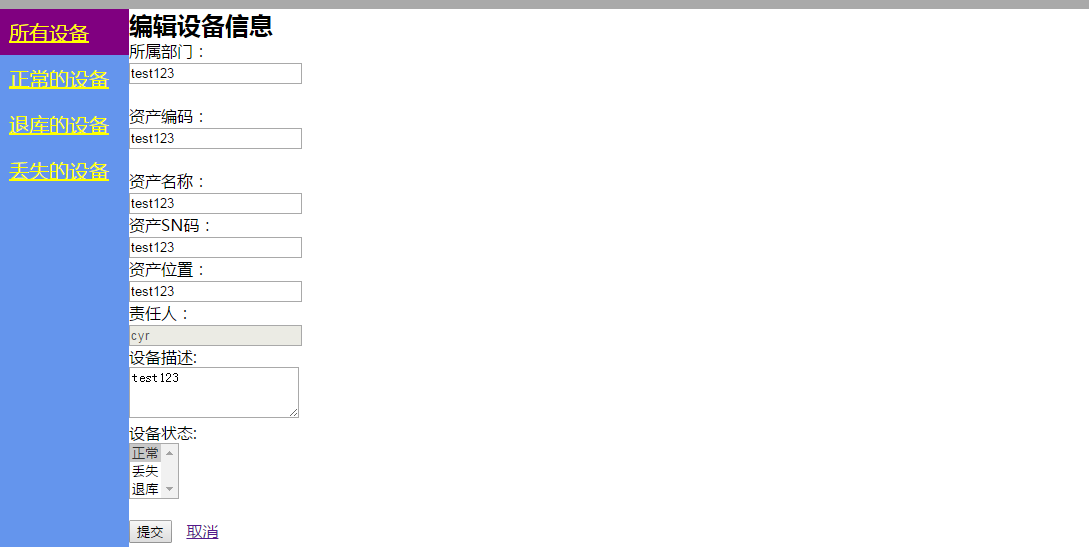
{% block content %}
<h2>编辑设备信息</h2>
<form action="/zhaoshebei/edit_device/" method="post">
<input type="text" value="{{ username }}" name="username" style="display:none;">
<input type="text" value="{{ device_did }}" name="id" style="display: none">
<p><label for="device_partment">所属部门:</label><br><input type="text" placeholder="所属部门" name="device_partment" id="device_partment" value="{{ device_partment }}"></p>
<span>{{ device_partment_error }}</span><br>
<p><label for="device_id">资产编码:</label><br><input type="text" placeholder="资产编码" name="device_id" id="device_id" value="{{ device_id }}"></p>
<span>{{ device_id_error }}</span><br>
<p><label for="device_name">资产名称:</label><br><input type="text" placeholder="资产名称,可不填" name="device_name" id="device_name" value="{{ device_name }}"></p>
<p><label for="device_sn">资产SN码:</label><br><input type="text" placeholder="资产SN码,可不填" name="device_sn" id="device_sn" value="{{ device_sn }}"></p>
<p><label for="device_position">资产位置:</label><br><input type="text" placeholder="资产位置,可不填" name="device_postion" id="device_postion" value="{{ device_postion }}"></p>
<p><label for="device_user__user_name">责任人:</label><br><input type="text" disabled="disabled" placeholder="责任人" name="device_user" id="device_user" value="{{ device_user }}"></p>
设备描述:<br><textarea name="device_remark" rows="3" cols="21" placeholder="设备描述,可不填">{{ device_remark }}</textarea><br>
设备状态:<br>
{{device_status_str|safe}}
<br>
<span>{{ device_status_error }}</span><br>
<input type="submit" value="提交">
<a href="/zhaoshebei/index/?uname={{ username }}">取消</a>
</form>
{% endblock %}
{% block jq %}
<script src="/static/jq/jquery-3.3.1.min.js"></script>
<script>
$(function () {
$("#menu_all_device").addClass("active")
})
</script>
{% endblock %}
然后我们看下后端代码的post请求是处理
        device_edit_info_dict = request.POST
        username = device_edit_info_dict["username"]
        device_partment = request.POST.get("device_partment")
        if not device_edit_info_dict["device_partment"]:
            device_partment_error = "部门名称不允许为空"
            return render(request, "edit_device.html", locals())
        else:
            # device_id = request.POST.get("device_id")
            if not device_edit_info_dict["device_id"]:
                device_id_error = "该设备编码不允许为空"
                return render(request, "edit_device.html", locals())
            else:
                if not device_edit_info_dict["device_status"]:
                    device_status_error = "设备状态不允许为空"
                    return render(request, "edit_device.html", locals())
                else:
                    try:
                        models.device_table.objects.filter(id=int(device_edit_info_dict["id"])).update(
                            device_partment = request.POST.get("device_partment"),
                            device_id = request.POST.get("device_id"),
                            device_name = request.POST.get("device_name"),
                            device_status = request.POST.get("device_status"),
                            device_sn = request.POST.get("device_sn"),
                            device_position = request.POST.get("device_position"),
                            device_remark = request.POST.get("device_remark")
                        )

                        models.device_table.objects.filter(id=int(device_edit_info_dict["id"]))[0].save()
                    except Exception as e:
                        print(e,"-----------------------------------")
                    else:
                        return redirect(("/zhaoshebei/index/?uname={name}".format(name=username)))
拿到用户信息后,先做基本的判断,然后通过update方法更新数据库中的信息就可以了
这里我们需要补充一个点,我们看下我们的数据库的设计
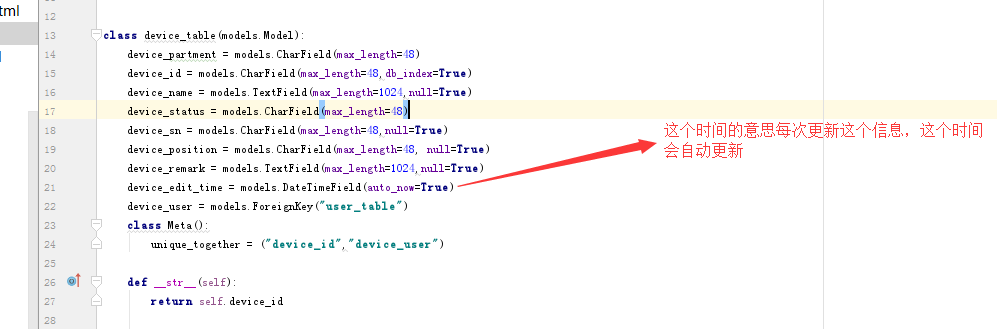
这里我在实际测试中,发现未更新,最终发现调用一下save方法,这个时间就会更新了

下面我们看下删除


先看取消按钮是怎么实现,就是a标签
{% extends "base.html" %}
{% block css %}
{% endblock %}
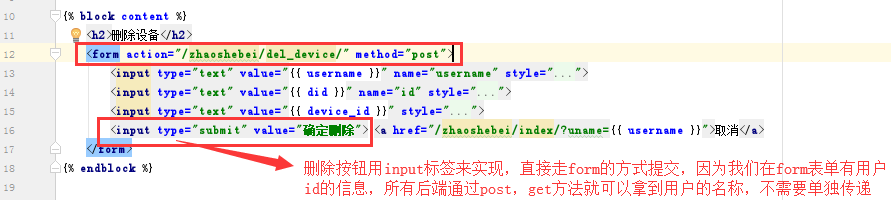
{% block content %}
<h2>删除设备</h2>
<form action="/zhaoshebei/del_device/" method="post">
<input type="text" value="{{ username }}" name="username" style="display:none;">
<input type="text" value="{{ did }}" name="id" style="display: none">
<input type="text" value="{{ device_id }}" style="display: block">
<input type="submit" value="确定删除">|<a href="/zhaoshebei/index/?uname={{ username }}">取消</a>
</form>
{% endblock %}
{% block jq %}
<script src="/static/jq/jquery-3.3.1.min.js"></script>
<script>
$(function () {
$("#menu_all_device").addClass("active")
})
</script>
{% endblock %}

下面看下确定删除的按钮
在看下后端的代码是如何实现的,同样这个函数也需要用装饰器装饰
@outer
def del_device(request):
    method = request.method.lower()
    if method == "get":
        username = request.GET.get("uname")
        did = request.GET.get("device_did")
        # print(id)
        device_id = models.device_table.objects.get(id=did).device_id


        return render(request,"delete_device.html",locals())

    else:
        username = request.POST.get("username")
        did = request.POST.get("id")
        models.device_table.objects.get(id=did).delete()
        return redirect("/zhaoshebei/index/?uname={name}".format(name=username))
如果是get请求,则拿到用户信息和设备id,通过render方式渲染给前端,如果post请求,则调用delete方法删除对应的信息,然后通过redirect重定向到index页面,这里也需要主要,重定向的url也务必要传递用户信息,丢失了用户名称,页面就不知道怎么渲染了

最后我们添加的设备是如何实现的
先看下html代码
{% extends "base.html" %}
{% block css %}
    <style>
        textarea{
            overflow:scroll;
        }
        span{
            color: red;
        }
    </style>
{% endblock %}

{% block content %}
    <form method="post" action="/zhaoshebei/add_device/?uname={{ username }}">
        <p><label for="device_partment">所属部门:</label><br><input type="text" placeholder="所属部门" name="device_partment" id="device_partment"></p>
        <span>{{ device_partment_error }}</span><br>
        <p><label for="device_id">资产编码:</label><br><input type="text" placeholder="资产编码" name="device_id" id="device_id"></p>
        <span>{{ device_id_error }}</span><br>
        <p><label for="device_name">设备名称:</label><br><input type="text" placeholder="设备名称,可不填" name="device_name" id="device_name"></p>
        <p><label for="device_sn">设备sn:</label><br><input type="text" placeholder="设备sn,可不填" name="device_sn" id="device_sn"></p>
        <p><label for="device_position">设备位置:</label><br><input type="text" placeholder="设备位置,可不填" name="device_position" id="device_position"></p>
        设备描述:<br><textarea name="device_remark" rows="3" cols="21" placeholder="设备描述,可不填"></textarea><br>
        设备状态:<br>
        <select name="device_status" size="3">
            <option value="ok">正常</option>
            <option value="lost">丢失</option>
            <option value="discard">退库</option>
        </select>
        <span>{{ device_status_error }}</span><br>
        <br>
        <input type="reset" value="重置">
        <input type="submit" value="提交">
        <a href="/zhaoshebei/index/?uname={{ username }}">取消</a>
    </form>


{% endblock %}

 {% block jq %}
        <script src="/static/jq/jquery-3.3.1.min.js"></script>
        <script>
            $(function () {
                $("#menu_all_device").addClass("active")
            })

        </script>
    {% endblock %}
先看取消和重置按钮
取消按钮

重置按钮

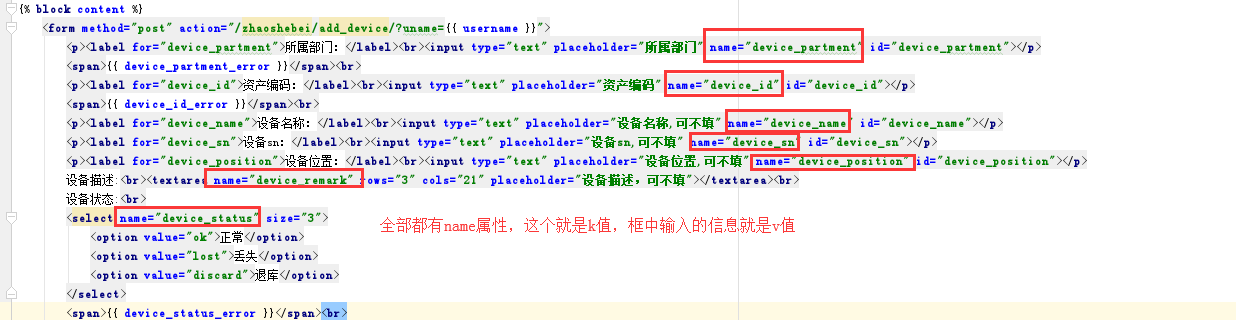
下面下添加的页面,使用form表单的方式和后端进行交互,用到input标签和slect标签
    <form method="post" action="/zhaoshebei/add_device/?uname={{ username }}">
        <p><label for="device_partment">所属部门:</label><br><input type="text" placeholder="所属部门" name="device_partment" id="device_partment"></p>
        <span>{{ device_partment_error }}</span><br>
        <p><label for="device_id">资产编码:</label><br><input type="text" placeholder="资产编码" name="device_id" id="device_id"></p>
        <span>{{ device_id_error }}</span><br>
        <p><label for="device_name">设备名称:</label><br><input type="text" placeholder="设备名称,可不填" name="device_name" id="device_name"></p>
        <p><label for="device_sn">设备sn:</label><br><input type="text" placeholder="设备sn,可不填" name="device_sn" id="device_sn"></p>
        <p><label for="device_position">设备位置:</label><br><input type="text" placeholder="设备位置,可不填" name="device_position" id="device_position"></p>
        设备描述:<br><textarea name="device_remark" rows="3" cols="21" placeholder="设备描述,可不填"></textarea><br>
        设备状态:<br>
        <select name="device_status" size="3">
            <option value="ok">正常</option>
            <option value="lost">丢失</option>
            <option value="discard">退库</option>
        </select>
这里我们复习一下select标签

页面的效果

其他input标签就是正常的用户,但是要务必要name属性,这样后端才能正常获取数据
下面我们看下后端代码
@outer
def add_device(request):
method = request.method.lower()
if method == "get":
device_id_error = ""
username = request.GET.get("uname")
return render(request,"add_device.html",locals())
else:
username = request.GET.get("uname")
device_partment = request.POST.get("device_partment")
if not device_partment:
device_partment_error = "部门名称不允许为空"
return render(request, "add_device.html", locals())
else:
device_id = request.POST.get("device_id")
if not device_id:
device_id_error = "资产编码不允许为空"
return render(request, "add_device.html", locals())
else:
if models.device_table.objects.filter(device_id=device_id).exists():
device_id_error = "资产编码已经存在"
return render(request,"add_device.html",locals())
else:
device_status = request.POST.get("device_status")
if not device_status:
device_status_error = "资产状态不允许为空"
return render(request, "add_device.html", locals())
else:
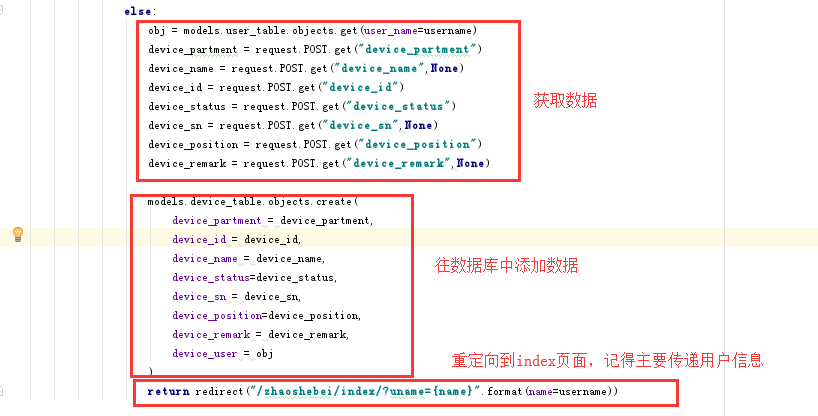
obj = models.user_table.objects.get(user_name=username)
device_partment = request.POST.get("device_partment")
device_name = request.POST.get("device_name",None)
device_id = request.POST.get("device_id")
device_status = request.POST.get("device_status")
device_sn = request.POST.get("device_sn",None)
device_position = request.POST.get("device_position")
device_remark = request.POST.get("device_remark",None)
models.device_table.objects.create(
device_partment = device_partment,
device_id = device_id,
device_name = device_name,
device_status=device_status,
device_sn = device_sn,
device_position=device_position,
device_remark = device_remark,
device_user = obj
)
return redirect("/zhaoshebei/index/?uname={name}".format(name=username))
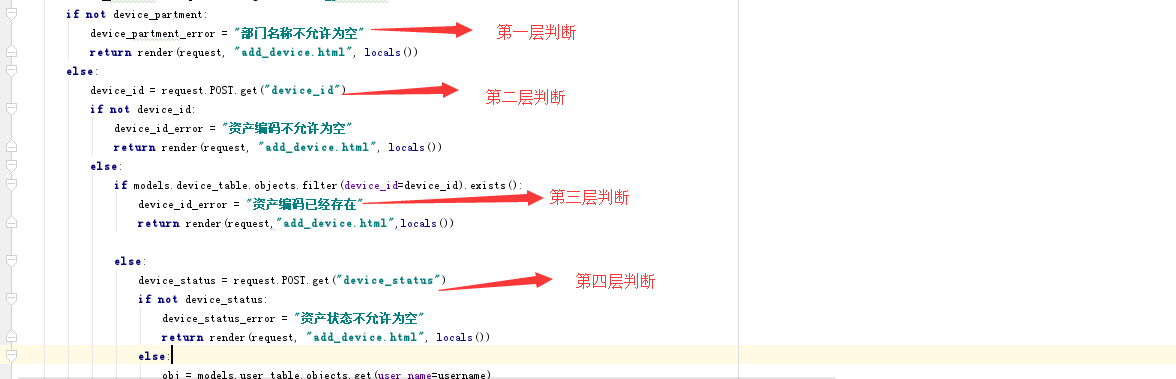
判断通过,则调用post.get方法去获取前端传递过来的值,然后调用create方法去数据库中增加数据
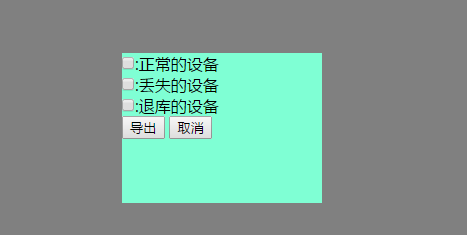
下面我们下导出的实现,这个是浪费了我不少时间
我们看为这个input标签绑定了ajax事件,导出我们是用ajax+模态对话框实现的,所有需要模态对话框,这里是把模态对话显示和隐藏
        function import_data_form() {
            $(".import_botton").bind("click",function () {
                $("#import_shade").removeClass("hide");
                $("#import_modal").removeClass("hide");
            })
        }

        function delete_import() {
            $(".delete_import").bind("click",function () {
                   $("#import_shade").addClass("hide");
                    $("#import_modal").addClass("hide");
            })
        }
我们为这个导出按钮再次绑定了一个ajax事件
        function import_data_again() {

            $("#confirm_import_data_new").bind("click",function () {
                    var check_id = [];
                    $("input[type='checkbox']:checked").each(function(i){
                        check_id[i] =$(this).val();
                    });
                check_id = JSON.stringify(check_id)
                $.ajax({
                    url:"/zhaoshebei/import_func/?p={{ username }}",
                    type:"post",
                    data:{
                        "import_select_list":check_id,
                    },
                    success:function (data) {
{#                        alert(data)#}
                        window.location.href = "/zhaoshebei/big_file_download/?file=" + data
                    }
                })
            })
        }


后台拿到数据后,把数据从数据库读取出来,然后写到excel中,然后把文件对象发给前端
@outer
def import_func(request):
    method = request.method.lower()
    if method == "post":
        # print(request.POST)
        username = request.GET.get("p")
        import_select_list = request.POST.get("import_select_list")
        s = ""
        import_select_list = json.loads(import_select_list)
        l = len(import_select_list)
        # print(import_select_list)
        if l == 1:
            list_obj = models.device_table.objects.filter(Q(device_user__user_name=username) & Q(device_status="{arg}".format(arg=import_select_list[0])))
        elif l == 2:
            list_obj = models.device_table.objects.filter(Q(device_user__user_name=username) & (Q(device_status="{arg1}".format(arg1=import_select_list[0])) | Q(device_status="{arg2}".format(arg2=import_select_list[1]))))
        elif l == 3:
            list_obj = models.device_table.objects.filter(Q(device_user__user_name=username))
        else:
            list_obj = models.device_table.objects.all(Q(device_user__user_name=username))


        import urllib
        import_time = time.strftime("%Y_%m_%d_%H_%M_%S",time.localtime())
        filename = import_time + ".xlsx"
        file = os.path.join("static","file",filename)

        workbook = xlsxwriter.Workbook(file)
        worksheet = workbook.add_worksheet(name="设备管理")
        row = 0
        top = workbook.add_format(
            {'border': 1, 'align': 'center', 'bg_color': 'cccccc', 'font_size': 13, 'bold': True})  # 创建标题名称及背景颜色
        top_list = [
            '所属部门',
            '资产编码',
            '资产名称',
            '设备状态',
            '资产SN码',
            '资产位置',
            '资产备注',
            '责任人'
        ]  # 内容
        c = 0
        for i in top_list:

            worksheet.write(row,c,i,top)
            c += 1
        start_row = 1
        for data in list_obj.values_list("device_partment","device_id","device_name","device_status","device_sn","device_position","device_remark","device_user__user_name"):
            data = list(data)
            if data[3] == "lost":
                data[3] = "丢失"
                # print(type(data), type(data[3]))
            elif data[3] == "ok":
                # print(type(data), type(data[3]))
                data[3] = "正常"
            else:
                # print(type(data),type(data[3]))
                data[3] = "退库"
            worksheet.write(start_row,0,data[0])
            worksheet.write(start_row,1,data[1])
            worksheet.write(start_row,2,data[2])
            worksheet.write(start_row,3,data[3])
            worksheet.write(start_row,4,data[4])
            worksheet.write(start_row,5,data[5])
            worksheet.write(start_row,6,data[6])
            worksheet.write(start_row,7,data[7])
            start_row += 1
        workbook.close()

        # response = big_file_download(request)
        return HttpResponse(file)
前端拿到文件对象后,访问下载的函数,实现下载

最后在看下下载的函数
def big_file_download(request):
    # do something...
    def file_iterator(file_name, chunk_size=512):
        with open(file_name,"rb") as f:
            while True:
                c = f.read(chunk_size)
                if c:
                    yield c
                else:
                    break

    the_file_name = request.GET.get("file")
    response = StreamingHttpResponse(file_iterator(the_file_name))
    response['Content-Type'] = 'application/octet-stream'
    response['Content-Disposition'] = 'attachment;filename="{0}"'.format(the_file_name)
    return response
这里我们在后端拿数据的时候用到model的Q查询
        if l == 1:
            list_obj = models.device_table.objects.filter(Q(device_user__user_name=username) & Q(device_status="{arg}".format(arg=import_select_list[0])))
        elif l == 2:
            list_obj = models.device_table.objects.filter(Q(device_user__user_name=username) & (Q(device_status="{arg1}".format(arg1=import_select_list[0])) | Q(device_status="{arg2}".format(arg2=import_select_list[1]))))
        elif l == 3:
            list_obj = models.device_table.objects.filter(Q(device_user__user_name=username))
        else:
            list_obj = models.device_table.objects.all(Q(device_user__user_name=username))
这里要注意括号的运用,
注销函数的后台实现


 浙公网安备 33010602011771号