Vue基础知识
Attribute v-bind
<script setup> import { ref } from 'vue' const titleClass = ref('title') </script> <template> <h1 :class="titleClass">Make me red</h1> <!-- 此处添加一个动态 class 绑定 --> </template> <style> .title { color: red; } </style>
titleClass是一个类,它指向对象title。把这个类绑定到h1标签上,在最后为title的颜色属性赋值。绑定用的是v-bind,简写为:
class是规定好的HTML标签属性
事件监听 v-on
<script setup> import { ref } from 'vue' const count = ref(0) function increment(){ count.value-- } </script> <template> <!-- 使此按钮生效 --> <button @click="increment">Count is: {{ count }}</button> </template>
把button用v-on:click监听,简写为@,监听click事件.
表单绑定 v-model
把函数和展示绑定在一起
<script setup> import { ref } from 'vue' const text = ref('') function onInput(e) { text.value = e.target.value } </script> <template> <input :value="text" @input="onInput" placeholder="Type here"> <p>{{ text }}</p> </template>
把onInput函数和text对象绑定在一起
<script setup> import { ref } from 'vue' const text = ref('') </script> <template> <input v-model="text" placeholder="Type here"> <p>{{ text }}</p> </template>
条件渲染v-if,v-else
给组件加上逻辑关系来渲染
<script setup> import { ref } from 'vue' const awesome = ref(true) function toggle() { awesome.value = !awesome.value } </script> <template> <button @click="toggle">Toggle</button> <h1 v-if="awesome">Vue is awesome!</h1> <h1 v-else>Oh no 😢</h1> </template>
这样实现有条件的渲染组件
循环渲染v-for
<script setup> import { ref } from 'vue' // 给每个 todo 对象一个唯一的 id let id = 0 const newTodo = ref('') const todos = ref([ { id: id++, text: 'Learn HTML' }, { id: id++, text: 'Learn JavaScript' }, { id: id++, text: 'Learn Vue' } ]) function addTodo() { todos.value.push({ id: id++, text: newTodo.value }) newTodo.value = '' } function removeTodo(todo) { todos.value = todos.value.filter((t) => t !== todo) } </script> <template> <form @submit.prevent="addTodo"> <input v-model="newTodo" required placeholder="new todo"> <button>Add Todo</button> </form> <ul> <li v-for="todo in todos" :key="todo.id"> {{ todo.text }} <button @click="removeTodo(todo)">X</button> </li> </ul> </template>
对todos进行循环渲染,并且把标签<li>的key绑定到id上
计算属性computed()
<script setup> import { ref, computed } from 'vue' let id = 0 const newTodo = ref('') const hideCompleted = ref(false) const todos = ref([ { id: id++, text: 'Learn HTML', done: true }, { id: id++, text: 'Learn JavaScript', done: true }, { id: id++, text: 'Learn Vue', done: false } ]) const filteredTodos = computed(() => { return hideCompleted.value ? todos.value.filter((t) => !t.done) : todos.value }) function addTodo() { todos.value.push({ id: id++, text: newTodo.value, done: false }) newTodo.value = '' } function removeTodo(todo) { todos.value = todos.value.filter((t) => t !== todo) } </script> <template> <form @submit.prevent="addTodo"> <input v-model="newTodo" required placeholder="new todo"> <button>Add Todo</button> </form> <ul> <li v-for="todo in filteredTodos" :key="todo.id"> <input type="checkbox" v-model="todo.done"> <span :class="{ done: todo.done }">{{ todo.text }}</span> <button @click="removeTodo(todo)">X</button> </li> </ul> <button @click="hideCompleted = !hideCompleted"> {{ hideCompleted ? 'Show all' : 'Hide completed' }} </button> </template> <style> .done { text-decoration: line-through; } </style>
我个人的理解是,本来要隐藏这个done的任务,是需要一个函数来计算是不是完成了,比如
function filteredTodos() { return hideCompleted.value ? todos.value.filter((t) => !t.done) : todos.value }
这样的话,在每次我点击隐藏按钮的时候,都要计算一遍过滤的数组
其实这个过滤器filter,并没有删掉数组中的元素,只是返回了一个经过过滤的子数组
如果我采用computed(),这实质上是一个属性,也就是一种vue提供的数据格式。
const filteredTodos = computed(() => { return hideCompleted.value ? todos.value.filter((t) => !t.done) : todos.value })
用computed()的话,来定义一个量,其括号里面放的其实还是函数内的语句,但问题在于
- 这个不是函数,而是一个量,像const int b;中的b
- 当这其中的值不变化,不需要重新调用computed中的函数
What that means? 意思就是如果我采用一个函数,每次我点击隐藏按钮的时候,都要计算一遍过滤的数组。而采用computed就不需要了,如果我没有改变任务是否完成(即todos数组的值),我点击按钮得到的值是上一次缓存下来的
模板引用
<p ref="pElementRef">hello</p>
声明一个指向DOM元素的ref,这是一种特殊的ref,要想访问它,我们需要声明一个同名的ref
const pElementRef = ref(null)
使用null进行初始化,是因为<script setup>执行的时候,后面模板中的DOM还未渲染。因此要采用函数来使这部分代码在组件挂载之后再执行
生命周期
使用onMounted()来实现在组件挂载之后再执行其内部的代码
<script setup> import { ref, onMounted } from 'vue' const pElementRef = ref(null) onMounted(() => { pElementRef.value.textContent = 'mounted!' }) </script> <template> <p ref="pElementRef">Hello</p> </template>
在这里,textContent是一种DOM属性,是规定好的,其他规定好的DOM属性
侦听器watch()
<script setup> import { ref, watch } from 'vue' const todoId = ref(1) const todoData = ref(null) async function fetchData() { todoData.value = null const res = await fetch( `https://jsonplaceholder.typicode.com/todos/${todoId.value}` ) todoData.value = await res.json() } fetchData() watch(todoId, fetchData) </script> <template> <p>Todo id: {{ todoId }}</p> <button @click="todoId++" :disabled="!todoData">Fetch next todo</button> <p v-if="!todoData">Loading...</p> <pre v-else>{{ todoData }}</pre> </template>
对于这段代码,watch()在todoId变化时调用了fetchData(),实现监听。
此处,fetchData()的作用是每次清空todoData的值,并且抓取这段传输的json数据显示出来,并赋值给todoData
子组件
vue的nb之处之一在于嵌套组件
比如我有一个文件ChildComp.vue,是我写好的一个组件
我想在App.vue中调用它作为一个小组件
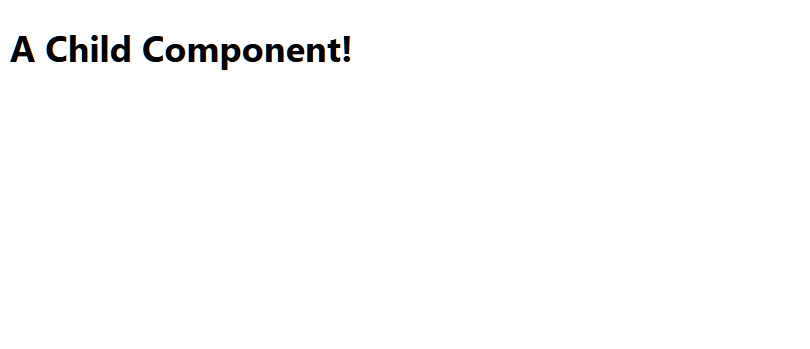
<!-- ChildComp.vue --> <template> <h2>A Child Component!</h2> </template>
<!-- App.vue --> <script setup> import ChildComp from './ChildComp.vue' </script> <template> <ChildComp /> </template>
渲染App.vue的效果:
子组件的参数Props
和其他组件(button,form)等一样,vue的子组件也支持attributes,可以用v-bind进行绑定。不同的是,子组件有何attributes需要自己定义。
attributes是指,比如button有type,img有src,是规定好的HTML标签属性
<!-- ChildComp.vue --> <script setup> const props = defineProps({ msg: String }) </script> <template> <h2>{{ msg || 'No props passed yet' }}</h2> </template>
props中就是定义好的属性,此处有一个msg
属性是对于调用这个子组件的父组件而言的。在父组件眼里,这个msg是一个属性。而对于子组件内部,msg是一个参数(变量)
<!-- App.vue --> <script setup> import { ref } from 'vue' import ChildComp from './ChildComp.vue' const greeting = ref('Hello from parent') </script> <template> <ChildComp :msg="greeting"/> </template>
此处通过:(即v-bind)把msg属性赋值为greeting。如果子组件中没有msg,就会报错
子组件定义事件Emit
和其他组件(button,form)等一样,vue的子组件也支持事件,可以用v-on进行绑定。不同的是,子组件有何事件需要自己定义。
事件是指,比如button有click,form有submit,是规定好的HTML响应事件
<!-- ChildComp.vue --> <script setup> const emit = defineEmits(['response']) emit('response', 'hello from child') </script> <template> <h2>Child component</h2> </template>
defineEmits是规定的函数,注意到其中的参数其实是一个数组,意味着你可以定义多个事件,like this
<!-- ChildComp.vue --> <script setup> const emit = defineEmits(['response','update']) emit('response', 'hello from child') emit('update', 'hello') </script> <template> <h2>Child component</h2> </template>
然后在父组件中监听事件(不是watch,是v-on)
<!-- App.vue --> <script setup> import { ref } from 'vue' import ChildComp from './ChildComp.vue' const childMsg = ref('No child msg yet') </script> <template> <ChildComp @update="(msg) => childMsg = msg" /> <p>{{ childMsg }}</p> </template>
插槽slot
在父组件中,调用子组件的时候插入内容
<!-- App.vue --> <script setup> import { ref } from 'vue' import ChildComp from './ChildComp.vue' const msg = ref('from parent') </script> <template> <ChildComp>Message: {{ msg }}</ChildComp> </template>
这时候,其实如同<p>text</p>这种,在中间显示一些值。但我们自己写的组件需要在子组件中进行定义。
<!-- ChildComp.vue --> <template> <slot>Fallback content</slot> </template>


【推荐】国内首个AI IDE,深度理解中文开发场景,立即下载体验Trae
【推荐】编程新体验,更懂你的AI,立即体验豆包MarsCode编程助手
【推荐】抖音旗下AI助手豆包,你的智能百科全书,全免费不限次数
【推荐】轻量又高性能的 SSH 工具 IShell:AI 加持,快人一步
· 全程不用写代码,我用AI程序员写了一个飞机大战
· DeepSeek 开源周回顾「GitHub 热点速览」
· 记一次.NET内存居高不下排查解决与启示
· MongoDB 8.0这个新功能碉堡了,比商业数据库还牛
· .NET10 - 预览版1新功能体验(一)