centos7 只需两步安装rabbitmq
# yum -y install rabbitmq-server
# systemctl start rabbitmq-server  && systemctl enable rabbitmq-server

------------------------------------------------------------------------------

参考内容


参考https://computingforgeeks.com/installing-rabbitmq-on-centos-6-centos-7/

添加用户
# rabbitmqctl add_user admin NUaiMe0k
Adding user "admin" ...
# rabbitmqctl set_user_tags admin administrator
# rabbitmqctl list_users
Listing users ...
admin [administrator]
guest [administrator]
Delete User:
rabbitmqctl delete_user user
Change User Password:
rabbitmqctl change_password user strongpassword
Add virtualhost:
rabbitmqctl add_vhost /my_vhost
List virtualhosts:
rabbitmqctl list_vhosts
Delete virtualhost:
rabbitmqctl delete_vhost /my_vhost
Grant user permissions for vhost:
rabbitmqctl set_permissions -p /my_vhost user ".*" ".*" ".*"
List vhost permissions:
rabbitmqctl list_permissions -p /my_vhost
To list user permissions:
rabbitmqctl list_user_permissions user
Delete user permissions:
rabbitmqctl clear_permissions -p /my_vhost user
nable RabbitMQ UI
You can enable Management Plugin to use a web-based interface to administer RabbitMQ.
# rabbitmq-plugins enable rabbitmq_management
# systemctl restart rabbitmq-server
 or for CentOS 6:
# service rabbitmq-server restart
Open ports on the firewall:
# firewall-cmd --add-port={4369/tcp,25672}/tcp --permanent
With Iptables:
# iptables -A INPUT -p tcp -m tcp --dport 4369 -j ACCEPT
# iptables -A INPUT -p tcp -m tcp --dport 25672 -j ACCEPT
==========================================================================
参考 https://www.howtoforge.com/tutorial/how-to-install-rabbitmq-server-on-centos-7/
In this tutorial, we will install RabbitMQ on CentOS 7 server.
Prerequisite
- Minimal CentOS 7 server
- Root privileges. This guide is written as the root user, if you are logged in as sudo user, run sudo -i.
Update Base System
Before installing any package it is recommended that you update the packages and repository using the following command.
yum -y updateOnce your system is updated, proceed further to install Erlang.
Install Erlang
RabbitMQ is written in Erlang Language, in this tutorial we will install the latest version of Erlang into the server. Erlang is not available in default YUM repository, hence you will need to install EPEL repository. Run the following command for same.
yum -y install epel-releaseyum -y updateNow install Erlang using following command.
yum -y install erlang socatYou can now check the Erlang version using the following command.
erl -versionYou will get the following output.
[root@liptan-pc ~]# erl -version
Erlang (ASYNC_THREADS,HIPE) (BEAM) emulator version 5.10.4
To switch to Erlang shell, you can type the following command.
erlThe shell will change and you will get the following output.
Erlang R16B03-1 (erts-5.10.4) [source] [64-bit] [async-threads:10] [hipe] [kernel-poll:false]

Eshell V5.10.4  (abort with ^G)
1>
You can exit from the shell by pressing ctrl + C twice. Erlang is now installed on your system, you can now proceed to install RabbitMQ.
Install RabbitMQ
RabbitMQ provides RPM package for enterprise Linux systems which are precompiled and can be installed directly. The only required dependency was to install Erlang into the system. As we have installed Erlang we can proceed further to download RabbitMQ. Download the Erlang RPM package by running.
wget https://www.rabbitmq.com/releases/rabbitmq-server/v3.6.10/rabbitmq-server-3.6.10-1.el7.noarch.rpmIf you do not have wget installed, you can run yum -y install wget. You can always find the link to the latest version of RabbitMQ download page.
Import the GPG key by running:
rpm --import https://www.rabbitmq.com/rabbitmq-release-signing-key.ascInstall the RPM package by running:
rpm -Uvh rabbitmq-server-3.6.10-1.el7.noarch.rpmRabbitMQ is now installed on your system.
Starting RabbitMQ
You can start RabbitMQ server process by running the following command.
systemctl start rabbitmq-serverTo automatically start RabbitMQ at boot time, run the following command.
systemctl enable rabbitmq-serverTo check the status of RabbitMQ server, run:
systemctl status rabbitmq-serverYou should get the following output if started successfully.
? rabbitmq-server.service - RabbitMQ broker
   Loaded: loaded (/usr/lib/systemd/system/rabbitmq-server.service; enabled; vendor preset: disabled)
   Active: active (running) since Sat 2017-07-15 18:59:14 UTC; 3min 22s ago
 Main PID: 29006 (beam.smp)
   Status: "Initialized"
   CGroup: /system.slice/rabbitmq-server.service
           ??29006 /usr/lib64/erlang/erts-9.0/bin/beam.smp -W w -A 64 -P 1048576 -t 5000000 -stbt db -zdbbl 32000 -K tr...
           ??29149 /usr/lib64/erlang/erts-9.0/bin/epmd -daemon
           ??29283 erl_child_setup 1024
           ??29303 inet_gethost 4
           ??29304 inet_gethost 4

Jul 15 18:59:13 centos rabbitmq-server[29006]: Starting broker...
Jul 15 18:59:14 centos rabbitmq-server[29006]: systemd unit for activation check: "rabbitmq-server.service"
Jul 15 18:59:14 centos systemd[1]: Started RabbitMQ broker.
Jul 15 18:59:14 centos rabbitmq-server[29006]: completed with 0 plugins.
Modify Firewall and SELinux Rules
If you have firewalld installed and running, you will have to allow port 8161 through the firewall. Run the following command for same.
firewall-cmd --zone=public --permanent --add-port=4369/tcp
firewall-cmd --zone=public --permanent --add-port=25672/tcp
firewall-cmd --zone=public --permanent --add-port=5671-5672/tcp
firewall-cmd --zone=public --permanent --add-port=15672/tcp
firewall-cmd --zone=public --permanent --add-port=61613-61614/tcp
firewall-cmd --zone=public --permanent --add-port=1883/tcp
firewall-cmd --zone=public --permanent --add-port=8883/tcp
firewall-cmd --reloadIf you have SELinux enabled, you will have to run the following command to allow RabbitMQ service.
setsebool -P nis_enabled 1Access Web Console
Enable RabbitMQ web management console by running:
rabbitmq-plugins enable rabbitmq_managementProvide ownership of RabbitMQ files to the RabbitMQ user by running:
chown -R rabbitmq:rabbitmq /var/lib/rabbitmq/Now you will need to create an administrative user for RabbitMQ web management console. Run the following commands for same.
rabbitmqctl add_user admin StrongPassword
 rabbitmqctl set_user_tags admin administrator
 rabbitmqctl set_permissions -p / admin ".*" ".*" ".*"
Change admin to your preferred username for administrator user. Be sure to change StrongPassword to a very strong password.
To access the administrative panel of RabbitMQ, use your favourite web browser and open the following URL.
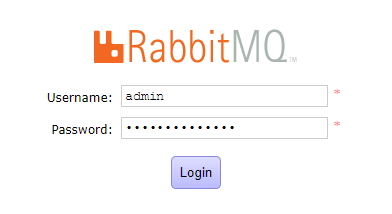
http://Your_Server_IP:15672/You will see following login page.
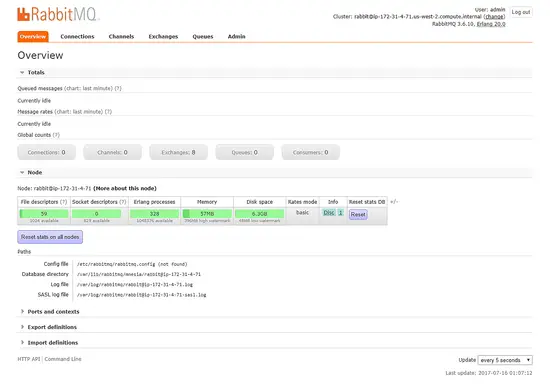
Once you are logged in, you will see the administrative dashboard.
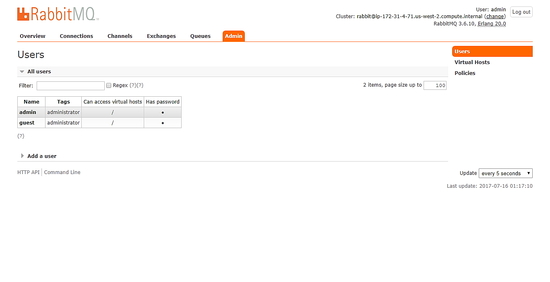
You can find the list of users, virtual hosts, policies at Admin tab of the dashboard. You should delete the Guest user for security considerations.
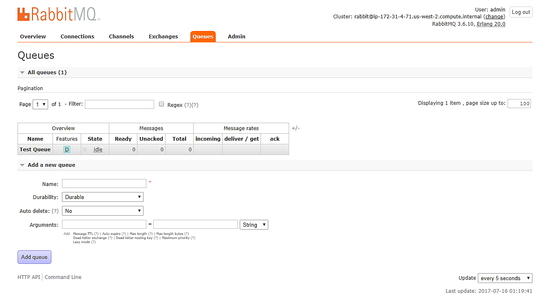
You can find the list of message queues at Queues tab. You can create a new queue or delete an existing one through this interface.
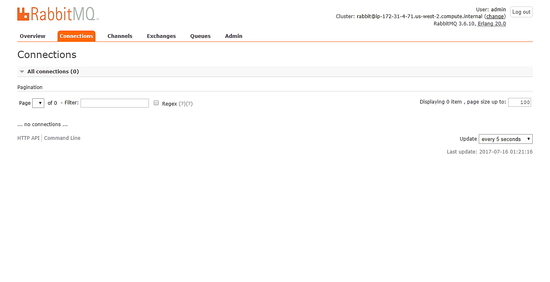
You can find the list of current connection on Connections tab
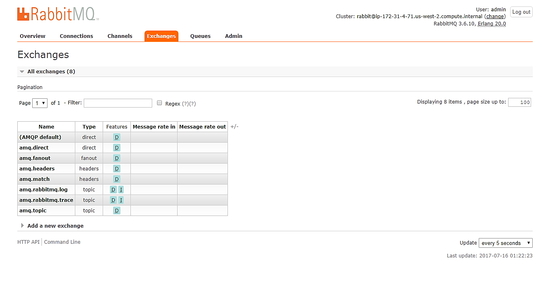
Similarly, you can find the channels and exchanges at their respective tabs.
//////////////整理


参考 https://www.howtoforge.com/tutorial/how-to-install-rabbitmq-server-on-centos-7/#install-erlang


安装erlang

yum -y update

yum -y install epel-release

yum -y update

yum -y install erlang socat

erl -version


[root@liptan-pc ~]# erl -version
Erlang (ASYNC_THREADS,HIPE) (BEAM) emulator version 5.10.4

输入 erl

Erlang R16B03-1 (erts-5.10.4) [source] [64-bit] [async-threads:10] [hipe] [kernel-poll:false]

Eshell V5.10.4  (abort with ^G)
1>
/////////////////////////////////////////////////////////////////////////


安装 RabbitMQ

1:
wget https://www.rabbitmq.com/releases/rabbitmq-server/v3.6.10/rabbitmq-server-3.6.10-

1.el7.noarch.rpm

2: Import the GPG key by running:

rpm --import https://www.rabbitmq.com/rabbitmq-release-signing-key.asc

3:Install the RPM package by running:

rpm -Uvh rabbitmq-server-3.6.10-1.el7.noarch.rpm

Starting RabbitMQ

systemctl start rabbitmq-server

systemctl start rabbitmq-server

systemctl status rabbitmq-server


调整防火墙


firewall-cmd --zone=public --permanent --add-port=4369/tcp
firewall-cmd --zone=public --permanent --add-port=25672/tcp
firewall-cmd --zone=public --permanent --add-port=5671-5672/tcp
firewall-cmd --zone=public --permanent --add-port=15672/tcp
firewall-cmd --zone=public --permanent --add-port=61613-61614/tcp
firewall-cmd --zone=public --permanent --add-port=1883/tcp
firewall-cmd --zone=public --permanent --add-port=8883/tcp

firewall-cmd --reload

setsebool -P nis_enabled 1

启用web Access Web Console

rabbitmq-plugins enable rabbitmq_management


chown -R rabbitmq:rabbitmq /var/lib/rabbitmq/

添加用户
rabbitmqctl add_user admin StrongPassword
 rabbitmqctl set_user_tags admin administrator
 rabbitmqctl set_permissions -p / admin ".*" ".*" ".*"

http://Your_Server_IP:15672/
////////////////////////////////////////////////////////////////////////////////////////////
删除erlang

如果yum install
 的就执行

 yum list installed | grep erlang

 yum remove erlang*    删除所有包

编译安装的需要删除 whereis erlang 找他然后删除
rm -rf /usr/local/erlang/




【推荐】国内首个AI IDE,深度理解中文开发场景,立即下载体验Trae
【推荐】编程新体验,更懂你的AI,立即体验豆包MarsCode编程助手
【推荐】抖音旗下AI助手豆包,你的智能百科全书,全免费不限次数
【推荐】轻量又高性能的 SSH 工具 IShell:AI 加持,快人一步
· 基于Microsoft.Extensions.AI核心库实现RAG应用
· Linux系列:如何用heaptrack跟踪.NET程序的非托管内存泄露
· 开发者必知的日志记录最佳实践
· SQL Server 2025 AI相关能力初探
· Linux系列:如何用 C#调用 C方法造成内存泄露
· Manus爆火,是硬核还是营销?
· 终于写完轮子一部分:tcp代理 了,记录一下
· 别再用vector<bool>了!Google高级工程师:这可能是STL最大的设计失误
· 单元测试从入门到精通
· 震惊!C++程序真的从main开始吗?99%的程序员都答错了
2017-11-29 在文件写入字符串
2017-11-29 eclipse 安装tomcat
2017-11-29 The type javax.servlet.http.HttpServletRequest cannot be resolved. It is indirectly referenced from required .class files
2017-11-29 javac 编译源文件出现"java:1: 需要为 class、interface 或 enum"、" [javac] 锘縫"错误
2017-11-29 Eclipse javax.servlet.jsp.PageContext cannot be resolved to a type 错误解决办法
2017-11-29 Spring/Java error: namespace element 'annotation-config' … on JDK 1.5 and higher