
3.11
今天实现通过安卓连接web后端 最后在mysql数据库添加数据库的操作
在安卓项目中首先在AndroidMainfest.xml中添加链接网络权限,同时允许安卓明文传输所要连接的IP地址
<?xml version="1.0" encoding="utf-8"?>
<manifest xmlns:android="http://schemas.android.com/apk/res/android"
          xmlns:tools="http://schemas.android.com/tools">
<uses-permission android:name="android.permission.INTERNET"/>
    <application
            android:allowBackup="true"
            android:dataExtractionRules="@xml/data_extraction_rules"
            android:fullBackupContent="@xml/backup_rules"
            android:icon="@mipmap/ic_launcher"
            android:label="@string/app_name"
            android:roundIcon="@mipmap/ic_launcher_round"
            android:supportsRtl="true"
            android:theme="@style/Theme.MySqlWeb"
            tools:targetApi="31"
            android:networkSecurityConfig="@xml/network_security_config">
        <activity
                android:name=".MainActivity"
                android:exported="true">
            <intent-filter>
                <action android:name="android.intent.action.MAIN"/>

                <category android:name="android.intent.category.LAUNCHER"/>
            </intent-filter>
        </activity>
    </application>

</manifest>
然后在xml配置文件中添加上文所提到到的允许明文传输的文件
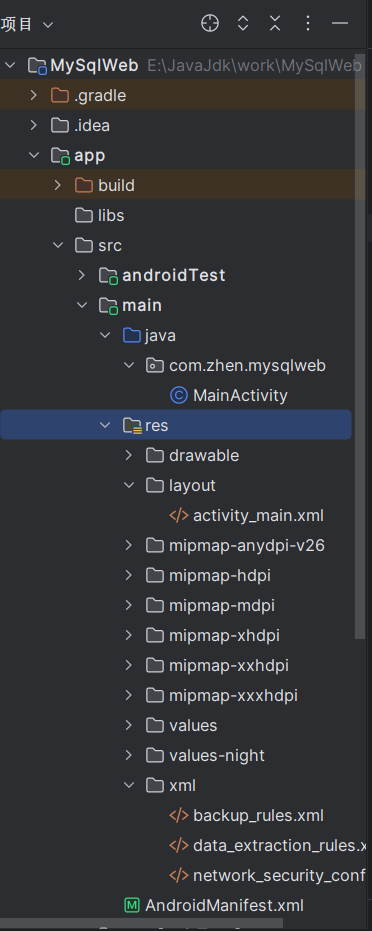
上述图片中xml文件夹的最后一个文件
<?xml version="1.0" encoding="utf-8"?>
<!-- 解决 Android P 禁用 http 请求的问题 -->
<network-security-config>
    <!-- 允许明文通信 -->
    <base-config cleartextTrafficPermitted="true" />
</network-security-config>
然后在布局中添加 用户名 年龄的文本框和按钮
<?xml version="1.0" encoding="utf-8"?>
<androidx.appcompat.widget.LinearLayoutCompat
        xmlns:android="http://schemas.android.com/apk/res/android"
        xmlns:tools="http://schemas.android.com/tools"
        xmlns:app="http://schemas.android.com/apk/res-auto"
        android:layout_width="match_parent"
        android:layout_height="match_parent"
        tools:context=".MainActivity"
        android:orientation="vertical">

    <LinearLayout
            android:layout_width="match_parent"
            android:layout_height="wrap_content"
            android:orientation="horizontal">
        <TextView
                android:layout_width="wrap_content"
                android:layout_height="wrap_content"
                android:textStyle="bold"
                android:textColor="#00f"
                android:text="用户名"/>
        <EditText
                android:id="@+id/name"
                android:layout_width="match_parent"
                android:layout_height="wrap_content"
                android:textStyle="bold"
                android:textColor="#00f"
                android:hint="请输入用户名"/>
    </LinearLayout>
    <LinearLayout android:layout_width="match_parent"
                  android:layout_height="wrap_content"
                  android:orientation="horizontal">
        <TextView
                android:layout_width="wrap_content"
                android:layout_height="wrap_content"
                android:textStyle="bold"
                android:textColor="#00f"
                android:text="年 龄"/>
        <EditText
                android:id="@+id/age"
                android:layout_width="match_parent"
                android:layout_height="wrap_content"
                android:textStyle="bold"
                android:inputType="number"
                android:textColor="#00f"
                android:hint="请输入年龄"/>
    </LinearLayout>
    <Button
            android:text="添加"
            android:layout_width="wrap_content"
            android:layout_height="wrap_content"
            android:layout_gravity="center"
            android:id="@+id/button"/>
</androidx.appcompat.widget.LinearLayoutCompat>
然后再MainActivity文件中连接后端 同时接受文本框的值 为按钮定义点击事件 传递给后端
package com.zhen.mysqlweb;

import android.view.View;
import android.widget.Button;
import android.widget.EditText;
import android.widget.Toast;
import androidx.appcompat.app.AppCompatActivity;
import android.os.Bundle;
import okhttp3.*;

public class MainActivity extends AppCompatActivity {
private EditText nameEdit;
private EditText ageEdit;
    @Override
    protected void onCreate(Bundle savedInstanceState) {
        super.onCreate(savedInstanceState);
        setContentView(R.layout.activity_main);
        Button button = findViewById(R.id.button);
        nameEdit = findViewById(R.id.name);
        ageEdit=findViewById(R.id.age);
        button.setOnClickListener(new View.OnClickListener() {
            @Override
            public void onClick(View view) {
                new Thread(new Runnable() {
                    @Override
                    public void run() {
                        try {
                            String name=nameEdit.getText().toString();
                            int age=Integer.parseInt(ageEdit.getText().toString());
                            String json = "{\n" +
                                    "\t\"name\": \""+name+"\",\n" +
                                    " \t\"age\":" +age+"\n" +
                                    "}";
                            OkHttpClient client = new OkHttpClient();//创建http客户端
                            Request request = new Request.Builder()
                                    .url("http://10.99.113.50:8080/user/add")
                                    .post(RequestBody.create(MediaType.parse("application/json"), json))
                                    .build();//创造http请求
                            //回复
                            Response response = client.newCall(request).execute();//execute表示执行
                            runOnUiThread(() -> Toast.makeText(MainActivity.this, "请求成功", Toast.LENGTH_SHORT).show());

                        } catch (Exception e) {
                            e.printStackTrace();
                            runOnUiThread(new Runnable() {
                                @Override
                                public void run() {
                                    Toast.makeText(MainActivity.this, "网络连接失败", Toast.LENGTH_SHORT).show();
                                }
                            });
                        }
                    }
                }).start();
            }
        });
    }
}
要注意这里的10.99.113.50是我本地电脑的ip地址,你需要替换成自己的,需要在控制台中输入ipconfig查看自己本地电脑的ip地址,这也就意味着你再运行项目时是需要联网的。这样安卓端的代码就实现了,然后通过springboot后端写一个接口传递数据,通过controller service mapper三层架构处理数据传递给mysql数据库处理请求,最终实现数据库数据的增。

