vite+vue3+ts+pinis搭建项目框架
一:使用 vite 快速创建脚手架
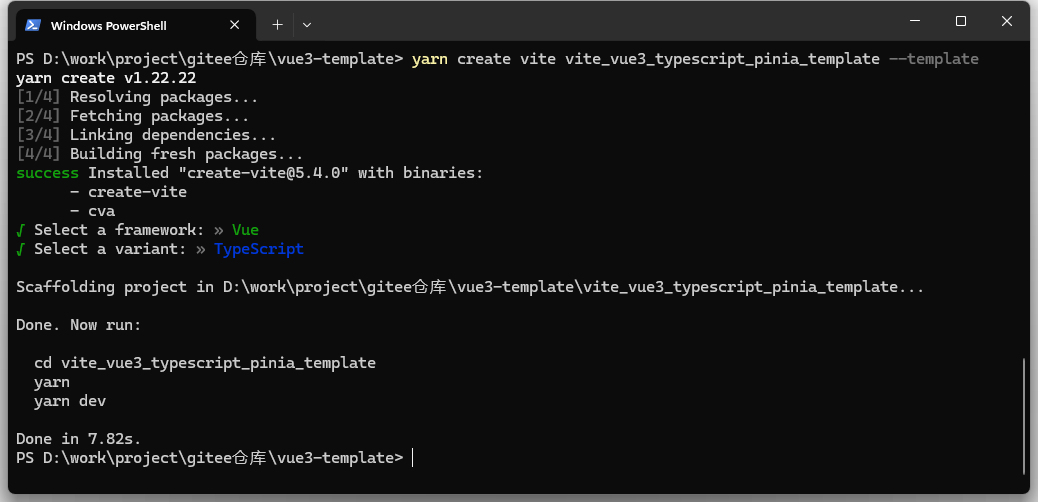
1.创建新项目
命令行输入后,依次选择vue -> typescript。
1 yarn create vite vite_vue3_typescript_pinia_template --template
2.cd 到项目文件,安装依赖,启动项目
1 # 进入项目文件夹
2 cd vite_vue3_typescript_pinia_template
3 # 安装依赖
4 yarn
5 # 启动
6 yarn dev
![]()

二:约束代码风格
1.安装Eslint
 1 # eslint 安装
 2 yarn add eslint --dev
 3 # eslint 插件安装
 4 yarn add eslint-plugin-vue --dev
 5
 6 yarn add @typescript-eslint/eslint-plugin --dev
 7
 8 yarn add eslint-plugin-prettier --dev
 9
10 # typescript parser
11 yarn add @typescript-eslint/parser --dev
2.项目下新建 .eslintrc.js
配置 eslint 校验规则:
  1 module.exports = {
  2   root: true,
  3   env: {
  4     browser: true,
  5     node: true,
  6     es2021: true,
  7   },
  8   parser: "vue-eslint-parser",
  9   extends: [
 10     "eslint:recommended",
 11     "plugin:vue/vue3-recommended",
 12     "plugin:@typescript-eslint/recommended",
 13     "plugin:prettier/recommended",
 14     // eslint-config-prettier 的缩写
 15     "prettier",
 16   ],
 17   parserOptions: {
 18     ecmaVersion: 12,
 19     parser: "@typescript-eslint/parser",
 20     sourceType: "module",
 21     ecmaFeatures: {
 22       jsx: true,
 23     },
 24   },
 25   // eslint-plugin-vue @typescript-eslint/eslint-plugin eslint-plugin-prettier的缩写
 26   plugins: ["vue", "@typescript-eslint", "prettier"],
 27   rules: {
 28     "@typescript-eslint/ban-ts-ignore": "off",
 29     "@typescript-eslint/no-unused-vars": "off",
 30     "@typescript-eslint/explicit-function-return-type": "off",
 31     "@typescript-eslint/no-explicit-any": "off",
 32     "@typescript-eslint/no-var-requires": "off",
 33     "@typescript-eslint/no-empty-function": "off",
 34     "@typescript-eslint/no-use-before-define": "off",
 35     "@typescript-eslint/ban-ts-comment": "off",
 36     "@typescript-eslint/ban-types": "off",
 37     "@typescript-eslint/no-non-null-assertion": "off",
 38     "@typescript-eslint/explicit-module-boundary-types": "off",
 39     "no-var": "error",
 40     "prettier/prettier": "error",
 41     // 禁止出现console
 42     "no-console": "warn",
 43     // 禁用debugger
 44     "no-debugger": "warn",
 45     // 禁止出现重复的 case 标签
 46     "no-duplicate-case": "warn",
 47     // 禁止出现空语句块
 48     "no-empty": "warn",
 49     // 禁止不必要的括号
 50     "no-extra-parens": "off",
 51     // 禁止对 function 声明重新赋值
 52     "no-func-assign": "warn",
 53     // 禁止在 return、throw、continue 和 break 语句之后出现不可达代码
 54     "no-unreachable": "warn",
 55     // 强制所有控制语句使用一致的括号风格
 56     curly: "warn",
 57     // 要求 switch 语句中有 default 分支
 58     "default-case": "warn",
 59     // 强制尽可能地使用点号
 60     "dot-notation": "warn",
 61     // 要求使用 === 和 !==
 62     eqeqeq: "warn",
 63     // 禁止 if 语句中 return 语句之后有 else 块
 64     "no-else-return": "warn",
 65     // 禁止出现空函数
 66     "no-empty-function": "warn",
 67     // 禁用不必要的嵌套块
 68     "no-lone-blocks": "warn",
 69     // 禁止使用多个空格
 70     "no-multi-spaces": "warn",
 71     // 禁止多次声明同一变量
 72     "no-redeclare": "warn",
 73     // 禁止在 return 语句中使用赋值语句
 74     "no-return-assign": "warn",
 75     // 禁用不必要的 return await
 76     "no-return-await": "warn",
 77     // 禁止自我赋值
 78     "no-self-assign": "warn",
 79     // 禁止自身比较
 80     "no-self-compare": "warn",
 81     // 禁止不必要的 catch 子句
 82     "no-useless-catch": "warn",
 83     // 禁止多余的 return 语句
 84     "no-useless-return": "warn",
 85     // 禁止变量声明与外层作用域的变量同名
 86     "no-shadow": "off",
 87     // 允许delete变量
 88     "no-delete-var": "off",
 89     // 强制数组方括号中使用一致的空格
 90     "array-bracket-spacing": "warn",
 91     // 强制在代码块中使用一致的大括号风格
 92     "brace-style": "warn",
 93     // 强制使用骆驼拼写法命名约定
 94     camelcase: "warn",
 95     // 强制使用一致的缩进
 96     indent: "off",
 97     // 强制在 JSX 属性中一致地使用双引号或单引号
 98     // 'jsx-quotes': 'warn',
 99     // 强制可嵌套的块的最大深度4
100     "max-depth": "warn",
101     // 强制最大行数 300
102     // "max-lines": ["warn", { "max": 1200 }],
103     // 强制函数最大代码行数 50
104     // 'max-lines-per-function': ['warn', { max: 70 }],
105     // 强制函数块最多允许的的语句数量20
106     "max-statements": ["warn", 100],
107     // 强制回调函数最大嵌套深度
108     "max-nested-callbacks": ["warn", 3],
109     // 强制函数定义中最多允许的参数数量
110     "max-params": ["warn", 3],
111     // 强制每一行中所允许的最大语句数量
112     "max-statements-per-line": ["warn", { max: 1 }],
113     // 要求方法链中每个调用都有一个换行符
114     "newline-per-chained-call": ["warn", { ignoreChainWithDepth: 3 }],
115     // 禁止 if 作为唯一的语句出现在 else 语句中
116     "no-lonely-if": "warn",
117     // 禁止空格和 tab 的混合缩进
118     "no-mixed-spaces-and-tabs": "warn",
119     // 禁止出现多行空行
120     "no-multiple-empty-lines": "warn",
121     // 禁止出现;
122     semi: ["warn", "never"],
123     // 强制在块之前使用一致的空格
124     "space-before-blocks": "warn",
125     // 强制在 function的左括号之前使用一致的空格
126     // 'space-before-function-paren': ['warn', 'never'],
127     // 强制在圆括号内使用一致的空格
128     "space-in-parens": "warn",
129     // 要求操作符周围有空格
130     "space-infix-ops": "warn",
131     // 强制在一元操作符前后使用一致的空格
132     "space-unary-ops": "warn",
133     // 强制在注释中 // 或 /* 使用一致的空格
134     // "spaced-comment": "warn",
135     // 强制在 switch 的冒号左右有空格
136     "switch-colon-spacing": "warn",
137     // 强制箭头函数的箭头前后使用一致的空格
138     "arrow-spacing": "warn",
139     "no-var": "warn",
140     "prefer-const": "warn",
141     "prefer-rest-params": "warn",
142     "no-useless-escape": "warn",
143     "no-irregular-whitespace": "warn",
144     "no-prototype-builtins": "warn",
145     "no-fallthrough": "warn",
146     "no-extra-boolean-cast": "warn",
147     "no-case-declarations": "warn",
148     "no-async-promise-executor": "warn",
149   },
150   globals: {
151     defineProps: "readonly",
152     defineEmits: "readonly",
153     defineExpose: "readonly",
154     withDefaults: "readonly",
155   },
156 };
3.项目下新建 .eslintignore
1 # eslint 忽略检查 (根据项目需要自行添加)
2 node_modules
3 dist
4.安装prettier
1 # 安装 prettier
2 yarn add prettier --dev
5.解决 eslint 和 prettier 冲突
解决 ESLint 中的样式规范和 prettier 中样式规范的冲突,以 prettier 的样式规范为准,使 ESLint 中的样式规范自动失效。
1 # 安装插件 eslint-config-prettier
2 yarn add eslint-config-prettier --dev
6.项目下新建.prettierrc.js
 1 module.exports = {
 2   tabWidth: 2,
 3   jsxSingleQuote: true,
 4   jsxBracketSameLine: true,
 5   printWidth: 100,
 6   singleQuote: true,
 7   semi: false,
 8   overrides: [
 9     {
10       files: "*.json",
11       options: {
12         printWidth: 200,
13       },
14     },
15   ],
16   arrowParens: "always",
17 };
7.项目下新建.prettierignore
1 # 忽略格式化文件 (根据项目需要自行添加)
2 node_modules
3 dist
8.package.json 添加配置:
1 {
2   "script": {
3     "lint": "eslint src --fix --ext .ts,.tsx,.vue,.js,.jsx",
4     "prettier": "prettier --write ."
5   }
6 }
9.配置文件引用别名 alias
直接修改 vite.config.ts 文件配置:
 1 import { defineConfig } from 'vite'
 2 import vue from '@vitejs/plugin-vue'
 3 import path from 'path'
 4
 5 // https://vitejs.dev/config/
 6 export default defineConfig({
 7   plugins: [vue()],
 8   resolve: {
 9     alias: {
10       '@': path.resolve(__dirname, 'src'),
11     },
12   },
13 })
如果出现path报红,则需安装@types/node。
1 yarn add @types/node --dev
修改 tsconfig.app.json
 1 {
 2   "compilerOptions": {
 3     "target": "esnext",
 4     "useDefineForClassFields": true,
 5     "module": "esnext",
 6     "moduleResolution": "node",
 7     "strict": true,
 8     "jsx": "preserve",
 9     "sourceMap": true,
10     "resolveJsonModule": true,
11     "isolatedModules": true,
12     "esModuleInterop": true,
13     "lib": ["esnext", "dom"],
14     "skipLibCheck": true,
15     "baseUrl": ".",
16     "paths": {
17       "@/*":["src/*"]
18     },
19     "allowJs": true,
20     "noImplicitAny": false,
21   },
22   "include": ["src/**/*.ts", "src/**/*.d.ts", "src/**/*.tsx", "src/**/*.vue"]
23 }
三:配置scss
1.安装scss
1 yarn add dart-sass --dev
2 yarn add sass --dev
2.配置全局 scss 样式文件
在 src/assets 下新增 style 文件夹,用于存放全局样式文件。
新建 global.scss, 设置全局样式 ,并设置一个测试的颜色变量:
1 /*---- 全局样式文件 ----*/
2 $test-color: red;
全局样式文件在main.ts中引入一下
 1 import { createApp } from 'vue'
 2 import App from './App.vue'
 3
 4 // 公共样式引入
 5 import './assets/style/reset.scss'
 6 import './assets/style/global.scss'
 7
 8 const app = createApp(App)
 9
10 app.mount('#app')
四:环境变量配置
vite 提供了两种模式:具有开发服务器的开发模式(development)和生产模式(production)
1 # 开发环境
2 VITE_ENV = development
3 VITE_APP_WEB_URL= 'YOUR WEB URL'
1 # 生产环境
2 VITE_ENV = production
3 VITE_APP_WEB_URL= 'YOUR WEB URL'
组件中使用:
1 console.log(import.meta.env.VITE_APP_WEB_URL)
配置package.json,用于打包区分开发环境和生产环境:
1 "build:dev": "vite build --mode development",
2 "build:prod": "vite build --mode production",
五:引入element-plus组件库
1.安装element-ui
# 安装 element
yarn add element-plus
# 安装 element图标包管理器yarn add @element-plus/icons-vue
2.完整引入element组件
在main.ts中可完整引入:
 1 import { createApp } from 'vue'
 2 import App from './App.vue'
 3
 4 // 公共样式引入
 5 import './assets/style/reset.scss'
 6 import './assets/style/global.scss'
 7
 8 // element引入
 9 import ElementPlus from 'element-plus'
10 import "element-plus/theme-chalk/src/message.scss"
11 import locale from 'element-plus/es/locale/lang/zh-cn'
12 import * as ElementPlusIconsVue from '@element-plus/icons-vue'
13
14
15 const app = createApp(App)
16
17 app.use(ElementPlus, { size: 'large', zIndex: 3000, locale })
18
19 app.mount('#app')
20
21 // 全局注册所有el图标
22 for (const [key, component] of Object.entries(ElementPlusIconsVue)) {
23    app.component(key, component)
24 }
3.按需引入element组件
需要安装 unplugin-auto-import 和 unplugin-vue-components 两个插件,其中 unplugin-auto-import 可以在项目中自动导入其他vue依赖库:
# 安装 unplugin-auto-import
yarn add unplugin-auto-import

# 安装 unplugin-vue-components
yarn add unplugin-vue-components
然后在vite.config.ts中配置:
 1 import { defineConfig } from 'vite'
 2 import vue from '@vitejs/plugin-vue'
 3 import path from 'path'
 4 import AutoImport from 'unplugin-auto-import/vite'
 5 import Components from 'unplugin-vue-components/vite'
 6 import { ElementPlusResolver } from 'unplugin-vue-components/resolvers'
 7
 8 // https://vitejs.dev/config/
 9 export default defineConfig({
10   plugins: [
11     vue(),
12     AutoImport({
13       imports: ['vue', 'vue-router'],
14       dts: 'src/auto-import.d.ts',
15       resolvers: [ElementPlusResolver()],
16     }),
17     Components({
18       resolvers: [ElementPlusResolver()],
19     }),
20   ],
21   resolve: {
22     alias: {
23       '@': path.resolve(__dirname, 'src'),
24     },
25   },
26 })
六:路由配置
1.安装路由
1 # 安装路由
2 yarn add vue-router
在 src 文件下新增 router目录,并进入目录新建index.js文件:
 1 import { createRouter, createWebHashHistory, RouteRecordRaw } from 'vue-router'
 2
 3 const routes: RouteRecordRaw[] = [
 4   {
 5     path: '/',
 6     name: 'Login',
 7     component: () => import('@/views/login/Login.vue'),   // 确保页面已创建
 8   },
 9 ]
10
11 const router = createRouter({
12   history: createWebHashHistory(),
13   routes,
14 })
15
16 export default router
在main.ts中引入
 1 import { createApp } from 'vue'
 2 import App from './App.vue'
 3 import router from './router/index'
 4
 5 // 公共样式引入
 6 import './assets/style/reset.scss'
 7 import './assets/style/global.scss'
 8
 9 // element引入
10 // import ElementPlus from 'element-plus'
11 // import "element-plus/theme-chalk/src/message.scss"
12 // import locale from 'element-plus/es/locale/lang/zh-cn'
13 // import * as ElementPlusIconsVue from '@element-plus/icons-vue'
14
15
16 const app = createApp(App)
17
18 app.use(router)
19 // app.use(ElementPlus, { size: 'large', zIndex: 3000, locale })
20
21 app.mount('#app')
22
23 // 全局注册所有el图标
24 // for (const [key, component] of Object.entries(ElementPlusIconsVue)) {
25 //   app.component(key, component)
26 // }
七:统一请求封装
1.安装axios
1 # 安装 axios
2 yarn add axios
3 # 安装 nprogress 用于请求 loading的进度条
4 yarn add nprogress
5 # 类型声明,或者添加一个包含 `declare module 'nprogress'
6 yarn add @types/nprogress --dev
2.nprogress页面进度条组件封装
src下新增utils目录,用于存放工具类封装文件,创建 nprogress.ts
 1 // 页面进度条组件封装
 2 import NProgress from 'nprogress'
 3 import 'nprogress/nprogress.css'
 4 NProgress.configure({ showSpinner: false }) // 显示右上角螺旋加载提示
 5
 6 // NProgress.configure({
 7 //   easing: 'ease', // 动画方式
 8 //   speed: 1000, // 递增进度条的速度
 9 //   showSpinner: false, // 是否显示加载ico
10 //   trickleSpeed: 200, // 自动递增间隔
11 //   minimum: 0.3, // 更改启动时使用的最小百分比
12 //   parent: 'body', //指定进度条的父容器
13 //   template: `<div class="bar" role="bar" :style="{'color': }"><div class="peg"></div></div><div class="spinner" role="spinner"><div class="spinner-icon"></div></div>`
14 // })
15
16 // 打开进度条
17 export const NProgressStart = (color: string = '#5180ee') => {
18   document.getElementsByTagName('body')[0].style.setProperty('--nprogress-background-color', color);
19   NProgress.start()
20 }
21
22 // 关闭进度条
23 export const NProgressDone = () => {
24   NProgress.done()
25 }
3.引入js-cookie,用于存放token
1 # 安装 js-cookie
2 yarn add js-cookie
在src/utils目录下创建auth.js
 1 // token存放到cookie
 2 import Cookies from "js-cookie";
 3 const TokenKey = "vite-vue3-ts-token";  // 设置本项目token名称
 4
 5 export const getToken = () => {
 6   return Cookies.get(TokenKey);
 7 }
 8
 9 export const setToken = (token: string, cookieExpires?: number) => {
10   return Cookies.set(TokenKey, token, { expires: cookieExpires || 1 });
11 }
12
13 export const removeToken = () => {
14   return Cookies.remove(TokenKey);
15 }
4.src下新增api目录,并进入/api创建http.ts及baseUrl.ts
  1 //http.ts
  2 import axios, { InternalAxiosRequestConfig, AxiosResponse } from 'axios'
  3 import { NProgressStart, NProgressDone } from '@/utils/nporgress'
  4 import { BASE_URL } from './baseUrl'
  5 import { useRouter } from 'vue-router'
  6 import { ElMessage } from 'element-plus'
  7 import { getToken, removeToken } from '@/utils/auth'
  8
  9 const router = useRouter()
 10
 11 // 设置请求头和请求路径
 12 axios.defaults.baseURL = BASE_URL
 13 axios.defaults.timeout = 10000
 14 axios.defaults.headers.post['Content-Type'] = 'application/json;charset=UTF-8'
 15 axios.interceptors.request.use(
 16   (config): InternalAxiosRequestConfig<any> => {
 17     const token = getToken()
 18     if (token) {
 19       config.headers.Authorization = token
 20     }
 21     return config
 22   },
 23   (err) => {
 24     return err
 25   }
 26 )
 27 // 响应拦截
 28 axios.interceptors.response.use(
 29   (res): AxiosResponse<any, any> => {
 30     if (res.data.code == 401) {
 31       removeToken()
 32       router.push({
 33         path: '/login'
 34       }).catch(e => console.log(e))
 35     } else if (res.data.code != 200) {
 36       ElMessage({
 37         type: 'error',
 38         message: res.data.msg || '操作失败',
 39       })
 40       console.error(res.data)
 41     }
 42     return res
 43   },
 44   (err) => {
 45     const { status, data } = err.response
 46     ElMessage({
 47       type: 'error',
 48       message: data?.msg || '操作失败',
 49     })
 50     if (status === 401) {
 51       removeToken()
 52       router.push({
 53         path: '/login'
 54       }).catch(e => console.log(e))
 55     }
 56     return err.response // 返回接口返回的错误信息
 57   }
 58 )
 59
 60 interface ResType<T> {
 61   code: number
 62   data?: T
 63   msg: string
 64   err?: string
 65 }
 66 interface Http {
 67   get<T>(url: string, params?: unknown): Promise<ResType<T>>
 68   post<T>(url: string, params?: any): Promise<ResType<T>>
 69   upload<T>(url: string, params: unknown): Promise<ResType<T>>
 70   download(url: string): void
 71 }
 72
 73 const http: Http = {
 74   get(url, params) {
 75     return new Promise((resolve, reject) => {
 76       NProgressStart()
 77       axios
 78         .get(url, { params })
 79         .then((res) => {
 80           NProgressDone()
 81           resolve(res.data)
 82         })
 83         .catch((err) => {
 84           NProgressDone()
 85           reject(err.data)
 86         })
 87     })
 88   },
 89   post(url, params) {
 90     return new Promise((resolve, reject) => {
 91       NProgressStart()
 92       axios
 93         .post(url, JSON.stringify(params))
 94         .then((res) => {
 95           NProgressDone()
 96           resolve(res.data)
 97         })
 98         .catch((err) => {
 99           NProgressDone()
100           reject(err.data)
101         })
102     })
103   },
104   upload(url, params) {
105     return new Promise((resolve, reject) => {
106       NProgressStart()
107       axios
108         .post(url, params, {
109           headers: { 'Content-Type': 'multipart/form-data' },
110         })
111         .then((res) => {
112           NProgressDone()
113           resolve(res.data)
114         })
115         .catch((err) => {
116           NProgressDone()
117           reject(err.data)
118         })
119     })
120   },
121   download(url) {
122     const iframe = document.createElement('iframe')
123     iframe.style.display = 'none'
124     iframe.src = url
125     iframe.onload = function () {
126       document.body.removeChild(iframe)
127     }
128     document.body.appendChild(iframe)
129   },
130 }
131 export default http
1 // baseUrl.ts
2 const baseUrl:any = {
3   development: 'xxxx',
4   production: 'xxxx',
5 }
6
7 export const BASE_URL = baseUrl[import.meta.env.VITE_ENV];
5.请求接口管理
根据模块在 src/api 目录下新建目录及接口文件,例如在 src/api 下新建login目录,用于存放登录模块的请求接口,login目录下分别新增 login.ts 和 types.ts:
login.ts:
 1 import http from '@/api/http'
 2 import * as T from './types'
 3
 4 const loginApi: T.ILoginApi = {
 5   login(params) {
 6     return http.post('/login', params)
 7   }
 8 }
 9 export {
10   loginApi,
11 }
types.ts:
1 export interface ILoginParams {
2   userName: string
3   password: string
4 }
5 export interface ILoginApi {
6   login: (params: ILoginParams) => Promise<any>
7 }
八:状态管理pinia
1.安装pinia及pinia持久化插件 pinia-plugin-persistedstate
1 # 安装 pinia
2 yarn add pinia
3
4 # 安装 pinia-plugin-persistedstate
5 yarn add pinia-plugin-persistedstate
2.在src下新增store目录,并在store中创建 store.ts
1 import { createPinia } from 'pinia'
2 import piniaPluginPersistedstate from 'pinia-plugin-persistedstate'
3
4 const pinia = createPinia()
5 pinia.use(piniaPluginPersistedstate)
6
7 export default pinia
3.在main.ts中引入pinia
 1 import { createApp } from 'vue'
 2 import App from './App.vue'
 3 import router from './router/index'
 4 import pinia from "@/store/store"
 5
 6 // 公共样式引入
 7 import './assets/style/reset.scss'
 8 import './assets/style/global.scss'
 9
10 // element引入
11 // import ElementPlus from 'element-plus'
12 // import "element-plus/theme-chalk/src/message.scss"
13 // import locale from 'element-plus/es/locale/lang/zh-cn'
14 // import * as ElementPlusIconsVue from '@element-plus/icons-vue'
15
16
17 const app = createApp(App)
18
19 app.use(router)
20 app.use(pinia)
21 // app.use(ElementPlus, { size: 'large', zIndex: 3000, locale })
22
23 app.mount('#app')
24
25 // 全局注册所有el图标
26 // for (const [key, component] of Object.entries(ElementPlusIconsVue)) {
27 //   app.component(key, component)
28 // }
4.pinia用法
pinia 的用法与 vuex 相似,但 pinia 放弃了 mutations 只依靠 Actions,并且使 Actions 更加灵活:
- 可以通过组件或其他 action 调用
- 可以从其他 store 的 action 中调用
- 直接在 store 实例上调用
- 支持同步或异步
- 有任意数量的参数
- 可以包含有关如何更改状态的逻辑(也就是 vuex 的 mutations 的作用)
- 可以 $patch 方法直接更改状态属性
 1 import { defineStore } from 'pinia'
 2 import { getToken } from '@/utils/auth'
 3
 4 interface ISystemMenu {
 5   children: Array<ISystemMenuChildren>,
 6   component: object,
 7   meta: IMeta,
 8   path: string,
 9 }
10
11 interface ISystemMenuChildren {
12   name: string,
13   component: object,
14   meta: IMeta,
15   path: string,
16 }
17
18 interface IMeta {
19   title?: string,
20   icon?: string,
21   iconActive?: string,
22   role?: Array<string>,
23   hidden?: boolean,
24 }
25
26 export const userStore = defineStore("user", {
27   state: () => {
28     return {
29       token: getToken(),
30       userName: '',
31       avatar: '',
32       role: '',
33       systemMenuList: [] as ISystemMenu[],
34     }
35   },
36   getters: {},
37   actions: {
38     setToken(token: string) {
39       this.token = token
40     },
41     setUserName(userName: string) {
42       this.userName = userName
43     },
44     setAvatar(avatar: string) {
45       this.avatar = avatar
46     },
47     setRole(role: string) {
48       this.role = role
49     },
50   },
51   // pinia数据持久化
52   persist: {
53     key: 'user_info',
54     storage: localStorage,
55     paths: ['userName', 'avatar', 'role']
56   }
57 })
九:Vite常用基础配置
1.运行 代理 和 打包 配置
1 // 启动服务配置
2 server: {
3   host: '0.0.0.0',
4   port: 8000,
5   open: true,
6   proxy: {}
7 },
2.生产环境去除 console debugger
先安装terser:
1 # 安装 terser
2 yarn add terser --dev
 1 // 生产环境打包配置
 2 // 去除 console debugger
 3 build: {
 4   outDir: env.VITE_ENV === 'production' ? 'xxx' : 'xxx', // 打包名称
 5   minify: "terser",
 6   terserOptions: {
 7     compress: {
 8       drop_console: false,
 9       drop_debugger: true
10     }
11   }
12 }
3.完整 vite.config.ts 文件
 1 import { defineConfig, loadEnv } from 'vite'
 2 import vue from '@vitejs/plugin-vue'
 3 import path from 'path'
 4 import AutoImport from 'unplugin-auto-import/vite'
 5 import Components from 'unplugin-vue-components/vite'
 6 import { ElementPlusResolver } from 'unplugin-vue-components/resolvers'
 7
 8 // https://vitejs.dev/config/
 9 export default ({ mode }: any) => {
10     const env = loadEnv(mode, process.cwd());
11     return defineConfig({
12     plugins: [
13       vue(),
14       AutoImport({
15         imports: ['vue', 'vue-router'],
16         dts: 'src/auto-import.d.ts',
17         resolvers: [ElementPlusResolver()],
18       }),
19       Components({
20         resolvers: [ElementPlusResolver()],
21       }),
22     ],
23     resolve: {
24       alias: {
25         '@': path.resolve(__dirname, 'src'),
26       },
27     },
28     base: './', // 打包路径
29     // 启动服务配置
30     server: {
31       host: '0.0.0.0',
32       port: 8000,
33       open: true,
34       proxy: {}
35     },
36     // 生产环境打包配置
37     // 去除 console debugger
38     build: {
39       outDir: env.VITE_ENV === 'production' ? 'vite_vue3_ts_template' : 'vite_vue3_ts_template-test', // 打包名称
40       minify: "terser",
41       terserOptions: {
42         compress: {
43           drop_console: false,
44           drop_debugger: true
45         }
46       }
47     }
48     })
49 }
十:框架其他优化
1.全局添加并声明公共组件
在 src/components 下创建项目公共组件,可以将公共组件全局引入到项目中,无需使用一次引用一次,
例如 src/components 下已创建表格组件 table-com,在 src/components 下创建index.ts:
1 import type { Component } from 'vue'
2 import TableCom from './table-com/TableCom.vue'
3
4 const components: {
5   [propName: string]: Component
6 } = {
7   TableCom
8 }
9 export default components
然后在main.ts中引入:
 1 import { createApp } from 'vue'
 2 import App from './App.vue'
 3 import router from './router/index'
 4 import pinia from "@/store/store"
 5
 6 // 路由守卫
 7 import './utils/permission'
 8
 9 // 公共样式引入
10 import './assets/style/reset.scss'
11 import './assets/style/global.scss'
12 import './assets/style/elementReset.scss'
13
14 // element引入
15 import ElementPlus from 'element-plus'
16 import "element-plus/theme-chalk/src/message.scss"
17 import locale from 'element-plus/es/locale/lang/zh-cn'
18 import * as ElementPlusIconsVue from '@element-plus/icons-vue'
19
20 // 全局组件引入
21 import globalComponent from './components/index'
22
23 // 公共方法引入
24 import { getAssetsImages } from './utils/getAssestsFile'
25
26 console.log('当前环境', import.meta.env)
27
28 const app = createApp(App)
29
30 // 全局挂载公共方法
31 app.config.globalProperties.$getAssetsImages = getAssetsImages
32
33 app.use(router)
34 app.use(pinia)
35 app.use(ElementPlus, { size: 'large', zIndex: 3000, locale })
36
37 app.mount('#app')
38
39 // 注册全局的组件
40 for (const componentItem in globalComponent) {
41   app.component(componentItem, globalComponent[componentItem])
42 }
43 // 全局注册所有el图标
44 for (const [key, component] of Object.entries(ElementPlusIconsVue)) {
45   app.component(key, component)
46 }

 浙公网安备 33010602011771号