python框架之Django(1)-第一个Django项目
准备
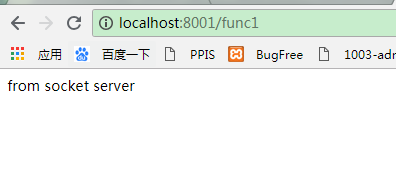
自己写一个简单的webServer


 1 import socket
 2
 3 # 生成socket实例对象
 4 sk = socket.socket()
 5 # 绑定IP和端口
 6 sk.bind(("127.0.0.1", 8001))
 7 # 监听
 8 sk.listen()
 9 # 写一个死循环,一直等待客户端来连我
10 while 1:
11     conn, _ = sk.accept()
12     data = conn.recv(8096)
13     data_str = str(data, encoding="utf-8")
14     # 给客户端回复消息
15     conn.send(b'http/1.1 200 OK\r\ncontent-type:text/html; charset=utf-8\r\n\r\n')
16     # 拿到函数的执行结果
17     response = b'from socket server'
18     # 将函数返回的结果发送给浏览器
19     conn.send(response)
20     # 关闭连接
21     conn.close()
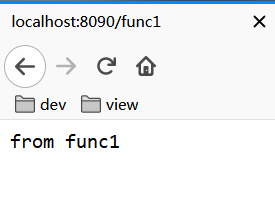
wsgiref实现的webServer
 1 import time
 2 from wsgiref.simple_server import make_server
 3
 4
 5 def func1():
 6     return 'from func1'
 7
 8
 9 def run_server(environ, start_response):
10     start_response('200 OK', [('Content-Type', 'text/html;charset=utf8'), ])  # 设置HTTP响应的状态码和头信息
11     url = environ['PATH_INFO']  # 取到用户输入的url
12     print(url)  # /func1
13     response = ''
14     if url == '/func1':
15         response = eval(url[1:] + '()')
16     response = bytes(response, encoding='utf8')
17     return [response, ]
18
19
20 if __name__ == '__main__':
21     httpd = make_server('127.0.0.1', 8090, run_server)
22     print("我在8090等你哦...")
23     httpd.serve_forever()
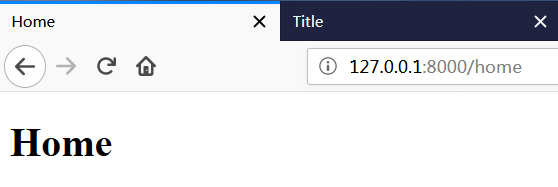
jinja2模板引擎
安装: pip3 install jinja2
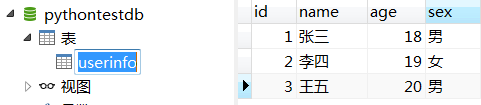
 1 from wsgiref.simple_server import make_server
 2 from jinja2 import Template
 3
 4
 5 def index():
 6     with open("user_template.html", "r", encoding="utf-8") as f:
 7         data = f.read()
 8     template = Template(data)  # 生成模板文件
 9     # 从数据库中取数据
10     import pymysql
11
12     conn = pymysql.connect(
13         host="127.0.0.1",
14         port=3306,
15         user="root",
16         password="root",
17         database="pythontestdb",
18         charset="utf8",
19     )
20     cursor = conn.cursor(cursor=pymysql.cursors.DictCursor)
21     cursor.execute("select * from userinfo;")
22     user_list = cursor.fetchall()
23     # 实现字符串的替换
24     ret = template.render({"user_list": user_list})  # 把数据填充到模板里面
25     return [bytes(ret, encoding="utf8"), ]
26
27
28 def home():
29     with open("home.html", "rb") as f:
30         data = f.read()
31     return [data, ]
32
33
34 # 定义一个url和函数的对应关系
35 URL_LIST = [
36     ("/index", index),
37     ("/home", home),
38 ]
39
40
41 def run_server(environ, start_response):
42     start_response('200 OK', [('Content-Type', 'text/html;charset=utf8'), ])  # 设置HTTP响应的状态码和头信息
43     url = environ['PATH_INFO']  # 取到用户输入的url
44     func = None  # 将要执行的函数
45     for i in URL_LIST:
46         if i[0] == url:
47             func = i[1]  # 去之前定义好的url列表里找url应该执行的函数
48             break
49     if func:  # 如果能找到要执行的函数
50         return func()  # 返回函数的执行结果
51     else:
52         return [bytes("404没有该页面", encoding="utf8"), ]
53
54
55 if __name__ == '__main__':
56     httpd = make_server('', 8000, run_server)
57     print("Serving HTTP on port 8000...")
58     httpd.serve_forever()
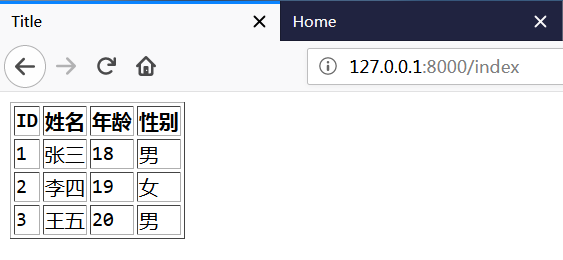
 1 <!DOCTYPE html>
 2 <html lang="zh-CN">
 3 <head>
 4     <meta charset="UTF-8">
 5     <meta http-equiv="x-ua-compatible" content="IE=edge">
 6     <meta name="viewport" content="width=device-width, initial-scale=1">
 7     <title>Title</title>
 8 </head>
 9 <body>
10
11
12 <table border="1">
13     <thead>
14     <tr>
15         <th>ID</th>
16         <th>姓名</th>
17         <th>年龄</th>
18         <th>性别</th>
19     </tr>
20     </thead>
21     <tbody>
22     {% for user in user_list %}
23     <tr>
24         <td>{{user.id}}</td>
25         <td>{{user.name}}</td>
26         <td>{{user.age}}</td>
27         <td>{{user.sex}}</td>
28     </tr>
29     {% endfor %}
30     </tbody>
31 </table>
32 </body>
33 </html>
 1 <!DOCTYPE html>
 2 <html lang="en">
 3 <head>
 4     <meta charset="UTF-8">
 5     <title>Home</title>
 6 </head>
 7 <body>
 8 <h1>Home</h1>
 9 </body>
10 </html>
django的安装与使用
介绍
-
支持时间图

-
python版本支持对照表
django版本 python版本 1.5.x 2.6.5|2.7|3.2|3.3 1.6.x 2.6|2.7|3.2|3.3 1.7.x 2.7|3.2|3.3|3.4 1.8.x 2.7|3.2|3.3|3.4|3.5 1.9.x 2.7|3.4|3.5 1.10.x 2.7|3.4|3.5 1.11.x(开发推荐) 2.7|3.4|3.5|3.6 2.0.x 3.4|3.5|3.6
安装
-
使用cmd安装
pip3 install django # 默认安装当前最高版本
pip3 install django==1.11.15 # 用==安装指定版本
-
使用pycharm安装


使用
-
配置相关
-
settings.py
Templates节:配置模板存放位置1 TEMPLATES = [ 2 { 3 'BACKEND': 'django.template.backends.django.DjangoTemplates', 4 'DIRS': [ 5 os.path.join(BASE_DIR, 'templates1'), # 根目录->templates1 6 os.path.join(BASE_DIR, 'templates2'), # 根目录->templates2 7 ], # 配置render()函数在上述路径下寻找模板 8 'APP_DIRS': True, 9 'OPTIONS': { 10 'context_processors': [ 11 'django.template.context_processors.debug', 12 'django.template.context_processors.request', 13 'django.contrib.auth.context_processors.auth', 14 'django.contrib.messages.context_processors.messages', 15 ], 16 }, 17 }, 18 ]
STATIC_URL&STATICFILES_DIRS节:配置静态文件存放目录1 # 静态文件保存目录的别名 2 STATIC_URL = '/static/' 3 4 # 静态文件存放文件夹 5 STATICFILES_DIRS = [ 6 os.path.join(BASE_DIR, "static1"), 7 os.path.join(BASE_DIR, "static2"), 8 ] 9 # 上述配置的效果就是 请求指定别名会在指定目录下寻找指定文件 10 # 例:127.0.0.1:8000/static/test.css 会在STATICFILES_DIRS节中配置的每个目录寻找名为test.css的文件
-
-
创建Django项目
-
命令行创建
django-admin startproject 项目名
-
pycharm创建
File --> New project --> 左侧选Django --> 右侧填项目路径-->Create
-
目录结构如下
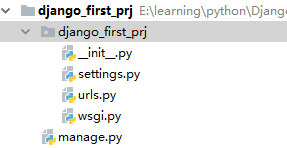
-
-
Django项目的运行
-
命令行运行
在项目的根目录下(也就是有manage.py的那个目录),运行:
            python3 manage.py runserver IP:端口--> 在指定的IP和端口启动
            python3 manage.py runserver 端口   --> 在指定的端口启动
            python3 manage.py runserver        --> 默认在本机的8000端口启动
-
pycharm运行

点绿色的小三角,直接可以启动Django项目(前提是小三角左边是你的Django项目名)
-
-
Hello Django
-
编辑urls.py
urls.py1 from django.conf.urls import url 2 from django.contrib import admin 3 4 5 def hello(request): 6 from django.shortcuts import HttpResponse 7 return HttpResponse('Hello Django') 8 9 10 urlpatterns = [ 11 url(r'^admin/', admin.site.urls), 12 url(r'^hello/',hello) 13 ]
-
运行
consolePerforming system checks... System check identified no issues (0 silenced). You have 13 unapplied migration(s). Your project may not work properly until you apply the migrations for app(s): admin, auth, contenttypes, sessions. Run 'python manage.py migrate' to apply them. September 18, 2018 - 14:27:53 Django version 1.11.15, using settings 'django_first_prj.settings' Starting development server at http://127.0.0.1:8000/ Quit the server with CTRL-BREAK.

-
Java博客目录 | Python博客目录 | C#博客目录

 浙公网安备 33010602011771号