Ceph集群应用基础-CephFS文件存储
在mgr1上安装ceph-mds服务,可以和其他服务器混用(如ceph-mon、ceph-mgr)
root@mgr1:~# apt-cache madison ceph-mds
root@mgr1:~# apt install ceph-md=16.2.10-1bionic
把mgr1主机加进来创建成mds服务
cephadmin@deploy:~$ ceph-deploy mds create mgr1验证MDS服务
MDS服务目前还无法正常使用,需要为MDS创建存储池用于保存MDS的数据
up:standby当前为备用状态,需要分配pool才可以使用
cephadmin@deploy:~$ ceph mds stat
 1 up:standby
创建CephFs metadata和data存储池
cephadmin@deploy:~$ ceph osd pool create cephfs-metadata 32 32
pool 'cephfs-metadata' created
cephadmin@deploy:~$ ceph osd pool create cephfs-data 64 64
pool 'cephfs-data' created
cephadmin@deploy:~$ ceph -s
  cluster:
    id:     dc883878-2675-4786-b000-ae9b68ab3098
    health: HEALTH_OK

  services:
    mon: 3 daemons, quorum mon1,mon2,mon3 (age 3h)
    mgr: mgr1(active, since 3h), standbys: mgr2
    osd: 12 osds: 12 up (since 3h), 12 in (since 3h)
    rgw: 1 daemon active (1 hosts, 1 zones)

  data:
    pools:   9 pools, 297 pgs
    objects: 206 objects, 10 MiB
    usage:   273 MiB used, 600 GiB / 600 GiB avail
    pgs:     7.744% pgs not active
             274 active+clean
             23  creating+peering

  io:
    client:   5.3 KiB/s wr, 0 op/s rd, 0 op/s wr
创建CephFS并验证
cephadmin@deploy:~$ ceph fs new mycephfs cephfs-metadata cephfs-data
new fs with metadata pool 8 and data pool 9
这样状态就都是活跃的了
cephadmin@deploy:~$ ceph mds stat
mycephfs:1 {0=mgr1=up:active}
cephadmin@deploy:~$ ceph fs status mycephfs
mycephfs - 0 clients
========
RANK  STATE   MDS      ACTIVITY     DNS    INOS   DIRS   CAPS
 0    active  mgr1  Reqs:    0 /s    10     13     12      0
      POOL         TYPE     USED  AVAIL
cephfs-metadata  metadata  96.0k   189G
  cephfs-data      data       0    189G
MDS version: ceph version 16.2.10 (45fa1a083152e41a408d15505f594ec5f1b4fe17) pacific (stable)
cephadmin@deploy:~$ ceph -s
  cluster:
    id:     dc883878-2675-4786-b000-ae9b68ab3098
    health: HEALTH_OK

  services:
    mon: 3 daemons, quorum mon1,mon2,mon3 (age 3h)
    mgr: mgr1(active, since 3h), standbys: mgr2
    mds: 1/1 daemons up
    osd: 12 osds: 12 up (since 3h), 12 in (since 3h)
    rgw: 1 daemon active (1 hosts, 1 zones)

  data:
    volumes: 1/1 healthy
    pools:   9 pools, 297 pgs
    objects: 228 objects, 10 MiB
    usage:   277 MiB used, 600 GiB / 600 GiB avail
    pgs:     297 active+clean

  io:
    client:   2.7 KiB/s wr, 0 op/s rd, 0 op/s wr
使用centos服务器挂载CephFs
10.0.0.17是我的mon地址
secret是我的client.admin的key
mount -t ceph 10.0.0.17:6789:/ /mnt -o name=admin,secret=AQDq+hdjGPjrCRAA2xLvyNb1T2GulPif4FXLrA==echo一个文件
echo "123" > 1.txt我用另外一台服务器直接挂在CephFS,可以发现已经有1.txt可以尝试修改文件,是实施更新的。
mount -t ceph 10.0.0.17:6789:/ /mnt -o name=admin,secret=AQDq+hdjGPjrCRAA2xLvyNb1T2GulPif4FXLrA==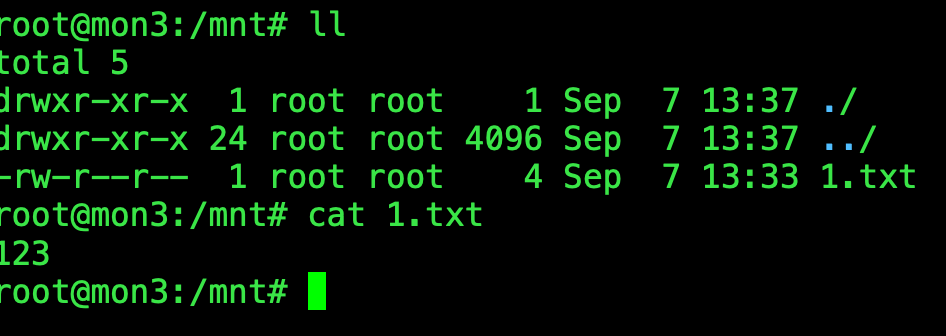
创建普通用户使用CephFS
服务端
ceph auth add client.yang mon 'allow r' mds 'allow rw' osd 'allow rwx pool=cephfs-data' #创建账号
ceph auth get client.yang #验证账号
ceph auth get client.yang -o ceph.client.yang.keyring #创建用keyring文件
ceph auth print-key client,yang > yang.key #创建key文件
cat ceph.client.yang.keyring #验证keyring文件
scp ceph.conf ceph.client.yang.keyring yang.key root@10.0.0.22:/etc/ceph #把ceph配置文件和keyring文件拷贝到客户端
客户端
ceph --user yang
mount -t ceph 10.0.0.3:6789,10.0.0.5:6789,10.0.0.2:6789:/ /data -o name=yang,secretfile=/etc/ceph/yang.key #写三个mon地址做高可用
mount -t ceph 10.0.0.3:6789,10.0.0.5:6789,10.0.0.2:6789:/ /data -o name=yang,secret={key值} #容器挂载的时候可以使用

10.0.0.3:6789,10.0.0.5:6789,10.0.0.2:6789:/ /data ceph defaults,name=yang,secretfile=/etc/ceph/yang.key _netdev 0 0 #如果写到/etc/fstab里就加这个配置
Ceph-fuse(不推荐此方式,性能较差)
yum install ceph-fuse ceph-common -y #客户端安装
scp ceph ceph.client.yang.keyring root@10.0.0.24:/etc/ceph
mkdir /data
ceph-fuse --name client.yang -m 10.0.0.3:6789,10.0.0.5:6789,10.0.0.2:6789 /data

node /data fuse.ceph ceph.id=yang,ceph.conf=/etc/ceph/ceph.conf_netdev,defaults 0 0 #/etc/fstab挂载方法
通过ganesha将cephfs导出为NFS
在mgr节点配置,并提前在mgr准备好ceph.conf和ceph.client.admin.keyring认证文件
sudo scp ceph.conf ceph.client.admin.keyring root@10.0.0.9:/etc/ceph/
apt install nfs-genesha-ceph
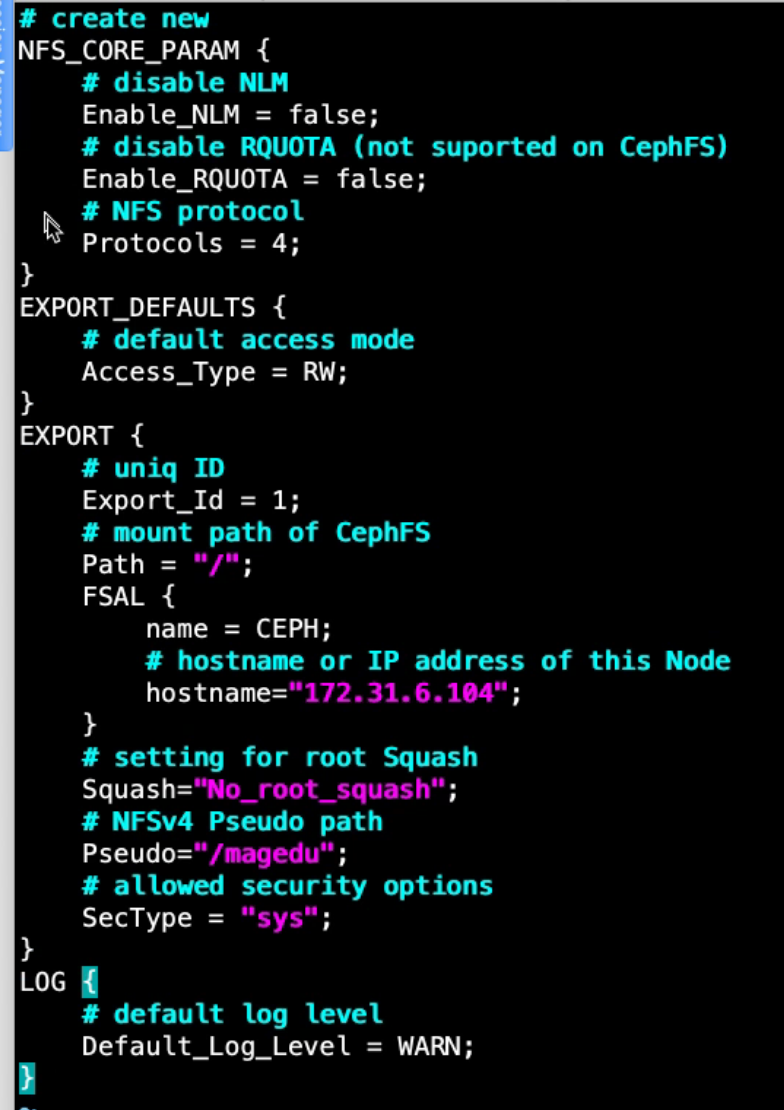
vim /etc/ganesha/ganesha.conf #编辑配置文件 以下图为模板
systemctl restart nfs-ganesha
systemctl status nfs-ganesha
tail -f /var/log/ganesha/ganesha.log
客户端挂载测试
apt install nfs-common -y
mount -t nfs 172.31.6.104:/magedu /data
df -TH
echo "ganesha v11111" >> /data/magedu/data/magedu.txt