Java匹马行天下之J2EE框架开发——Spring—>用IDEA开发Spring程序(01)
一、心动不如行动
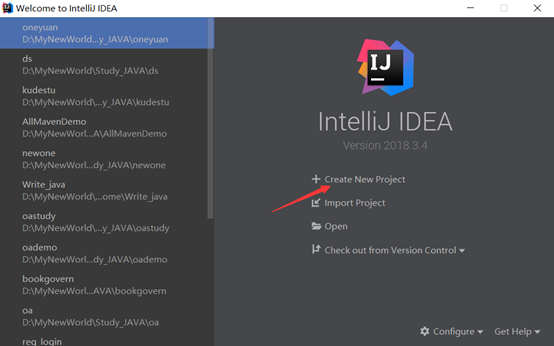
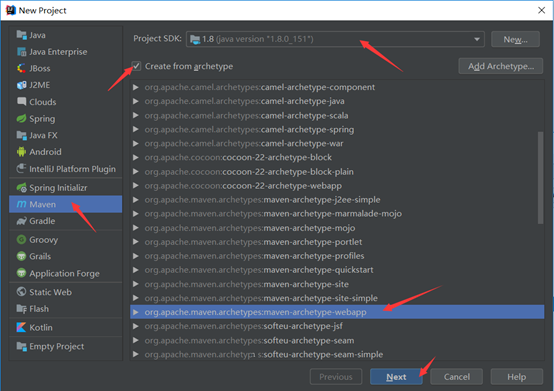
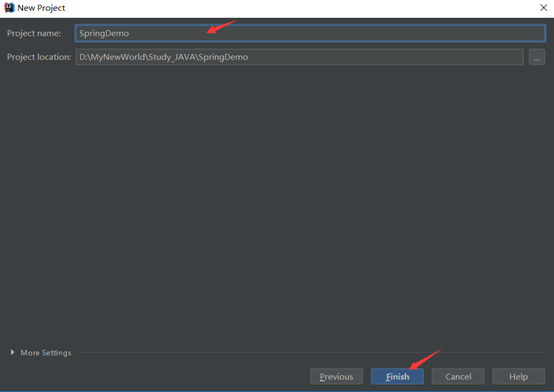
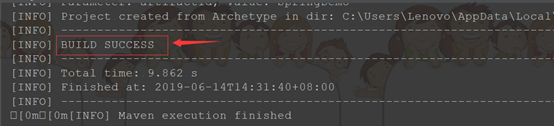
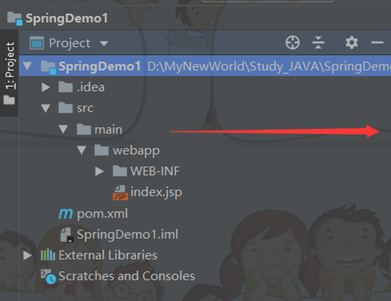
一、创建项目
*注:在IDEA中我创建的Maven项目,不了解Maven的朋友可以看我之前的博客“我们一起走进Maven——知己知彼”,了解Maven后可以看我之前的博客“Maven的安装与配置”,自行安装,行动起来吧。


二、加载依赖
在pom.xml文件中添加Spring依赖和日志相关依赖
<dependencies>
  <!--测试相关-->
  <dependency>
    <groupId>junit</groupId>
    <artifactId>junit</artifactId>
    <version>4.11</version>
    <scope>test</scope>
  </dependency>
  <!--Spring核心基础依赖-->
  <dependency>
    <groupId>org.springframework</groupId>
    <artifactId>spring-core</artifactId>
    <version>5.0.2.RELEASE</version>
  </dependency>
  <dependency>
    <groupId>org.springframework</groupId>
    <artifactId>spring-context</artifactId>
    <version>5.0.2.RELEASE</version>
  </dependency>
  <dependency>
    <groupId>org.springframework</groupId>
    <artifactId>spring-beans</artifactId>
    <version>5.0.2.RELEASE</version>
  </dependency>
  <dependency>
    <groupId>org.springframework</groupId>
    <artifactId>spring-expression</artifactId>
    <version>5.0.2.RELEASE</version>
  </dependency>
  <!--日志相关-->
  <dependency>
    <groupId>commons-logging</groupId>
    <artifactId>commons-logging</artifactId>
    <version>1.2</version>
  </dependency>
  <dependency>
    <groupId>log4j</groupId>
    <artifactId>log4j</artifactId>
    <version>1.2.17</version>
  </dependency>
</dependencies>
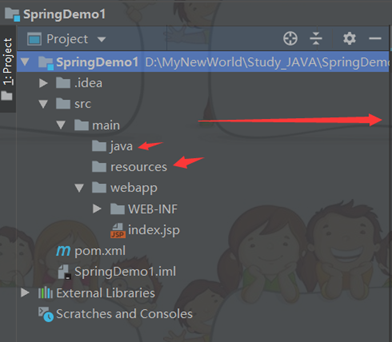
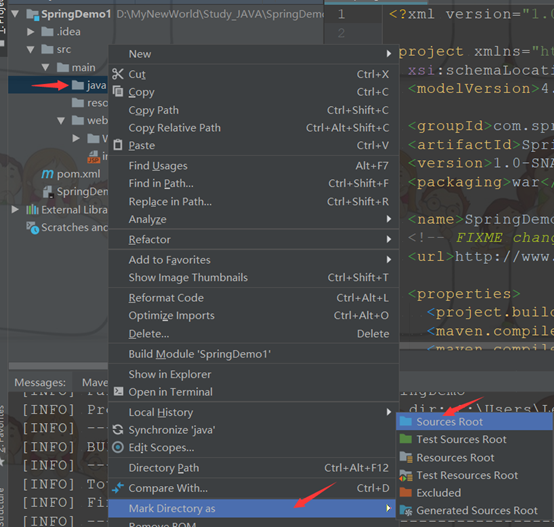
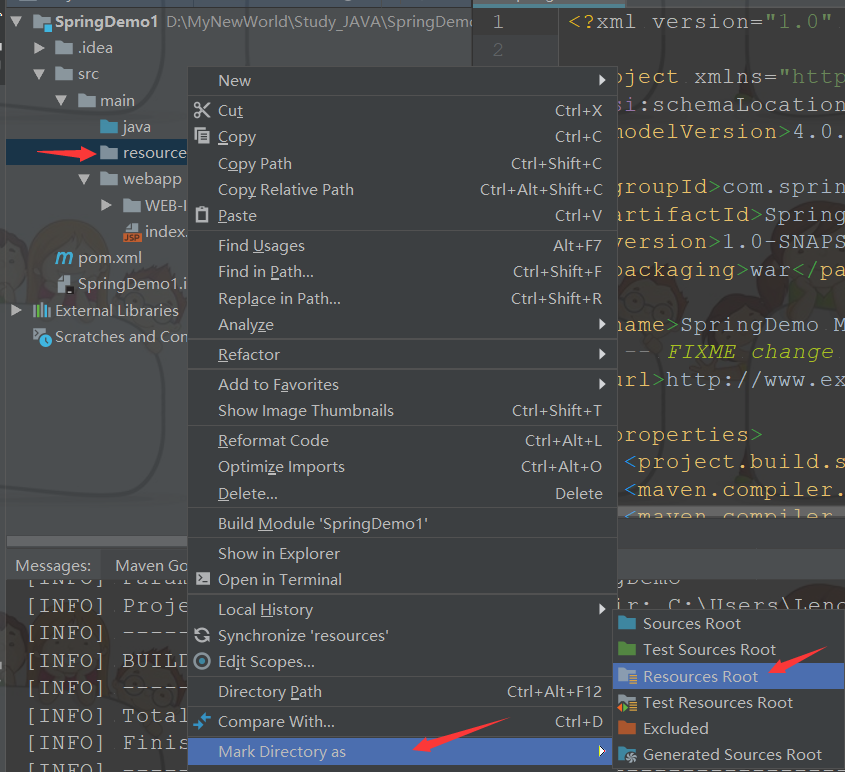
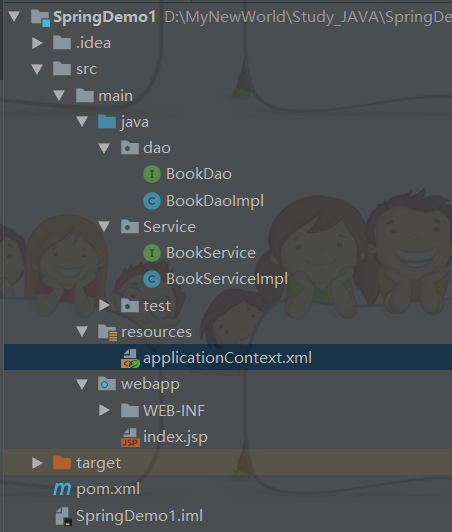
三、项目结构
在main目录下面创建java和resources目录

四、基础代码实现(练手)
- 创建TestDao接口和实现类
- 获得TestDao实现类的实例
- 在之前开发中,我们是直接new一个对象即可。即:`private TestDao dao = new TestDaoImpl();`
- 在学习Spring之后,将由Spring来创建对象的实例 --> 即:`IoC 控制反转(Inverse of Control)`
之后需要实例对象时,从Spring工厂(容器)中获得即可,需要将实现类的全限定名称配置到xml文件中。
创建dao包,在dao包下创建TestDao接口和TestDao接口的实现类,结构如下图:
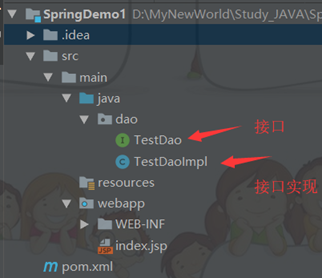
TestDao接口代码示例:
package dao;

public interface TestDao {
    public void sayHello();
}
TestDaoImpl实现类代码示例:
package dao;

public class TestDaoImpl implements TestDao{
    @Override
    public void sayHello() {
        System.out.println("Hello,Spring!");
    }
}
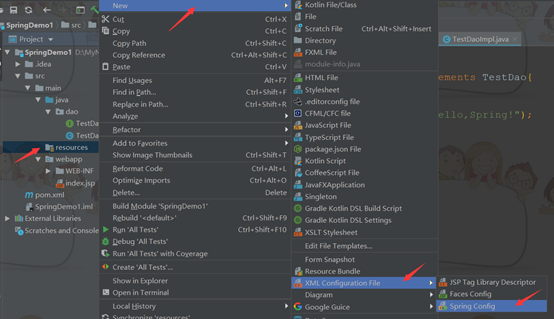
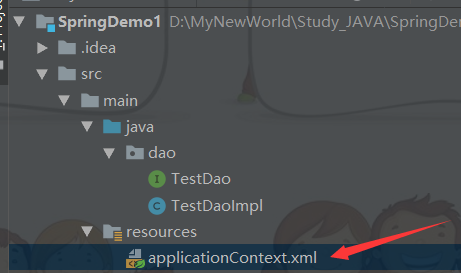
在resources资源目录点击右键,依次选择New-->XML Configuration File-->Spring Config,创建applicationContext.xml的配置文件
<?xml version="1.0" encoding="UTF-8"?>
<beans xmlns="http://www.springframework.org/schema/beans"
       xmlns:xsi="http://www.w3.org/2001/XMLSchema-instance"
       xsi:schemaLocation="http://www.springframework.org/schema/beans http://www.springframework.org/schema/beans/spring-beans.xsd">

    <!--把testDao对象的创建权交给Spring-->
    <!-- <bean> 配置需要创建的对象
        id :用于之后从Spring容器中获得实例时使用的
        class :需要创建实例的全限定类名-->
<bean id="testDao" class="dao.TestDaoImpl"></bean> </beans>
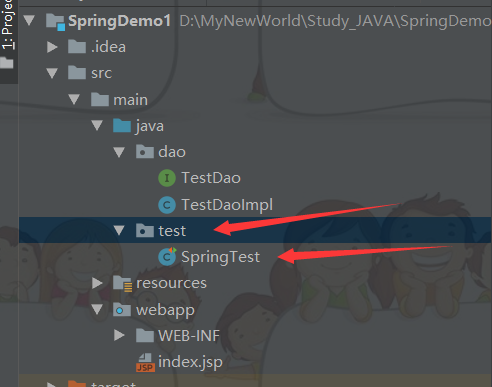
创建test包,在test包下创建测试类SpringTest
package test;
import dao.TestDao;
import org.junit.jupiter.api.Test;
import org.springframework.context.ApplicationContext;
import org.springframework.context.support.ClassPathXmlApplicationContext;

public class SpringTest {
@Test
public void demo1(){
    // 之前开发,自己手写new出对象
    TestDao dao= new TestDaoImpl();
    dao.sayHello();
}

@Test
public void demo2() {
    // 现在从spring容器中获得对象实例
    // 1 、获得容器
    //初始化Spring容器ApplicationContext,加载配置文件
    ApplicationContext application = new ClassPathXmlApplicationContext("applicationContext.xml");
    // 2、获得内容 ,注意此时不需要自己new出对象了,都是从spring容器中获得
    //通过容器获取testDao实例
    TestDao testDao = (TestDao) application.getBean("testDao");
    testDao.sayHello();
}
}
- IoC(Inverse of Control)反转控制的概念,就是将原本在程序中手动创建TestDaoImpl对象的控制权,交由Spring框架管理。
- 简单说,就是创建TestDaoImpl对象的控制权被反转到了Spring框架。
点击测试方法左侧的运行按钮,选择Run,测试代码

运行后控制台显示结果
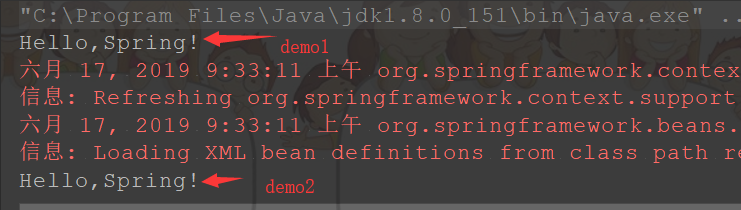
项目运行成功!!!!!!!
五、Spring入门案例:DI(掌握)
- DI :Dependency Injection :依赖注入
- is a :是一个,继承。
- has a:有一个,成员变量,依赖。
 class B {
       private A a;   // B类依赖A类,B类使用A类。
    }

    依赖:一个对象需要使用另一个对象。
    注入:通过setter方法进行另一个对象实例设置。
例如:
class BookServiceImpl {
        // 之前开发:接口 = 实现类(service和dao耦合了,写死了,知道具体的实现类是谁,那么我的具体实现类变化,那么这行代码也得跟着变)
        // private BookDao bookDao = new BookDaoImpl();

         // spring之后(解耦:service实现类使用了dao的接口,这样就不知道具体的实现类是谁了)
        private BookDao bookDao;
        setter方法
   }

模拟spring执行过程
    创建service实例:BookService bookService = new BookServiceImpl();   => IoC <bean>
    创建dao实例:BookDao bookDao = new BookDaoImple();                  => IoC
    将dao设置给service:bookService.setBookDao(bookDao);                => DI <property>
具体代码实现:
实现步骤:
- 创建BookDao接口和实现类
- 创建BookService接口和实现类
- 将dao和service配置到 applicationContext.xml文件中
- 使用api测试
项目结构:
加载依赖:
在pom.xml文件中添加Spring依赖和日志相关依赖
<dependencies>
  <!--测试相关-->
  <dependency>
    <groupId>junit</groupId>
    <artifactId>junit</artifactId>
    <version>4.11</version>
    <scope>test</scope>
  </dependency>
  <!--Spring核心基础依赖-->
  <dependency>
    <groupId>org.springframework</groupId>
    <artifactId>spring-core</artifactId>
    <version>5.0.2.RELEASE</version>
  </dependency>
  <dependency>
    <groupId>org.springframework</groupId>
    <artifactId>spring-context</artifactId>
    <version>5.0.2.RELEASE</version>
  </dependency>
  <dependency>
    <groupId>org.springframework</groupId>
    <artifactId>spring-beans</artifactId>
    <version>5.0.2.RELEASE</version>
  </dependency>
  <dependency>
    <groupId>org.springframework</groupId>
    <artifactId>spring-expression</artifactId>
    <version>5.0.2.RELEASE</version>
  </dependency>
  <!--日志相关-->
  <dependency>
    <groupId>commons-logging</groupId>
    <artifactId>commons-logging</artifactId>
    <version>1.2</version>
  </dependency>
  <dependency>
    <groupId>log4j</groupId>
    <artifactId>log4j</artifactId>
    <version>1.2.17</version>
  </dependency>
</dependencies>
BookDao接口和实现类
package dao;

public interface BookDao {
    void save();
}
package dao;

public class BookDaoImpl implements BookDao {
    @Override
    public void save() {
        System.out.println("实现添加功能");
    }
}
BookService接口和实现类
package Service;

public interface BookService {
    void addBook();
}
package Service;

import dao.BookDao;
import dao.BookDaoImpl;

public class BookServiceImpl implements BookService {

    //方式一:之前,接口=实现类
    //private BookDao bookDao= new BookDaoImpl();

    //方式二:现在,接口+setter方法
    private BookDao bookDao;
    public void setBookDao(BookDao bookDao){
        this.bookDao=bookDao;
    }

    @Override
    public void addBook() {
    this.bookDao.save();

    }
}

将dao和service配置到 applicationContext.xml文件中
<?xml version="1.0" encoding="UTF-8"?>
<beans xmlns="http://www.springframework.org/schema/beans"
xmlns:xsi="http://www.w3.org/2001/XMLSchema-instance"
xsi:schemaLocation="http://www.springframework.org/schema/beans http://www.springframework.org/schema/beans/spring-beans.xsd">
<!-- <bean> 配置需要创建的对象
id :用于之后从Spring容器中获得实例时使用的
class :需要创建实例的全限定类名-->
<!--
模拟spring执行过程
创建service实例:BookService bookService = new BookServiceImpl(); => IoC <bean>
创建dao实例:BookDao bookDao = new BookDaoImple(); => IoC
将dao实例设置给service实例:bookService.setBookDao(bookDao); => DI <property>
<property> 用于进行属性注入
name : Bean的属性名称,通过setter方法获得
setBookDao => BookDao => bookDao
ref :另一个Bean的id值的引用
-->
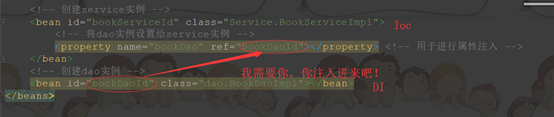
<!-- 创建service实例 -->
<bean id="bookServiceId" class="Service.BookServiceImpl">
<!-- 将dao实例设置给service实例 -->
<property name="bookDao" ref="bookDaoId"></property> <!-- 用于进行属性注入 -->
</bean>
<!-- 创建dao实例 -->
<bean id="bookDaoId" class="dao.BookDaoImpl"></bean>
</beans>
使用api测试
创建test包,在test包下创建测试类SpringTest
package test;

import Service.BookService;
import org.junit.jupiter.api.Test;
import org.springframework.context.ApplicationContext;
import org.springframework.context.support.ClassPathXmlApplicationContext;

public class SpringTest {
    @Test
    public void Test1(){
        // 之前开发,自己手写new出对象
        // BookService bookService = new BookServiceImpl();
        // bookService.addBook();
    }

    @Test
    public void Test2(){
        // 现在从spring容器中获得对象实例
        // 1 、获得容器
        ApplicationContext applicationContext = new ClassPathXmlApplicationContext("applicationContext.xml");
        // 2、获得内容 ,注意此时不需要自己new出对象了,都是从spring容器中获得
        BookService bookService = (BookService) applicationContext.getBean("bookServiceId");

        bookService.addBook();
    }
}
- DI:Dependency Injection 依赖注入,在Spring框架负责创建Bean对象时,动态的将依赖对象注入到Bean组件。
- getBean("bookServiceId"); 从spring容器中获得指定名称对象的实例时,会先判断本实例对象是否需要使用其他实例化对象,由于设置了< property name="bookDao" ref="bookDaoId">< /property>,说明需要使用其他实例化对象,所以就根据其他Bean的id值的引用,去spring容器中获得指定名称对象的实例,相当于将dao实例设置给service实例。
运行后控制台显示结果
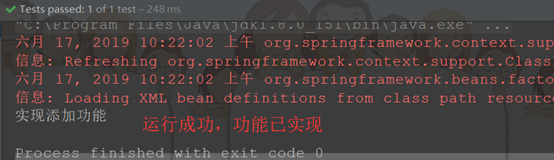
这就成功了,开心一下,通过这两个案例,多Spring有了初步的理解,加油!
六、Spring的核心API(了解)
api整体了解即可,之后不使用,在学习过程需要。
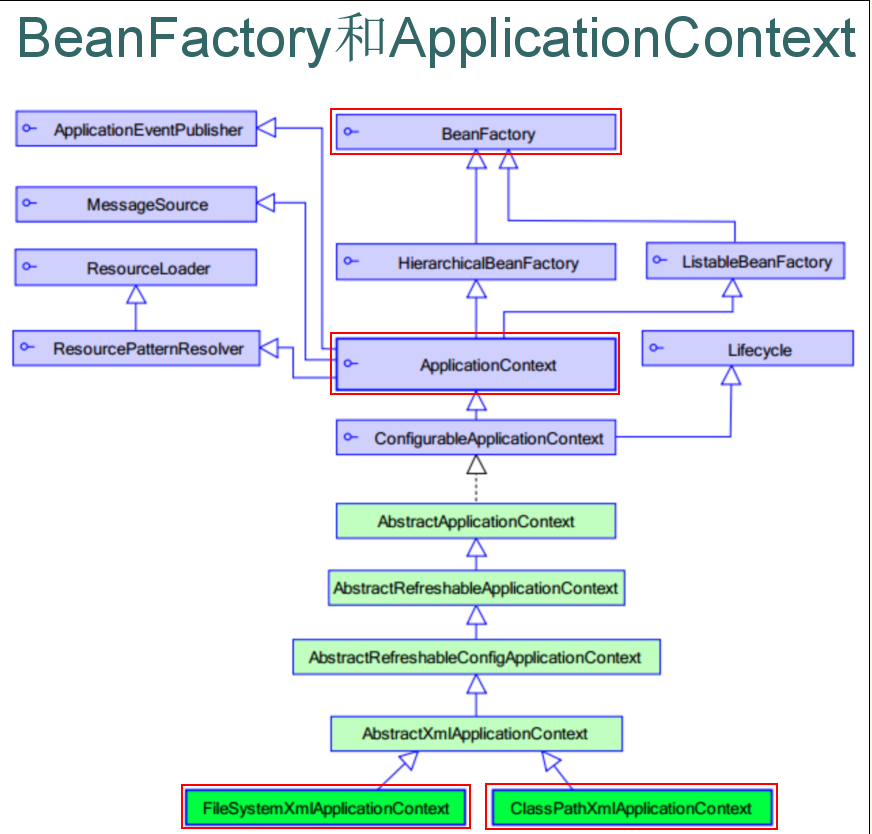
- BeanFactory :这是一个
工厂,用于生成任意Bean。采取延迟加载,第一次调用getBean(); 时才会初始化Bean。(即实例化对象) - ApplicationContext :是BeanFactory的子接口,功能更强大。(国际化处理、事件传递、Bean自动装配、各种不同应用层的Context实现)。
采取非延时加载,当配置文件被加载时,就进行对象的实例化。- ClassPathXmlApplicationContext 用于加载classpath(类路径/src)下的xml
- 加载xml运行时位置 --> /WEB-INF/classes/xxx.xml
- FileSystemXmlApplicationContext 用于加载指定盘符下的xml
- 加载xml运行时位置 --> /WEB-INF/xxx.xml
- 通过java web学习过的 ServletContext.getRealPath(); 获得具体盘符
- ClassPathXmlApplicationContext 用于加载classpath(类路径/src)下的xml
示例代码如下:
package test;

import Service.BookService;
import org.junit.jupiter.api.Test;
import org.springframework.beans.factory.BeanFactory;
import org.springframework.beans.factory.xml.XmlBeanFactory;
import org.springframework.context.ApplicationContext;
import org.springframework.context.support.ClassPathXmlApplicationContext;
import org.springframework.core.io.ClassPathResource;

public class SpringTest {
    @Test
    public void Test1(){
        // 之前开发,自己手写new出对象
        // BookService bookService = new BookServiceImpl();
        // bookService.addBook();
    }

    @Test
    public void Test2(){
        // 现在从spring容器中获得对象实例
        // 1 、获得容器
        ApplicationContext applicationContext = new ClassPathXmlApplicationContext("applicationContext.xml");
        // 采取非延时加载,当配置文件被加载时,就进行对象的实例化。
        // 2、获得内容 ,注意此时不需要自己new出对象了,都是从spring容器中获得
        BookService bookService = (BookService) applicationContext.getBean("bookServiceId");

        bookService.addBook();
    }

    @Test
    public void demo3() {
        // 现在从spring容器中获得对象实例,使用的是BeanFactory,里面需要一个Resource,该Resource又是一个接口,需要找它的实现类ClassPathResource
        // 1 、获得容器
        BeanFactory beanFactory = new XmlBeanFactory(new ClassPathResource("applicationContext.xml"));
        // 2、获得内容 ,注意此时不需要自己new出对象了,都是从spring容器中获得
        BookService  bookService = (BookService) beanFactory.getBean("bookServiceId"); // 采取延迟加载,第一次调用getBean(); 时才会初始化Bean(即实例化对象)。

        bookService.addBook();
    }
}
七、装配Bean:基于XML
3种bean实例化方式:
- 使用`默认构造方法`实例化
- 使用`静态工厂方法`实例化
- 使用`实例工厂方法`实例化
使用默认构造方法实例化
格式:
<bean id="从Spring容器中获得实例时使用的" class="需要创建实例的全限定类名"></bean>
例如:<bean id="userServiceId" class="Service.UserServiceImpl"></bean>
示例中用到的 UserService.java 和 UserServiceImpl.java 代码同上面实例中的代码,这里不再赘述!
在spring容器中进行配置:
applicationContext.xml
<?xml version="1.0" encoding="UTF-8"?>
<beans xmlns="http://www.springframework.org/schema/beans"
       xmlns:xsi="http://www.w3.org/2001/XMLSchema-instance"
       xsi:schemaLocation="http://www.springframework.org/schema/beans http://www.springframework.org/schema/beans/spring-beans.xsd">

 <!--第一种实例化Bean 的方式 :使用默认构造方法实例化,即要实例化的Bean必须要提供默认构造方法  -->
    <bean id="userServiceId" class="Service.UserServiceImpl"></bean>
</beans>
测试代码:
public class TestIoC {
    @Test
    public void demo01() {
        // 之前开发,自己手写new出对象
        UserService userService = new UserServiceImpl(); // 直接手动创建实例

        userService.addUser();
    }

    @Test
    public void demo02() {
        // 现在从spring容器中获得对象实例
        // 1 、获得容器
        ApplicationContext applicationContext = new ClassPathXmlApplicationContext("applicationContext.xml");
        // 2、获得内容 ,注意此时不需要自己new出对象了,都是从spring容器中获得
        UserService userService = (UserService) applicationContext.getBean("userServiceId");

        userService.addUser();
    }
}
使用`静态工厂方法`实例化
- 静态工厂:常用与spring整合其他框架(工具)时。
- 静态工厂:用于生成实例对象,所有的方法必须是static。
示例中用到的 UserService.java 和 UserServiceImpl.java 代码同上面实例中的代码,这里不再赘述!
格式:
<bean id="" class="工厂全限定类名" factory-method="静态方法名称">
在spring容器中进行配置:
applicationContext.xml
<?xml version="1.0" encoding="UTF-8"?>
<beans xmlns="http://www.springframework.org/schema/beans"
       xmlns:xsi="http://www.w3.org/2001/XMLSchema-instance"
       xsi:schemaLocation="http://www.springframework.org/schema/beans http://www.springframework.org/schema/beans/spring-beans.xsd">

 <!--第二种实例化Bean 的方式 :使用静态工厂方法实例化
        将自定义的静态工厂创建的实例交给spring管理
        class 自定义静态工厂全限定类名
        factory-method 静态方法名
    -->
    <bean id="userServiceId" class="Service.MyBeanFactory" factory-method="createService"></bean>
</beans>
静态工厂类代码:
public class MyBeanFactory {

    /**
     * 创建实例的静态工厂,所有的方法必须是静态的(static)。
     *
     * @return
     */
    public static UserService createService() {
        return new UserServiceImpl();
    }

    // 还有创建其他实例的静态工厂
    // ......
}
测试代码:
TestStaticFactory.java
/**
 * 第二种实例化Bean 的方式 :使用静态工厂方法实例化
 *
 */
public class TestStaticFactory {

    @Test
    public void demo01() {
        // 以前:使用自定义的静态实例工厂
        UserService userService = MyBeanFactory.createService();

        userService.addUser();
    }

    @Test
    public void demo02() {
        // 现在:使用spring 工厂:将自定义的静态工厂创建的实例交给spring管理
ApplicationContext applicationContext = new ClassPathXmlApplicationContext("applicationContext.xml");
UserService userService = applicationContext.getBean("userServiceId", UserService.class); // 这种方式底层会自动转换
// UserService userService = (UserService) applicationContext.getBean("userServiceId");
 userService.addUser();
 }
 }
注意:当使用JDK版本为1.8时,运行上面的测试代码会出现一个问题: java.lang.IllegalArgumentException,
问题解决链接:使用Junit测试一个 spring静态工厂实例化bean 的例子,所有代码都没有问题,但是出现java.lang.IllegalArgumentException异常
小结:在以后的开发中,工厂类不需要我们去手写,因为别人已经写好了,我们通过编写配置文件,把别人写好的工厂类拿来,写上要用的方法名,然后把它生产后的实例给Spring存起来,以后我们要用什么实例,跟Spring说一下,去拿就可以了。
使用`实例工厂方法`实例化
实例工厂:必须先有工厂的实例对象,然后通过实例对象去创建对象。特点:提供所有的方法都是“非静态”的。
示例中用到的 UserService.java 和 UserServiceImpl.java 代码同上面实例中的代码,这里不再赘述!
在spring容器中进行配置:
applicationContext.xml
<?xml version="1.0" encoding="UTF-8"?>
<beans xmlns="http://www.springframework.org/schema/beans"
       xmlns:xsi="http://www.w3.org/2001/XMLSchema-instance"
       xsi:schemaLocation="http://www.springframework.org/schema/beans http://www.springframework.org/schema/beans/spring-beans.xsd">
 <!--第三种实例化Bean 的方式 :使用实例工厂方法实例化 -->
    <!--创建工厂实例 -->
    <bean id="myBeanFactoryId" class="com.itheima.c_inject.c_factory.MyBeanFactory" ></bean>
    <!--通过工厂实例,获得对象      factory-bean 工厂实例名称        factory-method 普通方法名称 -->
    <bean id="userServiceId" factory-bean="myBeanFactoryId" factory-method="createService"></bean>
</beans>
静态工厂类代码:
public class MyBeanFactory {

    /**
     * 创建实例的工厂,所有方法非静态
     *
     * @return
     */
    public UserService createService() {
        return new UserServiceImpl();
    }

    // 还有创建其他实例的工厂
    // ......
}
测试代码:
TestFactory.java
package test;
import org.junit.Test;
import org.springframework.context.ApplicationContext;
import org.springframework.context.support.ClassPathXmlApplicationContext;
/**
 * 第三种实例化Bean 的方式 :使用实例工厂方法实例化
 *  */
public class TestFactory {

    @Test
    public void demo01() {
        // 以前:使用自定义的实例工厂
        // 1、创建工厂实例
        MyBeanFactory myBeanFactory = new MyBeanFactory();
        // 2、通过工厂实例,获得对象
        UserService userService = myBeanFactory.createService();

        userService.addUser();
    }

    @Test
    public void demo02() {
        // 现在:使用spring 工厂:将自定义的实例工厂创建的实例交给spring管理
ApplicationContext applicationContext = new ClassPathXmlApplicationContext("applicationContext.xml");
UserService userService = applicationContext.getBean("userServiceId", UserService.class); // 这种方式底层会自动转换
 // UserService userService = (UserService) applicationContext.getBean("userServiceId");
 userService.addUser();
 }
 }
-
一、Bean的种类
-
普通bean :之前操作的都是普通bean。例如:
< bean id="xxx" class="A" >,这句代码的意思是:Spring直接创建A的实例,并返回。 -
FactoryBean :是一个特殊的bean,
具有工厂生成对象能力,但是只能生成特定的对象。
想要生产对象的bean 必须实现FactoryBean 接口,此接口提供方法getObject(); 用于获得特定bean。- 示例:
< bean id="xxx" class="FB">,这句代码的意思是:Spring会先创建FB实例,然后调用getObject(); 方法,并返回方法的返回值。
即相当于如下两行代码:
FB fb = new FB();
return fb.getObject();
- 示例:
-
BeanFactory 和 FactoryBean 对比?
- BeanFactory :是一个生产bean的工厂,用于生成任意的bean。
- FactoryBean :是一个特殊的bean,用于生成另一个特定的bean。
- 例如:ProxyFactoryBean ,此工厂bean用于生产代理对象的实例。
< bean id="xxx" class="….ProxyFactoryBean">,这句代码的意思是:获得代理对象的实例。即AOP使用。
- 例如:ProxyFactoryBean ,此工厂bean用于生产代理对象的实例。
-
spring容器中bean元素id和name属性的区别?
-
在spring容器中添加以下配置:
示例:< bean id="userServiceId" class="com.itheima.a_ioc.UserServiceImpl"> -
bean节点中id和name的区别:
-
区别一:
- id : 指定唯一实例引用
- name : 可以指定多个实例引用,例如name="名称1, 名称2"
-
区别二:
-
id :id的命名要满足XML对ID属性命名规范
例如:必须以字母开始,可以使用字母、数字、连字符、下划线、句话、冒号 -
name : 如果Bean的名称中含有特殊字符,就需要使用name属性
例如 :< bean name="# boy" class="cn.itheima.ioc.Boy"/> -
因为name属性可以相同,所以后出现Bean会覆盖之前出现的同名的Bean。
-
总结:项目开发的时候,强烈要求用id,因为id可以表示唯一引用。
-
-
-
二、Bean的作用域
Bean 的作用域:用于确定spring所创建bean 的实例个数。
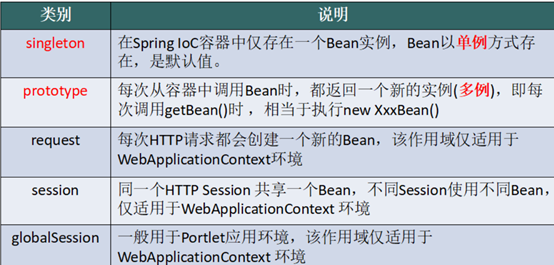
- 取值:
- singleton 单例,默认值。
- prototype 多例,每执行一次getBean() 将获得一个实例。例如:在struts整合spring时,需要配置action为多例。
- 配置示例:默认情况下会在容器启动时初始化bean,但我们可以指定Bean节点的
lazy-init="true"来延迟初始化bean,这时候,只有第一次获取bean会才初始化bean。- 例如:`< bean id="xxx" class="xxx" scope="xxx">`
例如:< bean id="xxx" class="service.UserServiceImpl" lazy-init="true">- 如果想对所有bean都应用延迟初始化,可以在根节点beans设置
default-lazy-init="true",
例如:< beans default-lazy-init="true“> - Portlet是基于java的web组件,由portlet容器管理,并由容器处理请求,生产动态内容。
- Portals使用portlets作为可插拔用户接口组件,提供信息系统的表示层。
- 作为利用servlets进行web应用编程的下一步,portlets实现了web应用的模块化和用户中心化。
在spring容器中进行配置:
applicationContext.xml
<?xml version="1.0" encoding="UTF-8"?>
<beans xmlns="http://www.springframework.org/schema/beans"
       xmlns:xsi="http://www.w3.org/2001/XMLSchema-instance"
       xsi:schemaLocation="http://www.springframework.org/schema/beans http://www.springframework.org/schema/beans/spring-beans.xsd">
<bean id="userServiceId" class="com.itheima.d_scope.UserServiceImpl" scope="prototype"></bean>
</beans>
测试代码:
TestScope.java
public class TestScope {

    @Test
    public void demo01() {
        // 现在:使用spring 工厂
ApplicationContext applicationContext = new ClassPathXmlApplicationContext("applicationContext.xml");
UserService userService1 = applicationContext.getBean("userServiceId", UserService.class);
 // 这种方式底层会自动转换
UserService userService2 = applicationContext.getBean("userServiceId", UserService.class);
// 这种方式底层会自动转换
 // 默认Bean的作用域是单例,所以打印的对象的地址是一样的
 // System.out.println(userService1); // service.UserServiceImpl@2ac273d3
 // System.out.println(userService2); // service.UserServiceImpl@2ac273d3
 // 现在在配置文件中添加scope属性,值为prototype,此时Bean的作用域变为多例了,再次打印,输出地址不一样了
System.out.println(userService1);
 //service.UserServiceImpl@66480dd7
System.out.println(userService2);
//service.UserServiceImpl@52a86356
 }
 }
-
三、Bean的生命周期
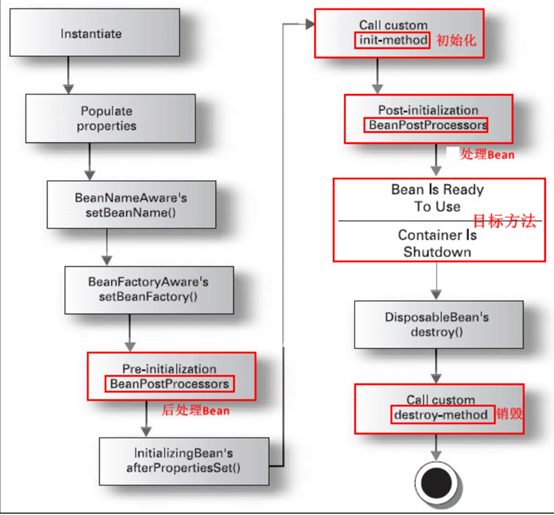
Bean 的生命周期详情
- instantiate bean 对象实例化。
- populate properties 封装属性。
- 如果Bean实现 BeanNameAware,则表示执行
setBeanName。 - 如果Bean实现 BeanFactoryAware 或者 ApplicationContextAware,则表示设置实例工厂(
setBeanFactory)或者上下文对象(setApplicationContext)。 - 如果存在类实现 BeanPostProcessor(后处理Bean),则表示执行
postProcessBeforeInitialization。 - 如果Bean实现 InitializingBean,则表示执行
afterPropertiesSet。 - 调用
,则表示指定初始化方法init。 - 如果存在类实现 BeanPostProcessor(处理Bean),则表示执行
postProcessAfterInitialization。 - 执行业务处理
- 如果Bean实现 DisposableBean,则表示执行
destroy。 - 调用
,则表示指定销毁方法customerDestroy。
-
四、Bean 的初始化和销毁
目标方法执行前和执行后,将进行Bean的初始化或销毁。
示例:<bean id="xxx" class="xxx" init-method="初始化的方法名称" destroy-method="销毁的方法名称"></bean>
示例代码如下:
编写目标类代码:
UserService.java
public interface UserService {
    void addUser();
}
UserServiceImpl.java
public class UserServiceImpl implements UserService {

    @Override
    public void addUser() {
        System.out.println("e_lifecycle add user");
    }

    public void myInit() {
        System.out.println("我的初始化方法");
    }

    public void myDestory() {
        System.out.println("我的销毁方法");
    }
}
在spring容器中进行配置:
applicationContext.xml
<?xml version="1.0" encoding="UTF-8"?>
<beans xmlns="http://www.springframework.org/schema/beans"
       xmlns:xsi="http://www.w3.org/2001/XMLSchema-instance"
       xsi:schemaLocation="http://www.springframework.org/schema/beans http://www.springframework.org/schema/beans/spring-beans.xsd">
<!--
        init-method 用于配置初始化方法,用于准备数据等使用场景
        destroy-method 用于配置销毁方法,用于清理资源等使用场景
    -->
    <bean id="userServiceId" class="service.UserServiceImpl"
        init-method="myInit" destroy-method="myDestory"></bean>
</beans>
编写测试代码:
public class TestLifecycle {

    @Test
    public void demo01() throws Exception {
        // 现在:使用spring 工厂(spring 容器)
ApplicationContext applicationContext = new ClassPathXmlApplicationContext("applicationContext.xml");
 UserService userService = (UserService) applicationContext.getBean("userServiceId");
 userService.addUser(); // 要想使我的销毁方法也执行,必须要求:
 // 1.容器必须先close,我的销毁方法才会执行;
 // 2.必须是单例的(spring所创建该bean的实例个数只有一个)即bean中的scope配置成默认即可。
 // 因为此close方法在接口 ApplicationContext 中没有定义,而在实现类中提供了该方法,我们可以使用反射,因为反射最后执行的就是实现类中的方法。
 applicationContext.getClass().getMethod("close").invoke(applicationContext); } }
-
五、BeanPostProcessor 后处理Bean
- 是由spring提供的一种机制,只要实现类实现此接口BeanPostProcessor,并将该实现类提供给spring容器,spring容器将自动执行两个方法:在初始化方法前执行before()方法,在初始化方法后执行after()方法。配置格式:
这句代码的意思就是:把实现类提供给了spring容器。
- Factory hook(勾子) that allows for custom modification of new bean instances, e.g. checking for marker interfaces or wrapping them with proxies.
- spring提供工厂勾子,用于修改实例对象,可以生成代理对象。(是AOP底层)
谷歌翻译:Factory hook(勾子),允许自定义修改新的bean实例,例如:检查标记接口或用代理包装它们。
我们来模拟这句话的意思:
before()    => postProcessAfterInitialization(Object bean, String beanName)
after()     => postProcessBeforeInitialization(Object bean, String beanName)

A a = new A();

a = B.before(a); // 将a的实例对象传递给后处理bean,可以什么都没做,也可以做一些事情,比如:生成jdk代理对象并返回给a,这样a就从实例对象变成代理对象了,此时的a就具有了AOP功能;再比如,如果把null返回给a,再用a去调用方法,就会出现空指针异常。
a.init();
a = B.after(a);

// 以下是AOP演示:
// 我们现在在后处理Bean 代码执行完之后,把jdk代理对象返回给a。让a在调用addUser()之前先做一些事情

// 之前要做的事情
a.addUser(); // 在目标方法的前后可以做一些事情,例如:开启事务、提交事务、性能监控(前后时间)等等
// 之后要做的事情

a.destroy();
目标类示例代码如下:
UserService.java
public interface UserService {
    void addUser();
}
UserServiceImpl.java
public class UserServiceImpl implements UserService {

    @Override
    public void addUser() {
        System.out.println("e_lifecycle add user");
    }

    public void myInit() {
        System.out.println("我的初始化方法");
    }

    public void myDestory() {
        System.out.println("我的销毁方法");
    }
}
实现类示例代码如下:
MyBeanPostProcessor.java
public class MyBeanPostProcessor implements BeanPostProcessor {

    @Override
    public Object postProcessBeforeInitialization(Object bean, String beanName) throws BeansException {
        System.out.println("执行了前方法:" + beanName);
        return bean;
    }

    @Override
    public Object postProcessAfterInitialization(final Object bean, String beanName) throws BeansException {
        System.out.println("执行了后方法:" + beanName);
        // 传入的参数bean是我们的目标对象,此时我们的目标对象只有一个接口,那么我们的代理对象也只有一个接口
        // 生成jdk代理对象
        return Proxy.newProxyInstance(
                MyBeanPostProcessor.class.getClassLoader(), // 代理对象
                bean.getClass().getInterfaces(), // 目标对象
                new InvocationHandler() {

                    @Override
                    public Object invoke(Object proxy, Method method, Object[] args) throws Throwable {
                        System.out.println("---开启事务---");
                        Object obj = method.invoke(bean, args); // 执行目标方法,本例中的目标方法是addUser
                        System.out.println("---关闭事务---");
                        return obj;
                    }
                }); // 代理的处理程序
    }
}
在spring容器中进行配置:
applicationContext.xml
<?xml version="1.0" encoding="UTF-8"?>
<beans xmlns="http://www.springframework.org/schema/beans"
       xmlns:xsi="http://www.w3.org/2001/XMLSchema-instance"
       xsi:schemaLocation="http://www.springframework.org/schema/beans http://www.springframework.org/schema/beans/spring-beans.xsd">
<!--
        init-method 用于配置初始化方法,用于准备数据等使用场景
        destroy-method 用于配置销毁方法,用于清理资源等使用场景
    -->
    <bean id="userServiceId" class="service.UserServiceImpl"
        init-method="myInit" destroy-method="myDestory"></bean>

    <!-- 将后处理的实现类注册给spring -->
    <bean class="com.itheima.e_lifecycle.MyBeanPostProcessor"></bean>
</beans>
测试示例代码如下:
TestLifecycle.java
public class TestLifecycle {

    @Test
    public void demo01() throws Exception {
        // 现在:使用spring 工厂(spring 容器)
        ApplicationContext applicationContext = new ClassPathXmlApplicationContext("applicationContext.xml");
        UserService userService = (UserService) applicationContext.getBean("userServiceId");
        userService.addUser();
       // 要想使我的销毁方法也执行,必须要求:
      // 1.容器必须先close,我的销毁方法才会执行;
      // 2.必须是单例的(spring所创建该bean的实例个数只有一个)即bean中的scope配置成默认即可。
      // 因为此close方法在接口 ApplicationContext 中没有定义,而在实现类中提供了该方法,我们可以使用反射,因为反射最后执行的就是实现类中的方法。
      applicationContext.getClass().getMethod("close").invoke(applicationContext);
      }
      }
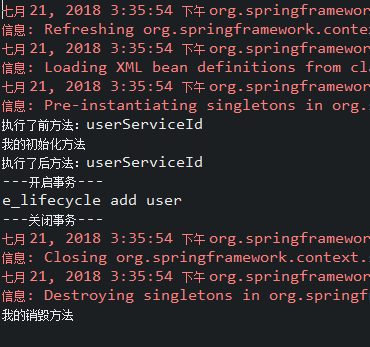
- 运行结果截图:
- 问题1:后处理bean作用某一个目标类,还是所有目标类?
答:所有。 - 问题2:如何只作用一个?
答:通过获取"参数2"beanName进行控制。例如:"xxx".equals(method.getName());
-
六、依赖注入Bean 的属性(xml)
- 注入依赖对象可以采用:
手工装配或自动装配。在实际应用中建议使用手工装配,因为自动装配会产生未知情况,开发人员无法预见最终的装配结果。- 手动装配:一般进行配置信息都采用手动装配。
- 基于xml装配基于注解装配 => 之后讲解
- 构造方法注入
- 属性setter方法注入
- 接口注入(spring不支持)
- 基于xml装配基于注解装配 => 之后讲解
- 自动装配:在struts 和spring 整合的时候使用自动装配。
- byType:按类型装配
- byName:按名称装配
- constructor:按构造装配
- autodetect:不确定装配(即自动装配)
- 手动装配:一般进行配置信息都采用手动装配。
构造方法
Bean对象类:
public class User {

    private Integer uid;
    private String username;
    private Integer age;

    public User(Integer uid, String username) { // 构造方法一
        super();
        this.uid = uid;
        this.username = username;
    }

    public User(String username, Integer age) { // 构造方法二
        super();
        this.username = username;
        this.age = age;
    }
    // 省略getter 和 setter 方法
    // ......
在spring容器中进行配置:
applicationContext.xml
<?xml version="1.0" encoding="UTF-8"?>
<beans xmlns="http://www.springframework.org/schema/beans"
       xmlns:xsi="http://www.w3.org/2001/XMLSchema-instance"
       xsi:schemaLocation="http://www.springframework.org/schema/beans http://www.springframework.org/schema/beans/spring-beans.xsd">
 <!--6.5.1、构造方法注入
        <constructor-arg> 用于配置构造方法的一个参数argument
            name :参数的名称
            value :设置普通数据
            ref :设置引用数据,一般是另一个bean 的id值

            index :参数的索引号,从0开始 。如果只有索引,匹配到了多个构造方法时,默认使用第一个。
            type :确定参数类型

        例如1:name属性开发中不常用,因为使用该属性需要关联要实例化对象的源码,否则name的值你就不知道。而一般开发中我们我们不会得到源码。
            <constructor-arg name="username" value="李晓艺"></constructor-arg>
            <constructor-arg name="age" value="26"></constructor-arg>
        例如2:类型type 和  索引index (这两者结合使用)
            <constructor-arg index="0" type="java.lang.String" value="1"></constructor-arg>
            <constructor-arg index="1" type="java.lang.Integer" value="2"></constructor-arg>

            注意:在开发中为了指定执行的是哪个构造方法,一般使用index属性和type属性结合的方式。
    -->
    <bean id="userId" class="entity.User">
        <constructor-arg index="0" type="java.lang.String" value="1"></constructor-arg>
        <constructor-arg index="1" type="java.lang.Integer" value="2"></constructor-arg>
    </bean>
</beans>
setter方法
在spring容器中进行配置:
applicationContext.xml
<?xml version="1.0" encoding="UTF-8"?>
<beans xmlns="http://www.springframework.org/schema/beans"
       xmlns:xsi="http://www.w3.org/2001/XMLSchema-instance"
       xsi:schemaLocation="http://www.springframework.org/schema/beans http://www.springframework.org/schema/beans/spring-beans.xsd">
 <!--6.5.2、setter方法注入
        * 注入的是普通数据 时
            <property name="" value="值"></property>
            等效
            <property name="">
                <value>值</value>
            </property>

        * 注入的是引用数据时
            <property name="" ref="另一个bean的id"></property>
            等效
            <property name="">
                <ref bean="另一个bean的id"></ref>
            </property>
    -->
    <bean id="personId" class="entity.Person">
        <property name="pname" value="晓艺"></property>
        <property name="age">
            <value>26</value>
        </property>

        <property name="homeAddr" ref="homeAddrId"></property>
        <property name="companyAddr">
            <ref bean="companyAddrId"></ref>
        </property>
    </bean>

    <bean id="homeAddrId" class="entity.Address">
        <property name="addr" value="山西运城"></property>
        <property name="tel" value="911">