Spring Boot -- Spring Boot之@Async异步调用、Mybatis、事务管理等
这一节将在上一节的基础上,继续深入学习Spring Boot相关知识,其中主要包括@Async异步调用,@Value自定义参数、Mybatis、事务管理等。
本节所使用的代码是在上一节项目代码中,继续追加的,因此需要先学习上一节内容。
一、使用@Async实现异步调用
要在springboot中使用异步调用方法,只要在被调用的方法上面加上@Async就可以了;
1.1.准备工作
准备一个Spring Boot项目,在App类上加上@EnableAsync注解开启异步:
package com.zy.example;

import org.springframework.boot.SpringApplication;
import org.springframework.boot.autoconfigure.SpringBootApplication;
import org.springframework.scheduling.annotation.EnableAsync;

/**
 * 启动代码
 *
 * @since 2020-2-2
 * @author zy
 */

@SpringBootApplication
@EnableAsync
public class App {
    public static void main(String[] args){
        //整个程序入口 启动Spring Boot项目
        SpringApplication.run(App.class,args);
    }
}
这个注解如果不加,@Async注解失效。
1.2、controller
在包com.zy.example.controller下,创建文件HelloController.java:
package com.zy.example.controller;

import com.zy.example.service.HelloService;
import org.springframework.beans.factory.annotation.Autowired;
import org.springframework.beans.factory.annotation.Value;
import org.springframework.web.bind.annotation.RequestMapping;
import org.springframework.web.bind.annotation.RestController;

import java.time.Instant;

/**
 * 用于演示@Async异步调用
 *
 * @author zy
 * @since 2020-2-4
 */
@RestController
@RequestMapping("/hello")
public class HelloController {

    @Autowired
    private HelloService helloService;/**
     * 同步方法
     * @return
     */
    @RequestMapping("/sync")
    public String getSyncHello(){

        long n = Instant.now().toEpochMilli();
        //异步
        String s = helloService.syncSayHello();

        long f = Instant.now().toEpochMilli();
        return s + " 时间: " + (f-n);
    }

    /**
     * 异步方法
     * @return
     */
    @RequestMapping("/async")
    public String getAsyncHello(){
        long n = Instant.now().toEpochMilli();
        //异步
        String s = helloService.asyncSayHello();

        long f = Instant.now().toEpochMilli();
        return s + "时间:" + (f-n);
    }

}
1.3、Service
新建包com.zy.example.service,并在包下创建HelloService.java文件:
package com.zy.example.service;

import lombok.extern.slf4j.Slf4j;
import org.springframework.beans.factory.annotation.Autowired;
import org.springframework.stereotype.Service;

/**
 * 用于演示@Async异步调用
 *
 * @author zy
 * @since 2020-2-4
 */
@Service
@Slf4j
public class HelloService {
    @Autowired
    private SleepService sleepService;

    /**
     * 同步方法
     * @return
     */
    public String syncSayHello() {
        try {
            sleepService.syncSleep();
            return "hello world,这是同步方法";
        } catch (InterruptedException e) {
            log.error(e.getMessage(),e);
            return "error";
        }
    }

    /**
     * 异步方法
     * @return
     */
    public String asyncSayHello() {
        try {
            log.info("主线程 " + Thread.currentThread().getName());
            sleepService.asyncSleep();
            return "hello world,这是异步方法";
        } catch (InterruptedException e) {
            log.error(e.getMessage(),e);
            return "error";
        }
    }
}
这里为了模拟应用场景,将耗时的方法放在另一个service里面,就叫SleepService,两个方法都是休眠3秒,aysncSleep方法上面有一个@Async注解。
package com.zy.example.service;

import lombok.extern.slf4j.Slf4j;
import org.springframework.scheduling.annotation.Async;
import org.springframework.stereotype.Service;

/**
 * 用于演示@Async异步调用
 *
 * @author zy
 * @since 2020-2-4
 */
@Service
@Slf4j
public class SleepService {
    /**
     * 同步方法
     * @throws InterruptedException
     */
    public void syncSleep() throws InterruptedException {
        log.info("线程名: " +Thread.currentThread().getName());
        log.info("开始同步休眠3秒");
        Thread.sleep(3000);
        log.info("同步休眠结束");
    }

    /**
     * 异步方法
     * @throws InterruptedException
     */
    @Async
    public void asyncSleep() throws InterruptedException {
        log.info("次线程 "+Thread.currentThread().getName());
        log.info("开始异步休眠3秒");
        Thread.sleep(3000);
        log.info("异步休眠休眠结束");
    }
}
1.4、测试
同步:访问 http://localhost:8080/hello/sync, 需要3秒的时间才能收到响应;

异步:访问 http://localhost:8080/hello/async,可见主线程和次线程打印出来的线程名不一样,也就是Spring Boot帮我们开启了一个线程去处理。

注意事项
- 必须要加@EnableAsync注解;
- 不能在同一类下调用@Async注解的方法,比如A类下有a和b方法,b方法有@Async注解,不能直接这样a调用b,要把b放到其他类中;
- @Async也可以打在类上,这样类下面的所有方法都是异步的(被其他类调用的时候);
二、@Value自定义参数
@Value在Spring中,功能非常强大,可以注入一个配置项,可以引用容器中的Bean(调用其方法),也可以做一些简单的运算。下面通过@Value引用一个配置项。在配置文件application.properties中配置如下内容:
name=www.zy.example.com
修改HelloController.java文件,添加如下代码:
    //初始化的时候加载
    @Value("${name}")
    private String name;

    @RequestMapping("/getName")
    public String getName(){
        return name;
    }
此时访问http://localhost:8080/hello/getName,将会返回配置文件中name属性的值。
此外@configurationproperties也具有类似的作用,具体可以查看博客springboot @value和@configurationproperties注解的区别。
三、多环境配置
软件开发中经常有开发环境、测试环境、预发布环境、生产环境,而且一般这些环境配置会各不相同,手动改配置麻烦且容易出错,如何管理不同环境的配置参数呢?Spring Boot + maven可以解决不同环境独立配置不同参数的问题。
不同环境的配置yml(或者properties,yml比properties配置文件更加节约、简约)文件名不一样:
- application-dev.yml(开发环境);
- application-test.yml(测试环境);
- application-uat.yml(预发布);
- application-pro.yml(生产环境);
eg:

application-dev.yml配置示例:
info:
  build:
    name: ${project.artifactId}
    groupId: ${project.groupId}
    artifactId: ${project.artifactId}
    version: ${project.version}

server:
  port: 8081

endpoints:
  enabled: true
  sensitive: false

data:
  test:
    envName: dev
    envconfig: 127.0.0.1:8081
注意属性名: 属性值,在:后有一个空格;
application.properties文件追加:
spring.profiles.active=dev
如果要切换不同环境,只需要修改spring.profiles.active即可。
如果想读取开发环境中的配置信息,可以通过如下方式:
@Setter
@Getter
@NoArgsConstructor
@AllArgsConstructor
@Component
@ConfigurationProperties(prefix = "data.test")
@Service
public class DataConfig {
    private String envName;
    private String envconfig;
}
验证环境参数:
@Api("home controller")
@RestController
public class HomeController {
    @Autowired
    private DataConfig dataConfig;

    @RequestMapping("/env")
    @ApiOperation("env")
    public Object testEnv() {
        return dataConfig;
    }
}
四、Mybatis
4.1、创建数据表
这里测试采用的是mysql数据库,首先创建example数据库:
--创建数据库
DROP DATABASE IF EXISTS  GLODWIND;

CREATE DATABASE IF NOT EXISTS  example;

--选择数据库
USE  example;
创建student数据表、并插入数据:
--创建表
CREATE TABLE student(
             ID INT PRIMARY KEY AUTO_INCREMENT ,
             NAME VARCHAR(20),
             AGE SMALLINT,
             SEX BIT,
             CLASS  VARCHAR(50),
             ADDRESS  VARCHAR(100)) default charset=utf8;

--插入
insert into student(name,age,sex,class,address) values('郑洋','24',1,'计算机(1)班','江苏省无锡市滨湖区');

--查询
select * from student;
4.2、pom文件导入依赖
<!--  mybatis  -->
<dependency>
   <groupId>org.mybatis.spring.boot</groupId>
   <artifactId>mybatis-spring-boot-starter</artifactId>
   <version>2.1.1</version>
</dependency>

<!--  mysql依赖  -->
<dependency>
    <groupId>mysql</groupId>
    <artifactId>mysql-connector-java</artifactId>
    <version>5.1.47</version>
</dependency>
4.3、配置mybatis
修改appliction.properties,追加sql配置信息:
#mybati sql配置
#MySQL的JDBC URL编写方式:jdbc:mysql://主机名称:连接端口/数据库的名称  默认使用zy.example数据库
spring.datasource.driver-class-name=com.mysql.jdbc.Driver
spring.datasource.url=jdbc:mysql://localhost:3306/example?serverTimezone=UTC&characterEncoding=utf8&useUnicode=true&useSSL=false
spring.datasource.username=root
spring.datasource.password=123456aa
spring.datasource.max-idle=10
spring.datasource.max-wait=10000
spring.datasource.min-idle=5
4.4、代码
在包com.zy.example.entity下新建StudentEntity.java文件
package com.zy.example.entity;

import lombok.Data;

/**
 * student实体类
 *
 * @author zy
 * @since  2020-2-4
 */
@Data
public class StudentEntity {
    /**
     * id 主键、自增
     */
    private Integer id;

    /**
     * 姓名
     */
    private String name;

    /**
     * 年龄
     */
    private Integer age;

    /**
     * 性别
     */
    private Boolean sex;

    /**
     * 班级
     */
    private String className;

    /**
     * 地址
     */
    private String address;

}
新建包com.zy.example.mapper,并在包下新建StudentMapper.java文件:
package com.zy.example.mapper;

import com.zy.example.entity.StudentEntity;
import org.apache.ibatis.annotations.Insert;
import org.apache.ibatis.annotations.Param;
import org.apache.ibatis.annotations.Select;
import org.springframework.stereotype.Service;

import java.util.List;

/**
 * student Mapper类
 *
 * @author zy
 * @since 2020-2-4
 */
@Service
public interface  StudentMapper {
    //查询语句
    @Select("SELECT id,name,age,sex,`class` as className,address FROM STUDENT WHERE ID = #{id}")
    StudentEntity getStudentById(@Param("id") Integer id);

    //新增语句
    @Insert("INSERT INTO STUDENT(name,age,sex) VALUES(#{name}, #{age},#{sex})")
    int insertStudent(@Param("name") String name, @Param("age") Integer age, @Param("sex") Boolean sex);
}
在包com.zy.example.service下新建StudentService.java文件:
package com.zy.example.service;

import com.github.pagehelper.PageHelper;
import com.github.pagehelper.PageInfo;
import com.zy.example.mapper.StudentMapper;
import com.zy.example.entity.StudentEntity;
import lombok.extern.slf4j.Slf4j;
import org.springframework.beans.factory.annotation.Autowired;
import org.springframework.stereotype.Service;import java.util.List;

/**
 * student业务逻辑
 *
 * @author zy
 * @since 2020-2-4
 */
@Slf4j
@Service
public class StudentService {

    @Autowired
    private StudentMapper studentMapper;

    /**
     * 新增学生
     * @param name:姓名
     * @param age:年龄
     * @param sex:性别
     * @return 返回受影响的行数
     */public int insertStudent(String name,Integer age,Boolean sex){
        int ret = studentMapper.insertStudent(name,age,sex);
        int i = 1/age;
        log.info("#####新增学生###########",ret);
        return ret;
    }


    /**
     * 根据id获取学生信息
     * @param id 学生id
     * @return 返回学生信息
     */
    public StudentEntity getStudentById(Integer id){
        log.info("#####获取学生信息###########",id);
        return studentMapper.getStudentById(id);
    }

}
在包com.zy.example.controller下新建StudentController.java文件:
package com.zy.example.controller;

import com.github.pagehelper.PageInfo;
import com.zy.example.entity.StudentEntity;
import com.zy.example.service.StudentService;
import org.springframework.beans.factory.annotation.Autowired;
import org.springframework.web.bind.annotation.RequestMapping;
import org.springframework.web.bind.annotation.RequestParam;
import org.springframework.web.bind.annotation.RestController;

/**
 * student控制器  测试mybatis
 *
 * @author zy
 * @since 2020-2-4
 */
@RestController
public class StudentController {

    @Autowired
    private StudentService studentService;

    /**
     * 新增学生 这里没有对参数进行校验  127.0.0.1:8081/insertStudent?name=李艳&age=25&sex=1
     * @param name 姓名
     * @param age 年龄
     * @param sex 性别
     * @return 返回受影响的行数
     */
    @RequestMapping("/insertStudent")
    public int insertStudent(@RequestParam String name,@RequestParam Integer age,@RequestParam Boolean sex){
        return studentService.insertStudent(name,age,sex);
    }

    /**
     * 根据id获取学生信息 127.0.0.1:8081/getStudent?id=1
     * @param id 学生id
     * @return 返回学生信息
     */
    @RequestMapping("/getStudent")
    public StudentEntity getStudentById(@RequestParam Integer id){
        return studentService.getStudentById(id);
    }

}
修改App.java文件,加入mapper扫包范围:
package com.zy.example;

import org.mybatis.spring.annotation.MapperScan;
import org.springframework.boot.SpringApplication;
import org.springframework.boot.autoconfigure.SpringBootApplication;
import org.springframework.scheduling.annotation.EnableAsync;

/**
 * 启动代码
 * mybatis启动方式有两种:
 * 1、在mapper层添加@Mapper注解
 * 2、在启动类上加@MapperScan指定扫包范围
 *
 * @since 2020-2-2
 * @author zy
 */
@SpringBootApplication
@MapperScan(basePackages = {"com.zy.example.mapper"})
@EnableAsync
public class App {
    public static void main(String[] args){
        //整个程序入口 启动Spring Boot项目
        SpringApplication.run(App.class,args);
    }
}
启动程序,访问http://127.0.0.1:8081/getStudent?id=1,输出结果如下:

4.5、mybatis整合分页插件
(1)、pageHelper
PageHelper 是一款好用的开源免费的 Mybatis 第三方物理分页插件,它具有以下特点:
- 物理分页;
- 支持常见的 12 种数据库,Oracle,MySql,MariaDB,SQLite,DB2,PostgreSQL,SqlServer 等;
- 支持多种分页方式;
- 支持常见的 RowBounds(PageRowBounds),PageHelper.startPage 方法调用,Mapper 接口参数调用;
(2)、新增依赖
<!-- springboot 整合 pagehelper -->
<dependency>
       <groupId>com.github.pagehelper</groupId>
       <artifactId>pagehelper-spring-boot-starter</artifactId>
        <version>1.2.5</version>
</dependency>
(3)、新增配置信息
在application.properties文件中追加如下配置:
logging.level.com.example.demo.dao=DEBUG
pagehelper.helperDialect=mysql
pagehelper.reasonable=true
pagehelper.supportMethodsArguments=true
pagehelper.params=count=countSql
pagehelper.page-size-zero=true
(4)、代码
修改StudentMapper.java,添加查询全部学生信息的方法:
package com.zy.example.mapper;

import com.zy.example.entity.StudentEntity;
import org.apache.ibatis.annotations.Insert;
import org.apache.ibatis.annotations.Param;
import org.apache.ibatis.annotations.Select;
import org.springframework.stereotype.Service;

import java.util.List;

/**
 * student Mapper类
 *
 * @author zy
 * @since 2020-2-4
 */
@Service
public interface  StudentMapper {
    //查询语句
    @Select("SELECT id,name,age,sex,`class` as className,address FROM STUDENT WHERE ID = #{id}")
    StudentEntity getStudentById(@Param("id") Integer id);

    //查询全部
    @Select("SELECT id,name,age,sex,`class` as className,address FROM STUDENT")
    List<StudentEntity> getStudentList();

    //新增语句
    @Insert("INSERT INTO STUDENT(name,age,sex) VALUES(#{name}, #{age},#{sex})")
    int insertStudent(@Param("name") String name, @Param("age") Integer age, @Param("sex") Boolean sex);
}
修改StudentService.java:
package com.zy.example.service;

import com.github.pagehelper.PageHelper;
import com.github.pagehelper.PageInfo;
import com.zy.example.mapper.StudentMapper;
import com.zy.example.entity.StudentEntity;
import lombok.extern.slf4j.Slf4j;
import org.springframework.beans.factory.annotation.Autowired;
import org.springframework.stereotype.Service;import java.util.List;

/**
 * student业务逻辑
 *
 * @author zy
 * @since 2020-2-4
 */
@Slf4j
@Service
public class StudentService {

    @Autowired
    private StudentMapper studentMapper;

    /**
     * 新增学生
     * @param name:姓名
     * @param age:年龄
     * @param sex:性别
     * @return 返回受影响的行数
     */public int insertStudent(String name,Integer age,Boolean sex){
        int ret = studentMapper.insertStudent(name,age,sex);
        int i = 1/age;
        log.info("#####新增学生###########",ret);
        return ret;
    }


    /**
     * 根据id获取学生信息
     * @param id 学生id
     * @return 返回学生信息
     */
    public StudentEntity getStudentById(Integer id){
        log.info("#####获取学生信息###########",id);
        return studentMapper.getStudentById(id);
    }


    /**
     * 分页查询 获取学生信息
     * @param page 当前页
     * @param pageSize 每页记录数目
     * @return 返回学生信息
     */
    public  PageInfo<StudentEntity>  getStudentList(int page,int pageSize){
        //mysql查询 limit
        //pageHelper 帮我们生成分页语句     底层实现原理:利用AOP、改写sql语句
        PageHelper.startPage(page,pageSize);
        List<StudentEntity> listStudent = studentMapper.getStudentList();
        //返回给客户端展示
        PageInfo<StudentEntity> pageInfoStudent = new PageInfo<StudentEntity>(listStudent);
        return pageInfoStudent;
    }
}
修改StudentController.java:
package com.zy.example.controller;

import com.github.pagehelper.PageInfo;
import com.zy.example.entity.StudentEntity;
import com.zy.example.service.StudentService;
import org.springframework.beans.factory.annotation.Autowired;
import org.springframework.web.bind.annotation.RequestMapping;
import org.springframework.web.bind.annotation.RequestParam;
import org.springframework.web.bind.annotation.RestController;

/**
 * student控制器  测试mybatis
 *
 * @author zy
 * @since 2020-2-4
 */
@RestController
public class StudentController {

    @Autowired
    private StudentService studentService;

    /**
     * 新增学生 这里没有对参数进行校验  127.0.0.1:8081/insertStudent?name=李艳&age=25&sex=1
     * @param name 姓名
     * @param age 年龄
     * @param sex 性别
     * @return 返回受影响的行数
     */
    @RequestMapping("/insertStudent")
    public int insertStudent(@RequestParam String name,@RequestParam Integer age,@RequestParam Boolean sex){
        return studentService.insertStudent(name,age,sex);
    }

    /**
     * 根据id获取学生信息 127.0.0.1:8081/getStudent?id=1
     * @param id 学生id
     * @return 返回学生信息
     */
    @RequestMapping("/getStudent")
    public StudentEntity getStudentById(@RequestParam Integer id){
        return studentService.getStudentById(id);
    }

    /**
     * 分页查询 获取学生信息  127.0.0.1:8081/student?page=1&pageSize=2
     * @param page 当前页
     * @param pageSize 每页记录数目
     * @return 返回学生信息
     */

    @RequestMapping("/student")
    public PageInfo<StudentEntity> getStudentList(@RequestParam  int page,@RequestParam  int pageSize){
        return studentService.getStudentList(page,pageSize);
    }
}
运行程序,访问http://127.0.0.1:8081/student?page=1&pageSize=2,输出如下:

五、Spring事务管理
按是否通过编程分为声明式事务和编程式事务:
- 声明式事务:通过XML配置或者注解实现;
- 编程式事务:通过编程代码在业务逻辑时需要时自行实现,粒度更小;
Spring Boot默认集成事物,只要在方法上加上@Transactional即可。
5.1、@Transactional使用
我们给类StudentService的insertStudent()方法加上@Transactional注解,并修改代码如下:
    /**
     * 新增学生
     * @param name:姓名
     * @param age:年龄
     * @param sex:性别
     * @return:返回受影响的行数
     */
    @Transactional
    public int insertStudent(String name,Integer age,Boolean sex){
        int ret = studentMapper.insertStudent(name,age,sex);
        int i = 1/age;
        log.info("#####新增学生###########",ret);
        return ret;
    }
当我们运行程序,访问http://127.0.0.1:8081/insertStudent?name=李艳&age=25&sex=1,此时会将数据成功插入数据库。而当我们访问http://127.0.0.1:8081/insertStudent?name=李艳&age=0&sex=1,此时事务将会执行失败,执行回归操作,数据不会插入数据库。

使用Spring事务注意事项:不要try,为什么不要try,因为需要将异常抛出给外层;
六、Spring Boot整合多数据源
什么是多数据源,说白了就是一个项目使用到多个数据库。
在一个项目中多数据源如何划分:分包名(业务)或者注解方式。
采用分包的方式划分如:
- com.zy.example.datasource1---- datasource1
- com.zy.example.datasource2 ---- datasource2
为了演示分包方式,我们将会新建一个项目spring-boot-multidatasource。
6.1、创建数据库、数据表
--创建数据库1
DROP DATABASE IF EXISTS  DATABASE1;

CREATE DATABASE IF NOT EXISTS  DATABASE1;

--选择数据库
USE  DATABASE1;

--创建表
CREATE TABLE student1(
             ID INT PRIMARY KEY AUTO_INCREMENT ,
             NAME VARCHAR(20),
             AGE SMALLINT,
             SEX BIT,
             CLASS  VARCHAR(50),
             ADDRESS  VARCHAR(100)) default charset=utf8;


--创建数据库2
DROP DATABASE IF EXISTS  DATABASE2;

CREATE DATABASE IF NOT EXISTS  DATABASE2;

--选择数据库
USE  DATABASE2;

--创建表
CREATE TABLE student2(
             ID INT PRIMARY KEY AUTO_INCREMENT ,
             NAME VARCHAR(20),
             AGE SMALLINT,
             SEX BIT,
             CLASS  VARCHAR(50),
             ADDRESS  VARCHAR(100)) default charset=utf8;
6.2、配置mybatis
新建appliction.properties,追加多数据源sql配置信息:
###datasource1
spring.datasource.datasource1.jdbc-url = jdbc:mysql://localhost:3306/database1
spring.datasource.datasource1.username = root
spring.datasource.datasource1.password = 123456aa
spring.datasource.datasource1.driver-class-name = com.mysql.jdbc.Driver

###datasource2
spring.datasource.datasource2.jdbc-url = jdbc:mysql://localhost:3306/database2
spring.datasource.datasource2.username = root
spring.datasource.datasource2.password = 123456aa
spring.datasource.datasource2.driver-class-name = com.mysql.jdbc.Driver
6.3、pom文件追加依赖
<?xml version="1.0" encoding="UTF-8"?>
<project xmlns="http://maven.apache.org/POM/4.0.0"
         xmlns:xsi="http://www.w3.org/2001/XMLSchema-instance"
         xsi:schemaLocation="http://maven.apache.org/POM/4.0.0 http://maven.apache.org/xsd/maven-4.0.0.xsd">

    <groupId>com.zy.example</groupId>
    <artifactId>spring-boot-multidatasource</artifactId>
    <version>1.0-SNAPSHOT</version>
    <modelVersion>4.0.0</modelVersion>

    <!--  spring-boot-starter-parent  整合第三方常用框架依赖信息(各种引来信息)-->
    <parent>
        <groupId>org.springframework.boot</groupId>
        <artifactId>spring-boot-starter-parent</artifactId>
        <version>2.2.2.RELEASE</version>
    </parent>

    <!--  spring-boot-starter-web 是Spring Boot整合Spring MVC Web  -->
    <!--  相当于把第三方常用Maven依赖信息,在parent项目中封装好了,使用Spring Boot提供依赖信息关联整合的Jar包 -->
    <dependencies>
        <dependency>
            <groupId>org.springframework.boot</groupId>
            <artifactId>spring-boot-starter-web</artifactId>
            <!--  为什么不需要版本号,在parent里面已经封装好了版本号 -->
        </dependency>

        <!--   日志管理   -->
        <dependency>
            <groupId>org.springframework.boot</groupId>
            <artifactId>spring-boot-starter</artifactId>
            <exclusions>
                <!-- 排除自带的logback依赖 -->
                <exclusion>
                    <groupId>org.springframework.boot</groupId>
                    <artifactId>spring-boot-starter-logging</artifactId>
                </exclusion>
            </exclusions>
        </dependency>

        <dependency>
            <groupId>org.springframework.boot</groupId>
            <artifactId>spring-boot-starter-log4j</artifactId>
            <version>1.3.8.RELEASE</version>
        </dependency>

        <!--  lombok使用     -->
        <dependency>
            <groupId>org.projectlombok</groupId>
            <artifactId>lombok</artifactId>
            <version>1.16.20</version>
            <scope>provided</scope>
        </dependency>

        <!--  mybatis  -->
        <dependency>
            <groupId>org.mybatis.spring.boot</groupId>
            <artifactId>mybatis-spring-boot-starter</artifactId>
            <version>2.1.1</version>
        </dependency>

        <!--  mysql依赖  -->
        <dependency>
            <groupId>mysql</groupId>
            <artifactId>mysql-connector-java</artifactId>
            <version>5.1.47</version>
        </dependency>

    </dependencies>

</project>
6.4、代码
新建包com.zy.example.entity,新建StudentEntity.java文件:


package com.zy.example.entity;

import lombok.Data;

/**
 * student实体类
 *
 * @author zy
 * @since  2020-2-4
 */
@Data
public class StudentEntity {
    /**
     * id 主键、自增
     */
    private Integer id;

    /**
     * 姓名
     */
    private String name;

    /**
     * 年龄
     */
    private Integer age;

    /**
     * 性别
     */
    private Boolean sex;

    /**
     * 班级
     */
    private String className;

    /**
     * 地址
     */
    private String address;

}
新建包com.zy.example.mapper.datasource1.,并新建StudentMapper01.java文件:
package com.zy.example.mapper.datasource1;

import com.zy.example.entity.StudentEntity;
import org.apache.ibatis.annotations.Insert;
import org.apache.ibatis.annotations.Param;
import org.apache.ibatis.annotations.Select;
import org.springframework.stereotype.Service;

/**
 * student Mapper类
 *
 * @author zy
 * @since  2020-2-4
 */
@Service
public interface StudentMapper01 {
    //查询语句
    @Select("SELECT id,name,age,sex,`class` as className,address FROM STUDENT1 WHERE ID = #{id}")
    StudentEntity getStudentById(@Param("id") Integer id);

    //新增语句
    @Insert("INSERT INTO STUDENT1(name,age,sex) VALUES(#{name}, #{age},#{sex})")
    int insertStudent(@Param("name") String name, @Param("age") Integer age,@Param("sex") Boolean sex);
}
新建包com.zy.example.mapper.datasource2.,并新建StudentMapper02.java文件:
package com.zy.example.mapper.datasource2;

import com.zy.example.entity.StudentEntity;
import org.apache.ibatis.annotations.Insert;
import org.apache.ibatis.annotations.Param;
import org.apache.ibatis.annotations.Select;
import org.springframework.stereotype.Service;

/**
 * student Mapper类
 *
 * @author zy
 * @since 2020-2-4
 */
@Service
public interface StudentMapper02 {
    //查询语句
    @Select("SELECT id,name,age,sex,`class` as className,address FROM STUDENT2 WHERE ID = #{id}")
    StudentEntity getStudentById(@Param("id") Integer id);

    //新增语句
    @Insert("INSERT INTO STUDENT2(name,age,sex) VALUES(#{name}, #{age},#{sex})")
    int insertStudent(@Param("name") String name, @Param("age") Integer age, @Param("sex") Boolean sex);
}
新建包com.zy.example.service.datasource1,并新建StudentService01.java文件:
package com.zy.example.service.datasource1;

import com.zy.example.mapper.datasource1.StudentMapper01;
import com.zy.example.entity.StudentEntity;
import lombok.extern.slf4j.Slf4j;
import org.springframework.beans.factory.annotation.Autowired;
import org.springframework.stereotype.Service;

/**
 * student业务逻辑
 *
 * @author zy
 * @since 2020-2-4
 */
@Service
@Slf4j
public class StudentService01 {
    @Autowired
    private StudentMapper01 studentMapper01;

    /**
     * 新增学生
     * @param name 姓名
     * @param age 年龄
     * @param sex 性别
     * @return 返回受影响的行数
     */
    public int insertStudent(String name,Integer age,Boolean sex){
        int ret = studentMapper01.insertStudent(name,age,sex);
        log.info("#####新增学生###########",ret);
        return ret;
    }


    /**
     * 根据id获取学生信息
     * @param id 学生id
     * @return 返回学生信息
     */
    public StudentEntity  getStudentById(Integer id){
        log.info("#####获取学生信息###########",id);
        return studentMapper01.getStudentById(id);
    }
}
新建包com.zy.example.service.datasource2,并新建StudentService02.java文件:
package com.zy.example.service.datasource2;

import com.zy.example.mapper.datasource2.StudentMapper02;
import com.zy.example.entity.StudentEntity;
import lombok.extern.slf4j.Slf4j;
import org.springframework.beans.factory.annotation.Autowired;
import org.springframework.stereotype.Service;

/**
 * student业务逻辑
 *
 * @author zy
 * @since 2020-2-4
 */
@Service
@Slf4j
public class StudentService02 {
    @Autowired
    private StudentMapper02 studentMapper02;

    /**
     * 新增学生
     * @param name 姓名
     * @param age 年龄
     * @param sex 性别
     * @return 返回受影响的行数
     */
    public int insertStudent(String name,Integer age,Boolean sex){
        int ret = studentMapper02.insertStudent(name,age,sex);
        log.info("#####新增学生###########",ret);
        return ret;
    }


    /**
     * 根据id获取学生信息
     * @param id 学生id
     * @return 返回学生信息
     */
    public StudentEntity  getStudentById(Integer id){
        log.info("#####获取学生信息###########",id);
        return studentMapper02.getStudentById(id);
    }
}
新建包com.zy.example.datasource,在包下新建Datasource1Config.java:
package com.zy.example.datasource;

import org.apache.ibatis.session.SqlSessionFactory;
import org.mybatis.spring.SqlSessionFactoryBean;
import org.mybatis.spring.SqlSessionTemplate;
import org.mybatis.spring.annotation.MapperScan;
import org.springframework.beans.factory.annotation.Qualifier;
import org.springframework.boot.context.properties.ConfigurationProperties;
import org.springframework.boot.jdbc.DataSourceBuilder;
import org.springframework.context.annotation.Bean;
import org.springframework.context.annotation.Configuration;
import org.springframework.context.annotation.Primary;
import org.springframework.jdbc.datasource.DataSourceTransactionManager;

import javax.sql.DataSource;


/**
 * 读取数据源datasource1配置信息
 * {@link Configuration}用于定义配置类,可替换xml配置文件,被注解的类内部包含有一个或多个被@Bean注解的方法,这些方法将会被AnnotationConfigApplicationContext或AnnotationConfigWebApplicationContext类进行扫描,并用于构建bean定义,初始化Spring容器
 * {@link Configuration}等价于<Beans></Beans>
 * {@link Bean}等价于<Bean></Bean>
 * {@link ComponentScan}等价于<context:component-scan base-package="com.zy.example.datasource1"/>
 *
 * @author zy
 * @since  2020-2-5
 */
//表示这个类为一个配置类
@Configuration
//配置mybatis的接口类放的地方
@MapperScan(basePackages = "com.zy.example.mapper.datasource1", sqlSessionFactoryRef = "datasource1SqlSessionFactory")
public class Datasource1Config {

    /**
     * 功能描述:(配置datasource1数据库)
     * @return:@return DataSource
     */
    //创建一个bean对象,并注入到Spring容器中
    @Bean(name = "datasource1DataSource")
    // 读取application.properties中的配置参数映射成为一个对象
    @ConfigurationProperties(prefix = "spring.datasource.datasource1")
    //表示这个数据源是默认数据源
    @Primary
    public DataSource testDataSource() {
        return DataSourceBuilder.create().build();
    }


    /**
     * 功能描述:(datasource1 sql会话工厂)
     * @param dataSource
     * @return
     * @throws Exception
     */
    @Bean(name = "datasource1SqlSessionFactory")
    //表示这个数据源是默认数据源
    @Primary
    //@Qualifier表示查找Spring容器中名字为datasource1DataSource的对象
    public SqlSessionFactory testSqlSessionFactory(@Qualifier("datasource1DataSource") DataSource dataSource)
            throws Exception {
        SqlSessionFactoryBean bean = new SqlSessionFactoryBean();
        bean.setDataSource(dataSource);
        return bean.getObject();
    }


    /**
     * 功能描述:(datasource1 事物管理)
     * @param dataSource
     * @return
     */
    @Bean(name = "datasource1TransactionManager")
    //表示这个数据源是默认数据源
    @Primary
    public DataSourceTransactionManager testTransactionManager(@Qualifier("datasource1DataSource") DataSource dataSource) {
        return new DataSourceTransactionManager(dataSource);
    }

    @Bean(name = "datasource1SqlSessionTemplate")
    //表示这个数据源是默认数据源
    @Primary
    public SqlSessionTemplate testSqlSessionTemplate(
            @Qualifier("datasource1SqlSessionFactory") SqlSessionFactory sqlSessionFactory) throws Exception {
        return new SqlSessionTemplate(sqlSessionFactory);
    }

}
在包com.zy.example.datasource下,新建Datasource2Config.java:
package com.zy.example.datasource;

import org.apache.ibatis.session.SqlSessionFactory;
import org.mybatis.spring.SqlSessionFactoryBean;
import org.mybatis.spring.SqlSessionTemplate;
import org.mybatis.spring.annotation.MapperScan;
import org.springframework.beans.factory.annotation.Qualifier;
import org.springframework.boot.context.properties.ConfigurationProperties;
import org.springframework.boot.jdbc.DataSourceBuilder;
import org.springframework.context.annotation.Bean;
import org.springframework.context.annotation.Configuration;
import org.springframework.jdbc.datasource.DataSourceTransactionManager;

import javax.sql.DataSource;


/**
 * 读取数据源datasource1配置信息
 * {@link Configuration}用于定义配置类,可替换xml配置文件,被注解的类内部包含有一个或多个被@Bean注解的方法,这些方法将会被AnnotationConfigApplicationContext或AnnotationConfigWebApplicationContext类进行扫描,并用于构建bean定义,初始化Spring容器
 * {@link Configuration}等价于<Beans></Beans>
 * {@link Bean}等价于<Bean></Bean>
 * {@link ComponentScan}等价于<context:component-scan base-package="com.zy.example.datasource2"/>
 *
 * @author zy
 * @since  2020-2-5
 */
//表示这个类为一个配置类
@Configuration
//配置mybatis的接口类放的地方
@MapperScan(basePackages = "com.zy.example.mapper.datasource2", sqlSessionFactoryRef = "datasource2SqlSessionFactory")
public class Datasource2Config {

    /**
     * 功能描述:(配置datasource2数据库)
     * @return:@return DataSource
     */
    //创建一个bean对象,并注入到Spring容器中
    @Bean(name = "datasource2DataSource")
    // 读取application.properties中的配置参数映射成为一个对象
    @ConfigurationProperties(prefix = "spring.datasource.datasource2")
    public DataSource testDataSource() {
        return DataSourceBuilder.create().build();
    }


    /**
     * 功能描述:(datasource2 sql会话工厂)
     * @param dataSource
     * @return
     * @throws Exception
     */
    @Bean(name = "datasource2SqlSessionFactory")
    //@Qualifier表示查找Spring容器中名字为datasource2DataSource的对象
    public SqlSessionFactory testSqlSessionFactory(@Qualifier("datasource2DataSource") DataSource dataSource)
            throws Exception {
        SqlSessionFactoryBean bean = new SqlSessionFactoryBean();
        bean.setDataSource(dataSource);
        return bean.getObject();
    }


    /**
     * 功能描述:(datasource2 事物管理)
     * @param dataSource
     * @return
     */
    @Bean(name = "datasource2TransactionManager")
    public DataSourceTransactionManager testTransactionManager(@Qualifier("datasource2DataSource") DataSource dataSource) {
        return new DataSourceTransactionManager(dataSource);
    }

    @Bean(name = "datasource2SqlSessionTemplate")
    public SqlSessionTemplate testSqlSessionTemplate(
            @Qualifier("datasource2SqlSessionFactory") SqlSessionFactory sqlSessionFactory) throws Exception {
        return new SqlSessionTemplate(sqlSessionFactory);
    }

}
新建包com.zy.example.controller,并新建MyBatisMultilDataSourceController.java文件:
package com.zy.example.controller;

import com.zy.example.service.datasource1.StudentService01;
import com.zy.example.service.datasource2.StudentService02;
import com.zy.example.entity.StudentEntity;
import org.springframework.beans.factory.annotation.Autowired;import org.springframework.web.bind.annotation.RequestMapping;
import org.springframework.web.bind.annotation.RequestParam;
import org.springframework.web.bind.annotation.RestController;

/**
 * 多数据源控制器
 *
 * @author zy
 * @since  2020-2-5
 */
@RestController
public class MyBatisMultilDataSourceController {
    @Autowired
    private StudentService01 studentService01;

    /**
     * 新增学生 这里没有对参数进行校验  127.0.0.1:8080/insertStudent01?name=01&age=25&sex=1
     * @param name 姓名
     * @param age 年龄
     * @param sex 性别
     * @return 返回受影响的行数
     */
    @RequestMapping("/insertStudent01")
    public int insertStudent01(@RequestParam String name, @RequestParam Integer age, @RequestParam Boolean sex){
        return studentService01.insertStudent(name,age,sex);
    }

    /**
     * 根据id获取学生信息
     * @param id 学生id
     * @return 返回学生信息
     */
    @RequestMapping("/getStudent01")
    public StudentEntity getStudentById01(@RequestParam Integer id){
        return studentService01.getStudentById(id);
    }

    @Autowired
    private StudentService02 studentService02;

    /**
     * 新增学生 这里没有对参数进行校验  127.0.0.1:8080/insertStudent02?name=02&age=25&sex=1
     * @param name 姓名
     * @param age 年龄
     * @param sex 性别
     * @return 返回受影响的行数
     */
    @RequestMapping("/insertStudent02")
    public int insertStudent02(@RequestParam String name, @RequestParam Integer age, @RequestParam Boolean sex){
        return studentService02.insertStudent(name,age,sex);
    }

    /**
     * 根据id获取学生信息
     * @param id 学生id
     * @return 返回学生信息
     */
    @RequestMapping("/getStudent02")
    public StudentEntity getStudentById02(@RequestParam Integer id){
        return studentService02.getStudentById(id);
    }

}
在包com.zy.example下新建程序入口文件App.java:
package com.zy.example;

import org.springframework.boot.SpringApplication;
import org.springframework.boot.autoconfigure.SpringBootApplication;

/**
 * 启动代码
 *
 * @author zy
 * @since  2020-2-2
 */

@SpringBootApplication
public class App {
    public static void main(String[] args){
        //整个程序入口 启动Spring Boot项目
        SpringApplication.run(App.class,args);
    }
}
最终项目结构如下:

运行程序,访问http://127.0.0.1:8080/insertStudent01?name=01&age=25&sex=1,查看数据库database1表student1:

运行程序,访问http://127.0.0.1:8080/insertStudent02?name=02&age=25&sex=1,查看数据库database2表student2:

6.5、多数据源事务管理
在多数据源的情况下,使用@Transactional注解时,应该指定事务管理者:
@Transactional(transactionManager = "datasource1TransactionManager")
我们修改MyBatisMultilDataSourceController.java,添加如下函数:
    /**
     * 新增学生 这里没有对参数进行校验  127.0.0.1:8080/insertStudent?name=00&age=25&sex=1
     * @param name 姓名
     * @param age 年龄
     * @param sex 性别
     * @return 返回受影响的行数
     */
    @RequestMapping("/insertStudent")
    @Transactional(transactionManager = "datasource1TransactionManager")
    public int insertStudent01AndStudent02(@RequestParam String name, @RequestParam Integer age, @RequestParam Boolean sex){
        //第一个数据源
        int ret1 = studentService01.insertStudent(name,age,sex);
        //第二个数据源
        int ret2 = studentService02.insertStudent(name,age,sex);
        int i=1/0;
        //datasource1回滚、datasource2入库
        return ret1+ret2;
    }
当我们访问http://127.0.0.1:8080/insertStudent?name=00&age=25&sex=1,我们会发现database2数据库student2表数据插入成功,而database1数据库student1表由于事务的特性,将会进行回滚,数据将不会插入成功。
七、分布式事务
随着微服务的拆分,肯定设计到分库分表,但这之中肯定设计到分布式事务。最典型的例子就是银行转账,比如银行A给银行B转账500 块钱,流程肯定是银行A-500,银行B+500,在这个过程要么都成功,要么都成仁。
首先银行A和银行B的数肯定是在不同的数据库,如果在转账的过程中,银行A首先-500库钱之后,在银行B+500的时候出现了问题,如果事务不回滚,那么就会出现500块钱丢失的问题,也就是出现了事务一致性问题。
可以通过JTA + Atomikos解决分布式事务。
JTA(java Transaction API)是JavaEE 13 个开发规范之一。Java 事务API,允许应用程序执行分布式事务处理——在两个或多个网络计算机资源上访问并且更新数据。JDBC驱动程序的JTA支持极大地增强了数据访问能力。事务最简单最直接的目的就是保证数据的有效性,数据的一致性。
Atomikos是一个为Java平台提供增值服务的并且开源类事务管理器。
7.1、创建项目
我们首先拷贝一份spring-boot-multidatasource代码,修改项目名称为spring-boot-atomikos。
我们继续以6.5小节中的insertStudent01AndStudent02()函数为例,我们想事务执行函数中的代码。
我们首先添加ita-atomikos依赖:
<!--   分布式事务   -->
<dependency>
    <groupId>org.springframework.boot</groupId>
    <artifactId>spring-boot-starter-jta-atomikos</artifactId>
</dependency>
7.2、新增配置文件信息
修改application.properties文件,配置信息如下:
###mysql1
mysql.datasource.datasource1.url = jdbc:mysql://localhost:3306/database1?serverTimezone=UTC&characterEncoding=utf8&useUnicode=true&useSSL=false
mysql.datasource.datasource1.username = root
mysql.datasource.datasource1.password = 123456aa

mysql.datasource.datasource1.minPoolSize = 3
mysql.datasource.datasource1.maxPoolSize = 25
mysql.datasource.datasource1.maxLifetime = 20000
mysql.datasource.datasource1.borrowConnectionTimeout = 30
mysql.datasource.datasource1.loginTimeout = 30
mysql.datasource.datasource1.maintenanceInterval = 60
mysql.datasource.datasource1.maxIdleTime = 60


###mysql2
mysql.datasource.datasource2.url = jdbc:mysql://localhost:3306/database2?serverTimezone=UTC&characterEncoding=utf8&useUnicode=true&useSSL=false
mysql.datasource.datasource2.username = root
mysql.datasource.datasource2.password = 123456aa

mysql.datasource.datasource2.minPoolSize = 3
mysql.datasource.datasource2.maxPoolSize = 25
mysql.datasource.datasource2.maxLifetime = 20000
mysql.datasource.datasource2.borrowConnectionTimeout = 30
mysql.datasource.datasource2.loginTimeout = 30
mysql.datasource.datasource2.maintenanceInterval = 60
mysql.datasource.datasource2.maxIdleTime = 60
7.3、读取配置文件信息
新建包com.zy.example.config,并新建DBConfig1.java:
package com.zy.example.config;

import lombok.Data;
import org.springframework.boot.context.properties.ConfigurationProperties;

/**
 * 读取配置文件信息
 *
 * @author zy
 * @since 2020-2-5
 */
@Data
@ConfigurationProperties(prefix = "mysql.datasource.datasource1")
public class DBConfig1 {
    private String url;
    private String username;
    private String password;
    private int minPoolSize;
    private int maxPoolSize;
    private int maxLifetime;
    private int borrowConnectionTimeout;
    private int loginTimeout;
    private int maintenanceInterval;
    private int maxIdleTime;
    private String testQuery;
}
在包com.zy.example.config下,新建DBConfig2.java:
package com.zy.example.config;

import lombok.Data;
import org.springframework.boot.context.properties.ConfigurationProperties;

/**
 * 读取配置文件信息
 *
 * @author zy
 * @since 2020-2-5
 */
@Data
@ConfigurationProperties(prefix = "mysql.datasource.datasource2")
public class DBConfig2 {
    private String url;
    private String username;
    private String password;
    private int minPoolSize;
    private int maxPoolSize;
    private int maxLifetime;
    private int borrowConnectionTimeout;
    private int loginTimeout;
    private int maintenanceInterval;
    private int maxIdleTime;
    private String testQuery;
}
删除包com.zy.example.datasource下的所有文件,新建MyBatisConfig1.java:
package com.zy.example.datasource;

import com.zy.example.config.DBConfig1;
import com.mysql.jdbc.jdbc2.optional.MysqlXADataSource;
import org.apache.ibatis.session.SqlSessionFactory;
import org.mybatis.spring.SqlSessionFactoryBean;
import org.mybatis.spring.SqlSessionTemplate;
import org.mybatis.spring.annotation.MapperScan;
import org.springframework.beans.factory.annotation.Qualifier;
import org.springframework.boot.jta.atomikos.AtomikosDataSourceBean;
import org.springframework.context.annotation.Bean;
import org.springframework.context.annotation.Configuration;

import javax.sql.DataSource;
import java.sql.SQLException;


/**
 * 读取数据源datasource1配置信息
 *
 * @author zy
 * @since 2020-2-5
 */
//表示这个类为一个配置类
@Configuration
//配置mybatis的接口类放的地方
@MapperScan(basePackages = "com.zy.example.mapper.datasource1", sqlSessionTemplateRef = "testSqlSessionTemplate1")
public class MyBatisConfig1 {
    //创建一个bean对象,并注入到Spring容器中
    @Bean(name = "testDataSource1")
    public DataSource testDataSource(DBConfig1 testConfig) throws SQLException {
        MysqlXADataSource mysqlXaDataSource = new MysqlXADataSource();
        mysqlXaDataSource.setUrl(testConfig.getUrl());
        mysqlXaDataSource.setPinGlobalTxToPhysicalConnection(true);
        mysqlXaDataSource.setPassword(testConfig.getPassword());
        mysqlXaDataSource.setUser(testConfig.getUsername());
        mysqlXaDataSource.setPinGlobalTxToPhysicalConnection(true);

        //将本地事务注册到Atomikos全局事务
        AtomikosDataSourceBean xaDataSource = new AtomikosDataSourceBean();
        xaDataSource.setXaDataSource(mysqlXaDataSource);
        xaDataSource.setUniqueResourceName("testDataSource1");

        xaDataSource.setMinPoolSize(testConfig.getMinPoolSize());
        xaDataSource.setMaxPoolSize(testConfig.getMaxPoolSize());
        xaDataSource.setMaxLifetime(testConfig.getMaxLifetime());
        xaDataSource.setBorrowConnectionTimeout(testConfig.getBorrowConnectionTimeout());
        xaDataSource.setLoginTimeout(testConfig.getLoginTimeout());
        xaDataSource.setMaintenanceInterval(testConfig.getMaintenanceInterval());
        xaDataSource.setMaxIdleTime(testConfig.getMaxIdleTime());
        xaDataSource.setTestQuery(testConfig.getTestQuery());

//        Connection conn = xaDataSource.getConnection();
//        PreparedStatement ps = conn.prepareStatement("select * from student1");
//        ResultSet res = ps.executeQuery();
//        System.out.println(res);
//        conn.close();
        return xaDataSource;
    }

    /**
     * 功能描述:(datasource1 sql会话工厂)
     * @param dataSource
     * @return
     * @throws Exception
     */
    @Bean(name = "testSqlSessionFactory1")
    //@Qualifier表示查找Spring容器中名字为datasource1DataSource的对象
    public SqlSessionFactory testSqlSessionFactory(@Qualifier("testDataSource1") DataSource dataSource)
            throws Exception {
        SqlSessionFactoryBean bean = new SqlSessionFactoryBean();
        bean.setDataSource(dataSource);
        return bean.getObject();
    }

    @Bean(name = "testSqlSessionTemplate1")
    public SqlSessionTemplate testSqlSessionTemplate(
            @Qualifier("testSqlSessionFactory1") SqlSessionFactory sqlSessionFactory) throws Exception {
        return new SqlSessionTemplate(sqlSessionFactory);
    }
}
新建MyBatisConfig2.java:
package com.zy.example.datasource;

import com.zy.example.config.DBConfig2;
import com.mysql.jdbc.jdbc2.optional.MysqlXADataSource;
import org.apache.ibatis.session.SqlSessionFactory;
import org.mybatis.spring.SqlSessionFactoryBean;
import org.mybatis.spring.SqlSessionTemplate;
import org.mybatis.spring.annotation.MapperScan;
import org.springframework.beans.factory.annotation.Qualifier;
import org.springframework.boot.jta.atomikos.AtomikosDataSourceBean;
import org.springframework.context.annotation.Bean;
import org.springframework.context.annotation.Configuration;

import javax.sql.DataSource;
import java.sql.SQLException;


/**
 * 读取数据源datasource2配置信息
 *
 * @author zy
 * @since  2020-2-5
 */
//表示这个类为一个配置类
@Configuration
//配置mybatis的接口类放的地方
@MapperScan(basePackages = "com.zy.example.mapper.datasource2", sqlSessionTemplateRef = "testSqlSessionTemplate2")
public class MyBatisConfig2 {
    //创建一个bean对象,并注入到Spring容器中
    @Bean(name = "testDataSource2")
    public DataSource testDataSource(DBConfig2 testConfig) throws SQLException {
        MysqlXADataSource mysqlXaDataSource = new MysqlXADataSource();
        mysqlXaDataSource.setUrl(testConfig.getUrl());
        mysqlXaDataSource.setPinGlobalTxToPhysicalConnection(true);
        mysqlXaDataSource.setPassword(testConfig.getPassword());
        mysqlXaDataSource.setUser(testConfig.getUsername());
        mysqlXaDataSource.setPinGlobalTxToPhysicalConnection(true);

        //将本地事务注册到Atomikos全局事务
        AtomikosDataSourceBean xaDataSource = new AtomikosDataSourceBean();
        xaDataSource.setXaDataSource(mysqlXaDataSource);
        xaDataSource.setUniqueResourceName("testDataSource2");

        xaDataSource.setMinPoolSize(testConfig.getMinPoolSize());
        xaDataSource.setMaxPoolSize(testConfig.getMaxPoolSize());
        xaDataSource.setMaxLifetime(testConfig.getMaxLifetime());
        xaDataSource.setBorrowConnectionTimeout(testConfig.getBorrowConnectionTimeout());
        xaDataSource.setLoginTimeout(testConfig.getLoginTimeout());
        xaDataSource.setMaintenanceInterval(testConfig.getMaintenanceInterval());
        xaDataSource.setMaxIdleTime(testConfig.getMaxIdleTime());
        xaDataSource.setTestQuery(testConfig.getTestQuery());
        return xaDataSource;
    }

    /**
     * 功能描述:(datasource2 sql会话工厂)
     * @param dataSource
     * @return
     * @throws Exception
     */
    @Bean(name = "testSqlSessionFactory2")
    //@Qualifier表示查找Spring容器中名字为datasource2DataSource的对象
    public SqlSessionFactory testSqlSessionFactory(@Qualifier("testDataSource2") DataSource dataSource)
            throws Exception {
        SqlSessionFactoryBean bean = new SqlSessionFactoryBean();
        bean.setDataSource(dataSource);
        return bean.getObject();
    }

    @Bean(name = "testSqlSessionTemplate2")
    public SqlSessionTemplate testSqlSessionTemplate(
            @Qualifier("testSqlSessionFactory2") SqlSessionFactory sqlSessionFactory) throws Exception {
        return new SqlSessionTemplate(sqlSessionFactory);
    }
}
7.4、代码
修改代码MyBatisMultilDataSourceController.java:
package com.zy.example.datasource;

import com.zy.example.service.datasource1.StudentService01;
import com.zy.example.service.datasource2.StudentService02;
import com.zy.example.entity.StudentEntity;
import org.springframework.beans.factory.annotation.Autowired;
import org.springframework.transaction.annotation.Transactional;
import org.springframework.web.bind.annotation.RequestMapping;
import org.springframework.web.bind.annotation.RequestParam;
import org.springframework.web.bind.annotation.RestController;

/**
 * 多数据源控制器
 *
 * @author zy
 * @since 2020-2-5
 */
@RestController
public class MyBatisMultilDataSourceController {
    @Autowired
    private StudentService01 studentService01;

    /**
     * 新增学生 这里没有对参数进行校验  127.0.0.1:8080/insertStudent01?name=01&age=25&sex=1
     * @param name 姓名
     * @param age 年龄
     * @param sex 性别
     * @return 返回受影响的行数
     */
    @RequestMapping("/insertStudent01")
    public int insertStudent01(@RequestParam String name, @RequestParam Integer age, @RequestParam Boolean sex){
        return studentService01.insertStudent(name,age,sex);
    }

    /**
     * 根据id获取学生信息
     * @param id 学生id
     * @return 返回学生信息
     */
    @RequestMapping("/getStudent01")
    public StudentEntity getStudentById01(@RequestParam Integer id){
        return studentService01.getStudentById(id);
    }

    @Autowired
    private StudentService02 studentService02;

    /**
     * 新增学生 这里没有对参数进行校验  127.0.0.1:8080/insertStudent02?name=02&age=25&sex=1
     * @param name 姓名
     * @param age 年龄
     * @param sex 性别
     * @return 返回受影响的行数
     */
    @RequestMapping("/insertStudent02")
    public int insertStudent02(@RequestParam String name, @RequestParam Integer age, @RequestParam Boolean sex){
        return studentService02.insertStudent(name,age,sex);
    }

    /**
     * 根据id获取学生信息
     * @param id 学生id
     * @return 返回学生信息
     */
    @RequestMapping("/getStudent02")
    public StudentEntity getStudentById02(@RequestParam Integer id){
        return studentService02.getStudentById(id);
    }


    /**
     * 新增学生 这里没有对参数进行校验  127.0.0.1:8080/insertStudent?name=00&age=25&sex=1
     * @param name 姓名
     * @param age 年龄
     * @param sex 性别
     * @return 返回受影响的行数
     */
    @RequestMapping("/insertStudent")
    @Transactional
    public int insertStudent01AndStudent02(@RequestParam String name, @RequestParam Integer age, @RequestParam Boolean sex){
        //第一个数据源
        int ret1 = studentService01.insertStudent(name,age,sex);
        //第二个数据源
        int ret2 = studentService02.insertStudent(name,age,sex);
        int i=1/age;
        //要不全部插入 要不全部不插入
        return ret1+ret2;
    }
}
修改App.java代码:
package com.zy.example;

import com.zy.example.config.DBConfig1;
import com.zy.example.config.DBConfig2;
import org.mybatis.spring.annotation.MapperScan;
import org.springframework.boot.SpringApplication;
import org.springframework.boot.autoconfigure.SpringBootApplication;
import org.springframework.boot.context.properties.EnableConfigurationProperties;
import org.springframework.scheduling.annotation.EnableAsync;

/**
 * @Author: zy
 * @Description: 启动代码
 * @Date: 2020-2-2
 */

@SpringBootApplication
//开启读取配置文件
@EnableConfigurationProperties(value = { DBConfig1.class, DBConfig2.class })
public class App {
    public static void main(String[] args){
        //整个程序入口 启动Spring Boot项目
        SpringApplication.run(App.class,args);
    }
}
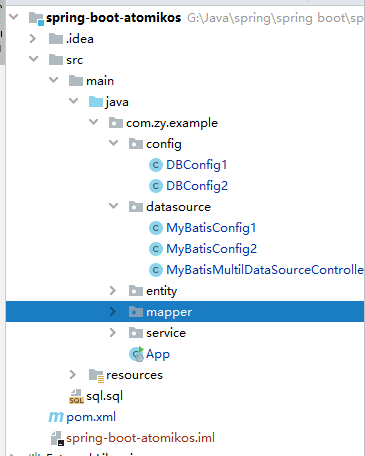
最终项目结构如下:
运行程序,访问http://127.0.0.1:8080/insertStudent?name=00&age=25&sex=1,结果: database1和database2数据库都插入数据。
访问http://127.0.0.1:8080/insertStudent?name=00&age=25&sex=1,结果: database1和database2数据库都未插入数据,因此事务执行失败了。
八、源码下载
源码放置在gitee:
参考文章:
[1] 使用SpringBoot的@Async实现异步调用方法,以及自己开启新线程异步调用
[2] springboot 多环境配置
[3] 深入理解Spring事务的基本原理、传播属性、隔离级别
[4] SpringAOP原理分析
[5] spring4.0之二:@Configuration的使用
[6] @ConfigurationProperties 注解使用姿势,这一篇就够了
[7] springboot-mybatis多数据源的两种整合方法
[8] 一文详解 SpringBoot 多数据源中的分布式事务
[10] java技术驿站

 浙公网安备 33010602011771号