VueJS教程1
文档资料参考:
- 参考:https://cn.vuejs.org/
- 参考:Vue.js教程 | 菜鸟教程
- 参考:Vue.js技术揭秘
- 参考:Vue-Cli(客户端)
- 参考:创建一个Vue项目、Vue-Cli创建一个Router项目
- 参考:https://codesandbox.io
- 参考:https://codepen.io/
- API参考:https://cn.vuejs.org/v2/api/
- Chrome浏览器安装Vue插件便于调试:Vue.js devtools
- Vue调试神器:vue-devtools
- 代码管理:代码管理
- 图标管理:iconfont
目录:
- 1、Vue介绍
- 2、计算属性和侦听器
- 3、Class 与 Style 绑定
- 4、条件渲染(v-if、v-else、v-else-if、v-show、v-for、表格)
- 5、事件处理
- 6、v-model、v-text、v-html
- 7、组件基础
- 7.1 组件的组织
- 7.2 通过 Prop 向子组件传递数据(props属性小写)
- 7.3 通过插槽分发内容(组件元素标签后增加自定义内容,slot标签内容分发,作用域插槽)
- 7.4 组件的三种使用方法
- (1)方式一:全局组件
- (2)方式二:局部注册(组件嵌套)
- (3)方式三:以一个.vue的单文件作为组件(推荐)
- (1)方式一:全局组件
- 7.5 监听子组件事件(子组件把数据传回去)、自定义组件事件(事件名称小写)
- 7.6 组件上使用 v-model
- 7.7 Vue使用小技巧
- 7.1 组件的组织
8、过渡 & 动画- 8.1 Vue中CSS动画原理
- 8.2 Vue中使用Animate.css库
- 8.3 Vue中同时使用过渡和动画
- 8.4 Vue中JS动画与Velocity.js结合
- 8.5 Vue中多个元素或组件的过渡
- (1)多个元素的过渡
- (2)多个组件的过渡
- 8.6 Vue中的列表过渡
- 8.7 Vue中的动画封装(让动画复用)
- 9、可复用性&组合
- 10、工具
- 11、规模化(路由)
- 12、深入响应式原理
13、Vue实例
- 14、Vue CLI
15、Vue指令
1、Vue介绍
- 参考:https://cn.vuejs.org/v2/guide/index.html
- Vue.js的核心思想:数据驱动的组件,为现代化的Web界面而生
- Vue.js的特点:侵入性低;鼓励模块化;轻量、高性能
(1)MV*架构
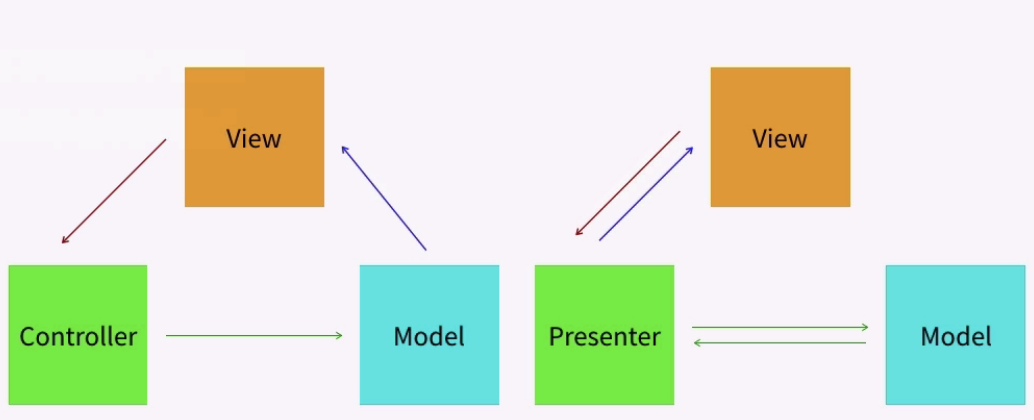
(2)MVVM架构
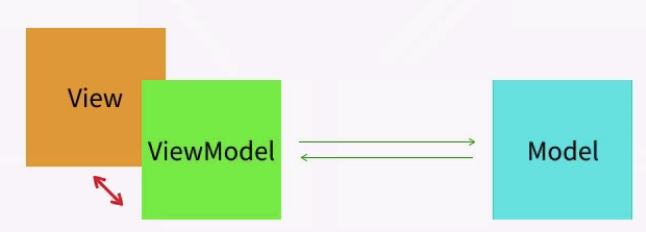
(3)Vue.js在MVVM架构中的定位
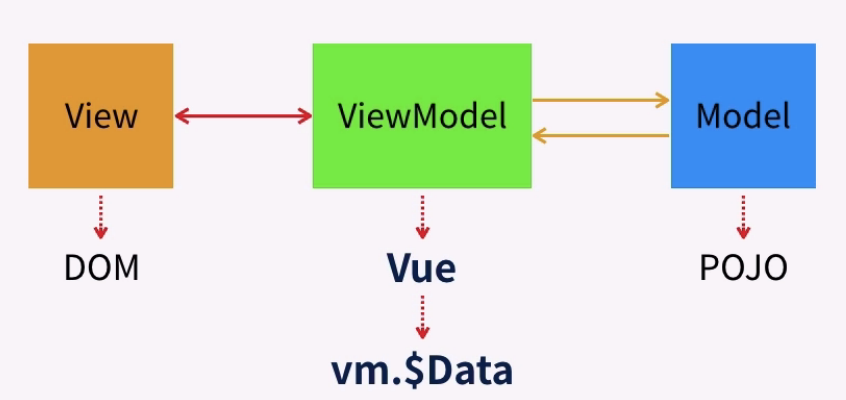
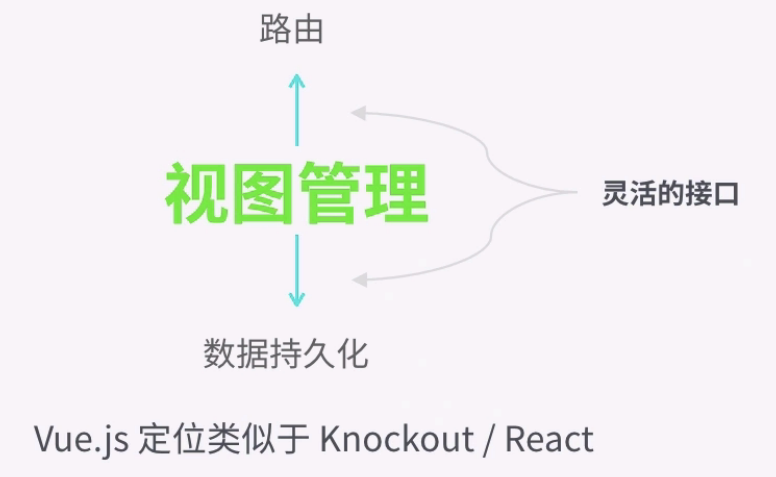
(4)Vue.js的功能定位
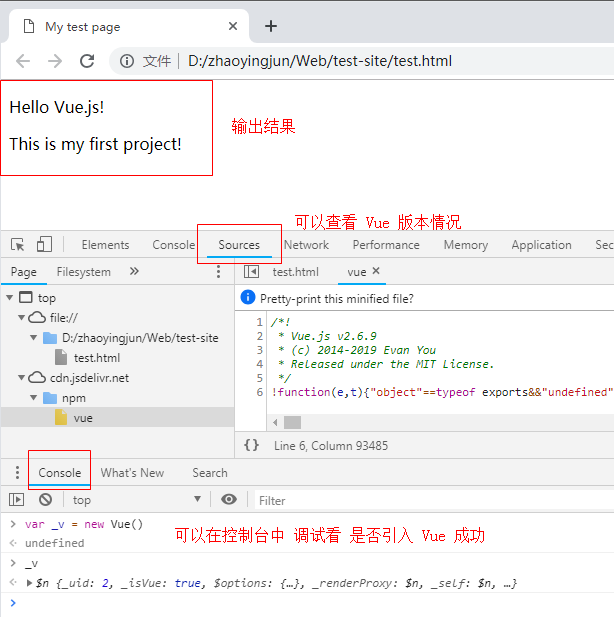
1.1 声明式渲染
举例(声明式渲染):
 1 <!DOCTYPE html>
 2 <html>
 3
 4 <head>
 5     <!--<meta charset="utf-8">--> <! 选择中文字体 -->
 6     <meta http-equiv="Content-Type" content="text/html; charset=gb2312" />
 7     <meta http-equiv="Content-Language" content="zh-cn" />
 8     <title>My test page</title>
 9     <script src="https://cdn.jsdelivr.net/npm/vue/dist/vue.js"></script>
10 </head>
11
12 <body>
13     <div id="app">
14         <p>{{ message1 }}</p>
15         <p>{{ message2 }}</p>
16     </div>
17
18     <script>
19         new Vue({
20             el: '#app',
21             data: {
22                 message1: 'Hello Vue.js!',
23                 message2: 'This is my first project!',
24             }
25         })
26     </script>
27 </body>
28 </html>
输出结果:
1.2 声明式渲染(绑定元素特性)
举例(声明式渲染,绑定元素特性):
 1 <!DOCTYPE html>
 2 <html>
 3
 4 <head>
 5     <meta charset="utf-8">
 6     <meta http-equiv="Content-Type" content="text/html; charset=gb2312" />
 7     <meta http-equiv="Content-Language" content="zh-cn" />
 8     <title>My test page</title>
 9     <script src="https://cdn.jsdelivr.net/npm/vue/dist/vue.js"></script>
10 </head>
11
12 <body>
13     <div id="app-2">
14         <span v-bind:title="message">
15             鼠标悬停几秒钟查看此处动态绑定的提示信息!
16         </span>
17     </div>
18
19     <script>
20         new Vue({
21             el: '#app-2',
22             data: {
23                 message: '页面加载于 ' + new Date().toLocaleDateString(),
24             }
25         })
26     </script>
27 </body>
28 </html>
输出结果:

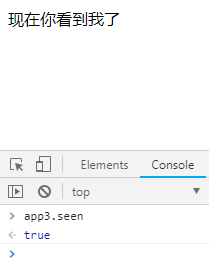
1.3 条件与循环
举例1:
 1 <!DOCTYPE html>
 2 <html>
 3
 4 <head>
 5     <meta charset="utf-8">
 6     <meta http-equiv="Content-Type" content="text/html; charset=gb2312" />
 7     <meta http-equiv="Content-Language" content="zh-cn" />
 8     <title>My test page</title>
 9     <script src="https://cdn.jsdelivr.net/npm/vue/dist/vue.js"></script>
10 </head>
11
12 <body>
13     <div id="app-2">
14         <span v-if="seen">
15             现在你看到我了
16         </span>
17     </div>
18
19     <script>
20         var app3 = new Vue({
21             el: '#app-2',
22             data: {
23                 seen: true
24             }
25         })
26     </script>
27 </body>
28 </html>
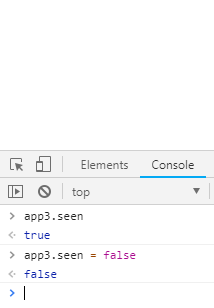
输出结果(在控制台输入 app3.seen = false,文字内容即消失了):
举例2:


 1 <!DOCTYPE html>
 2 <html>
 3
 4 <head>
 5     <meta charset="utf-8">
 6     <meta http-equiv="Content-Type" content="text/html; charset=gb2312" />
 7     <meta http-equiv="Content-Language" content="zh-cn" />
 8     <title>My test page</title>
 9     <script src="https://cdn.jsdelivr.net/npm/vue/dist/vue.js"></script>
10 </head>
11
12 <body>
13     <div id="app-2">
14         <span v-if="seen"> 现在你看到我了 </span>
15         <button v-on:click="switchSeen">点击显示或隐藏</button> <!-- v-on:click 可以用 @click替代 -->
16     </div>
17
18     <script>
19         var app3 = new Vue({
20             el: '#app-2',
21             data: {
22                 seen: true
23             },
24             methods: {
25                 switchSeen: function () {
26                     this.seen = !this.seen;
27                 }
28             }
29         })
30     </script>
31 </body>
32
33 </html>
输出结果:

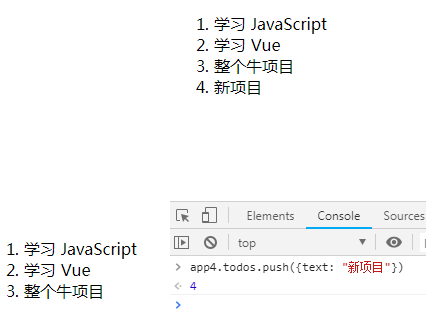
举例3:
 1 <!DOCTYPE html>
 2 <html>
 3
 4 <head>
 5     <meta charset="utf-8">
 6     <meta http-equiv="Content-Type" content="text/html; charset=gb2312" />
 7     <meta http-equiv="Content-Language" content="zh-cn" />
 8     <title>My test page</title>
 9     <script src="https://cdn.jsdelivr.net/npm/vue/dist/vue.js"></script>
10 </head>
11
12 <body>
13     <div id="app-4">
14         <ol>
15             <li v-for="todo in todos">
16                 {{ todo.text }}
17             </li>
18         </ol>
19     </div>
20
21     <script>
22         var app4 = new Vue({
23             el: '#app-4',
24             data: {
25                 todos: [
26                     { text: '学习 JavaScript' },
27                     { text: '学习 Vue' },
28                     { text: '整个牛项目' }
29                 ]
30             }
31         })
32     </script>
33 </body>
34
35 </html>
输出结果(在控制台里,输入 app4.todos.push({ text: '新项目' }),你会发现列表最后添加了一个新项目):
1.4 处理用户输入(包括双向数据绑定,v-model)
- 参考:表单输入绑定
举例1:
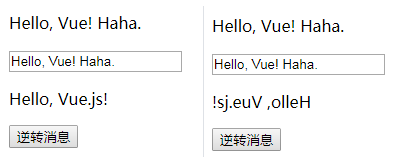
 1 <!DOCTYPE html>
 2 <html>
 3
 4 <head>
 5     <meta charset="utf-8">
 6     <meta http-equiv="Content-Type" content="text/html; charset=gb2312" />
 7     <meta http-equiv="Content-Language" content="zh-cn" />
 8     <title>My test page</title>
 9     <script src="https://cdn.jsdelivr.net/npm/vue/dist/vue.js"></script>
10 </head>
11
12 <body>
13     <div id="app-5">
14         <p>{{ msg_input }}</p>
15         <br>
16         <p>{{ msg }}</p>
17         <button v-on:click="reverseMessage">逆转消息</button> <!-- v-on:click 可以用 @click替代 -->
18     </div>
19
20     <script>
21         var app5 = new Vue({
22             el: '#app-5',
23             data: {
24                 msg: "Hello, Vue.js!",
25                 msg_input: "Hello, Vue!"
26             },
27             methods: {
28                 reverseMessage: function () {
29                     this.msg = this.msg.split('').reverse().join('')
30                 }
31             }
32         })
33     </script>
34 </body>
35
36 </html>
输出结果:
举例2(双向数据绑定):
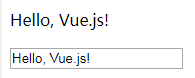
 1 <!DOCTYPE html>
 2 <html>
 3
 4 <head>
 5     <meta charset="utf-8">
 6     <meta http-equiv="Content-Type" content="text/html; charset=gb2312" />
 7     <meta http-equiv="Content-Language" content="zh-cn" />
 8     <title>My test page</title>
 9     <script src="https://cdn.jsdelivr.net/npm/vue/dist/vue.js"></script>
10 </head>
11
12 <body>
13     <div id="app-5">
14         <p>{{ msg }}</p>
15         <!-- <input type="text" v-bind:value="msg"> -->
16         <input type="text" v-model="msg">
17     </div>
18
19     <script>
20         var app5 = new Vue({
21             el: '#app-5',
22             data: {
23                 msg: "Hello, Vue.js!",
24             },
25             methods: {
26             }
27         })
28     </script>
29 </body>
30
31 </html>
输出结果:(双向绑定之前和双向绑定之后效果)
1.5 组件化应用构建
举例1:
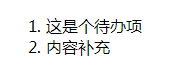
 1 <!DOCTYPE html>
 2 <html>
 3
 4 <head>
 5     <meta charset="utf-8">
 6     <meta http-equiv="Content-Type" content="text/html; charset=gb2312" />
 7     <meta http-equiv="Content-Language" content="zh-cn" />
 8     <title>My test page</title>
 9     <script src="https://cdn.jsdelivr.net/npm/vue/dist/vue.js"></script>
10 </head>
11
12 <body>
13
14     <ol id="app">
15         <!-- 创建一个 todo-item 组件的实例 -->
16         <todo-item></todo-item>
17         <li>内容补充</li>
18     </ol>
19
20     <script>
21         // 定义一个名为 todo-item 的新组件
22         Vue.component("todo-item", {
23             template: '<li>这是个待办项</li>'
24         });
25
26         var app = new Vue({
27             el: '#app'
28         })
29     </script>
30 </body>
31
32 </html>
输出结果:
举例2:
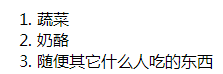
 1 <!DOCTYPE html>
 2 <html>
 3
 4 <head>
 5     <meta charset="utf-8">
 6     <meta http-equiv="Content-Type" content="text/html; charset=gb2312" />
 7     <meta http-equiv="Content-Language" content="zh-cn" />
 8     <title>My test page</title>
 9     <script src="https://cdn.jsdelivr.net/npm/vue/dist/vue.js"></script>
10 </head>
11
12 <body>
13
14     <div id="app-7">
15         <ol>
16             <!-- 创建一个 todo-item 组件的实例 -->
17             <!-- 现在我们为每个 todo-item 提供 todo 对象,todo 对象是变量,即其内容可以是动态的。我们也需要为每个组件提供一个“key”。 -->
18             <todo-item v-for="item in groceryList" v-bind:todo="item" v-bind:key="item.id">
19             </todo-item>
20         </ol>
21     </div>
22
23     <script>
24         // 定义一个名为 todo-item 的新组件
25         Vue.component("todo-item", {
26             props: ['todo'],
27             template: '<li>{{ todo.text }}</li>'
28         });
29
30         var app = new Vue({
31             el: '#app-7',
32             data: {
33                 groceryList: [
34                     { id: 0, text: '蔬菜' },
35                     { id: 1, text: '奶酪' },
36                     { id: 2, text: '随便其它什么人吃的东西' }
37                 ]
38             }
39         })
40     </script>
41 </body>
42
43 </html>
注释:应用分割成了两个更小的单元。子单元通过 prop 接口与父单元进行了良好的解耦。我们现在可以进一步改进 <todo-item> 组件,提供更为复杂的模板和逻辑,而不会影响到父单元。
输出结果:
1.6 实例生命周期钩子
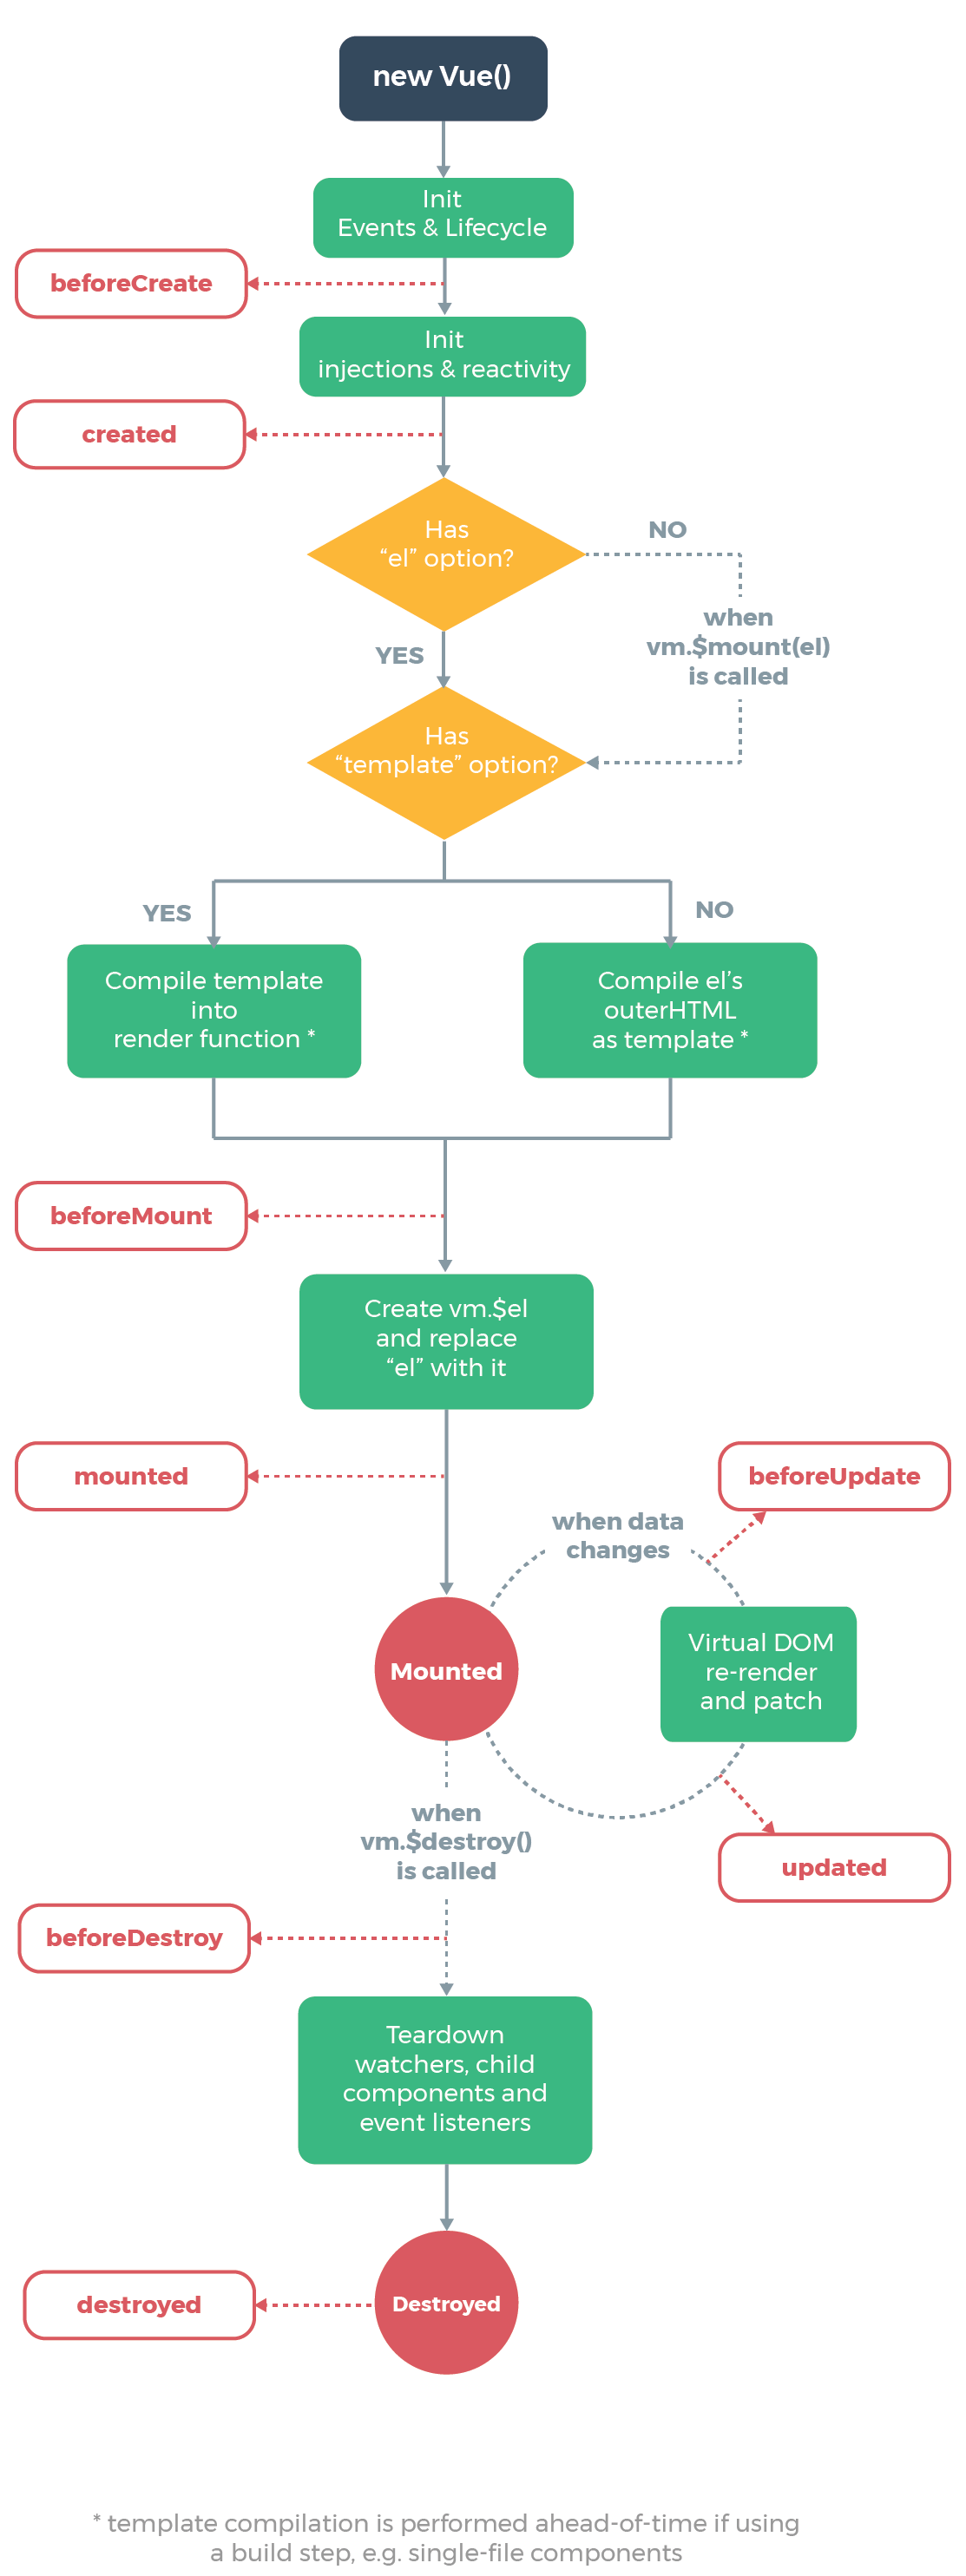
每个 Vue 实例在被创建时都要经过一系列的初始化过程——例如,需要设置数据监听、编译模板、将实例挂载到 DOM 并在数据变化时更新 DOM 等。同时在这个过程中也会运行一些叫做生命周期钩子的函数,这给了用户在不同阶段添加自己的代码的机会。
举例1:
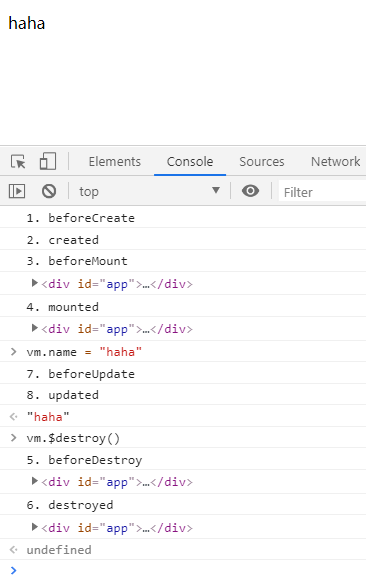
 1 <!DOCTYPE html>
 2 <html>
 3
 4 <head>
 5     <meta charset="utf-8">
 6     <title>Vue实例生命周期函数</title>
 7     <script src="https://cdn.jsdelivr.net/npm/vue/dist/vue.js"></script>
 8 </head>
 9
10 <body>
11     <div id="app">
12         <blog-post :title="name"></blog-post>
13     </div>
14
15     <script>
16         Vue.component("blog-post", {
17             props: ['title'],
18             template: `
19                 <div>
20                     <p>{{ title }}</p>
21                 </div>
22             `
23         });
24
25         // 生命周期函数就是 Vue实例 在某一个时间点会自动执行的函数
26         var vm = new Vue({
27             el: '#app',
28             data: {
29                 name: 'Vue.js',
30             },
31             beforeCreate() { // Vue实例 部分初始化(事件和生命周期初始化完成)
32                 console.log("1. beforeCreate");
33             },
34             created() { // Vue实例 初始化基本完成
35                 console.log("2. created");
36             },
37             // 查询 Vue实例 中是否存在 el 选项
38             // 查询 Vue实例 中是否存在 template 选项
39             beforeMount() { // 页面渲染之前,模板和数据相结合,即将挂载在页面上一瞬间之前
40                 console.log("3. beforeMount");
41                 console.log(this.$el);
42             },
43             mounted() { // 模板和数据相结合,即将挂载在页面上之后
44                 console.log("4. mounted");
45                 console.log(this.$el);
46             },
47             beforeDestroy() {
48                 console.log("5. beforeDestroy");
49             },
50             destroyed() {
51                 console.log("6. destroyed");
52             },
53             beforeUpdate() { // 数据改变,重新渲染之前
54                 console.log("7. beforeUpdate");
55             },
56             updated() { // 数据改变,重新渲染之后
57                 console.log("8. updated");
58             },
59
60             computed: {
61
62             },
63             methods: {
64
65             }
66         })
67     </script>
68 </body>
69
70 </html>
输出结果:
举例2(比如 created 钩子可以用来在一个实例被创建之后执行代码):
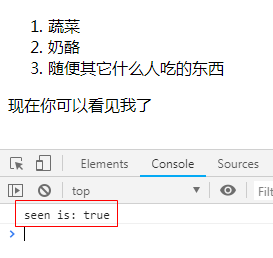
 1 <!DOCTYPE html>
 2 <html>
 3
 4 <head>
 5     <meta charset="utf-8">
 6     <meta http-equiv="Content-Type" content="text/html; charset=gb2312" />
 7     <meta http-equiv="Content-Language" content="zh-cn" />
 8     <title>My test page</title>
 9     <script src="https://cdn.jsdelivr.net/npm/vue/dist/vue.js"></script>
10 </head>
11
12 <body>
13
14     <div id="app-7">
15         <ol>
16             <!-- 创建一个 todo-item 组件的实例 -->
17             <!-- 现在我们为每个 todo-item 提供 todo 对象,todo 对象是变量,即其内容可以是动态的。我们也需要为每个组件提供一个“key”。 -->
18             <todo-item v-for="item in groceryList" v-bind:todo="item" v-bind:key="item.id">
19             </todo-item>
20         </ol>
21         <div v-if="seen">
22             <p>现在你可以看见我了</p>
23         </div>
24     </div>
25
26     <script>
27         // 定义一个名为 todo-item 的新组件
28         Vue.component("todo-item", {
29             props: ['todo'],
30             template: '<li>{{ todo.text }}</li>'
31         });
32
33         var app = new Vue({
34             el: '#app-7',
35             data: {
36                 groceryList: [
37                     { id: 0, text: '蔬菜' },
38                     { id: 1, text: '奶酪' },
39                     { id: 2, text: '随便其它什么人吃的东西' }
40                 ],
41                 seen: true
42             },
43             created: function () {
44                 // this 指向 vm 实例
45                 console.log("seen is: " + this.seen);
46             }
47         })
48     </script>
49 </body>
50
51 </html>
输出结果:
1.7 生命周期图示
2、计算属性和侦听器
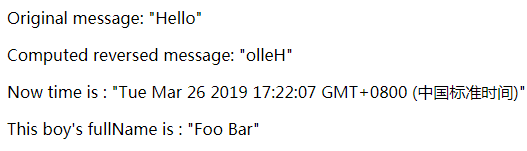
2.1 计算属性
对于任何复杂逻辑,你都应当使用计算属性。计算属性比调用方法性能会更好。
计算属性,依赖于数据属性发生变化时候,其才会重新调用一次该计算属性(比如 return new Date();)。
举例:
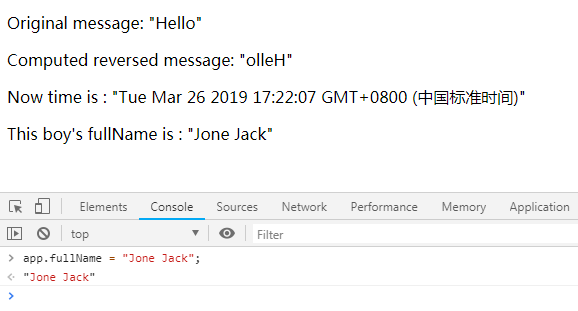
 1 <!DOCTYPE html>
 2 <html>
 3
 4 <head>
 5     <meta charset="utf-8">
 6     <meta http-equiv="Content-Type" content="text/html; charset=gb2312" />
 7     <meta http-equiv="Content-Language" content="zh-cn" />
 8     <title>My test page</title>
 9     <script src="https://cdn.jsdelivr.net/npm/vue/dist/vue.js"></script>
10 </head>
11
12 <body>
13
14     <div id="example">
15         <p>Original message: "{{ message }}"</p>
16         <p>Computed reversed message: "{{ reversedMessage }}"</p>
17         <p>Now time is : "{{ now }}"</p>
18         <p>This boy's fullName is : "{{ fullName }}"</p>
19     </div>
20
21     <script>
22         var app = new Vue({
23             el: '#example',
24             data: {
25                 message: 'Hello',
26                 firstName: "Foo",
27                 lastName: "Bar"
28             },
29             // 计算属性是基于它们的依赖进行缓存的,只在相关依赖发生改变时它们才会重新求值
30             computed: {
31                 // 计算属性的 getter
32                 reversedMessage: function () {
33                     // `this` 指向 vm 实例
34                     return this.message.split('').reverse().join('');
35                 },
36                 now: function () {
37                     return new Date();
38                 },
39                 // 计算属性的 setter,计算属性默认只有getter,不过在需要时,也可以提供一个setter
40                 fullName: {
41                     // getter
42                     get: function () {
43                         return this.firstName + " " + this.lastName;
44                     },
45                     set: function (newValue) {
46                         var names = newValue.split(" ");
47                         this.firstName = names[0];
48                         this.lastName = names[names.length - 1];
49                     }
50                 }
51             }
52         })
53     </script>
54 </body>
55
56 </html>
输出结果:
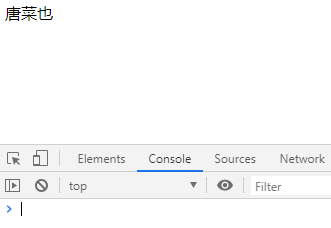
2.2 侦听器
虽然计算属性在大多数情况下更合适,但有时也需要一个自定义的侦听器。这就是为什么 Vue 通过 watch 选项提供了一个更通用的方法,来响应数据的变化。当需要在数据变化时执行异步或开销较大的操作时,这个方式是最有用的。
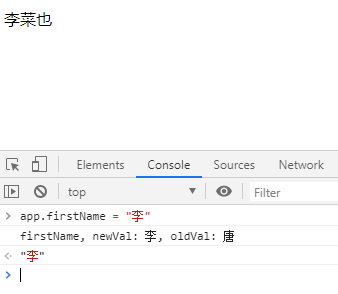
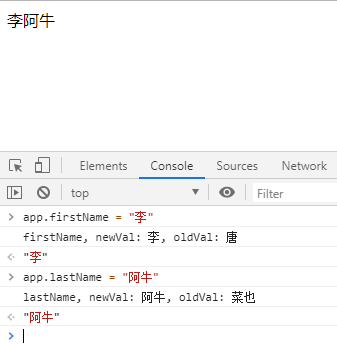
举例1(侦听器,方式一):
 1 <!DOCTYPE html>
 2 <html>
 3
 4 <head>
 5     <meta charset="utf-8">
 6     <meta http-equiv="Content-Type" content="text/html; charset=gb2312" />
 7     <meta http-equiv="Content-Language" content="zh-cn" />
 8     <title>My test page</title>
 9     <script src="https://cdn.jsdelivr.net/npm/vue/dist/vue.js"></script>
10 </head>
11
12 <body>
13     <div id="app">
14         {{ fullName }}
15     </div>
16
17     <script>
18         var app = new Vue({
19             el: '#app',
20             data: {
21                 firstName: "唐",
22                 lastName: "菜也",
23                 fullName: "唐菜也"
24             },
25             watch: {
26                 firstName(newVal, oldVal){
27                     console.log("firstName, newVal: " + newVal + ", oldVal: " + oldVal);
28                     this.fullName = newVal + this.lastName;
29                 },
30                 lastName(newVal, oldVal){
31                     console.log("lastName, newVal: " + newVal + ", oldVal: " + oldVal);
32                     this.fullName = this.firstName + newVal;
33                 }
34             }
35         })
36
37     </script>
38 </body>
39
40 </html>
输出结果:
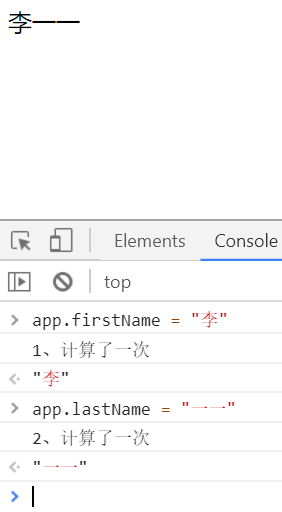
举例2(侦听器,方式二):
 1 <!DOCTYPE html>
 2 <html>
 3
 4 <head>
 5     <meta charset="utf-8">
 6     <meta http-equiv="Content-Type" content="text/html; charset=gb2312" />
 7     <meta http-equiv="Content-Language" content="zh-cn" />
 8     <title>My test page</title>
 9     <script src="https://cdn.jsdelivr.net/npm/vue/dist/vue.js"></script>
10 </head>
11
12 <body>
13     <div id="app">
14         {{ fullName }}
15     </div>
16
17     <script>
18         var app = new Vue({
19             el: '#app',
20             data: {
21                 firstName: "唐",
22                 lastName: "菜也",
23                 fullName: "唐菜也",
24                 age: 28,
25             },
26             watch: {
27                 firstName: function () { // 监听 firstName 属性的变化
28                     console.log("1、计算了一次");
29                     this.fullName = this.firstName + this.lastName;
30                 },
31                 lastName: function () { // 监听 lastName 属性的变化
32                     console.log("2、计算了一次");
33                     this.fullName = this.firstName + this.lastName;
34                 }
35             }
36         })
37
38     </script>
39 </body>
40
41 </html>
输出结果:
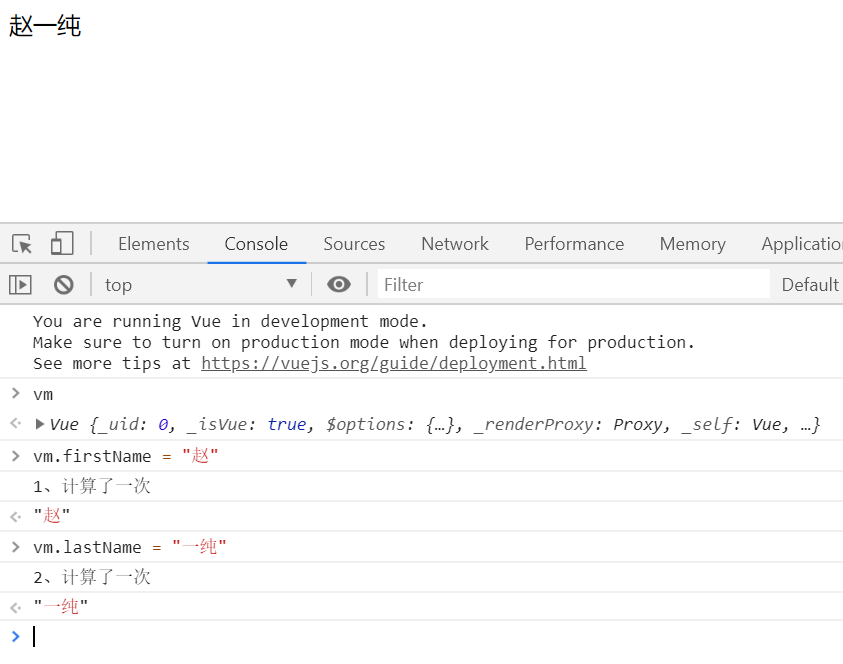
举例3(侦听器,方式三):
 1 <!DOCTYPE html>
 2 <html>
 3
 4 <head>
 5     <meta charset="utf-8">
 6     <meta http-equiv="Content-Type" content="text/html; charset=gb2312" />
 7     <meta http-equiv="Content-Language" content="zh-cn" />
 8     <title>My test page</title>
 9     <script src="https://cdn.jsdelivr.net/npm/vue/dist/vue.js"></script>
10 </head>
11
12 <body>
13     <div id="app">
14         {{ fullName }}
15     </div>
16
17     <script>
18         var vm = new Vue({
19             el: '#app',
20             data: {
21                 firstName: "唐",
22                 lastName: "菜也",
23                 fullName: "唐菜也",
24                 age: 28,
25             },
26         })
27
28         vm.$watch("firstName", function (val) {
29             console.log("1、计算了一次");
30             this.fullName = val + this.lastName;
31         });
32
33         vm.$watch("lastName", function (val) {
34             console.log("2、计算了一次");
35             this.fullName = this.firstName + val;
36         });
37
38     </script>
39 </body>
40
41 </html>
举例4(计算属性方式实现):
 1 <!DOCTYPE html>
 2 <html>
 3
 4 <head>
 5     <meta charset="utf-8">
 6     <meta http-equiv="Content-Type" content="text/html; charset=gb2312" />
 7     <meta http-equiv="Content-Language" content="zh-cn" />
 8     <title>My test page</title>
 9     <script src="https://cdn.jsdelivr.net/npm/vue/dist/vue.js"></script>
10 </head>
11
12 <body>
13     <div id="app">
14         {{ fullNameFun }}
15     </div>
16
17     <script>
18         var app = new Vue({
19             el: '#app',
20             data: {
21                 firstName: "唐",
22                 lastName: "菜也",
23                 fullName: "唐菜也"
24             },
25             watch: {/*
26                 firstName(newVal, oldVal){
27                     console.log("firstName, newVal: " + newVal + ", oldVal: " + oldVal);
28                     this.fullName = newVal + this.lastName;
29                 },
30                 lastName(newVal, oldVal){
31                     console.log("lastName, newVal: " + newVal + ", oldVal: " + oldVal);
32                     this.fullName = this.firstName + newVal;
33                 } */
34             },
35             computed: {
36                 fullNameFun(){
37                     return this.firstName + this.lastName;
38                 }
39             }
40         })
41
42     </script>
43 </body>
44
45 </html>
输出结果:同上。
3、Class 与 Style 绑定
3.1 绑定class
三种方式:
- 直接绑定方式
- 绑定数组方式
- 绑定对象方式
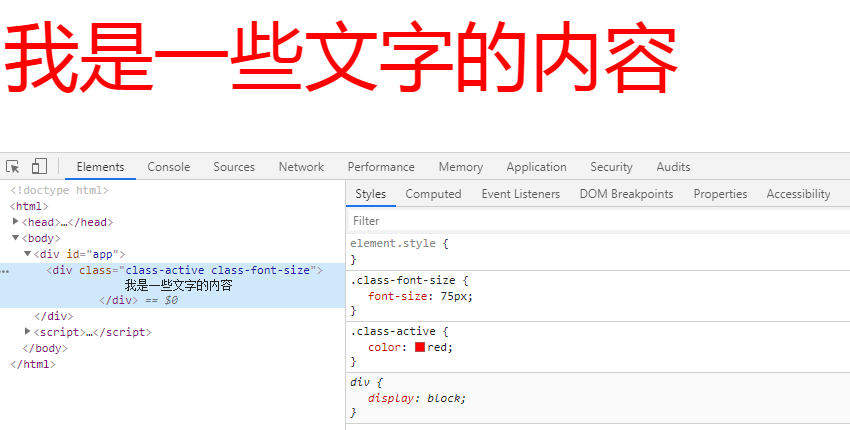
举例1(方式一:直接绑定方式):
 1 <!DOCTYPE html>
 2 <html>
 3
 4 <head>
 5     <meta charset="utf-8">
 6     <meta http-equiv="Content-Type" content="text/html; charset=gb2312" />
 7     <meta http-equiv="Content-Language" content="zh-cn" />
 8     <title>My test page</title>
 9     <script src="https://cdn.jsdelivr.net/npm/vue/dist/vue.js"></script>
10
11     <style>
12         .class-active {
13             color: red;
14         }
15         .class-font-size {
16             font-size: 75px;
17         }
18     </style>
19 </head>
20
21 <body>
22     <div id="app">
23         <div v-bind:class="{'class-active':isActive, 'class-font-size':isFontSet}">
24             我是一些文字的内容
25         </div>
26     </div>
27
28     <script>
29         var app = new Vue({
30             el: '#app',
31             data: {
32                 isActive: true,
33                 isFontSet: true
34             }
35         })
36     </script>
37 </body>
38
39 </html>
输出结果:
举例2-1(方式二:数组绑定方式):
 1 <!DOCTYPE html>
 2 <html>
 3
 4 <head>
 5     <meta charset="utf-8">
 6     <meta http-equiv="Content-Type" content="text/html; charset=gb2312" />
 7     <meta http-equiv="Content-Language" content="zh-cn" />
 8     <title>My test page</title>
 9     <script src="https://cdn.jsdelivr.net/npm/vue/dist/vue.js"></script>
10
11     <style>
12         .class-active {
13             color: red;
14         }
15
16         .class-font-size {
17             font-size: 75px;
18         }
19     </style>
20 </head>
21
22 <body>
23     <div id="app">
24         <div v-bind:class="className">
25             我是一些文字的内容
26         </div>
27     </div>
28
29     <script>
30         var app = new Vue({
31             el: '#app',
32             data: {
33                 className: ["class-active", "class-font-size"]
34             }
35         })
36     </script>
37 </body>
38
39 </html>
输出结果:同上。
举例2-2(方式二:数组方式):
 1 <!DOCTYPE html>
 2 <html>
 3
 4 <head>
 5     <meta charset="utf-8">
 6     <meta http-equiv="Content-Type" content="text/html; charset=gb2312" />
 7     <meta http-equiv="Content-Language" content="zh-cn" />
 8     <title>My test page</title>
 9     <script src="https://cdn.jsdelivr.net/npm/vue/dist/vue.js"></script>
10
11     <style>
12         .class-active {
13             color: red;
14         }
15
16         .class-font-size {
17             font-size: 75px;
18         }
19     </style>
20 </head>
21
22 <body>
23     <div id="app">
24         <div v-bind:class="[classActive, classFontSize]"> 我是一些文字的内容 </div> <!-- classActive 和 classFontSize 都是变量 -->
25     </div>
26
27     <script>
28         var app = new Vue({
29             el: '#app',
30             data: {
31                 classActive: "class-active",
32                 classFontSize: "class-font-size",
33             }
34         })
35     </script>
36 </body>
37
38 </html>
输出结果:略。
举例3(方式三:对象绑定方式):
 1 <!DOCTYPE html>
 2 <html>
 3
 4 <head>
 5     <meta charset="utf-8">
 6     <meta http-equiv="Content-Type" content="text/html; charset=gb2312" />
 7     <meta http-equiv="Content-Language" content="zh-cn" />
 8     <title>My test page</title>
 9     <script src="https://cdn.jsdelivr.net/npm/vue/dist/vue.js"></script>
10
11     <style>
12         .class-active {
13             color: red;
14         }
15
16         .class-font-size {
17             font-size: 75px;
18         }
19     </style>
20 </head>
21
22 <body>
23     <div id="app">
24         <div v-bind:class="classObject">
25             我是一些文字的内容
26         </div>
27     </div>
28
29     <script>
30         var app = new Vue({
31             el: '#app',
32             data: {
33                 classObject: {
34                     'class-active': true,
35                     'class-font-size': true
36                 }
37
38             }
39         })
40     </script>
41 </body>
42
43 </html>
输出结果:略。
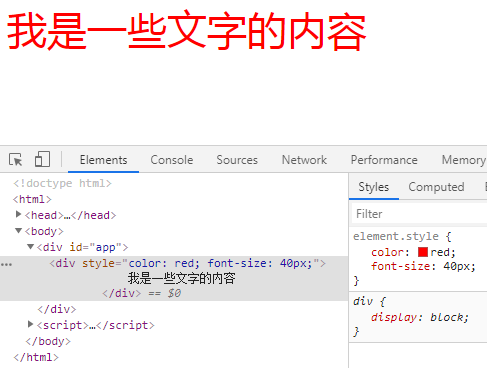
3.2 绑定内联样式
举例1(方式一:对象方式):
 1 <!DOCTYPE html>
 2 <html>
 3
 4 <head>
 5     <meta charset="utf-8">
 6     <meta http-equiv="Content-Type" content="text/html; charset=gb2312" />
 7     <meta http-equiv="Content-Language" content="zh-cn" />
 8     <title>My test page</title>
 9     <script src="https://cdn.jsdelivr.net/npm/vue/dist/vue.js"></script>
10 </head>
11
12 <body>
13     <div id="app">
14         <div v-bind:style="{color: theColor, 'font-size': fontSize + 'px'}">
15             我是一些文字的内容
16         </div>
17     </div>
18
19     <script>
20         var app = new Vue({
21             el: '#app',
22             data: {
23                 'theColor': 'red',
24                 'fontSize': 40
25             }
26         })
27     </script>
28 </body>
29
30 </html>
输出结果:
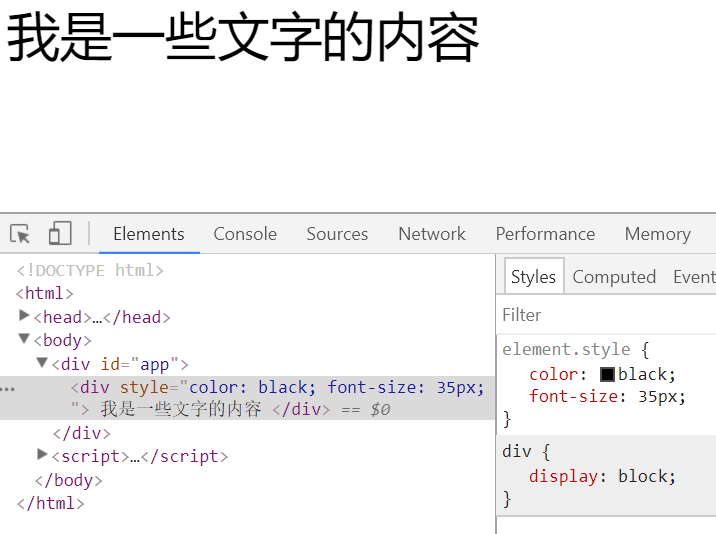
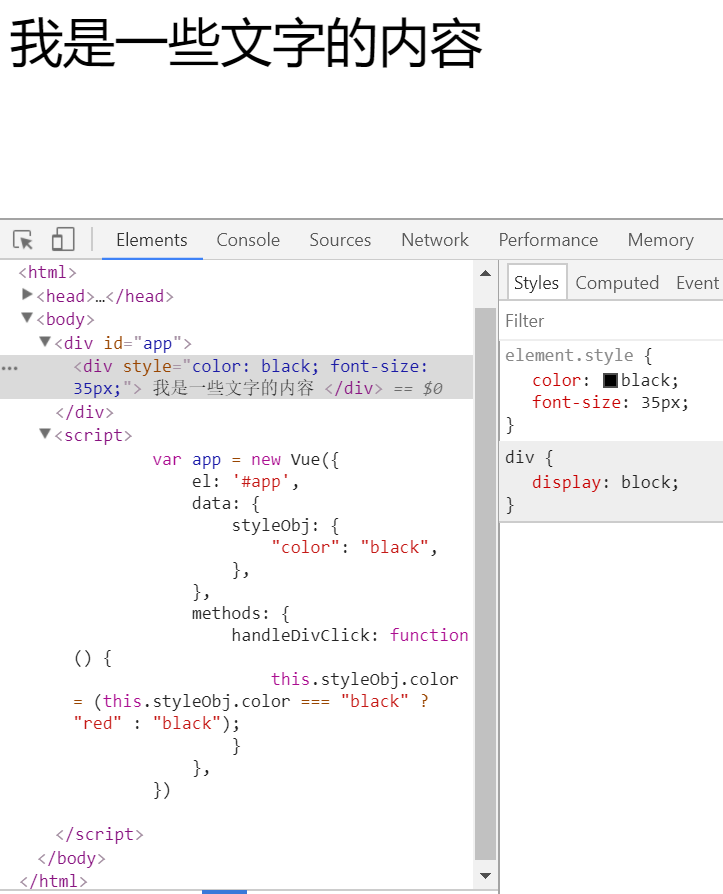
举例2(方式一:对象方式):
 1 <!DOCTYPE html>
 2 <html>
 3
 4 <head>
 5     <meta charset="utf-8">
 6     <title>My test page</title>
 7     <script src="https://cdn.jsdelivr.net/npm/vue/dist/vue.js"></script>
 8 </head>
 9
10 <body>
11     <div id="app">
12         <div :style="styleObj" @click="handleDivClick"> 我是一些文字的内容 </div>
13     </div>
14
15     <script>
16         var app = new Vue({
17             el: '#app',
18             data: {
19                 styleObj: {
20                     "color": "black",
21                     "font-size": "35px",
22                 },
23             },
24             methods: {
25                 handleDivClick: function () {
26                     this.styleObj.color = (this.styleObj.color === "black" ? "red" : "black");
27                 }
28             },
29         })
30     </script>
31 </body>
32
33 </html>
输出结果:
举例3(方式二:数组方式):
 1 <!DOCTYPE html>
 2 <html>
 3
 4 <head>
 5     <meta charset="utf-8">
 6     <title>My test page</title>
 7     <script src="https://cdn.jsdelivr.net/npm/vue/dist/vue.js"></script>
 8 </head>
 9
10 <body>
11     <div id="app">
12         <div :style="[styleObj, {'font-size': '35px'}]" @click="handleDivClick"> 我是一些文字的内容 </div>
13     </div>
14
15     <script>
16         var app = new Vue({
17             el: '#app',
18             data: {
19                 styleObj: {
20                     "color": "black",
21                 },
22             },
23             methods: {
24                 handleDivClick: function () {
25                     this.styleObj.color = (this.styleObj.color === "black" ? "red" : "black");
26                 }
27             },
28         })
29     </script>
30 </body>
31
32 </html>
输出结果:
4、条件渲染(v-if、v-else、v-else-if、v-show、v-for、表格)
v-if 是“真正”的条件渲染,因为它会确保在切换过程中条件块内的事件监听器和子组件适当地被销毁和重建。
v-if 也是惰性的:如果在初始渲染时条件为假,则什么也不做——直到条件第一次变为真时,才会开始渲染条件块。
相比之下,v-show 就简单得多——不管初始条件是什么,元素总是会被渲染,并且只是简单地基于 CSS 进行切换。
一般来说,v-if 有更高的切换开销,而 v-show 有更高的初始渲染开销。因此,如果需要非常频繁地切换,则使用 v-show 较好;如果在运行时条件很少改变,则使用 v-if 较好。
4.1 v-if、v-else、v-else-if
举例1:
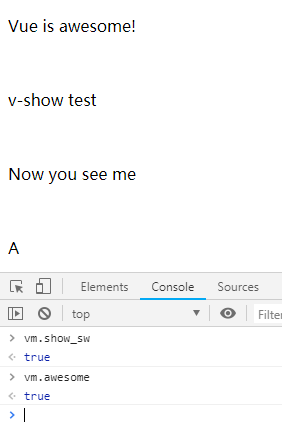
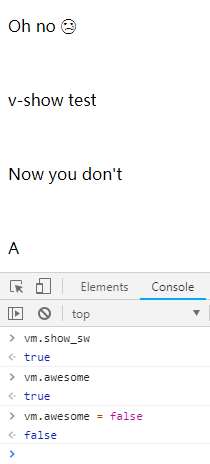
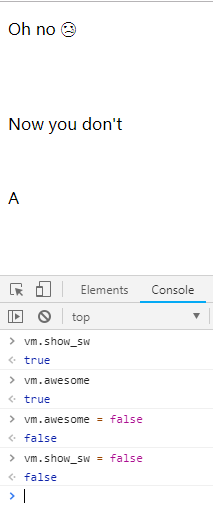
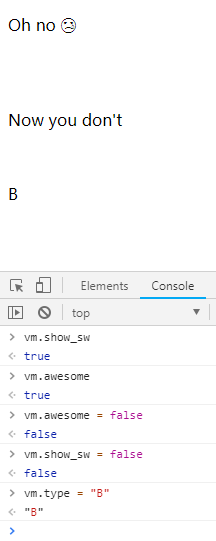
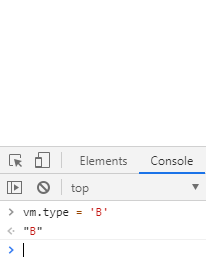
 1 <!DOCTYPE html>
 2 <html>
 3
 4 <head>
 5     <meta charset="utf-8">
 6     <meta http-equiv="Content-Type" content="text/html; charset=gb2312" />
 7     <meta http-equiv="Content-Language" content="zh-cn" />
 8     <title>My test page</title>
 9     <script src="https://cdn.jsdelivr.net/npm/vue/dist/vue.js"></script>
10 </head>
11
12 <body>
13
14     <div id="example">
15         <p v-if="awesome">Vue is awesome!</p>
16         <p v-else>Oh no 😢</p> <!-- v-else 元素必须紧跟在带 v-if 或者 v-else-if 的元素的后面,否则它将不会被识别 -->
17         <br>
18
19         <p v-if="Math.random() > 0.5">Now you see me</p>
20         <p v-else>Now you don't</p> <!-- v-else 指令标识 v-if 的 "else块" -->
21         <br>
22
23         <!-- 2.1.0 新增 v-else-if -->
24         <p v-if="type === 'A'">
25             A
26         </p>
27         <p v-else-if="type === 'B'"> <!-- v-else-if,顾名思义,充当 v-if 的 "else-if 块" -->
28             B
29         </p>
30         <p v-else-if="type === 'C'">
31             C
32         </p>
33         <p v-else>
34             Not A/B/C
35         </p>
36     </div>
37
38     <script>
39         var vm = new Vue({
40             el: '#example',
41             data: {
42                 awesome: true,
43                 type: "A"
44             }
45         })
46     </script>
47 </body>
48
49 </html>
输出结果:
4.2 template条件组
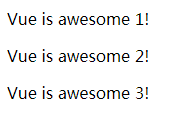
举例2(template条件组):
 1 <!DOCTYPE html>
 2 <html>
 3
 4 <head>
 5     <meta charset="utf-8">
 6     <meta http-equiv="Content-Type" content="text/html; charset=gb2312" />
 7     <meta http-equiv="Content-Language" content="zh-cn" />
 8     <title>My test page</title>
 9     <script src="https://cdn.jsdelivr.net/npm/vue/dist/vue.js"></script>
10 </head>
11
12 <body>
13
14     <div id="example">
15         <div v-if="type=='A'">
16             <p>Vue is awesome 1!</p>
17             <p>Vue is awesome 2!</p>
18             <p>Vue is awesome 3!</p>
19         </div>
20     </div>
21
22     <script>
23         var vm = new Vue({
24             el: '#example',
25             data: {
26                 type: "A"
27             }
28         })
29     </script>
30 </body>
31
32 </html>
输出结果:
4.3 v-for(列表渲染)
Vue遍历数组:
- 1、Vue支持的数组的遍历方法:JavaScript Array 对象
- push
- pop
- shift
- unshift
- splice
- sort
- reverse
- 2、使用set方法
Vue遍历对象,如果需要修改(增加/删除 对象中内容),可以有以下两种方式:
- 1、可以直接重写对象所有内容
- 2、使用set方法
举例1(v-for举例):
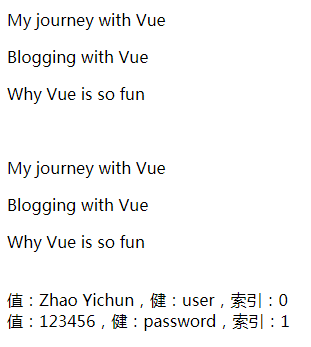
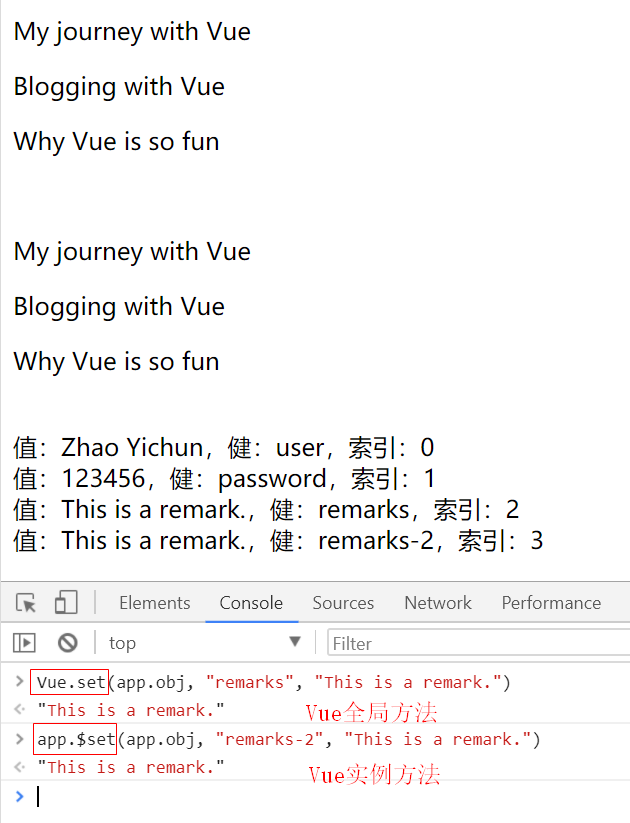
 1 <!DOCTYPE html>
 2 <html>
 3
 4 <head>
 5     <meta charset="utf-8">
 6     <meta http-equiv="Content-Type" content="text/html; charset=gb2312" />
 7     <meta http-equiv="Content-Language" content="zh-cn" />
 8     <title>My test page</title>
 9     <script src="https://cdn.jsdelivr.net/npm/vue/dist/vue.js"></script>
10 </head>
11
12 <body>
13     <div id="app">
14         <!-- 创建一个 button-counter 组件的实例(可以进行组件的复用) -->
15         <blog-post v-for="post in posts" v-bind:key="post.id" v-bind:title="post.title"></blog-post>
16         <br>
17         <blog-post v-for="(post, index) in posts" v-bind:key="post.id" v-bind:title="post.title"></blog-post>
18         <br>
19         <div v-for="(val, key, index) in obj">值:{{val}},健:{{key}},索引:{{index}}</div>
20     </div>
21
22     <script>
23         // 定义一个名为 blog-post 的新组件
24         Vue.component("blog-post", {
25             props: ['title'],
26             template: '<p>{{title}}</p>'
27         });
28
29         var app = new Vue({
30             el: '#app',
31             data: {
32                 posts: [
33                     { id: 1, title: 'My journey with Vue' },
34                     { id: 2, title: 'Blogging with Vue' },
35                     { id: 3, title: 'Why Vue is so fun' }
36                 ],
37                 obj: {
38                     user: "Zhao Yichun",
39                     password: "123456"
40                 }
41             }
42         })
43     </script>
44 </body>
45
46 </html>
输出结果:
两种set方法修改数组中内容:
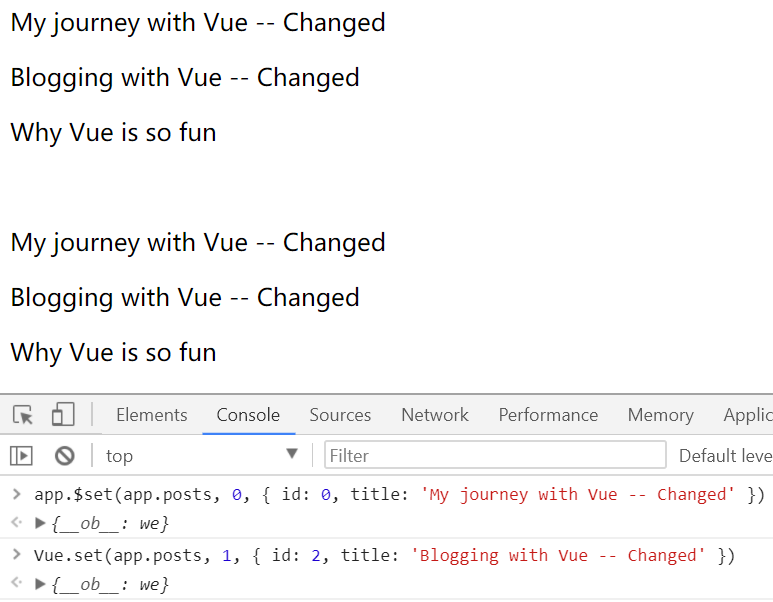
两种set方法修改对象中内容:
4.4 组件中使用v-for
- 参考:13.2节
5、事件处理
5.1 监听事件
举例1:
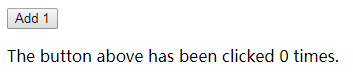
 1 <!DOCTYPE html>
 2 <html>
 3
 4 <head>
 5     <meta charset="utf-8">
 6     <title>My test page</title>
 7     <script src="https://cdn.jsdelivr.net/npm/vue/dist/vue.js"></script>
 8 </head>
 9
10 <body>
11     <div id="app">
12         <button @click="counter += 1">Add 1</button>
13         <p>The button above has been clicked {{ counter }} times.</p>
14     </div>
15
16     <script>
17         var app = new Vue({
18             el: '#app',
19             data: {
20                 counter: 0,
21             },
22             computed: {
23             },
24             methods: {
25             }
26         })
27     </script>
28 </body>
29
30 </html>
输出结果:
5.2 事件处理方法
举例1:
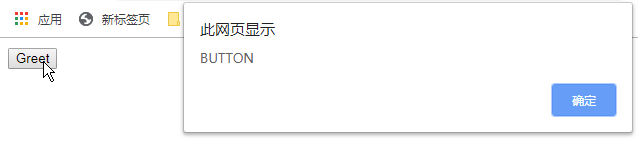
 1 <!DOCTYPE html>
 2 <html>
 3
 4 <head>
 5     <meta charset="utf-8">
 6     <title>My test page</title>
 7     <script src="https://cdn.jsdelivr.net/npm/vue/dist/vue.js"></script>
 8 </head>
 9
10 <body>
11     <div id="app">
12         <button @click="greet">Greet</button>
13     </div>
14
15     <script>
16         var app = new Vue({
17             el: '#app',
18             data: {
19                 name: 'Vue.js',
20             },
21             computed: {
22             },
23             methods: {
24                 greet: function (event) {
25                     // `this` 在方法里指向当前 Vue 实例
26                     alert('Hello' + this.name + '!');
27                     // `event` 是原生 DOM 事件
28                     if (event) {
29                         alert(event.target.tagName)
30                     }
31                 }
32             }
33         })
34     </script>
35 </body>
36
37 </html>
输出结果:
5.3 内联处理器中的方法
举例1:
 1 <!DOCTYPE html>
 2 <html>
 3
 4 <head>
 5     <meta charset="utf-8">
 6     <title>My test page</title>
 7     <script src="https://cdn.jsdelivr.net/npm/vue/dist/vue.js"></script>
 8 </head>
 9
10 <body>
11     <div id="app">
12         <button v-on:click="say('hi')">Say hi</button>
13         <button v-on:click="say('what')">Say what</button>
14     </div>
15
16     <script>
17         var app = new Vue({
18             el: '#app',
19             data: {
20                 name: 'Vue.js',
21             },
22             computed: {
23             },
24             methods: {
25                 say: function (message) {
26                     alert(message)
27                 }
28             }
29         })
30     </script>
31 </body>
32
33 </html>
输出结果:

5.4 事件修饰符
举例1:
 1 <!DOCTYPE html>
 2 <html>
 3
 4 <head>
 5     <meta charset="utf-8">
 6     <title>My test page</title>
 7     <script src="https://cdn.jsdelivr.net/npm/vue/dist/vue.js"></script>
 8 </head>
 9
10 <body>
11     <div id="app">
12         <!-- 1、阻止单击事件继续传播 -->
13         <a v-on:click.stop="doThis">1. v-on:click.stop</a>
14
15         <!-- 2、提交事件不再重载页面 -->
16         <form v-on:submit.prevent="onSubmit">2. v-on:submit.prevent</form>
17
18         <!-- 3、修饰符可以串联 -->
19         <a v-on:click.stop.prevent="doThat">3. v-on:click.stop.prevent</a>
20
21         <!-- 4、只有修饰符 -->
22         <form v-on:submit.prevent>4. v-on:submit.prevent</form>
23
24         <!-- 5、添加事件监听器时使用事件捕获模式 -->
25         <!-- 即元素自身触发的事件先在此处理,然后才交由内部元素进行处理 -->
26         <div v-on:click.capture="doThis">5. v-on:click.capture</div>
27
28         <!-- 6、只当在 event.target 是当前元素自身时触发处理函数 -->
29         <!-- 即事件不是从内部元素触发的 -->
30         <div v-on:click.self="doThat">6. v-on:click.self</div>
31
32         <!-- 7、阻止所有的点击 -->
33         <div v-on:click.prevent.self="doThis">7. v-on:click.prevent.self</div>
34
35         <!-- 8、阻止对元素自身的点击 -->
36         <div v-on:click.self.prevent="doThis">8. v-on:click.self.prevent</div>
37
38         <!-- 9、新增点击事件将只会触发一次 -->
39         <a v-on:click.once="doThis">9. v-on:click.once</a>
40
41         <!-- 10、滚动事件的默认行为 (即滚动行为) 将会立即触发 -->
42         <!-- 而不会等待 `onScroll` 完成  -->
43         <!-- 这其中包含 `event.preventDefault()` 的情况 -->
44         <div v-on:scroll.passive="onScroll">10. v-on:scroll.passive</div>
45     </div>
46
47     <script>
48         var app = new Vue({
49             el: '#app',
50             data: {
51                 name: 'Vue.js',
52             },
53             computed: {
54             },
55             methods: {
56                 doThis: function () {
57                     alert("doThis");
58                 },
59                 onSubmit: function () {
60                     alert("onSubmit");
61                 },
62                 doThat: function () {
63                     alert("doThat");
64                 },
65             }
66         })
67     </script>
68 </body>
69
70 </html>
输出结果:略。
5.5 按键修饰符、系统修饰健、鼠标按钮修饰符
举例1:
  1 <!DOCTYPE html>
  2 <html>
  3
  4 <head>
  5     <meta charset="utf-8">
  6     <title>My test page</title>
  7     <script src="https://cdn.jsdelivr.net/npm/vue/dist/vue.js"></script>
  8 </head>
  9
 10 <body>
 11     <div id="app">
 12         <!-- 1、按键修饰符 -->
 13         <!-- Vue 允许为 v-on 在监听键盘事件时添加按键修饰符 -->
 14
 15         <!-- 只有在 `key` 是 `Enter` 时调用 `vm.submit()` -->
 16         <input v-on:keyup.enter="submit1">
 17
 18         <!-- 可以直接将 KeyboardEvent.key 暴露的任意有效按键名转换为 kebab-case 来作为修饰符 -->
 19         <!-- 示例中,处理函数只会在 $event.key 等于 PageDown 时被调用 -->
 20         <input v-on:keyup.page-down="onPageDown">
 21
 22         <!-- **按键码,keyCode 的事件用法已经被废弃了并可能不会被最新的浏览器支持** -->
 23         <input v-on:keyup.13="submit2">
 24
 25         <!-- 按键码 -->
 26         <!-- .enter
 27              .tab
 28              .delete (捕获“删除”和“退格”键)
 29              .esc
 30              .space
 31              .up
 32              .down
 33              .left
 34              .right -->
 35
 36         <!-- 2、系统修饰键 -->
 37         <!-- 2.1.0 新增 -->
 38         <!-- .ctrl
 39              .alt
 40              .shift
 41              .meta -->
 42
 43         <!-- Alt + C -->
 44         <input @keyup.alt.67="clear">
 45
 46         <!-- Ctrl + Click -->
 47         <div @click.ctrl="doSomething">Do something</div>
 48
 49         <!-- 请注意修饰键与常规按键不同,在和 keyup 事件一起用时,事件触发时修饰键必须处于按下状态。
 50              换句话说,只有在按住 ctrl 的情况下释放其它按键,才能触发 keyup.ctrl。
 51              而单单释放 ctrl 也不会触发事件。如果你想要这样的行为,请为 ctrl 换用 keyCode:keyup.17 -->
 52
 53         <!-- 2.5.0 新增 -->
 54         <!-- .exact 修饰符允许你控制由精确的系统修饰符组合触发的事件。 -->
 55         <!-- 即使 Alt 或 Shift 被一同按下时也会触发 -->
 56         <button @click.ctrl="onClick1">A</button>
 57
 58         <!-- 有且只有 Ctrl 被按下的时候才触发 -->
 59         <button @click.ctrl.exact="onCtrlClick">A</button>
 60
 61         <!-- 没有任何系统修饰符被按下的时候才触发 -->
 62         <button @click.exact="onClick2">A</button>
 63
 64         <!-- 3、鼠标按钮修饰符 -->
 65         <!-- 2.2.0 新增 -->
 66         <!-- .left
 67              .right
 68              .middle -->
 69         <button @click.left="onClickLeft">Left</button>
 70         <button @click.right="onClickRight">Right</button>
 71         <button @click.middle="onClickMiddle">Middle</button>
 72
 73     </div>
 74
 75     <script>
 76         var app = new Vue({
 77             el: '#app',
 78             data: {
 79                 name: 'Vue.js',
 80             },
 81             computed: {
 82             },
 83             methods: {
 84                 submit1: function () {
 85                     alert("submit1");
 86                 },
 87                 onPageDown: function () {
 88                     alert("onPageDown");
 89                 },
 90                 submit2: function () {
 91                     alert("submit2");
 92                 },
 93                 clear: function () {
 94                     alert("clear");
 95                 },
 96                 doSomething: function () {
 97                     alert("doSomething");
 98                 },
 99                 onClick1: function () {
100                     alert("onClick1");
101                 },
102                 onCtrlClick: function () {
103                     alert("onCtrlClick");
104                 },
105                 onClick2: function () {
106                     alert("onClick2");
107                 },
108                 onClickLeft: function () {
109                     alert("onClickLeft");
110                 },
111                 onClickRight: function () {
112                     alert("onClickRight");
113                 },
114                 onClickMiddle: function () {
115                     alert("onClickMiddle");
116                 },
117             }
118         })
119     </script>
120 </body>
121
122 </html>
输出结果:

6、v-model、v-text、v-html
6.1 表单输入绑定(深入v-model的使用)
表单属性 value 和 v-bind:value 的区别:
<input type="radio" v-model="pick" v-bind:value="var_pick"> <!-- var_pick是一个变量 -->
<input type="radio" v-model="pick" value="PICK"> <!-- PICK是一个常量 -->
举例1:
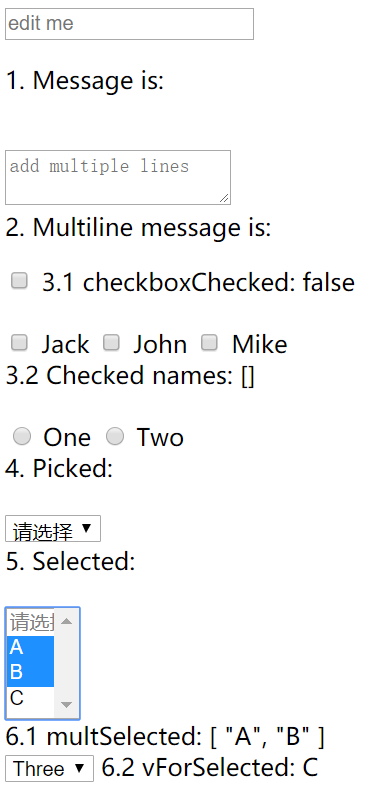
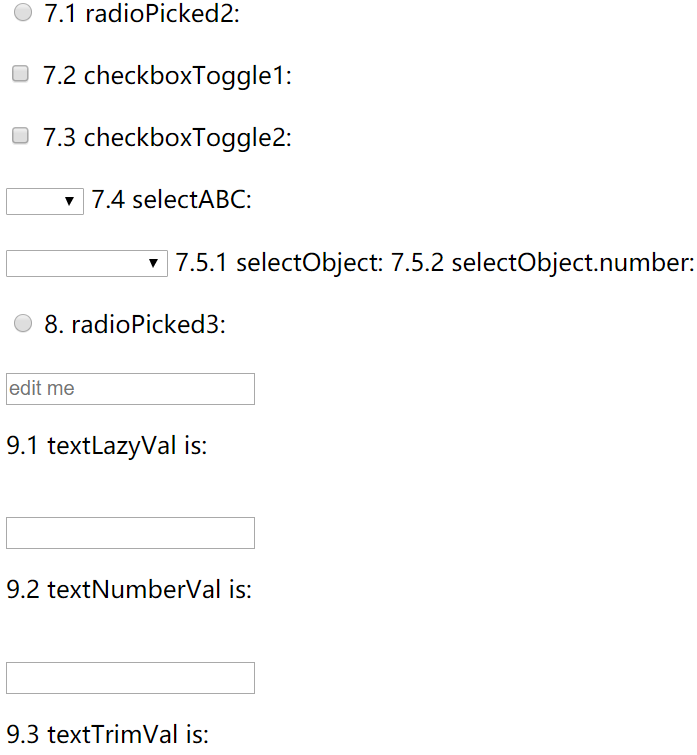
  1 <!DOCTYPE html>
  2 <html>
  3
  4 <head>
  5     <meta charset="utf-8">
  6     <meta http-equiv="Content-Type" content="text/html; charset=gb2312" />
  7     <meta http-equiv="Content-Language" content="zh-cn" />
  8     <title>My test page</title>
  9     <script src="https://cdn.jsdelivr.net/npm/vue/dist/vue.js"></script>
 10 </head>
 11
 12 <body>
 13     <div id="app">
 14         <!-- 1、文本 -->
 15         <!-- 2、多行文本 -->
 16         <!-- 3.1 单个复选框 -->
 17         <!-- 3.2 多个复选框 -->
 18         <!-- 4、单选按钮 -->
 19         <!-- 5、单选框 -->
 20         <!-- 6、多选框(多选时,绑定到一个数组) -->
 21         <!-- 7、值绑定 -->
 22         <!-- 8、复选框 -->
 23         <!-- 9、修饰符:
 24                 .lazy(输入值变化之后,需要按下 Enter 回车键,才会生效),
 25                 .number(自动将用户的输入值转为数值类型,即将输入为 Number 类型,自动转换为 Number 类型(默认都是 String 类型)),
 26                 .trim (自动过滤用户输入的首尾空白字符)-->
 27
 28         <!-- 1、文本 -->
 29         <input type="text" placeholder="edit me" v-model="textVal">
 30         <p>1. Message is: {{ textVal }}</p>
 31         <br>
 32         <input type="text" placeholder="edit me" v-model="textVal" debounce='5000'>
 33         <p>1. 内容是在5000ms后才改变的,Message is: {{ textVal }}</p>
 34         <br>
 35
 36         <!-- 2、多行文本 -->
 37         <textarea v-model="testAreaVal" placeholder="add multiple lines"></textarea>
 38         <br>
 39         <span>2. Multiline message is:</span>
 40         <p style="white-space: pre-line;">{{ testAreaVal }}</p>
 41
 42         <!-- 3.1 单个复选框 -->
 43         <input type="checkbox" name="" id="checkbox" v-model="checkboxChecked">
 44         <label for="checkbox">3.1 checkboxChecked: {{ checkboxChecked }}</label>
 45         <br><br>
 46
 47         <!-- 3.2 多个复选框 -->
 48         <input type="checkbox" value="Jack" id="jack" v-model="checkedNames">
 49         <label for="jack">Jack</label>
 50         <input type="checkbox" value="John" id="john" v-model="checkedNames">
 51         <label for="john">John</label>
 52         <input type="checkbox" value="Mike" id="mike" v-model="checkedNames">
 53         <label for="mike">Mike</label>
 54         <br>
 55         <span>3.2 Checked names: {{ checkedNames }}</span>
 56         <br><br>
 57
 58         <!-- 4、单选按钮 -->
 59         <input type="radio" name="radio-one" id="radio-one" value='One' v-model='radioPicked'>
 60         <label for="radio-one">One</label>
 61         <input type="radio" name="radio-two" id="radio-two" value='Two' v-model='radioPicked'>
 62         <label for="radio-two">Two</label>
 63         <br>
 64         <span>4. Picked: {{ radioPicked }}</span>
 65         <br><br>
 66
 67         <!-- 5、单选框 -->
 68         <select name="" id="" v-model="selected">
 69             <option value="" disabled>请选择</option>
 70             <!-- <option value="A">A</option>
 71                  <option value="B">B</option>
 72                  <option value="C">C</option> -->
 73             <option>A</option>
 74             <option>B</option>
 75             <option>C</option>
 76         </select>
 77         <br>
 78         <span>5. Selected: {{ selected }}</span>
 79         <br><br>
 80
 81         <!-- 6、多选框(多选时,绑定到一个数组) -->
 82         <select name="" id="" multiple style="width: 50px;" v-model="multSelected">
 83             <option value="" disabled>请选择</option>
 84             <!-- <option value="A">A</option>
 85                      <option value="B">B</option>
 86                      <option value="C">C</option> -->
 87             <option>A</option>
 88             <option>B</option>
 89             <option>C</option>
 90         </select>
 91         <br>
 92         <span>6.1 multSelected: {{ multSelected }}</span>
 93         <br>
 94
 95         <!-- v-for渲染的动态选项 -->
 96         <select name="" id="" v-model="vForSelected">
 97             <option v-for="(option, index) in options" :value="option.value">{{ option.text }}</option>
 98         </select>
 99         <span>6.2 vForSelected: {{ vForSelected }}</span>
100         <br>
101
102         <!-- 7、值绑定 -->
103         <!-- 对于单选按钮,复选框及选择框的选项,v-model 绑定的值通常是静态字符串(对于复选框也可以是布尔值) -->
104         <!-- 当选中时,`picked` 为字符串 "a" -->
105         <input type="radio" v-model="radioPicked2" value="a">
106         <label for="radio">7.1 radioPicked2: {{ radioPicked2 }}</label>
107         <br><br>
108
109         <!-- `toggle` 为 true 或 false -->
110         <input type="checkbox" v-model="checkboxToggle1">
111         <label for="radio">7.2 checkboxToggle1: {{ checkboxToggle1 }}</label>
112         <br><br>
113
114         <!-- `toggle` 为 true-value 或 false-value -->
115         <!-- 这里的 true-value 和 false-value 特性并不会影响输入控件的 value 特性,
116              因为浏览器在提交表单时并不会包含未被选中的复选框。
117              如果要确保表单中这两个值中的一个能够被提交,(比如 "yes" 或 "no"),请换用单选按钮。 -->
118         <input type="checkbox" v-model="checkboxToggle2" true-value="true-value" false-value="false-value">
119         <label for="radio">7.3 checkboxToggle2: {{ checkboxToggle2 }}</label>
120         <br><br>
121
122         <!-- 当选中第一个选项时,`selected` 为字符串 "ABC" -->
123         <select v-model="selectABC">
124             <option value="ABC">ABC</option>
125         </select>
126         <label for="radio">7.4 selectABC: {{ selectABC }}</label>
127         <br><br>
128
129         <!-- 当选中第一个选项时,`selected` 为 内联自变量 -->
130         <select v-model="selectObject">
131             <option value="{number: 123}">{number: 123}</option>
132         </select>
133         <label for="radio">7.5.1 selectObject: {{ selectObject }}</label> <!-- 选中时 selectObject 为一个 Object -->
134         <label for="radio">7.5.2 selectObject.number: {{ selectObject.number }}</label>
135         <!-- 选中时 selectObject.number 为 123 -->
136         <br><br>
137
138         <!-- 8、复选框 -->
139         <!-- 当选中时,vm.pick === vm.a -->
140         <input type="radio" name="radio-picked3" id="radio-picked3" v-model="radioPicked3"
141             v-bind:value="var_radioPicked3">
142         <label for="radio">8. radioPicked3: {{ radioPicked3 }}</label>
143         <br><br>
144
145         <!-- 9、修饰符:.lazy, .number, .trim -->
146         <input type="text" placeholder="edit me" v-model.lazy="textLazyVal">
147         <p>9.1 textLazyVal is: {{ textLazyVal }}</p>
148         <br>
149
150         <input type="text" v-model.number="textNumberVal">
151         <p>9.2 textNumberVal is: {{ textNumberVal }}</p>
152         <br>
153
154         <input type="text" v-model.trim="textTrimVal">
155         <p>9.3 textTrimVal is: {{ textTrimVal }}</p>
156         <br>
157     </div>
158
159     <script>
160         var app = new Vue({
161             el: '#app',
162             data: {
163                 textVal: "",
164                 testAreaVal: "",
165                 checkboxChecked: false,
166                 checkedNames: [],
167                 radioPicked: "",
168                 selected: "",
169                 multSelected: [],
170
171                 vForSelected: "",
172                 options: [
173                     { text: 'One', value: 'A' },
174                     { text: 'Two', value: 'B' },
175                     { text: 'Three', value: 'C' }
176                 ],
177
178                 radioPicked2: "",
179                 checkboxToggle1: "",
180                 checkboxToggle2: "",
181                 selectABC: "",
182                 selectObject: "",
183
184                 radioPicked3: "",
185                 var_radioPicked3: "haha",
186
187                 textLazyVal: "",
188                 textNumberVal: "",
189                 textTrimVal: "",
190             },
191             components: {
192             },
193             computed: {
194             },
195             methods: {
196             }
197         })
198     </script>
199 </body>
200
201 </html>
输出结果:
6.2 v-text(单向绑定)、v-html(输出HTML)
举例:
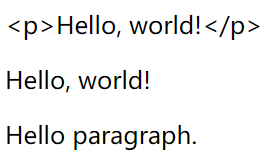
 1 <!DOCTYPE html>
 2 <html>
 3
 4 <head>
 5     <meta charset="utf-8">
 6     <title>My test page</title>
 7     <script src="https://cdn.jsdelivr.net/npm/vue/dist/vue.js"></script>
 8 </head>
 9
10 <body>
11     <div id="app">
12         <p v-text='msg'> </p>
13         <p v-html='msg'> </p>
14         <my-comp></my-comp> <!-- 这是一个注释测试 -->
15     </div>
16
17     <script>
18         Vue.component("my-comp", {
19             props: ["aa"],
20             template: "<p>Hello paragraph.</p>",
21         });
22
23         var vm = new Vue({
24             el: "#app",
25             data: {
26                 msg: "<p>Hello, world!</p>",
27                 obj: {
28                     age: 15,
29                 }
30             },
31             computed: {
32             },
33         });
34     </script>
35 </body>
36
37 </html>
输出结果:

7、组件基础
- 参考:组件基础
举例1:
 1 <!DOCTYPE html>
 2 <html>
 3
 4 <head>
 5     <meta charset="utf-8">
 6     <meta http-equiv="Content-Type" content="text/html; charset=gb2312" />
 7     <meta http-equiv="Content-Language" content="zh-cn" />
 8     <title>My test page</title>
 9     <script src="https://cdn.jsdelivr.net/npm/vue/dist/vue.js"></script>
10 </head>
11
12 <body>
13     <div id="app">
14         <!-- 创建一个 button-counter 组件的实例(可以进行组件的复用) -->
15         <button-counter></button-counter>
16         <button-counter></button-counter>
17         <button-counter></button-counter>
18     </div>
19
20     <script>
21         // 定义一个名为 todo-item 的新组件
22         Vue.component("button-counter", {
23             data: function () {
24                 return {
25                     count: 0
26                 }
27             },
28             template: '<button v-on:click="count++">You clicked me {{count}} times.</button>'
29         });
30
31         var app = new Vue({
32             el: '#app'
33         })
34     </script>
35 </body>
36
37 </html>
输出结果:

组件中,data 必须是一个函数
当我们定义这个 <button-counter> 组件时,你可能会发现它的 data 并不是像这样直接提供一个对象:
data: {
  count: 0
}
取而代之的是,一个组件的 data 选项必须是一个函数,因此每个实例可以维护一份被返回对象的独立的拷贝:
data: function () {
  return {
    count: 0
  }
}
如果 Vue 没有这条规则,点击一个按钮就可能会像如下代码一样影响到其它所有实例:

7.1 组件的组织
通常一个应用会以一棵嵌套的组件树的形式来组织:

例如,你可能会有页头、侧边栏、内容区等组件,每个组件又包含了其它的像导航链接、博文之类的组件。
为了能在模板中使用,这些组件必须先注册以便 Vue 能够识别。这里有两种组件的注册类型:全局注册和局部注册。至此,我们的组件都只是通过 Vue.component 全局注册的:
Vue.component('my-component-name', {
  // ... options ...
})
全局注册的组件可以用在其被注册之后的任何 (通过 new Vue) 新创建的 Vue 根实例,也包括其组件树中的所有子组件的模板中。
7.2 通过 Prop 向子组件传递数据(props属性小写)
- 参考:Prop
Vue是单向数据流,父组件可以通过 Prop 向子组件传递数据,子组件不能修改父组件的数据,子组件可以克隆一个父组件的数据值,修改自身的数据。
举例:
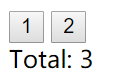
 1 <!DOCTYPE html>
 2 <html>
 3
 4 <head>
 5     <meta charset="utf-8">
 6     <title>My test page</title>
 7     <script src="https://cdn.jsdelivr.net/npm/vue/dist/vue.js"></script>
 8 </head>
 9
10 <body>
11     <div id="app">
12         <counter-tmp :count='defalVal1' @change-event='handleIncrease($event)'></counter-tmp>
13         <counter-tmp :count='defalVal2' @change-event='handleIncrease($event)'></counter-tmp>
14         <div>Total: {{ total }}</div>
15     </div>
16
17     <script>
18         Vue.component("counter-tmp", {
19             props: ['count'],
20             data: function () {
21                 return {
22                     number: this.count, // 子组件不能修改父组件的数据,子组件可以克隆一个父组件的数据值,修改自身的数据
23                 }
24             },
25             template: `
26                 <button @click='handleClick'>{{ number }}</button>
27             `,
28             methods: {
29                 handleClick: function () {
30                     this.number++;
31                     this.$emit('change-event', 1); // change-event 为子组件注册的事件名,1(可选) 为子组件向父组件传递的参数
32                 },
33             }
34         });
35
36         var app = new Vue({
37             el: '#app',
38             data: {
39                 defalVal1: 1,
40                 defalVal2: 2,
41                 total: 3,
42             },
43             methods: {
44                 handleIncrease: function (step) {
45                     this.total += step;
46                 }
47             }
48         })
49     </script>
50 </body>
51
52 </html>
输出结果:

(1)Prop使用、类型
props两种写法(区分类型和不区分类型):
- 数组方式
props: ['title']
- 对象方式(区分类型)
props: {title: String}
type 可以是下列原生构造函数中的一个:
- String
- Number
- Boolean
- Array
- Object
- Date
- Function
- Symbol
额外的,type 还可以是一个自定义的构造函数,并且通过 instanceof 来进行检查确认。例如,给定下列现成的构造函数:
function Person (firstName, lastName) {
  this.firstName = firstName
  this.lastName = lastName
}
你可以使用:
Vue.component('blog-post', {
  props: {
    author: Person
  }
})
来验证 author prop 的值是否是通过 new Person 创建的。
早些时候,我们提到了创建一个博文组件的事情。问题是如果你不能向这个组件传递某一篇博文的标题或内容之类的我们想展示的数据的话,它是没有办法使用的。这也正是 prop 的由来。
Prop 是你可以在组件上注册的一些自定义特性。当一个值传递给一个 prop 特性的时候,它就变成了那个组件实例的一个属性。为了给博文组件传递一个标题,我们可以用一个 props 选项将其包含在该组件可接受的 prop 列表中:
Vue.component('blog-post', {
  props: ['title'],
  template: '<h3>{{ title }}</h3>'
})
一个组件默认可以拥有任意数量的 prop,任何值都可以传递给任何 prop。在上述模板中,你会发现我们能够在组件实例中访问这个值,就像访问 data 中的值一样。
一个 prop 被注册之后,你就可以像这样把数据作为一个自定义特性传递进来:
<blog-post title="My journey with Vue"></blog-post>
<blog-post title="Blogging with Vue"></blog-post>
<blog-post title="Why Vue is so fun"></blog-post>
举例1:
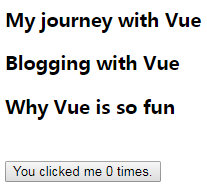
 1 <!DOCTYPE html>
 2 <html>
 3
 4 <head>
 5     <meta charset="utf-8">
 6     <meta http-equiv="Content-Type" content="text/html; charset=gb2312" />
 7     <meta http-equiv="Content-Language" content="zh-cn" />
 8     <title>My test page</title>
 9     <script src="https://cdn.jsdelivr.net/npm/vue/dist/vue.js"></script>
10 </head>
11
12 <body>
13     <div id="app">
14         <!-- 创建一个 button-counter 组件的实例(可以进行组件的复用) -->
15         <blog-post title="My journey with Vue"></blog-post>
16         <blog-post title="Blogging with Vue"></blog-post>
17         <blog-post title="Why Vue is so fun"></blog-post>
18         <br>
19         <button-counter></button-counter>
20     </div>
21
22     <script>
23         // 定义一个名为 button-counter 的新组件
24         Vue.component("button-counter", {
25             data: function () {
26                 return {
27                     count: 0
28                 }
29             },
30             template: '<button v-on:click="count++">You clicked me {{count}} times.</button>'
31         });
32         // 定义一个名为 blog-post 的新组件
33         Vue.component("blog-post", {
34             props: ['title'],
35             template: '<h3>{{title}}</h3>'
36         });
37
38         var app = new Vue({
39             el: '#app'
40         })
41     </script>
42 </body>
43
44 </html>
输出结果:
举例2(v-bind:title="variable"(后面为变量,传递动态Prop),或者 title="Hello, world!" (后面跟常量,传递静态Prop)):
 1 <!DOCTYPE html>
 2 <html>
 3
 4 <head>
 5     <meta charset="utf-8">
 6     <meta http-equiv="Content-Type" content="text/html; charset=gb2312" />
 7     <meta http-equiv="Content-Language" content="zh-cn" />
 8     <title>My test page</title>
 9     <script src="https://cdn.jsdelivr.net/npm/vue/dist/vue.js"></script>
10 </head>
11
12 <body>
13     <div id="app">
14         <!-- 创建一个 button-counter 组件的实例(可以进行组件的复用) -->
15         <blog-post v-for="post in posts" v-bind:key="post.id" v-bind:title="post.title"></blog-post>
16         <br>
17         <button-counter></button-counter>
18     </div>
19
20     <script>
21         // 定义一个名为 button-counter 的新组件
22         Vue.component("button-counter", {
23             data: function () {
24                 return {
25                     count: 0
26                 }
27             },
28             template: '<button v-on:click="count++">You clicked me {{count}} times.</button>'
29         });
30         // 定义一个名为 blog-post 的新组件
31         Vue.component("blog-post", {
32             props: ['title'],
33             template: '<h3>{{title}}</h3>'
34         });
35
36         var app = new Vue({
37             el: '#app',
38             data: {
39                 posts: [
40                     { id: 1, title: 'My journey with Vue' },
41                     { id: 2, title: 'Blogging with Vue' },
42                     { id: 3, title: 'Why Vue is so fun' }
43                 ]
44             }
45         })
46     </script>
47 </body>
48
49 </html>
输出结果:

举例3(推荐):
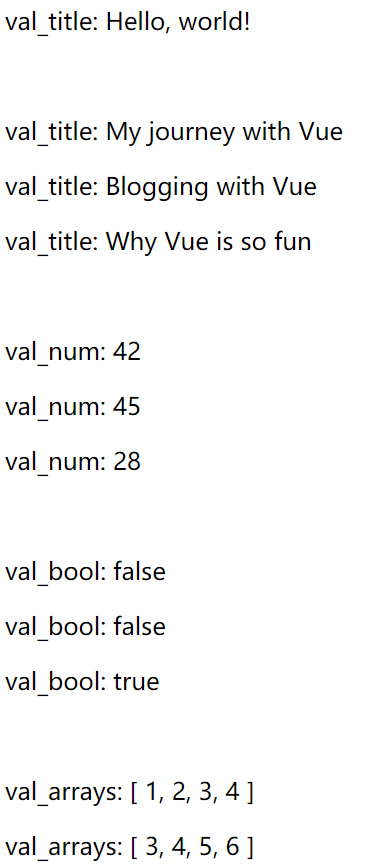
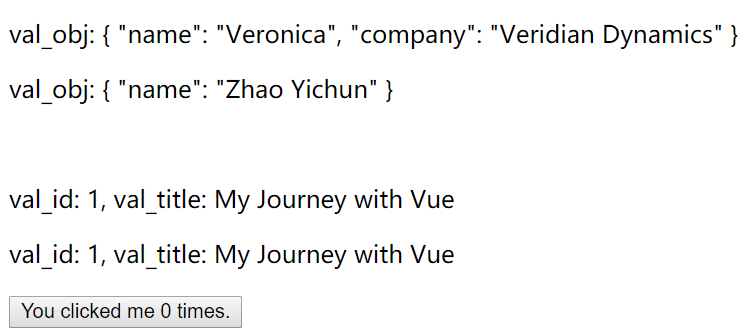
  1 <!DOCTYPE html>
  2 <html>
  3
  4 <head>
  5     <meta charset="utf-8">
  6     <meta http-equiv="Content-Type" content="text/html; charset=gb2312" />
  7     <meta http-equiv="Content-Language" content="zh-cn" />
  8     <title>My test page</title>
  9     <script src="https://cdn.jsdelivr.net/npm/vue/dist/vue.js"></script>
 10 </head>
 11
 12 <body>
 13     <div id="app">
 14         <!-- 1、传递静态Prop -->
 15         <!-- 2、传递动态Prop -->
 16         <!-- 3、传入一个数字 -->
 17         <!-- 4、传入一个布尔值 -->
 18         <!-- 5、传入一个数组 -->
 19         <!-- 6、传一个对象 -->
 20         <!-- 7、传一个对象的所有属性 -->
 21
 22         <!-- 1、传递静态Prop -->
 23         <blog-post1 val_title="Hello, world!"></blog-post1>
 24         <br>
 25
 26         <!-- 2、传递动态Prop -->
 27         <blog-post1 v-for="post in app_posts" v-bind:key="post.id" v-bind:val_title="post.title"></blog-post1>
 28         <br>
 29
 30         <!-- 3、传入一个数字 -->
 31         <!-- 即便 `42` 是静态的,我们仍然需要 `v-bind` 来告诉 Vue -->
 32         <!-- 这是一个 JavaScript 表达式而不是一个字符串。-->
 33         <blog-post2 val_num="42"></blog-post2> <!-- 不推荐 -->
 34         <blog-post2 :val_num="45"></blog-post2>
 35         <blog-post2 :val_num="app_post.age"></blog-post2>
 36         <br>
 37
 38         <!-- 4、传入一个布尔值 -->
 39         <blog-post3 :val_bool="app_isOkay"></blog-post3> <!-- 方式一 -->
 40         <blog-post3 app_isOkay></blog-post3> <!-- 方式二 -->
 41         <blog-post3 :val_bool='true'></blog-post3> <!-- 方式三 -->
 42         <br>
 43
 44         <!-- 5、传入一个数组 -->
 45         <!-- 即便数组是静态的,我们仍然需要 `v-bind` 来告诉 Vue -->
 46         <!-- 这是一个 JavaScript 表达式而不是一个字符串。-->
 47         <blog-post4 :val_arrays="[1, 2, 3, 4]"></blog-post4>
 48         <blog-post4 :val_arrays="app_arr"></blog-post4>
 49         <br>
 50
 51         <!-- 6、传一个对象 -->
 52         <!-- 即便对象是静态的,我们仍然需要 `v-bind` 来告诉 Vue -->
 53         <!-- 这是一个 JavaScript 表达式而不是一个字符串。-->
 54         <blog-post5 :val_obj="{ name: 'Veronica', company: 'Veridian Dynamics' }"> </blog-post5>
 55         <blog-post5 :val_obj="app_obj"></blog-post5>
 56         <br>
 57
 58         <!-- 7、传一个对象的所有属性 -->
 59         <blog-post6 v-bind="app_prop"></blog-post6>
 60         <blog-post6 :val_id="app_prop.val_id" :val_title="app_prop.val_title"></blog-post6>
 61
 62         <button-counter></button-counter>
 63     </div>
 64
 65     <script>
 66         // 定义一个名为 button-counter 的新组件
 67         Vue.component("button-counter", {
 68             data: function () {
 69                 return {
 70                     count: 0
 71                 }
 72             },
 73             template: '<button v-on:click="count++">You clicked me {{count}} times.</button>'
 74         });
 75
 76         // 定义一个名为 blog-post 的新组件
 77         Vue.component("blog-post1", {
 78             props: {
 79                 'val_title': String,
 80             },
 81             template: '<p>val_title: {{val_title}}</p>'
 82         });
 83
 84         Vue.component("blog-post2", {
 85             props: {
 86                 'val_num': Number,
 87                 // 'val_num': [String, Number], // 可能有多个类型
 88             },
 89             template: '<p>val_num: {{val_num}}</p>'
 90         });
 91
 92         Vue.component("blog-post3", {
 93             props: {
 94                 'val_bool': Boolean,
 95             },
 96             template: '<p>val_bool: {{val_bool}}</p>'
 97         });
 98
 99         Vue.component("blog-post4", {
100             props: {
101                 'val_arrays': Array,
102             },
103             template: '<p>val_arrays: {{val_arrays}}</p>'
104         });
105
106         Vue.component("blog-post5", {
107             props: {
108                 'val_obj': Object,
109             },
110             template: '<p>val_obj: {{val_obj}}</p>'
111         });
112
113         Vue.component("blog-post6", {
114             props: {
115                 'val_id': Number,
116                 'val_title': String,
117             },
118             template: '<p>val_id: {{val_id}}, val_title: {{val_title}}</p>'
119         });
120
121         var app = new Vue({
122             el: '#app',
123             data: {
124                 app_posts: [
125                     { id: 1, title: 'My journey with Vue' },
126                     { id: 2, title: 'Blogging with Vue' },
127                     { id: 3, title: 'Why Vue is so fun' }
128                 ],
129                 app_post: { age: 28 },
130                 app_isOkay: false,
131                 app_arr: [3, 4, 5, 6],
132                 app_obj: { "name": "Zhao Yichun" },
133                 app_prop: {
134                     val_id: 1,
135                     val_title: 'My Journey with Vue'
136                 },
137             }
138         })
139     </script>
140 </body>
141
142 </html>
输出结果:
举例4(参考推荐):
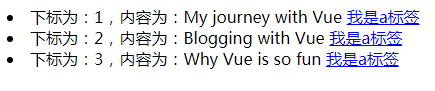
 1 <!DOCTYPE html>
 2 <html>
 3
 4 <head>
 5     <meta charset="utf-8">
 6     <meta http-equiv="Content-Type" content="text/html; charset=gb2312" />
 7     <meta http-equiv="Content-Language" content="zh-cn" />
 8     <title>My test page</title>
 9     <script src="https://cdn.jsdelivr.net/npm/vue/dist/vue.js"></script>
10 </head>
11
12 <body>
13     <div id="app">
14         <!-- 创建一个 button-counter 组件的实例(可以进行组件的复用) -->
15         <blog-post v-for="post in posts" v-bind:index="post.id" v-bind:content="post.title"></blog-post>
16     </div>
17
18     <script>
19
20         // 定义一个名为 blog-post 的新组件
21         Vue.component("blog-post", {
22             props: ['index', 'content'],
23             template: `
24                 <li>
25                     下标为:{{index}},内容为:{{content}}
26                     <a href="###">我是a标签</a>
27                 </li>
28             `
29         });
30
31         var app = new Vue({
32             el: '#app',
33             data: {
34                 posts: [
35                     { id: 1, title: 'My journey with Vue' },
36                     { id: 2, title: 'Blogging with Vue' },
37                     { id: 3, title: 'Why Vue is so fun' }
38                 ]
39             }
40         })
41     </script>
42 </body>
43
44 </html>
输出结果:
举例5(参考推荐):
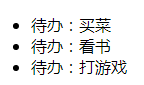
 1 <!DOCTYPE html>
 2 <html>
 3
 4 <head>
 5     <meta charset="utf-8">
 6     <meta http-equiv="Content-Type" content="text/html; charset=gb2312" />
 7     <meta http-equiv="Content-Language" content="zh-cn" />
 8     <title>My test page</title>
 9     <script src="https://cdn.jsdelivr.net/npm/vue/dist/vue.js"></script>
10 </head>
11
12 <body>
13     <div id="app">
14         <ul>
15             <!-- 创建一个 blog-post 组件的实例(可以进行组件的复用) -->
16             <blog-post v-for="(todo, index) in todos" v-bind:key='index' v-bind:props_todo="todo"></blog-post>
17         </ul>
18     </div>
19
20     <script>
21         // 定义一个名为 blog-post 的新组件
22         Vue.component("blog-post", {
23             props: ['props_todo'], // props中属性需要小写
24             template: '<li>待办:{{props_todo}}</li>'
25         });
26
27         var app = new Vue({
28             el: '#app',
29             data: {
30                 todos: [
31                     '买菜',
32                     '看书',
33                     '打游戏'
34                 ]
35             }
36         })
37     </script>
38 </body>
39
40 </html>
输出结果:
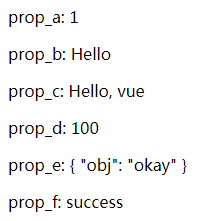
举例6:
 1 <!DOCTYPE html>
 2 <html>
 3
 4 <head>
 5     <meta charset="utf-8">
 6     <title>My test page</title>
 7     <script src="https://cdn.jsdelivr.net/npm/vue/dist/vue.js"></script>
 8 </head>
 9
10 <body>
11     <div id="app-demo">
12         <component-label :prop_a="1" :prop_b="'Hello'" :prop_c="'Hello, vue'" :prop_e="{'obj': 'okay'}" :prop_f="'success'"></component-label> <!-- v-bind:prop_d 自带默认值 -->
13     </div>
14
15     <script>
16         Vue.component("component-label", {
17             template: `
18                 <div>
19                     <p>prop_a: {{prop_a}}</p>
20                     <p>prop_b: {{prop_b}}</p>
21                     <p>prop_c: {{prop_c}}</p>
22                     <p>prop_d: {{prop_d}}</p>
23                     <p>prop_e: {{prop_e}}</p>
24                     <p>prop_f: {{prop_f}}</p>
25                 </div>
26             `,
27             props: {
28                 // 基础的类型检查 (`null` 和 `undefined` 会通过任何类型验证)
29                 prop_a: Number,
30                 // 多个可能的类型
31                 prop_b: [String, Number],
32                 // 必填的字符串
33                 prop_c: {
34                     type: String,
35                     required: true
36                 },
37                 // 带有默认值的数字
38                 prop_d: {
39                     type: Number,
40                     default: 100
41                 },
42                 // 带有默认值的对象
43                 prop_e: {
44                     type: Object,
45                     // 对象或数组默认值必须从一个工厂函数获取
46                     default: function () {
47                         return { message: 'hello' }
48                     }
49                 },
50                 // 自定义验证函数
51                 prop_f: {
52                     validator: function (value) {
53                         // 这个值必须匹配下列字符串中的一个
54                         return ['success', 'warning', 'danger'].indexOf(value) !== -1
55                     }
56                 }
57             }
58         })
59
60         var app = new Vue({
61             el: '#app-demo',
62             data: {
63
64             },
65             methods: {
66
67             }
68         })
69     </script>
70 </body>
71
72 </html>
输出结果:
(2)Prop验证
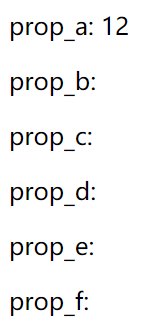
举例:
  1 <!DOCTYPE html>
  2 <html>
  3
  4 <head>
  5     <meta charset="utf-8">
  6     <meta http-equiv="Content-Type" content="text/html; charset=gb2312" />
  7     <meta http-equiv="Content-Language" content="zh-cn" />
  8     <title>My test page</title>
  9     <script src="https://cdn.jsdelivr.net/npm/vue/dist/vue.js"></script>
 10 </head>
 11
 12 <body>
 13     <div id="app">
 14         <blog-post :prop_a="app_propA" :prop_b="app_propB" :prop_c="app_propC" :prop_d="app_propD" :prop_e="app_propE"
 15             :prop_f="app_propF"></blog-post>
 16     </div>
 17
 18     <script>
 19         // 定义一个名为 blog-post 的新组件
 20         Vue.component("blog-post", {
 21             props: {
 22                 // 基础的类型检查 (`null` 和 `undefined` 会通过任何类型验证)
 23                 prop_a: Number,
 24                 // 多个可能的类型
 25                 prop_b: [String, Number],
 26                 // 必填的字符串
 27                 prop_c: {
 28                     type: String,
 29                     required: true
 30                 },
 31                 // 带有默认值的数字
 32                 prop_d: {
 33                     type: Number,
 34                     default: 100
 35                 },
 36                 // 带有默认值的对象
 37                 prop_e: {
 38                     type: Object,
 39                     // 对象或数组默认值必须从一个工厂函数获取
 40                     default: function () {
 41                         return { message: 'hello' }
 42                     }
 43                 },
 44                 // 自定义验证函数
 45                 prop_f: {
 46                     validator: function (value) {
 47                         // 这个值必须匹配下列字符串中的一个
 48                         return ['success', 'warning', 'danger'].indexOf(value) !== -1
 49                     }
 50                 }
 51             },
 52             template: `
 53                 <div>
 54                     <p>prop_a: {{prop_a}}</p>
 55                     <p>prop_b: {{prop_b}}</p>
 56                     <p>prop_c: {{prop_c}}</p>
 57                     <p>prop_d: {{prop_d}}</p>
 58                     <p>prop_e: {{prop_e}}</p>
 59                     <p>prop_f: {{prop_f}}</p>
 60                 </div>
 61             `,
 62         });
 63
 64         var app = new Vue({
 65             el: '#app',
 66             data: {
 67                 app_propA: 12,
 68                 app_propB: "",
 69                 app_propC: "",
 70                 app_propD: "",
 71                 app_propE: "",
 72                 app_propF: "",
 73             }
 74         })
 75     </script>
 76 </body>
 77
 78 </html>
 79
 80 <body>
 81     <div id="app">
 82         <!-- 当 prop 验证失败的时候,(开发环境构建版本的) Vue 将会产生一个控制台的警告 -->
 83         <my-component v-bind:prop_a="app_prop_a"></my-component>
 84     </div>
 85
 86     <script>
 87         Vue.component('my-component', {
 88             props: {
 89                 // 基础的类型检查 (`null` 和 `undefined` 会通过任何类型验证)
 90                 prop_a: Number
 91             },
 92             template: `
 93                 <p>prop_a: {{prop_a}}, propB: {{propB}}, propC: {{propC}}, propD: {{propD}}, propE: {{propE}}, propF: {{propF}}</p>
 94             `,
 95         })
 96         var app = new Vue({
 97             el: '#app',
 98             component: {
 99                 'my-component': 'my-component',
100             },
101             data: {
102                 app_prop_a: 12,
103                 app_propB: "",
104                 app_propC: "",
105                 app_propD: "",
106                 app_propE: "",
107                 app_propF: "",
108             }
109         })
110     </script>
111 </body>
112
113 </html>
输出结果:
(3)props特性和非props特性
- props特性:父组件向子组件传递参数,子组件通过props接受父组件的数据
- 非props特性:(1)父组件向子组件传递,子组件未设置props进行参数接收,控制台会报错;(2)属性会展示在子组件最外层的DOM标签的HTML属性里面;
7.3 通过插槽分发内容(组件元素标签后增加自定义内容,slot标签内容分发,作用域卡槽)
(1)通过插槽分发内容(组件元素标签后增加自定义内容,slot标签内容分发)
组件中 slot标签里面的内容,是在调用该组件的时候内容为空显示的。
- 默认在组件中 slot标签中添加了内容,也是可以显式出来;
- 如果在调用组件的时候,组件标签中填写的内容即会替换 slot标签中的内容。
举例1:
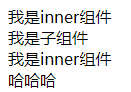
 1 <!DOCTYPE html>
 2 <html>
 3
 4 <head>
 5     <meta charset="utf-8">
 6     <meta http-equiv="Content-Type" content="text/html; charset=gb2312" />
 7     <meta http-equiv="Content-Language" content="zh-cn" />
 8     <title>My test page</title>
 9     <script src="https://cdn.jsdelivr.net/npm/vue/dist/vue.js"></script>
10 </head>
11
12 <body>
13     <div id="app">
14         <comp_child>哈哈哈</comp_child>
15     </div>
16
17     <script>
18         var app = new Vue({
19             el: '#app',
20             data: {
21             },
22             components: {
23                 'comp_child': {
24                     template: `
25                         <div>
26                             <inner></inner>
27                             我是子组件
28                             <inner></inner> <!-- 通过插槽分发内容(组件元素标签后增加自定义内容) -->
29                             <slot></slot>
30                         </div>
31                     `,
32                     components: {
33                         "inner": { // 只能在其父组件(comp_child组件)中使用,不能在其爷爷组件中使用
34                             template: `
35                             <div>我是inner组件</div>
36                         `
37                         }
38                     }
39                 }
40             },
41             computed: {
42
43             },
44             methods: {
45
46             }
47         })
48     </script>
49 </body>
50
51 </html>
输出结果:
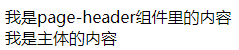
举例2:
 1 <!DOCTYPE html>
 2 <html>
 3
 4 <head>
 5     <meta charset="utf-8">
 6     <meta http-equiv="Content-Type" content="text/html; charset=gb2312" />
 7     <meta http-equiv="Content-Language" content="zh-cn" />
 8     <title>My test page</title>
 9     <script src="https://cdn.jsdelivr.net/npm/vue/dist/vue.js"></script>
10 </head>
11
12 <body>
13     <div id="app">
14         <div>
15             <page-comp>
16                 <page-header-comp></page-header-comp>
17             </page-comp>
18         </div>
19     </div>
20
21     <script>
22         // 定义一个名为 page-comp 的新组件
23         Vue.component("page-comp", {
24             template: `
25                 <div>
26                     <slot></slot>
27                     <main>我是主体的内容</main>
28                 </div>
29             `
30         });
31         // 定义一个名为 page-header-comp 的新组件
32         Vue.component("page-header-comp", {
33             template: `
34                 <header>
35                     我是page-header组件里的内容
36                 </header>
37             `
38         });
39
40         var app = new Vue({
41             el: '#app',
42             data: {
43
44             }
45         })
46     </script>
47 </body>
48
49 </html>
输出结果:
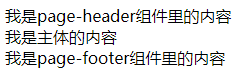
举例3(多个slot内容插槽):
 1 <!DOCTYPE html>
 2 <html>
 3
 4 <head>
 5     <meta charset="utf-8">
 6     <meta http-equiv="Content-Type" content="text/html; charset=gb2312" />
 7     <meta http-equiv="Content-Language" content="zh-cn" />
 8     <title>My test page</title>
 9     <script src="https://cdn.jsdelivr.net/npm/vue/dist/vue.js"></script>
10 </head>
11
12 <body>
13     <div id="app">
14         <div>
15             <page-comp>
16                 <!-- slot内容分发标签,如果需要插入多个slot,可以添加 name属性 -->
17                 <page-header-comp slot="header"></page-header-comp>
18                 <page-footer-comp slot="footer"></page-footer-comp>
19             </page-comp>
20         </div>
21     </div>
22
23     <script>
24         // 定义一个名为 page-comp 的新组件
25         Vue.component("page-comp", {
26             template: `
27                 <div>
28                     <slot name="header"></slot>
29                     <main>我是主体的内容</main>
30                     <slot name="footer"></slot>
31                 </div>
32             `
33         });
34         // 定义一个名为 page-header-comp 的新组件
35         Vue.component("page-header-comp", {
36             template: `
37                 <header>
38                     我是page-header组件里的内容
39                 </header>
40             `
41         });
42         // 定义一个名为 page-footer-comp 的新组件
43         Vue.component("page-footer-comp", {
44             template: `
45                 <footer>
46                     我是page-footer组件里的内容
47                 </footer>
48             `
49         });
50
51         var app = new Vue({
52             el: '#app',
53             data: {
54
55             }
56         })
57     </script>
58 </body>
59
60 </html>
输出结果:
(2)作用域插槽
当子组件做循环,或者某一部分子组件的结构由外部传递过来的时候。
使用作用域插槽,子组件可以向父组件传递数据,父组件传递过来的插槽如果要接收数据,必须在外层使用一个 template,同时使用一个 slot-scope属性对应的名字接收传递过来的数据。
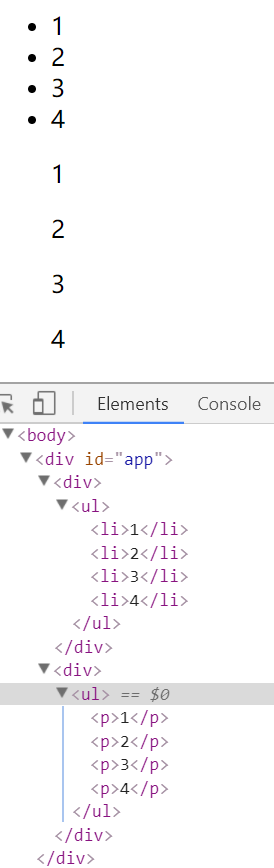
举例:
 1 <!DOCTYPE html>
 2 <html>
 3
 4 <head>
 5     <meta charset="utf-8">
 6     <title>My test page</title>
 7     <script src="https://cdn.jsdelivr.net/npm/vue/dist/vue.js"></script>
 8 </head>
 9
10 <body>
11     <div id="app">
12         <child-tmp>
13             <template slot-scope="props">
14                 <li>{{ props.parent_item }}</li>
15             </template>
16         </child-tmp>
17
18         <child-tmp>
19             <template slot-scope="props">
20                 <p>{{ props.parent_item }}</p>
21             </template>
22         </child-tmp>
23     </div>
24
25     <script>
26         Vue.prototype.bus = new Vue(); // 在Vue类的prototype上挂载了一个bus属性
27
28         Vue.component("child-tmp", {
29             props: ['content'],
30             template: `
31                 <div>
32                     <ul>
33                         <slot v-for="item of list" :parent_item=item>
34                         </slot>
35                     </ul>
36                 </div>
37             `,
38             data: function () {
39                 return {
40                     list: [1, 2, 3, 4],
41                 }
42             },
43             methods: {
44
45             },
46             mounted: function () {
47
48             }
49         });
50
51         var app = new Vue({
52             el: '#app',
53             data: {
54
55             },
56             methods: {
57
58             }
59         })
60     </script>
61 </body>
62
63 </html>
输出结果:
7.4 组件的三种使用方法
(1)方式一:全局组件
举例:
Vue.component('my-component', {
   // 选项
})
(2)方式二:局部注册(组件嵌套)
不必在全局注册每个组件。通过使用组件实例选项注册,可以使组件仅在另一个实例/组件的作用域中可用:
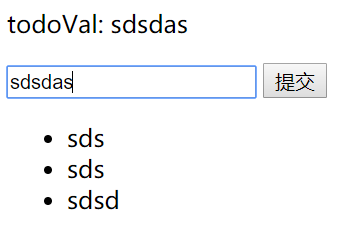
举例1(局部组件):
 1 <!DOCTYPE html>
 2 <html>
 3
 4 <head>
 5     <meta charset="utf-8">
 6     <meta http-equiv="Content-Type" content="text/html; charset=gb2312" />
 7     <meta http-equiv="Content-Language" content="zh-cn" />
 8     <title>My test page</title>
 9     <script src="https://cdn.jsdelivr.net/npm/vue/dist/vue.js"></script>
10 </head>
11
12 <body>
13     <div id="app">
14         <p>todoVal: {{ todoVal }}</p>
15         <input type="text" v-model="todoVal">
16         <button @click="addItemToList">提交</button>
17         <ul>
18             <todo-item v-for="(item, index) in list" v-bind:content="item" :key="index">
19             </todo-item>
20         </ul>
21     </div>
22
23     <script>
24         var TodoItem = {
25             template: `
26                 <li>{{ content }}<li>
27             `,
28             props: ['content'],
29         };
30
31         var app = new Vue({
32             el: '#app',
33             data: {
34                 todoVal: "",
35                 list: [],
36             },
37             components: {
38                 'todo-item': TodoItem,
39             },
40             computed: {
41
42             },
43             methods: {
44                 addItemToList: function () {
45                     this.list.push(this.todoVal);
46                     this.todoVal = "";
47                 }
48             }
49         })
50     </script>
51 </body>
52
53 </html>
输出结果:
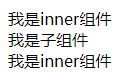
举例2(局部组件+组件嵌套):
 1 <!DOCTYPE html>
 2 <html>
 3
 4 <head>
 5     <meta charset="utf-8">
 6     <meta http-equiv="Content-Type" content="text/html; charset=gb2312" />
 7     <meta http-equiv="Content-Language" content="zh-cn" />
 8     <title>My test page</title>
 9     <script src="https://cdn.jsdelivr.net/npm/vue/dist/vue.js"></script>
10 </head>
11
12 <body>
13     <div id="app">
14         <comp_child></comp_child>
15     </div>
16
17     <script>
18         var app = new Vue({
19             el: '#app',
20             data: {
21             },
22             components: {
23                 'comp_child': {
24                     template: `
25                         <div>
26                             <inner></inner>
27                             我是子组件
28                             <inner></inner>
29                         </div>
30                     `,
31                     components: {
32                         "inner": { // 只能在其父组件(comp_child组件)中使用,不能在其爷爷组件中使用
33                             template: `
34                             <div>我是inner组件</div>
35                         `
36                         }
37                     }
38                 }
39             },
40             computed: {
41
42             },
43             methods: {
44
45             }
46         })
47     </script>
48 </body>
49
50 </html>
输出结果:
(3)方式三:以一个.vue的单文件作为组件(推荐)
一般在.vue独立文件中包含3个部分内容:
- template部分,放的是组件中的html代码
- script部分,放的是组件的js代码
- style部分,放的是组件中的css代码
7.5 监听子组件事件(子组件把数据传回去)、自定义组件事件(事件名称小写)
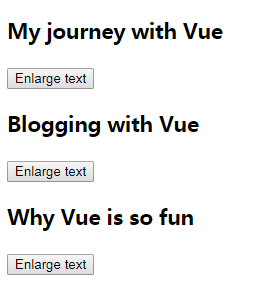
在我们开发 <blog-post> 组件时,它的一些功能可能要求我们和父级组件进行沟通。例如我们可能会引入一个可访问性的功能来放大博文的字号,同时让页面的其它部分保持默认的字号。
在其父组件中,我们可以通过添加一个 postFontSize 数据属性来支持这个功能:
new Vue({
  el: '#blog-posts-events-demo',
  data: {
    posts: [/* ... */],
    postFontSize: 1
  }
})
它可以在模板中用来控制所有博文的字号:
<div id="blog-posts-events-demo">
  <div :style="{ fontSize: postFontSize + 'em' }">
    <blog-post
      v-for="post in posts"
      v-bind:key="post.id"
      v-bind:post="post"
    ></blog-post>
  </div>
</div>
现在我们在每篇博文正文之前添加一个按钮来放大字号:
Vue.component('blog-post', {
  props: ['post'],
  template: `
    <div class="blog-post">
      <h3>{{ post.title }}</h3>
      <button>
        Enlarge text
      </button>
      <div v-html="post.content"></div>
    </div>
  `
})
问题是这个按钮不会做任何事:
<button>
  Enlarge text
</button>
当点击这个按钮时,我们需要告诉父级组件放大所有博文的文本。幸好 Vue 实例提供了一个自定义事件的系统来解决这个问题。父级组件可以像处理 native DOM 事件一样通过 v-on 监听子组件实例的任意事件:
<blog-post
  ...
  v-on:enlarge-text="postFontSize += 0.1"
></blog-post>
同时子组件可以通过调用内建的 $emit 方法 并传入事件名称来触发一个事件:
<button v-on:click="$emit('enlarge-text')">
  Enlarge text
</button>
有了这个 v-on:enlarge-text="postFontSize += 0.1" 监听器,父级组件就会接收该事件并更新 postFontSize 的值。
推荐:举例4、举例5
举例1:
 1 <!DOCTYPE html>
 2 <html>
 3
 4 <head>
 5     <meta charset="utf-8">
 6     <meta http-equiv="Content-Type" content="text/html; charset=gb2312" />
 7     <meta http-equiv="Content-Language" content="zh-cn" />
 8     <title>My test page</title>
 9     <script src="https://cdn.jsdelivr.net/npm/vue/dist/vue.js"></script>
10 </head>
11
12 <body>
13     <div id="blog-posts-events-demo">
14         <div :style="{ fontSize: postFontSize + 'em' }">
15             <blog-post v-for="post in posts" v-bind:key="post.id" v-bind:post="post" v-on:enlarge-text="postFontSize += 0.1"></blog-post>
16         </div>
17     </div>
18
19     <script>
20
21         // 定义一个名为 blog-post 的新组件
22         Vue.component("blog-post", {
23             props: ['post'],
24             template: `
25                 <div class="blog-post">
26                     <h3>{{ post.title }}</h3>
27                     <button v-on:click="$emit('enlarge-text')"> <!-- 注释:子组件可以通过调用内建的 $emit 方法 并传入事件名称来触发一个事件 -->
28                         Enlarge text
29                     </button>
30                     <div v-html="post.content"></div>
31                 </div>
32             `
33         });
34
35         var app = new Vue({
36             el: '#blog-posts-events-demo',
37             data: {
38                 posts: [
39                     { id: 1, title: 'My journey with Vue' },
40                     { id: 2, title: 'Blogging with Vue' },
41                     { id: 3, title: 'Why Vue is so fun' }
42                 ],
43                 postFontSize: 1
44             }
45         })
46     </script>
47 </body>
48
49 </html>
输出结果:
举例2(使用事件抛出一个值):
<blog-post> 组件决定它的文本要放大多少。这时可以使用 $emit 的第二个参数来提供这个值
当在父级组件监听这个事件的时候,我们可以通过 $event 访问到被抛出的这个值
 1 <!DOCTYPE html>
 2 <html>
 3
 4 <head>
 5     <meta charset="utf-8">
 6     <meta http-equiv="Content-Type" content="text/html; charset=gb2312" />
 7     <meta http-equiv="Content-Language" content="zh-cn" />
 8     <title>My test page</title>
 9     <script src="https://cdn.jsdelivr.net/npm/vue/dist/vue.js"></script>
10 </head>
11
12 <body>
13     <div id="blog-posts-events-demo">
14         <div :style="{ fontSize: postFontSize + 'em' }">
15             <blog-post v-for="post in posts" v-bind:key="post.id" v-bind:post="post" v-on:enlarge-text="postFontSize += $event"></blog-post> <!-- 当在父级组件监听这个事件的时候,我们可以通过 $event 访问到被抛出的这个值 -->>
16         </div>
17     </div>
18
19     <script>
20
21         // 定义一个名为 blog-post 的新组件
22         Vue.component("blog-post", {
23             props: ['post'],
24             template: `
25                 <div class="blog-post">
26                     <h3>{{ post.title }}</h3>
27                     <button v-on:click="$emit('enlarge-text', 0.1)"> <!-- 注释:子组件可以通过调用内建的 $emit 方法 并传入事件名称来触发一个事件 --> <!-- 可以使用 $emit 的第二个参数来提供这个值 -->
28                         Enlarge text
29                     </button>
30                     <div v-html="post.content"></div>
31                 </div>
32             `
33         });
34
35         var app = new Vue({
36             el: '#blog-posts-events-demo',
37             data: {
38                 posts: [
39                     { id: 1, title: 'My journey with Vue' },
40                     { id: 2, title: 'Blogging with Vue' },
41                     { id: 3, title: 'Why Vue is so fun' }
42                 ],
43                 postFontSize: 1
44             }
45         })
46     </script>
47 </body>
48
49 </html>
输出结果:同上。
举例3(使用事件抛出一个值,使用方法处理):
 1 <!DOCTYPE html>
 2 <html>
 3
 4 <head>
 5     <meta charset="utf-8">
 6     <meta http-equiv="Content-Type" content="text/html; charset=gb2312" />
 7     <meta http-equiv="Content-Language" content="zh-cn" />
 8     <title>My test page</title>
 9     <script src="https://cdn.jsdelivr.net/npm/vue/dist/vue.js"></script>
10 </head>
11
12 <body>
13     <div id="blog-posts-events-demo">
14         <div :style="{ fontSize: postFontSize + 'em' }">
15             <blog-post v-for="post in posts" v-bind:key="post.id" v-bind:post="post" v-on:enlarge-text="onEnlagerText(0.1)"> <!-- 采用事件处理函数方法 -->
16             </blog-post>
17         </div>
18     </div>
19
20     <script>
21         // 定义一个名为 blog-post 的新组件
22         Vue.component("blog-post", {
23             props: ['post'],
24             template: `
25                 <div class="blog-post">
26                     <h3>{{ post.title }}</h3>
27                     <button v-on:click="$emit('enlarge-text')"> <!-- 注释:子组件可以通过调用内建的 $emit 方法 并传入事件名称来触发一个事件 -->
28                         Enlarge text
29                     </button>
30                     <div v-html="post.content"></div>
31                 </div>
32             `
33         });
34
35         var app = new Vue({
36             el: '#blog-posts-events-demo',
37             data: {
38                 posts: [
39                     { id: 1, title: 'My journey with Vue' },
40                     { id: 2, title: 'Blogging with Vue' },
41                     { id: 3, title: 'Why Vue is so fun' }
42                 ],
43                 postFontSize: 1
44             },
45             methods: {
46                 onEnlagerText: function (enlargeAmount) { // 值作为第一个参数传入这个方法
47                     this.postFontSize += enlargeAmount;
48                 }
49             }
50         })
51     </script>
52 </body>
53
54 </html>
输出结果:同上。
自定义组件事件:
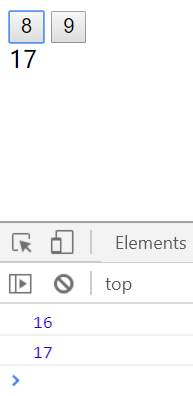
举例4:
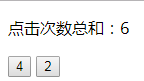
 1 <!DOCTYPE html>
 2 <html>
 3
 4 <head>
 5     <meta charset="utf-8">
 6     <meta http-equiv="Content-Type" content="text/html; charset=gb2312" />
 7     <meta http-equiv="Content-Language" content="zh-cn" />
 8     <title>My test page</title>
 9     <script src="https://cdn.jsdelivr.net/npm/vue/dist/vue.js"></script>
10 </head>
11
12 <body>
13     <div id="app">
14         <p>点击次数总和:{{total}}</p>
15         <button-counter @increment-event="incrementTotal"></button-counter> <!-- 监听事件,事件名称小写 -->
16         <button-counter @increment-event="incrementTotal"></button-counter>
17     </div>
18
19     <script>
20         Vue.component('button-counter', {
21             template: `
22                 <button @click="incrementFunc">{{counter}}</button>
23             `,
24             data: function () {
25                 return {
26                     counter: 0
27                 }
28             },
29             methods: {
30                 incrementFunc: function () {
31                     this.counter += 1;
32                     this.$emit('increment-event'); // 触发事件,自定义事件名,事件名称小写
33                 }
34             }
35         })
36
37         var app = new Vue({
38             el: '#app',
39             data: {
40                 total: 0
41             },
42             computed: {
43
44             },
45             methods: {
46                 incrementTotal: function () {
47                     this.total += 1;
48                 }
49             }
50         })
51     </script>
52 </body>
53
54 </html>
输出结果:
7.6 组件上使用 v-model
自定义事件也可以用于创建支持 v-model 的自定义输入组件。记住:
<input v-model="searchText">
等价于:
<input
  v-bind:value="searchText"
  v-on:input="searchText = $event.target.value"
>
当用在组件上时,v-model 则会这样:
<custom-input
  v-bind:value="searchText"
  v-on:input="searchText = $event"
></custom-input>
为了让它正常工作,这个组件内的 <input> 必须:
将其 value 特性绑定到一个名叫 value 的 prop 上
在其 input 事件被触发时,将新的值通过自定义的 input 事件抛出
写成代码之后是这样的:
Vue.component('custom-input', {
  props: ['value'],
  template: `
    <input
      v-bind:value="value"
      v-on:input="$emit('input', $event.target.value)"
    >
  `
})
现在 v-model 就应该可以在这个组件上完美地工作起来了:
<custom-input v-model="searchText"></custom-input>
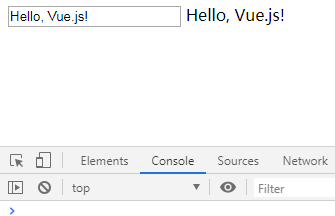
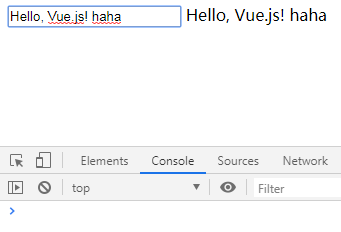
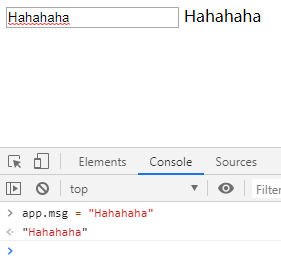
举例:
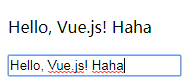
 1 <!DOCTYPE html>
 2 <html>
 3
 4 <head>
 5     <meta charset="utf-8">
 6     <title>My test page</title>
 7     <script src="https://cdn.jsdelivr.net/npm/vue/dist/vue.js"></script>
 8 </head>
 9
10 <body>
11     <div id="app-demo">
12         <input-label v-model="msg" ></input-label> <!-- input-event 为事件名称,$event为事件监听的入参 -->
13         <span>{{msg}}</span>
14     </div>
15
16     <script>
17         Vue.component("input-label", {
18             template: `
19                 <input type="text" v-bind:value="var_value" @input="$emit('input', $event.target.value)"> <!-- @input 等价于 v-on:input --> <!--为什么这里把 'input'(第二个input) 作为触发事件的事件名, input 在哪定义的?-->
20             `,
21             props: ["var_value"]
22         })
23
24         var app = new Vue({
25             el: '#app-demo',
26             data: {
27                 msg: "Hello, Vue.js!",
28             },
29             methods: {
30             }
31         })
32     </script>
33 </body>
34
35 </html>
输出结果:
给组件添加 v-model 属性时,默认会把 value 作为组件的属性,然后把 'input' 值作为给组件绑定事件时的事件名
<input-label v-model="msg" ></input-label>
<!--上行代码是下行的语法糖
  <input-label :value="msg" @input="msg = arguments[0]"></input-label>
-->
输出结果:略。
7.7 Vue使用小技巧
(1)使用 is 解决HTML5标签上的一些小bug(如表格、列表、选择框等)
- table → tbody → tr → td
- select → option
- ol → li
- ul → li
表格要求格式:
<table>
    <tbody>
        <tr>
            <td>11</td>
            <td>12</td>
        </tr>
        <tr>
            <td>21</td>
            <td>22</td>
        </tr>
    </tbody>
</table>
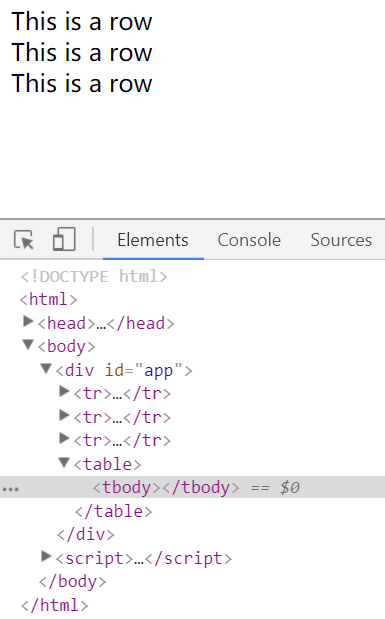
举例1(出错情况):
 1 <!DOCTYPE html>
 2 <html>
 3
 4 <head>
 5     <meta charset="utf-8">
 6     <meta http-equiv="Content-Type" content="text/html; charset=gb2312" />
 7     <meta http-equiv="Content-Language" content="zh-cn" />
 8     <title>My test page</title>
 9     <script src="https://cdn.jsdelivr.net/npm/vue/dist/vue.js"></script>
10 </head>
11
12 <body>
13     <div id="app">
14         <table>
15             <tbody>
16                 <row></row> <!-- 直接这样写会出错,tbody 下面只能是 tr标签 -->
17                 <row></row>
18                 <row></row>
19             </tbody>
20         </table>
21     </div>
22
23     <script>
24         // 定义一个名为 row 的新组件
25         Vue.component("row", {
26             template: `
27                 <tr>
28                     <td>This is a row</td>
29                 </tr>
30             `
31         });
32
33         var app = new Vue({
34             el: '#app',
35             data: {
36
37             }
38         })
39     </script>
40 </body>
41
42 </html>
输出结果(tr标签内容并没有到tbody标签下面):
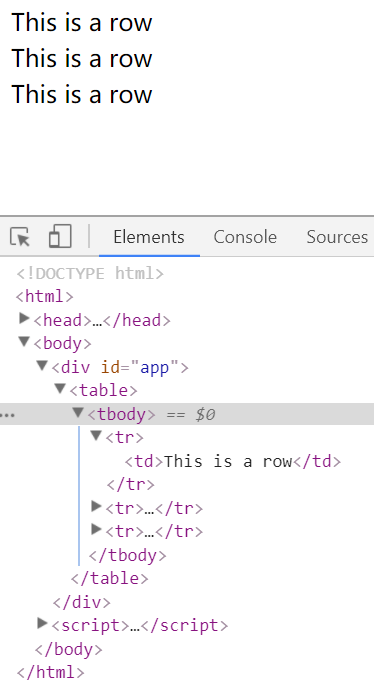
举例2(使用 is 方法解决该问题):
 1 <!DOCTYPE html>
 2 <html>
 3
 4 <head>
 5     <meta charset="utf-8">
 6     <meta http-equiv="Content-Type" content="text/html; charset=gb2312" />
 7     <meta http-equiv="Content-Language" content="zh-cn" />
 8     <title>My test page</title>
 9     <script src="https://cdn.jsdelivr.net/npm/vue/dist/vue.js"></script>
10 </head>
11
12 <body>
13     <div id="app">
14         <table>
15             <tbody>
16                 <tr is='row'></tr>
17                 <tr is='row'></tr>
18                 <tr is='row'></tr>
19             </tbody>
20         </table>
21     </div>
22
23     <script>
24         // 定义一个名为 row 的新组件
25         Vue.component("row", {
26             template: `
27                 <tr>
28                     <td>This is a row</td>
29                 </tr>
30             `
31         });
32
33         var app = new Vue({
34             el: '#app',
35             data: {
36
37             }
38         })
39     </script>
40 </body>
41
42 </html>
输出结果:
(2)ref 的使用
举例:
 1 <!DOCTYPE html>
 2 <html>
 3
 4 <head>
 5     <meta charset="utf-8">
 6     <title>My test page</title>
 7     <script src="https://cdn.jsdelivr.net/npm/vue/dist/vue.js"></script>
 8 </head>
 9
10 <body>
11     <div id="app">
12         <counter-tmp ref='one' @change-event="handleChange"></counter-tmp>
13         <counter-tmp ref='two' @change-event="handleChange"></counter-tmp>
14         <br>
15         <div>{{ total }}</div>
16     </div>
17
18     <script>
19         Vue.component("counter-tmp", {
20             data: function () {
21                 return {
22                     number: 0,
23                 }
24             },
25             template: `
26                 <button @click='handleClick'>{{ number }}</button>
27             `,
28             methods: {
29                 handleClick: function () {
30                     this.number++;
31                     this.$emit('change-event');
32                 },
33             }
34         });
35
36         var app = new Vue({
37             el: '#app',
38             data: {
39                 total: 0,
40             },
41             methods: {
42                 handleChange: function () {
43                     console.log(this.$refs.one.number + this.$refs.two.number);
44                     this.total = this.$refs.one.number + this.$refs.two.number;
45                 }
46             }
47         })
48     </script>
49 </body>
50
51 </html>
输出结果:
(3)给子组件绑定原生事件
背景:需要给子组件绑定一个事件。
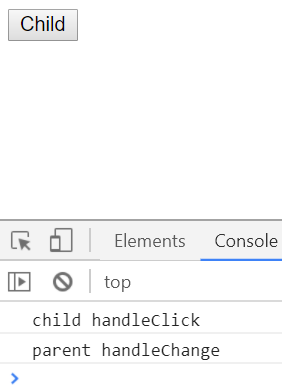
举例(原始写法,不推荐):
 1 <!DOCTYPE html>
 2 <html>
 3
 4 <head>
 5     <meta charset="utf-8">
 6     <title>My test page</title>
 7     <script src="https://cdn.jsdelivr.net/npm/vue/dist/vue.js"></script>
 8 </head>
 9
10 <body>
11     <div id="app">
12         <child-tmp @change-event='handleChange()'> </child-tmp>
13     </div>
14
15     <script>
16         Vue.component("child-tmp", {
17             props: ['count'],
18             data: function () {
19                 return {
20
21                 }
22             },
23             template: `
24                 <button @click='handleClick'>Child</button>
25             `,
26             methods: {
27                 handleClick: function () {
28                     console.log("child handleClick")
29                     this.$emit('change-event'); // change-event 为子组件注册的事件名
30                 },
31             }
32         });
33
34         var app = new Vue({
35             el: '#app',
36             data: {
37
38             },
39             methods: {
40                 handleChange: function () {
41                     console.log("parent handleChange");
42                 }
43             }
44         })
45     </script>
46 </body>
47
48 </html>
输出结果:
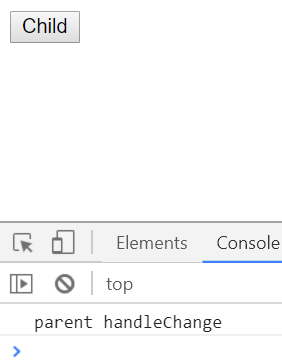
举例(推荐,直接给子组件绑定原生事件,在子组件事件后面加上 .native,如@click.native="handleClick"):
 1 <!DOCTYPE html>
 2 <html>
 3
 4 <head>
 5     <meta charset="utf-8">
 6     <title>My test page</title>
 7     <script src="https://cdn.jsdelivr.net/npm/vue/dist/vue.js"></script>
 8 </head>
 9
10 <body>
11     <div id="app">
12         <child-tmp @click.native='handleChange()'> </child-tmp>
13     </div>
14
15     <script>
16         Vue.component("child-tmp", {
17             props: ['count'],
18             data: function () {
19                 return {
20
21                 }
22             },
23             template: `
24                 <button>Child</button>
25             `,
26             methods: {
27                 handleClick: function () {
28
29                 },
30             }
31         });
32
33         var app = new Vue({
34             el: '#app',
35             data: {
36
37             },
38             methods: {
39                 handleChange: function () {
40                     console.log("parent handleChange");
41                 }
42             }
43         })
44     </script>
45 </body>
46
47 </html>
输出结果:
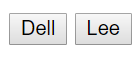
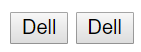
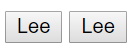
(4)非父子组件之前传值(Bus/总线/发布订阅模式/观察者模式)
举例(在点击Dell时候,将Lee也修改为Dell;在点击Lee的时候,将Dell也修改为Lee):
 1 <!DOCTYPE html>
 2 <html>
 3
 4 <head>
 5     <meta charset="utf-8">
 6     <title>My test page</title>
 7     <script src="https://cdn.jsdelivr.net/npm/vue/dist/vue.js"></script>
 8 </head>
 9
10 <body>
11     <div id="app">
12         <child-tmp content="Dell"> </child-tmp>
13         <child-tmp content="Lee"> </child-tmp>
14     </div>
15
16     <script>
17         Vue.prototype.bus = new Vue(); // 在Vue类的prototype上挂载了一个bus属性
18
19         Vue.component("child-tmp", {
20             props: ['content'],
21             template: `
22                 <button @click='handleClick'>{{ content }}</button>
23             `,
24             data: function () {
25                 return {
26                     selfContent: this.content,
27                 }
28             },
29             methods: {
30                 handleClick: function () {
31                     console.log("haha");
32                     this.bus.$emit("change-event", this.selfContent);
33                 },
34             },
35             mounted: function () {
36                 var this_ = this;
37                 this.bus.$on('change-event', function (msg) {
38                     this_.content = msg;
39                 });
40             }
41         });
42
43         var app = new Vue({
44             el: '#app',
45             data: {
46
47             },
48             methods: {
49
50             }
51         })
52     </script>
53 </body>
54
55 </html>
输出结果:
举例2:参考9.2节中举例2。
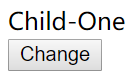
(5)动态组件和v-once指令
举例1(常规使用方法,非动态组件):
 1 <!DOCTYPE html>
 2 <html>
 3
 4 <head>
 5     <meta charset="utf-8">
 6     <title>My test page</title>
 7     <script src="https://cdn.jsdelivr.net/npm/vue/dist/vue.js"></script>
 8 </head>
 9
10 <body>
11     <div id="app">
12         <child-one v-if="type === 'childone'"></child-one>
13         <child-two v-if="type === 'childtwo'"></child-two>
14         <button @click="handleBtnChange">Change</button>
15     </div>
16
17     <script>
18         Vue.component("child-one", {
19             template: `
20                 <div>Child-One</div>
21             `,
22         });
23         Vue.component("child-two", {
24             template: `
25                 <div>Child-Two</div>
26             `,
27         });
28
29         var app = new Vue({
30             el: '#app',
31             data: {
32                 type: "childone", // type 配置一个默认值
33             },
34             methods: {
35                 handleBtnChange: function () {
36                     this.type = this.type == "childone" ? "childtwo" : "childone";
37                 },
38             }
39         })
40     </script>
41 </body>
42
43 </html>
输出结果:
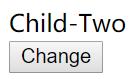
举例2(动态组件):
 1 <!DOCTYPE html>
 2 <html>
 3
 4 <head>
 5     <meta charset="utf-8">
 6     <title>My test page</title>
 7     <script src="https://cdn.jsdelivr.net/npm/vue/dist/vue.js"></script>
 8 </head>
 9
10 <body>
11     <div id="app">
12         <component :is="type"></component>
13    <!-- <child-one v-if="type === 'child-one'"></child-one>
14         <child-two v-if="type === 'child-two'"></child-two> -->
15         <button @click="handleBtnChange">Change</button>
16     </div>
17
18     <script>
19         Vue.component("child-one", {
20             template: `
21                 <div>Child-One</div>
22             `,
23         });
24         Vue.component("child-two", {
25             template: `
26                 <div>Child-Two</div>
27             `,
28         });
29
30         var app = new Vue({
31             el: '#app',
32             data: {
33                 type: "child-one", // type 配置一个默认值
34             },
35             methods: {
36                 handleBtnChange: function () {
37                     this.type = this.type == "child-one" ? "child-two" : "child-one";
38                 },
39             }
40         })
41     </script>
42 </body>
43
44 </html>
输出结果:同上。
举例3(v-once指令的使用,只渲染元素和组件依次,随后的重新悬案,元素/组件及其所有的子节点将被视为静态内容并跳过。这可以用于优化更新性能):
 1 <!DOCTYPE html>
 2 <html>
 3
 4 <head>
 5     <meta charset="utf-8">
 6     <title>My test page</title>
 7     <script src="https://cdn.jsdelivr.net/npm/vue/dist/vue.js"></script>
 8 </head>
 9
10 <body>
11     <div id="app">
12         <!-- <component :is="type"></component> -->
13         <child-one v-if="type === 'child-one'"></child-one>
14         <child-two v-if="type === 'child-two'"></child-two>
15         <button @click="handleBtnChange">Change</button>
16     </div>
17
18     <script>
19         Vue.component("child-one", {
20             template: `
21                 <div v-once>Child-One</div>
22             `,
23         });
24         Vue.component("child-two", {
25             template: `
26                 <div v-once>Child-Two</div>
27             `,
28         });
29
30         var app = new Vue({
31             el: '#app',
32             data: {
33                 type: "child-one", // type 配置一个默认值
34             },
35             methods: {
36                 handleBtnChange: function () {
37                     this.type = this.type == "child-one" ? "child-two" : "child-one";
38                 },
39             }
40         })
41     </script>
42 </body>
43
44 </html>
输出结果:同上。
posted on 2019-02-28 17:09 zyjhandsome 阅读(871) 评论(0) 编辑 收藏 举报
