Eureka服务端搭建
Eureka服务端搭建
什么是Eureka
Eureka:作为SpringCould的注册发现中心,提供了服务的注册与发现功能(最基本功能);
Eureka分为两部分:
1.Eureka服务端
2.Eureka客户端
Eureka的搭建
可以参考官方文档(文末)
Eureka服务端搭建
SpringCloud开发的三部曲: pom -> yml -> @注解
- 首先在pom文件中引依赖:
		<!-- spring-boot的web依赖 -->
		<dependency>
            <groupId>org.springframework.boot</groupId>
            <artifactId>spring-boot-starter-web</artifactId>
        </dependency>
        <!-- eureka 服务端 -->
        <dependency>
            <groupId>org.springframework.cloud</groupId>
            <artifactId>spring-cloud-starter-netflix-eureka-server</artifactId>
        </dependency>
-
yml文件的设置
# 服务端口 server: port: 7901 # 服务名称 spring: application: name: eureka # 注册中心配置 eureka: client: # 是否向注册中心注册自己 register-with-eureka: false # 表示是否检索服务 fetch-registry: false server-url: defaultZone: http://localhost7901:7901/eureka instance: hostname: eureka-7901 -
@注解设置
// 在SpringBoot启动类上添加Eureka服务端的注解
@EnableEurekaServer
@SpringBootApplication
public class EurekaApplication {
    public static void main(String[] args) {
        SpringApplication.run(EurekaApplication.class,args);
    }
}
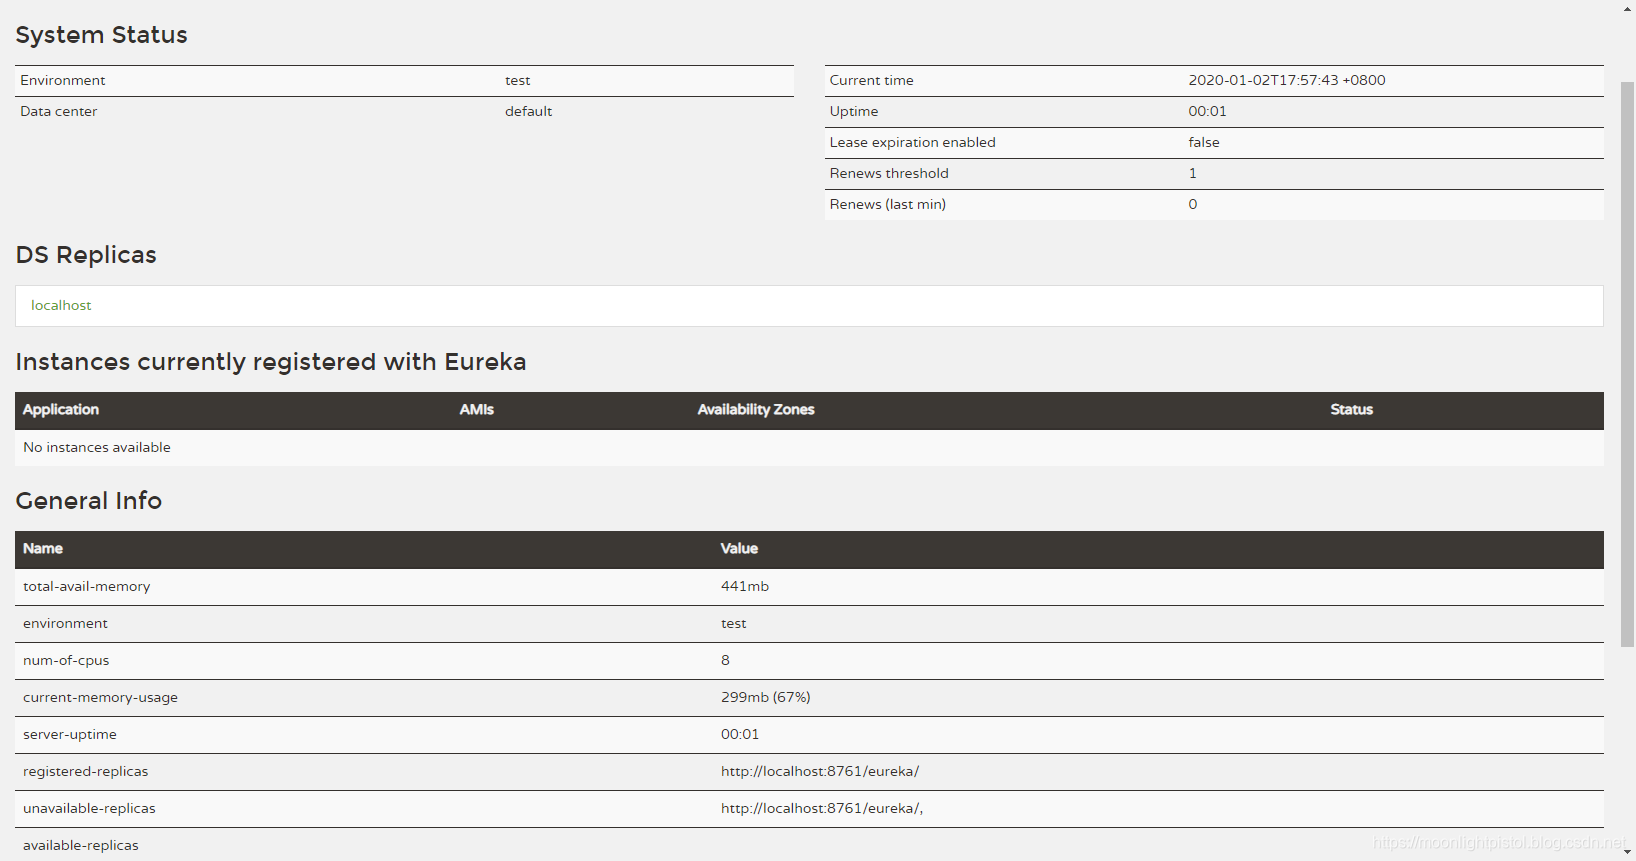
启动服务:
Eureka客户端搭建
依然是三部曲
-
pom导入依赖
<dependency> <groupId>org.springframework.boot</groupId> <artifactId>spring-boot-starter-web</artifactId> </dependency> <!-- 客户端 --> <dependency> <groupId>org.springframework.cloud</groupId> <artifactId>spring-cloud-starter-netflix-eureka-client</artifactId> </dependency> -
yml文件配置
server: port: 9001 spring: application: name: eureka-client eureka: client: server-url: defaultZone: http://localhost:7901/eureka -
添加对应@注解
@EnableEurekaClient
eureka服务集群搭建
当然还是3步走啦
第一 从不意气用事…(走错片场了)
-
pom导入依赖
看上边单节点依赖
-
yml文件配置
我这里采用的是这种方式:添加三个配置文件
application-7901.yml
application-7902.yml
application-7903.yml
#服务端口
server:
  port: 7901

#应用名称以及验证账号
spring:
  application:
    name: eureka

eureka:
  client:
    #是否注册到注册中心
    register-with-eureka: true
    #是否从注册中心拉取注册服务列表
    fetch-registry: true
    service-url:
      defaultZone: http://eureka7901:7901/eureka/,http://eureka7902:7902/eureka/,http://eureka7903:7903/eureka/

  instance:
    hostname: eureka7901
其他两个节点类似;对应修改port,以及instance: hostname: XXX;
-
添加对应@注解
看上边单节点注解
-
在本地的时候需要额外修改一下hosts文件
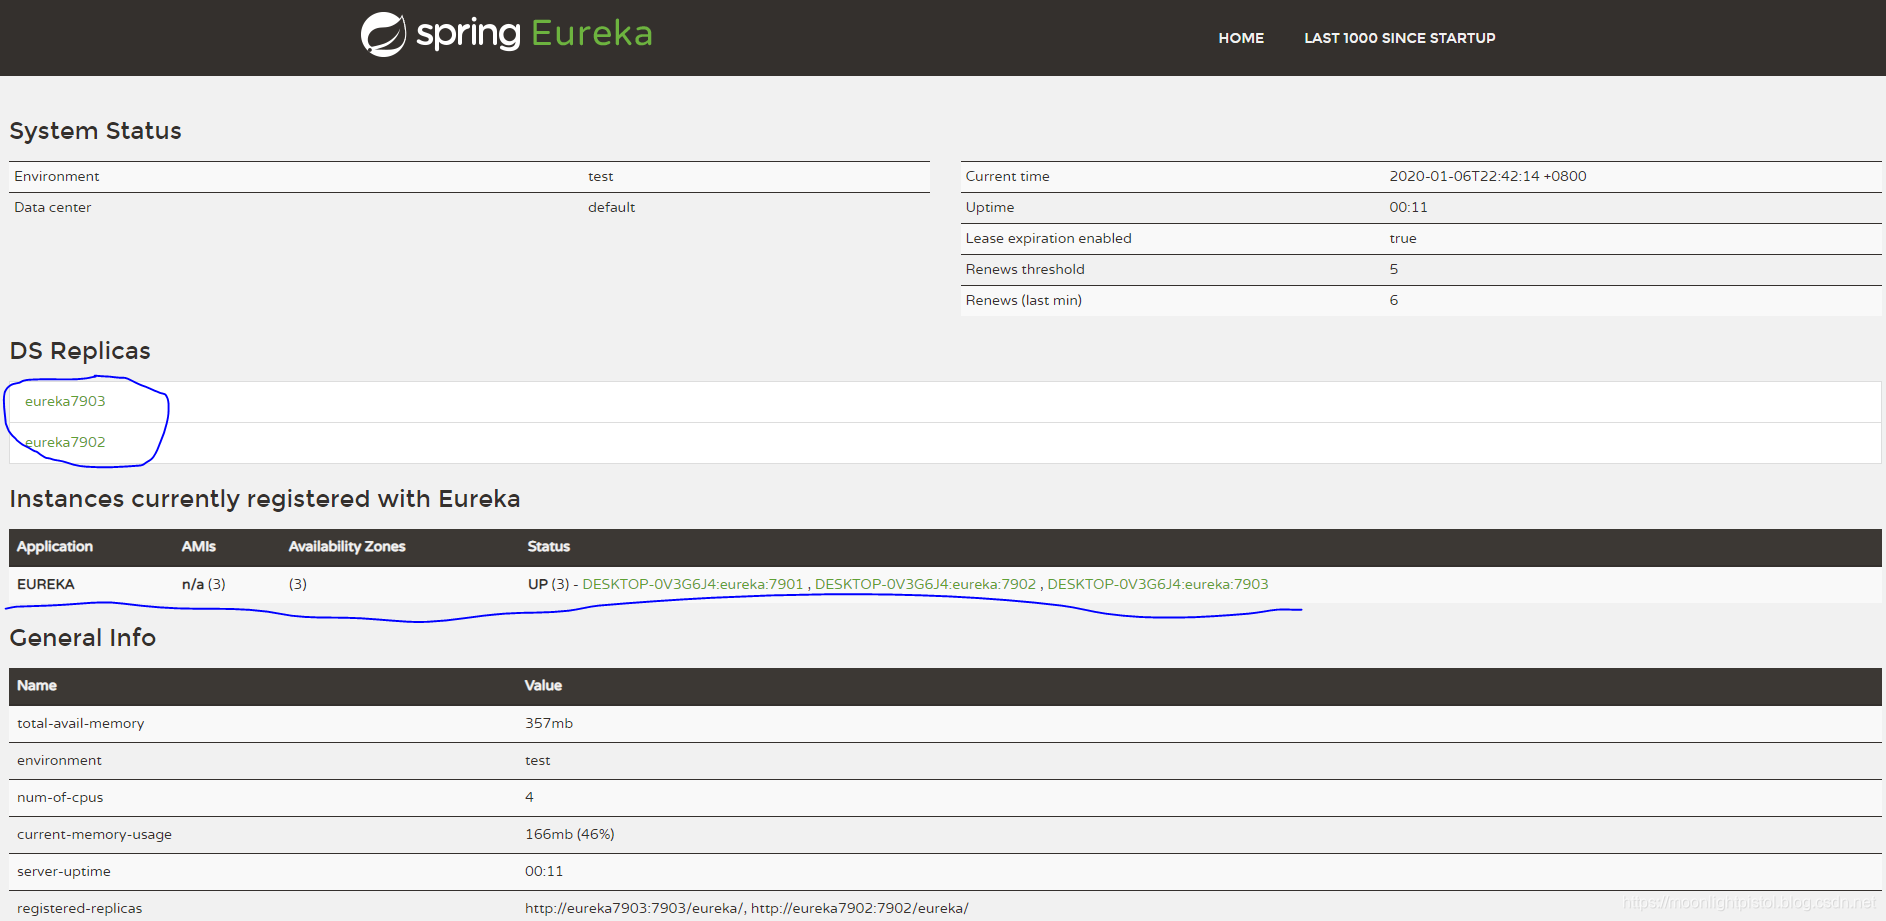
127.0.0.1 eureka7901 eureka7902 eureka7903启动成功:
-
添加服务端验证
-
在pom中添加依赖
<!--security--> <dependency> <groupId>org.springframework.boot</groupId> <artifactId>spring-boot-starter-security</artifactId> </dependency> -
添加配置信息
在yml文件添加
#应用名称以及验证账号
spring:
  application:
    name: eureka
  security:
    user:
      name: root #配置注册中心的登录用户
      password: root #配置注册中心的密码
添加配置类(copy官网上边的)
@EnableWebSecurity class WebSecurityConfig extends WebSecurityConfigurerAdapter { @Override protected void configure(HttpSecurity http) throws Exception { http.csrf().ignoringAntMatchers("/eureka/**"); super.configure(http); } } -
启动再次访问对应的服务中心时就需要登录密码了
-
END

 浙公网安备 33010602011771号