Ⅰ vue-router
【一】 路由守卫
是否登录,登录后才能访问,没登录重定向到login
作用:对路由进行权限控制
import Element from 'element-ui'
router.beforeEach((to, from, next) => {
if (to.name == 'login' || to.name == 'home') {
next()
} else {
let token = localStorage. ('token')
console.log(token)
if (token) {
next()
} else {
Element.Message.error('您没有登录,请先登录')
next({name: 'login'})
}
}
})
methods: {
handleLogin() {
axios.post('http://127.0.0.1:8000/login/', {
username: this.username,
password: this.password
}).then(res => {
if (res.data.code == 100) {
localStorage.setItem('token', res.data.token)
this.$router.push('/films')
} else {
alert(res.data.msg)
}
}).catch(err => {
alert(err)
})
}
}
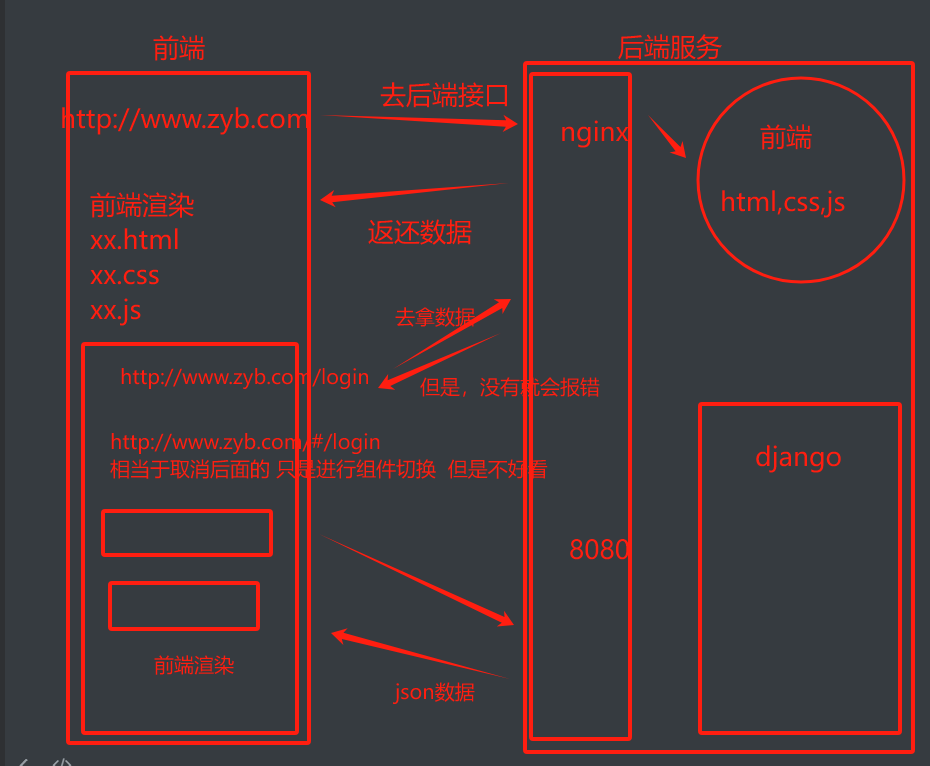
【二】路由两种工作模式
地址中永远带着
若以后将地址通过第三方手机app分享,若app校验严格,则地址会被标记为不合法。
兼容性较好
地址干净,美观 。
兼容性和hash模式相比略差。
应用部署上线时需要后端人员支持,解决刷新页面服务端404的问题
Ⅱ vue3介绍
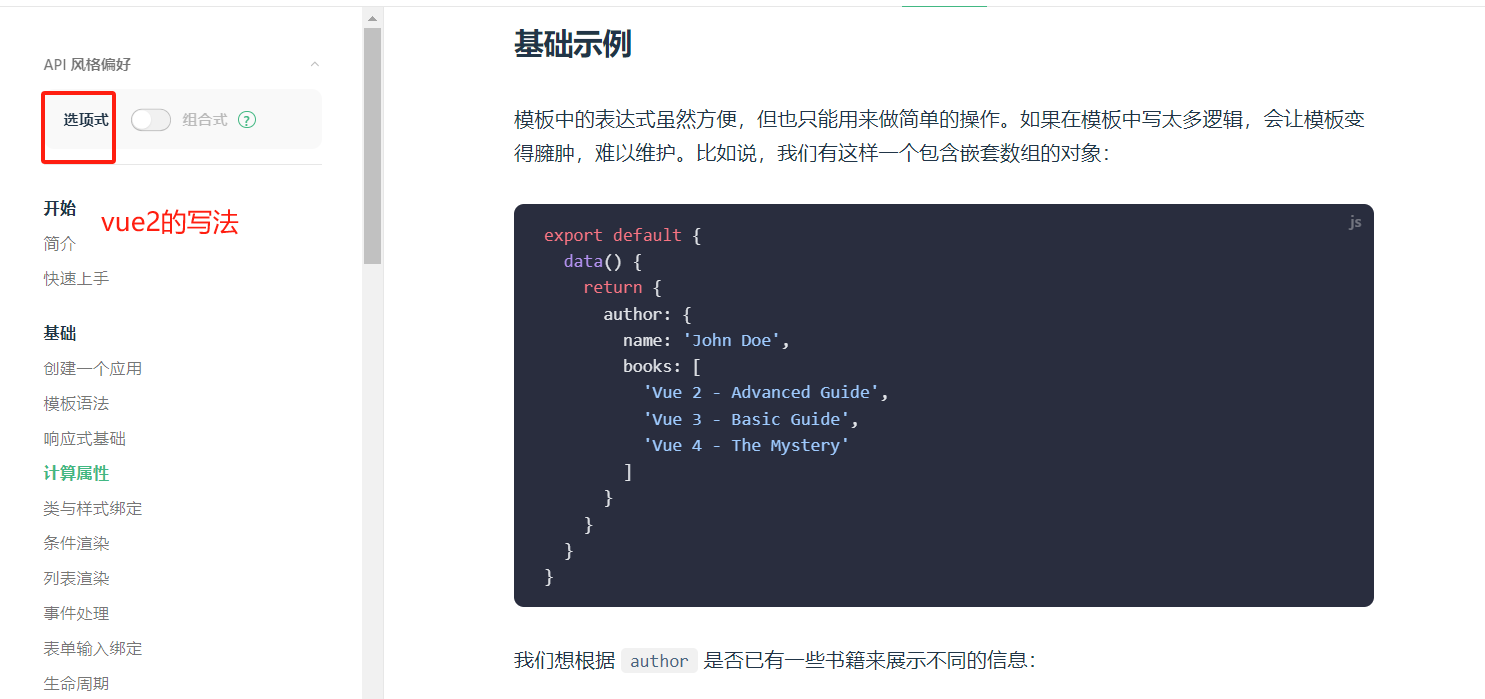
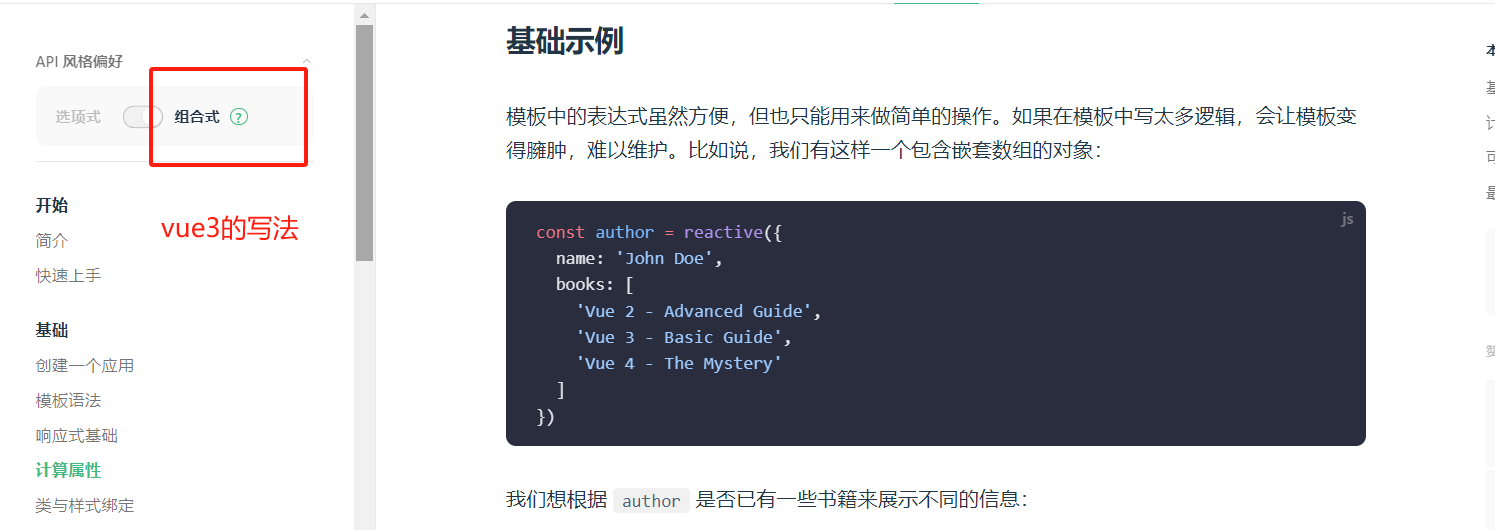
【一】vue2和vue3不同
-选项式:配置项:就是vue2的写法
export default{
data(){
return {}
},
methods:{}
}
-组合式 :
const items = ref([{ message: 'Foo' }, { message: 'Bar' }])
function add(){
}
- 使用传统OptionsAPI中,新增或者修改一个需求,就需要分别在data,methods,computed里修改 。
【二】快速体验组合式
<!DOCTYPE html>
<html lang="en">
<head>
    <meta charset="UTF-8">
    <title>Title</title>
    <script src="https://unpkg.com/vue@3/dist/vue.global.js"></script>
    <style></style>
</head>
<body>
<div id="app">

    <p>{{count}}</p>
    <br>
    <button @click="handleAdd">点我加1</button>


</div>
</body>
<script>

    let app=Vue.createApp({
        setup() {
            let count=Vue.ref(0)
            let handleAdd=()=>{
                count.value++
            }
            return {
                count,
                handleAdd
            }
        },

    })
    app.mount("#app")

</script>
</html>
【三】快速体验配置项
<!DOCTYPE html>
<html lang="en">
<head>
    <meta charset="UTF-8">
    <title>Title</title>
    <script src="https://unpkg.com/vue@3/dist/vue.global.js"></script>
    <style></style>
</head>
<body>
<div id="app">

    <p>{{count}}</p>
    <br>
    <button @click="handleAdd">点我加1</button>


</div>
</body>
<script>

    let app=Vue.createApp({
        data(){
            return {
                count:100
            }
        },
        methods:{
            handleAdd(){
                this.count++
            }
        }
    })
    app.mount("#app")

</script>
</html>
【四】 拥抱ts
-使用ts写,可以避免很大错误
-ts是js的超集--->ts完全兼容js
vue2+js+vue-router+vuex+elementui
vue3+js+vue-router+pinia+elementui-plus
新的生命周期钩子
data 选项应始终被声明为一个函数
移除keyCode支持作为 v-on 的修饰符
Ⅲ vue3快速创建项目
【一】使用vue-cli创建
或者是 不用管理员 运行终端 在终端上打 C:\Users\zhangyubin>vue ui 进行创建 只不过步骤一样 只是可视化界面
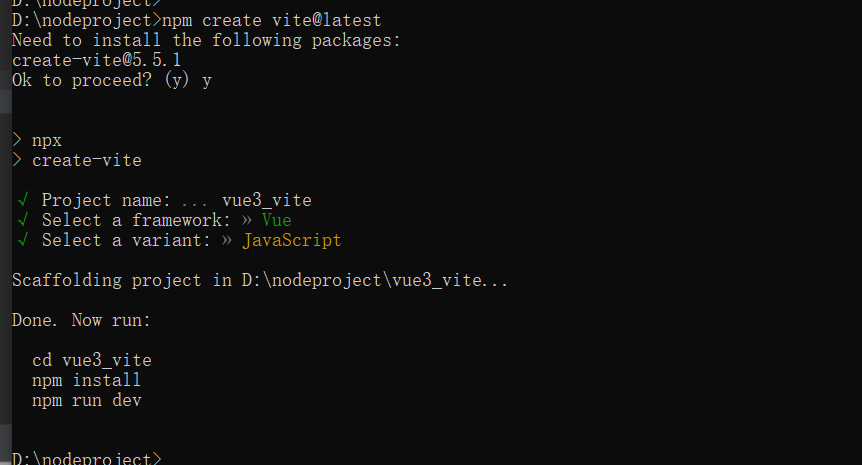
【二】使用vite创建(推荐)
优势如下:
开发环境中,无需打包操作,可快速的冷启动。
轻量快速的热重载(HMR)。
真正的按需编译,不再等待整个应用编译完成。
Vite 需要 Node.js 版本 18+,20+。然而,有些模板需要依赖更高的 Node 版本才能正常运行,当你的包管理器发出警告时,请注意升级你的 Node 版本
官网:https://cn.vitejs.dev/
npm create vite@latest
npm create vite@latest vue3_demo002
cnpm create vite@latest vue3_demo002
cnpm create vite vue3_demo002
npm install
npm run dev
- 创建项目贼快,是因为没有创建依赖 需要打开项目之后 手动创建依赖 npm install
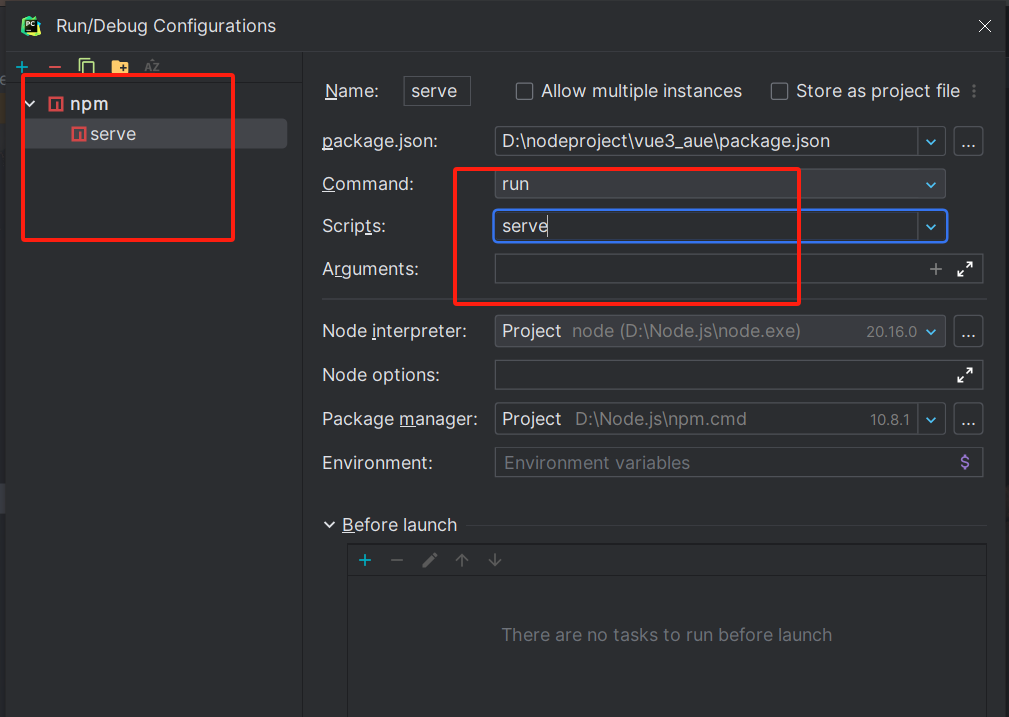
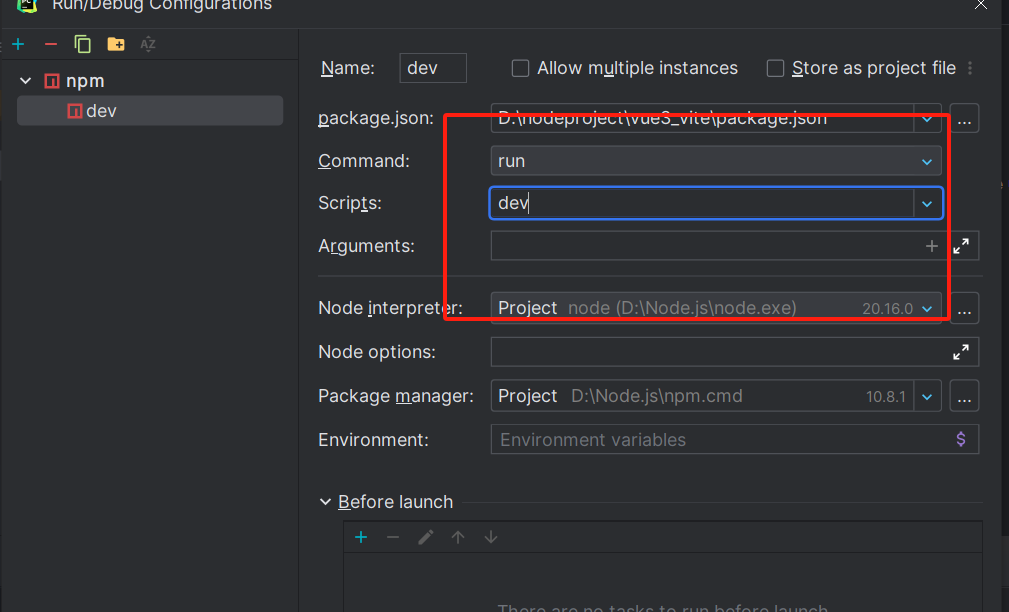
【三】运行vue项目时,执行的命名
"scripts": {
"dev": "vite",
"build": "vite build",
"preview": "vite preview"
},
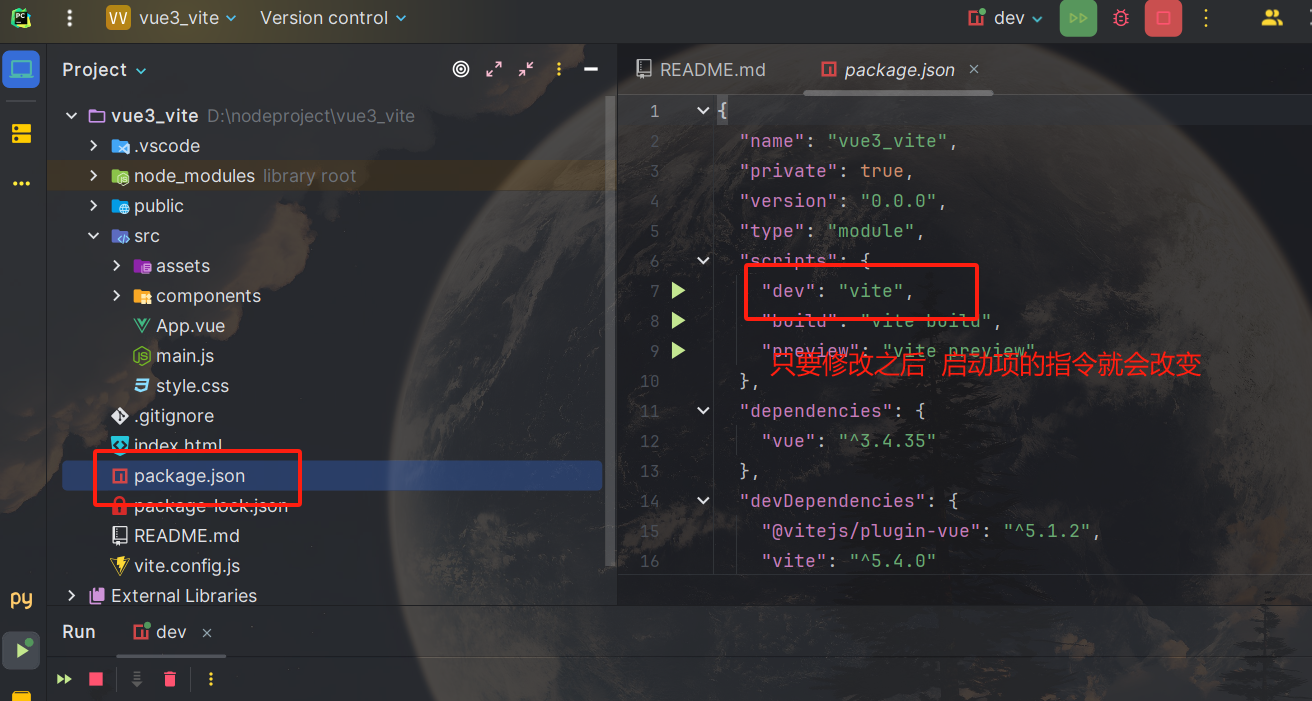
【四】目录结构(vite)

Ⅳ 常用api
【一】 定义变量统一用const
【二】以后代码都写在setup函数中-->组合式
-可以混用
-并且在配置项api的方法中,可以拿到setup函数中定义的变量
-以后只用一种
-配置项
-组合式(推荐的)
【三】setup函数
-后期除了setup函数,其他都不带了
<template>
  <div class="about">
    <h1>vue3的组合式写法</h1>

    {{name}}今日功德+{{count}}
    <button @click="add">功德+1</button>
    <button @click="handlerChangName">切换收益人</button>


  </div>
</template>

<script>

import {ref,reactive} from "vue";

export default {
  name:'AboutView.vue',
  setup(){
     //做成响应式,必须使用 Vue3提供的类,包裹 ref      reactive
    // let count=0
    const count=ref(0)
    function add(){
      // count+=1
      console.log(typeof (count))    // console.log(typeof (count)) -->  object
                                     // count 是 ref 的对象
      count.value+=1            // 从对象中取出具体的值 +1
      console.log(count.value)
    }


    // 点击按钮,切换名字
    const name=ref('zyb')
    const handlerChangName=()=>{
      name.value='hjj'
      count.value=0
    }


    return {count,add,name,handlerChangName}
  }
}

</script>
【四】ref
ref包裹的对象,需要使用 对象.value 修改值
const count = ref(0)
count.value
【五】 reactive
// 使用reactive包裹 对象,数组
const user_detail=reactive({name:'zyb',age:18})
function addage(){
user_detail.age++
console.log(user_detail.age)
}
user_detail.age++
【六】计算属性
<template>
  <div class="about">
    <h1>vue3的组合式写法</h1>

    <p>姓:<input type="text" v-model="person.firstName"></p>
    <p>名:<input type="text" v-model="person.lastName"></p>
    {{ person }}
    <br>
    <!--    <p>您的全名是:{{person.fullName}}</p>-->
    <p>您的全名是:<input type="text" v-model="person.fullName"></p>


  </div>
</template>

<script>

import {computed} from "vue";

export default {
  name:'AboutView.vue',
  setup(){

    // 计算属性-->页面中输入用户名字:firstName和lastName-->使用计算属性-->fullName
    const person = reactive({
      firstName: '',
      lastName: ''
    })
    // firstName 和 lastName 变-->fullName会变
    // person.fullName = computed(() => {
    //   return person.firstName + person.lastName
    // })
    // fullName变 firstName和 lastName 也变
    person.fullName = computed({
      get() { // 修改firstName 或lastName 会触发
        return person.firstName + person.lastName
      },
      set(value) { //修改fullName 会触发这里,被修改后的值放这里
        person.firstName = value.slice(0, 1)
        person.lastName = value.slice(1)
      }
    })


    return {person}
  }
}

</script>
【七】监听属性
【1】监听值类型,监听对象类型,监听多个变量
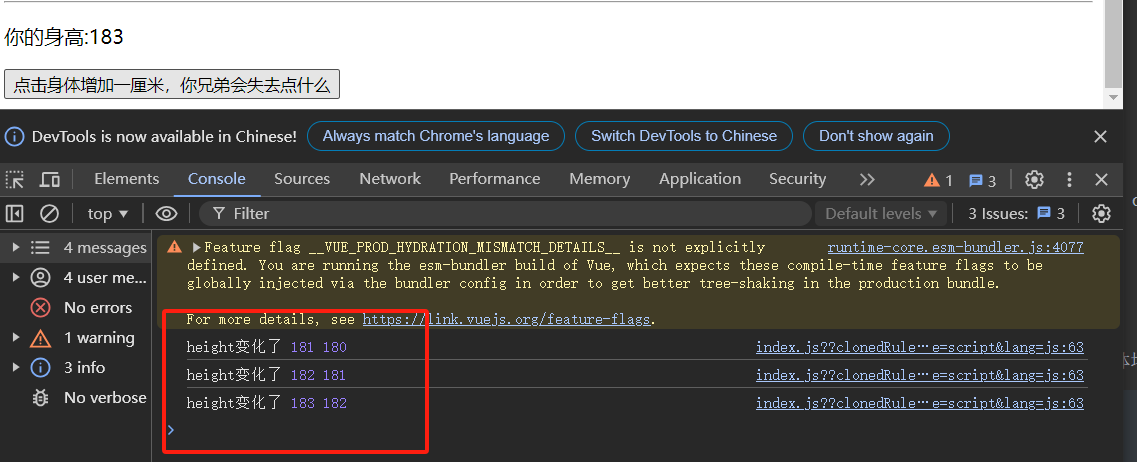
(1)监听值类型
const height =ref(180)
function handlerAddHeight(){
height.value++
}
// 监听值类型变化
watch(height, (newValue, oldValue) => {
console.log('height变化了', newValue, oldValue)
})
<p>你的身高:{{height}}</p>
<button @click="handlerAddHeight">点击身体增加一厘米,你兄弟会失去点什么</button>
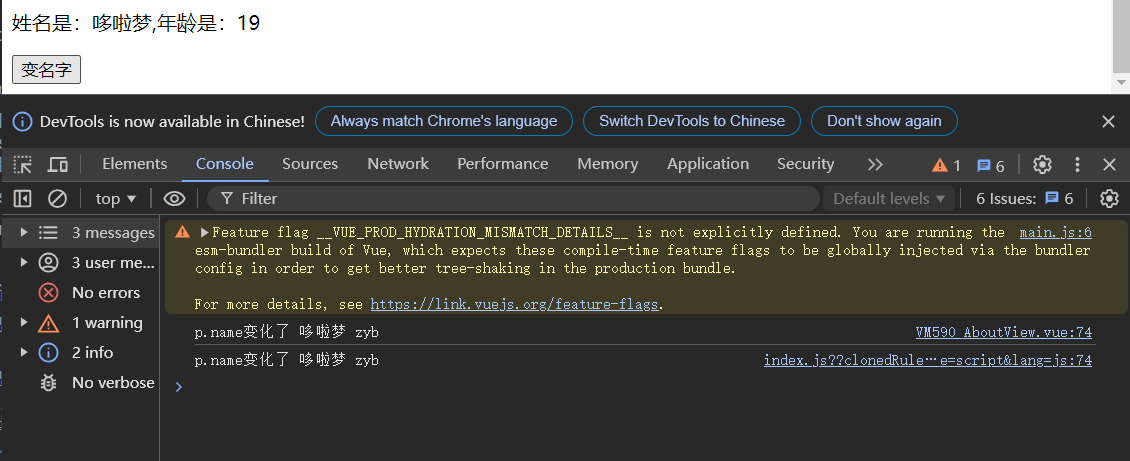
(2)监听对象类型
// 监听对象类型
const p = reactive({name: 'zyb', age: 19})
function changeName() {
p.name = '哆啦梦'
}
watch(() => p.name, (newValue, oldValue) => {
console.log('p.name变化了', newValue, oldValue)
})
<p>姓名是:{{ p.name }},年龄是:{{ p.age }}</p>
<button @click="changeName">变名字</button>
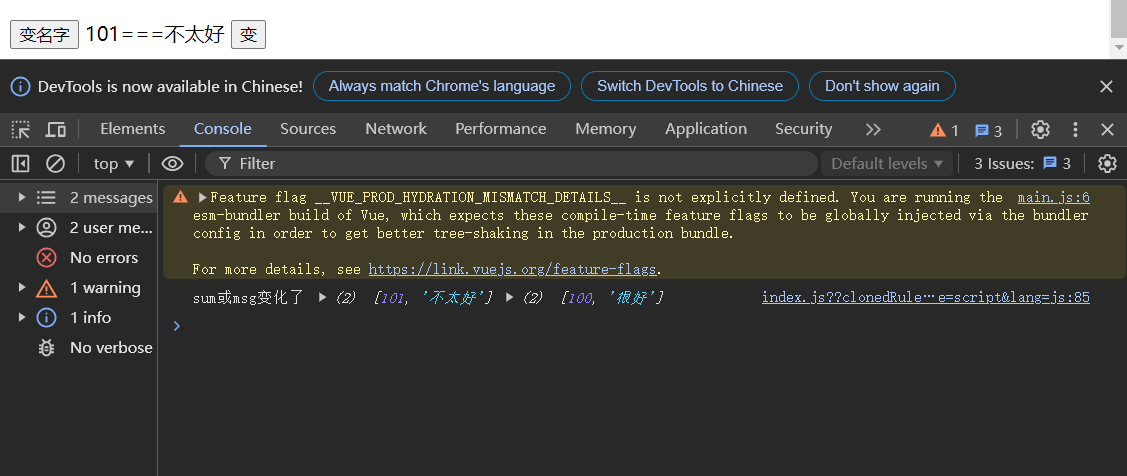
(3)监听多个变量
// 监听多个变化-->每个发生变化,都会触发
const sum = ref(100)
const msg = ref('很好')
function changeValue(){
sum.value++
msg.value='不太好'
}
watch([sum, msg], (newValue, oldValue) => {
console.log('sum或msg变化了', newValue, oldValue)
})
{{ sum }}==={{ msg }}
<button @click="changeValue">变</button>
【2】watchEffect函数
watchEffect(() => {
const x1 = sum.value
const x2 = person.name
console.log('watchEffect配置的回调执行了')
})
// watchEffect
const q = reactive({name: 'zyb', age: 19})
const gg = ref(15)
function change(){
gg.value++
q.name='htt'
}
watchEffect(() => {
const x1 = gg.value
const x2 = q.name
console.log(x1)
console.log(x2)
console.log('watchEffect配置的回调执行了')
})
<button @click="change">变化</button>

【八】总的代码
<template>
  <div class="about">
    <h1>vue3的组合式写法</h1>

    {{name}}今日功德+{{count}}
    <button @click="add">功德+1</button>
    <button @click="handlerChangName">切换收益人</button>

    <hr>
    <p>用户名:{{user_detail.name}}</p>
    <p>年龄:{{user_detail.age}}</p>
    <button @click="addage">点击增加年龄</button>

    <hr>
    <p>姓:<input type="text" v-model="person.firstName"></p>
    <p>名:<input type="text" v-model="person.lastName"></p>
    {{ person }}
    <br>
    <!--    <p>您的全名是:{{person.fullName}}</p>-->
    <p>您的全名是:<input type="text" v-model="person.fullName"></p>

    <hr>

    <p>你的身高:{{height}}</p>
    <button @click="handlerAddHeight">点击身体增加一厘米,你兄弟会失去点什么</button>

    <p>姓名是:{{ p.name }},年龄是:{{ p.age }}</p>
    <button @click="changeName">变名字</button>

        {{ sum }}==={{ msg }}
    <button @click="changeValue">变</button>
    <hr>
    <button @click="change">变化</button>


  </div>
</template>

<script>

import {ref,reactive,computed,watch,watchEffect} from "vue";

export default {
  name:'AboutView.vue',
  setup(){
     //做成响应式,必须使用 Vue3提供的类,包裹 ref      reactive
    // let count=0
    const count=ref(0)
    function add(){
      // count+=1
      console.log(typeof (count))    // console.log(typeof (count)) -->  object
                                     // count 是 ref 的对象
      count.value+=1            // 从对象中取出具体的值 +1
      console.log(count.value)
    }


    // 点击按钮,切换名字
    const name=ref('zyb')
    const handlerChangName=()=>{
      name.value='hjj'
      count.value=0
    }

    // 使用reactive包裹 对象,数组
    const user_detail=reactive({name:'zyb',age:18})

    function addage(){
      user_detail.age++
      console.log(user_detail.age)
    }


    // 计算属性-->页面中输入用户名字:firstName和lastName-->使用计算属性-->fullName
    const person = reactive({
      firstName: '',
      lastName: ''
    })
    // firstName 和 lastName 变-->fullName会变
    // person.fullName = computed(() => {
    //   return person.firstName + person.lastName
    // })
    // fullName变 firstName和 lastName 也变
    person.fullName = computed({
      get() { // 修改firstName 或lastName 会触发
        return person.firstName + person.lastName
      },
      set(value) { //修改fullName 会触发这里,被修改后的值放这里
        person.firstName = value.slice(0, 1)
        person.lastName = value.slice(1)
      }
    })


    const height =ref(180)
    function handlerAddHeight(){
      height.value++
    }
    // 1 监听值类型变化
    watch(height, (newValue, oldValue) => {
        console.log('height变化了', newValue, oldValue)
    })


    // 2 监听对象类型
    const p = reactive({name: 'zyb', age: 19})
    function changeName() {
        p.name = '哆啦梦'
    }
    watch(() => p.name, (newValue, oldValue) => {
        console.log('p.name变化了', newValue, oldValue)
    })


    // 3 监听多个变化--》每个发生变化,都会触发
    const sum = ref(100)
    const msg = ref('很好')
    function changeValue(){
        sum.value++
        msg.value='不太好'
    }
    watch([sum, msg], (newValue, oldValue) => {
        console.log('sum或msg变化了', newValue, oldValue)
    })


    // watchEffect
    const q = reactive({name: 'zyb', age: 19})
    const gg = ref(15)
    function change(){
      gg.value++
      q.name='htt'
    }
    watchEffect(() => {
      const x1 = gg.value
      const x2 = q.name
      console.log(x1)
      console.log(x2)
      console.log('watchEffect配置的回调执行了')
    })


    return {count,add,name,handlerChangName,user_detail,addage,person,height,handlerAddHeight,
      p,changeName,sum,msg,changeValue,change}
  }
}


</script>
- 有的代码也可以自用,只要不返回出去 template 就不能展示
    let a = 10
    a++
    console.log(a)

    function demo(a, b) {
      return a + b
    }

    let res = demo(a, 11)
    console.log(res)
Ⅴ 生命周期
beforeCreate
created
beforeMount
mounted
beforeUpdate
updated
beforeDestroy
destroyed
beforeCreate
created
beforeMount
mounted
beforeUpdate
updated
beforeUnmount
unmounted
beforeCreate===>setup()
created=======>setup()
beforeMount ===>onBeforeMount
mounted=======>onMounted
beforeUpdate===>onBeforeUpdate
updated =======>onUpdated
beforeUnmount ==>onBeforeUnmount
unmounted =====>onUnmounted

【一】vue3的配置项api生命周期钩子
export default {
  name: 'HomeView',
  beforeCreate() {
    console.log('beforeCreate')
  },
  created() {
  },
  beforeMount() {
    console.log('beforeMount')
  },
  mounted() {
  },
  beforeUpdate() {
  },
  updated() {
  },
  beforeUnmount() {
  },
  unmounted() {
    console.log('unmounted')
  }

}
【二】vue3的组合式生命周期钩子
<template>
  <h1>生命周期钩子--配置项</h1>
  {{name}}
  <button @click="changeName">点我变化值</button>
</template>

<script>
import {ref,onBeforeMount,onMounted,onBeforeUpdate,onUpdated,onBeforeUnmount,onUnmounted} from 'vue'

export default {
  name: 'HomeView',
  setup() {
    // 组合式api写法
    // 1 组件还没有创建时候执行:beforeCreate
    console.log('beforeCreate')
    // 2 组件创建完成执行:created-->跟后端交互拿数据
    const name=ref('zyb')
    // axios.get().then(res=>{
    //   name=res.data.name
    // })

    function changeName(){
      name.value='胡图图'
    }
    console.log('created')

    //3 beforeMount-->onBeforeMount
    // onBeforeMount,onMounted,onBeforeUpdate,onUpdated,onBeforeUnmount,onUnmounted
    onBeforeMount(()=>{
      console.log('onBeforeMount','组件挂载前')
    })
    //4 mounted-->onMounted
    onMounted(()=>{
      console.log('onMounted','组件挂载后')
    })
    //5 beforeUpdate-->onBeforeUpdate
    onBeforeUpdate(()=>{
      console.log('onBeforeUpdate','更新之前')
    })
    //6 updated-->onUpdated
    onUpdated(()=>{
      console.log('onUpdated','更新之后')
      console.log(name.value)
    })

    //7 beforeUnmount-->onBeforeUnmount
    onBeforeUnmount(()=>{
      console.log('onBeforeUnmount','销毁之前')
    })

    //8 unmounted-->onUnmounted
    onUnmounted(()=>{
      console.log('onUnmounted','销毁后')

    })

    return {changeName,name}

  }
}
</script>
Ⅵ setup的特殊写法
export default {
name: 'HomeView',
setup() {
}
}
<script setup> 写原来setup函数中的代码即可</script>
<HelloWorld :msg="msg"></HelloWorld>
defineProps({
msg: String,
})
-父组件中:
<HelloWorld @send="handleReceive"></HelloWorld>
<p>父组件中得name:{{name}}</p>
<script setup>
const name = ref('')
function handleReceive(a){
name.value=a
}
</script>
-子组件中:
let $emit = defineEmits(['send'])
const name =ref('')
const handleSend=()=>{
$emit('send',name.value)
}
<input type="text" v-model="name">-->{{name}}
<br>
<button @click="handleSend">点我传给父亲</button>
【一】setup写法 < script setup >
<template>
  <h1>setup的特殊写法</h1>
  {{name}}
  <button @click="changeName">变名字</button>
</template>

<script setup>
import {ref} from 'vue'

const name = ref('name')

function changeName() {
  name.value = '胡图图'
}

</script>
【二】新的组件间父子通信
<script setup>
import {ref,onUpdated} from 'vue'
defineProps({
  msg: String,
})

let $emit = defineEmits(['send']) // 等同于之前的  this.$emit
const count = ref(0)


// 子传父
const name =ref('')
const handleSend=()=>{
  $emit('send',name.value)
}
</script>

<template>
  <p>{{ msg }}</p>
  <p>{{ count }}</p>
  <input type="text" v-model="name">-->{{name}}
  <br>
  <button @click="handleSend">点我传给父亲</button>
</template>

<style scoped>

</style>
<template>
  <h1>我是首页</h1>
  {{ age }}-->
  <button @click="addAge">年龄增加</button>
  <HelloWorld :msg="msg" @send="handleReceive"></HelloWorld>
  <p>父组件中得name:{{name}}</p>
</template>

<script setup>
import HelloWorld from './components/HelloWorld.vue'
import {ref, reactive} from "vue";
const age = ref(10)
function addAge() {
  age.value += 2
}

//父传子
const msg = ref('你好组件')

// 子传父
const name = ref('')
function handleReceive(a){
  name.value=a
}
</script>


【推荐】国内首个AI IDE,深度理解中文开发场景,立即下载体验Trae
【推荐】编程新体验,更懂你的AI,立即体验豆包MarsCode编程助手
【推荐】抖音旗下AI助手豆包,你的智能百科全书,全免费不限次数
【推荐】轻量又高性能的 SSH 工具 IShell:AI 加持,快人一步
· 开源Multi-agent AI智能体框架aevatar.ai,欢迎大家贡献代码
· Manus重磅发布:全球首款通用AI代理技术深度解析与实战指南
· 被坑几百块钱后,我竟然真的恢复了删除的微信聊天记录!
· 没有Manus邀请码?试试免邀请码的MGX或者开源的OpenManus吧
· 园子的第一款AI主题卫衣上架——"HELLO! HOW CAN I ASSIST YOU TODAY