【转】CXF+Spring+Eclipse简明示例
Eclipse+CXF+Spring共同开发的示例,供大家赏鉴。
多系统(异构系统)进行交互时,一种良好的方式便是调用Web Service,本示例基于Apache组织的CXF,为了方便起见特将服务端和客户端写在同一个工程下,实际项目中是不可能的,但是客户端却依赖于服务端的Web Service接口,那么可以通过导出jar的方式。
环境:
Eclipse Mars.1 Release (4.5.1)
JDK 1.7.0_15
Tomcat 7
CXF 2.1.3
Spring3
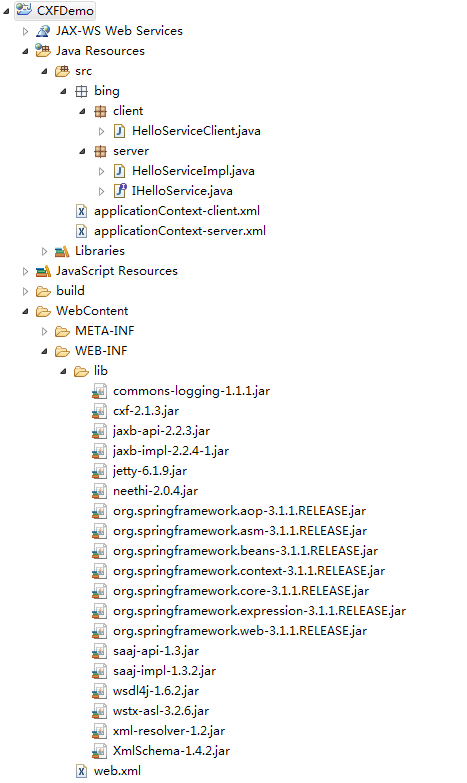
示例项目结构图:

如上图所示,全部依赖的第三方库都在lib中,下面贴出全部代码。
IHelloService.java
package bing.server;

import javax.jws.WebService;

/**
 * <p>
 * WebService接口
 * </p>
 *
 * @author IceWee
 * @date 2012-7-6
 * @version 1.0
 */
@WebService
public interface IHelloService {

    public String sayHello(String username);

}
HelloServiceImpl.java
package bing.server;

import javax.jws.WebService;

/**
 * <p>
 * WebService实现类
 * </p>
 *
 * @author IceWee
 * @date 2012-7-6
 * @version 1.0
 */
@WebService(endpointInterface = "bing.server.IHelloService", serviceName = "helloService")
public class HelloServiceImpl implements IHelloService {

    @Override
    public String sayHello(String username) {
        return "hello, " + username;
    }

}
HelloServiceClient.java
package bing.client;

import org.springframework.context.ApplicationContext;
import org.springframework.context.support.ClassPathXmlApplicationContext;

import bing.server.IHelloService;

/**
 * <p>
 * WebService调用方-客户端
 * </p>
 *
 * @author IceWee
 * @date 2012-7-6
 * @version 1.0
 */
public class HelloServiceClient {

    public static void main(String[] args) {
        ApplicationContext context = new ClassPathXmlApplicationContext("applicationContext-client.xml");
        IHelloService helloService = (IHelloService) context.getBean("client");
        String response = helloService.sayHello("Peter");
        System.out.println(response);
    }

}
applicationContext-server.xml
 1 <?xml version="1.0" encoding="UTF-8"?>
 2 <beans xmlns="http://www.springframework.org/schema/beans"
 3     xmlns:xsi="http://www.w3.org/2001/XMLSchema-instance" xmlns:jaxws="http://cxf.apache.org/jaxws"
 4     xsi:schemaLocation="http://www.springframework.org/schema/beans
 5                        http://www.springframework.org/schema/beans/spring-beans.xsd
 6                        http://cxf.apache.org/jaxws http://cxf.apache.org/schemas/jaxws.xsd">
 7     <!-- ***注意*** 手动添加的内容: xmlns:jaxws="http://cxf.apache.org/jaxws" http://cxf.apache.org/jaxws
 8         http://cxf.apache.org/schemas/jaxws.xsd" -->
 9
10     <import resource="classpath:META-INF/cxf/cxf.xml" />
11     <import resource="classpath:META-INF/cxf/cxf-extension-soap.xml" />
12     <import resource="classpath:META-INF/cxf/cxf-servlet.xml" />
13
14     <jaxws:endpoint id="helloService" implementor="bing.server.HelloServiceImpl"
15         address="/helloService" />
16
17 </beans>
applicationContext-client.xml
<?xml version="1.0" encoding="UTF-8"?>
<beans xmlns="http://www.springframework.org/schema/beans"
    xmlns:xsi="http://www.w3.org/2001/XMLSchema-instance" xmlns:jaxws="http://cxf.apache.org/jaxws"
    xsi:schemaLocation="http://www.springframework.org/schema/beans
                       http://www.springframework.org/schema/beans/spring-beans.xsd
                       http://cxf.apache.org/jaxws http://cxf.apache.org/schemas/jaxws.xsd">
    <!-- ***注意*** 手动添加的内容: xmlns:jaxws="http://cxf.apache.org/jaxws" http://cxf.apache.org/jaxws
        http://cxf.apache.org/schemas/jaxws.xsd" -->

    <import resource="classpath:META-INF/cxf/cxf.xml" />
    <import resource="classpath:META-INF/cxf/cxf-extension-soap.xml" />
    <import resource="classpath:META-INF/cxf/cxf-servlet.xml" />

    <bean id="client" class="bing.server.IHelloService" factory-bean="clientFactory"
        factory-method="create" />

    <bean id="clientFactory" class="org.apache.cxf.jaxws.JaxWsProxyFactoryBean">
        <property name="serviceClass" value="bing.server.IHelloService" />
        <property name="address"
            value="http://localhost:8082/CXFDemo/ws/helloService" />
    </bean>
</beans>
web.xml
<?xml version="1.0" encoding="UTF-8"?>
<web-app version="3.0" xmlns="http://java.sun.com/xml/ns/javaee"
    xmlns:xsi="http://www.w3.org/2001/XMLSchema-instance"
    xsi:schemaLocation="http://java.sun.com/xml/ns/javaee
    http://java.sun.com/xml/ns/javaee/web-app_3_0.xsd">
    <display-name>CXFDemo</display-name>

    <context-param>
        <param-name>contextConfigLocation</param-name>
        <param-value>classpath:applicationContext-server.xml</param-value>
    </context-param>

    <listener>
        <listener-class>org.springframework.web.context.ContextLoaderListener</listener-class>
    </listener>

    <servlet>
        <servlet-name>CXFServlet</servlet-name>
        <servlet-class>org.apache.cxf.transport.servlet.CXFServlet</servlet-class>
        <load-on-startup>1</load-on-startup>
    </servlet>
    <servlet-mapping>
        <servlet-name>CXFServlet</servlet-name>
        <url-pattern>/ws/*</url-pattern>
    </servlet-mapping>
    <welcome-file-list>
        <welcome-file>index.jsp</welcome-file>
    </welcome-file-list>
</web-app>
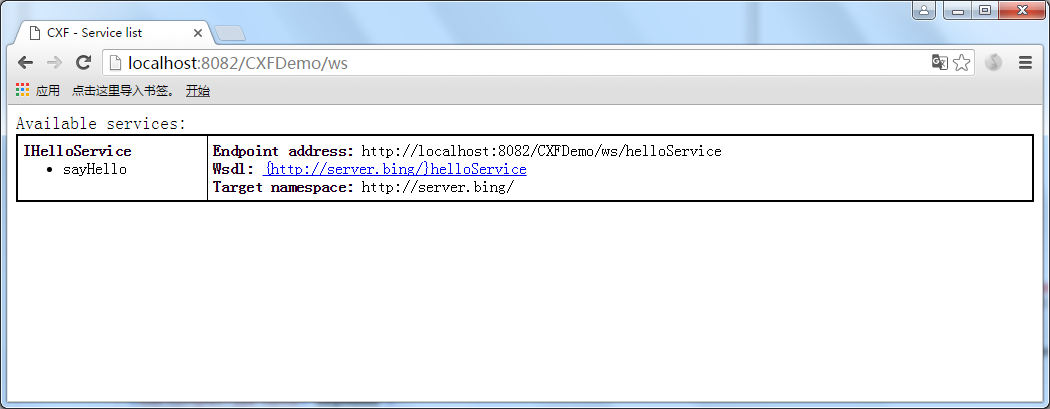
所有项目都已配置完成,可以发布到Tomcat了,在浏览器中输入:http://localhost:8082/CXFDemo/ws,返回如图:

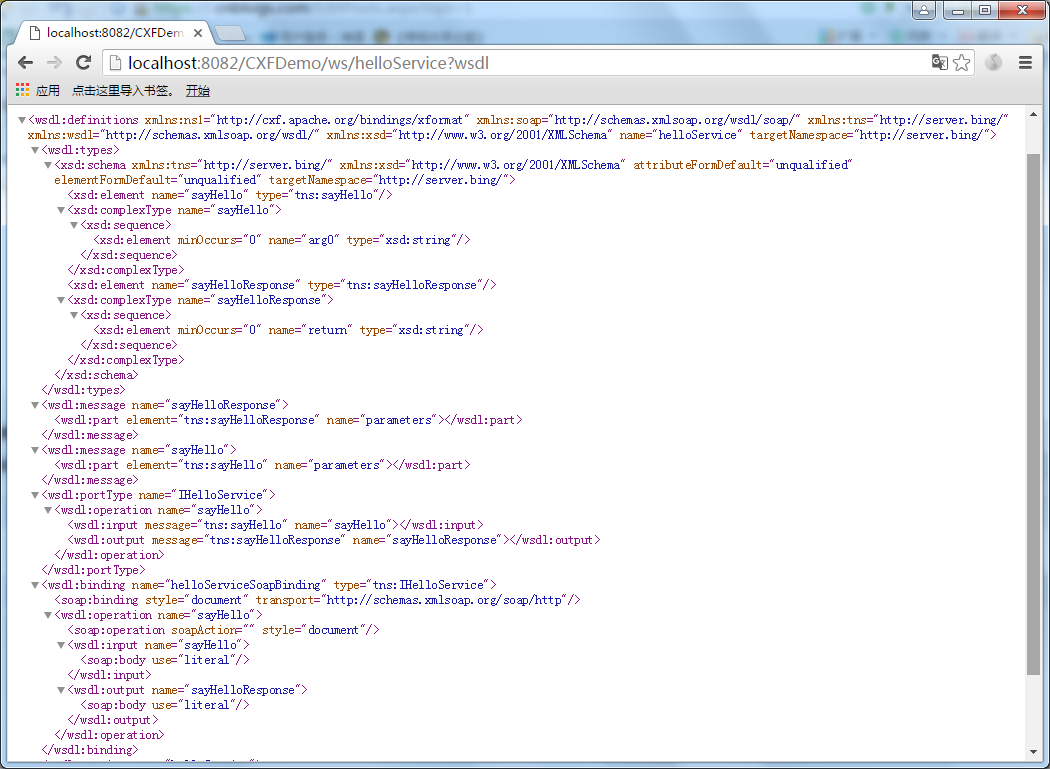
从上图中可以看到我们对外发布的WebService接口,点击蓝色超链接,返回如图:

到此,证明我们的Web Service已经发布成功,可以进行调用测试了。运行HelloServiceClient,返回如图:

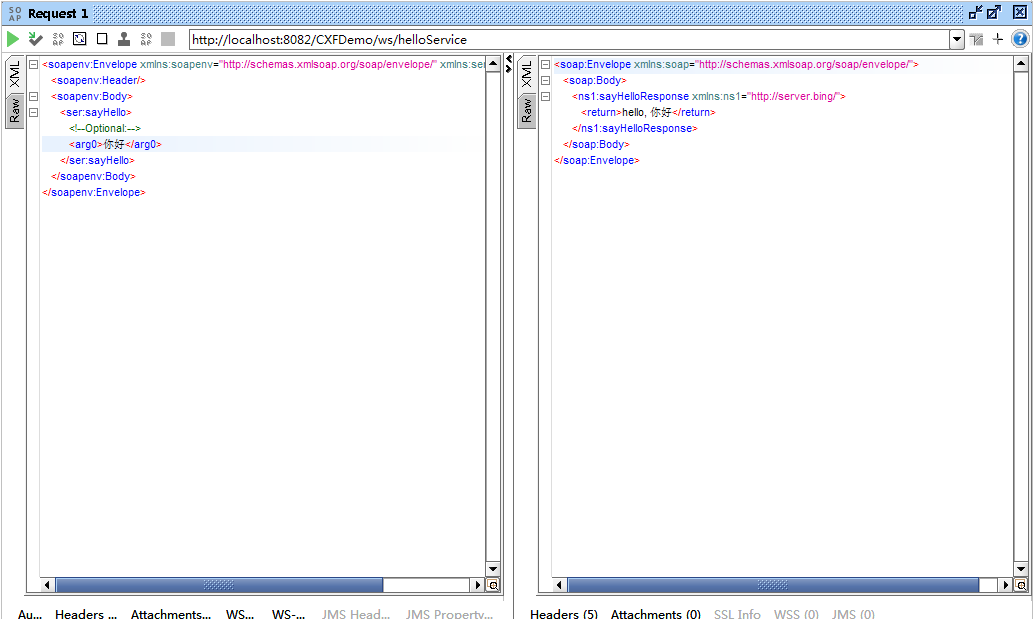
使用SoapUI运行结果如下:

声明:本文转载自http://www.blogjava.net/icewee/archive/2012/07/06/382399.html 对其中遇到的一些报错问题做了改进,亲测可以完美运行


