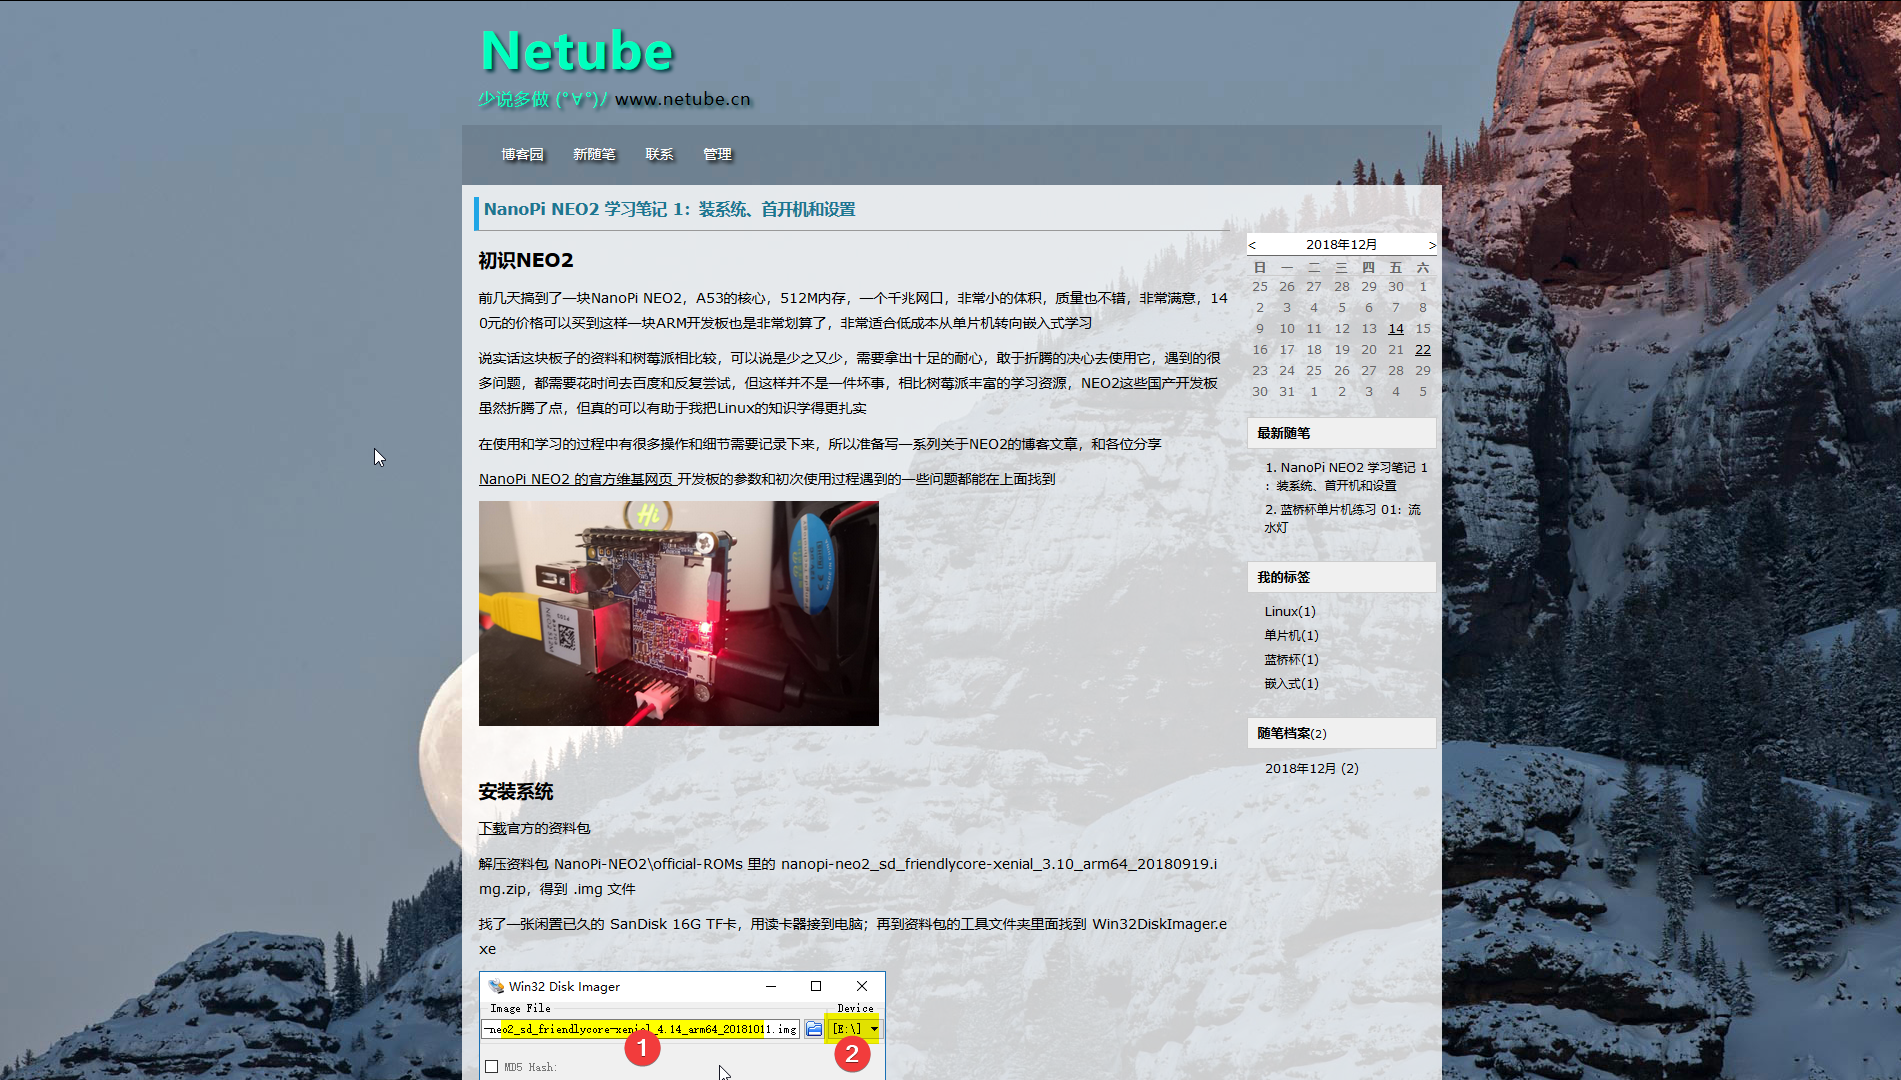
我的博客园美化
转载来自:https://www.cnblogs.com/netube/p/10160706.html
在加入博客园的前一个月,我都在进行前端html和css的学习
现发现博客园对用户开放高度的个人页面定制,让我很是惊喜
通过参考大佬们美化的主页,我逐渐了解了博客园的网页结构,于是也动了折腾的心思
我不喜欢花里胡哨,追求简单实用,希望我的美化主页CSS能对您有所帮助(随便复制拿去用吧)

美化内容:
背景每日随机变化,使用必应的api
更改博客名大小和颜色,更改小标题的大小和颜色
更改导航栏透明效果,文章背景透明效果,侧边附件栏宽度缩小,文章宽度增加
缩小评论输入框
关闭网页最下广告
美化教程
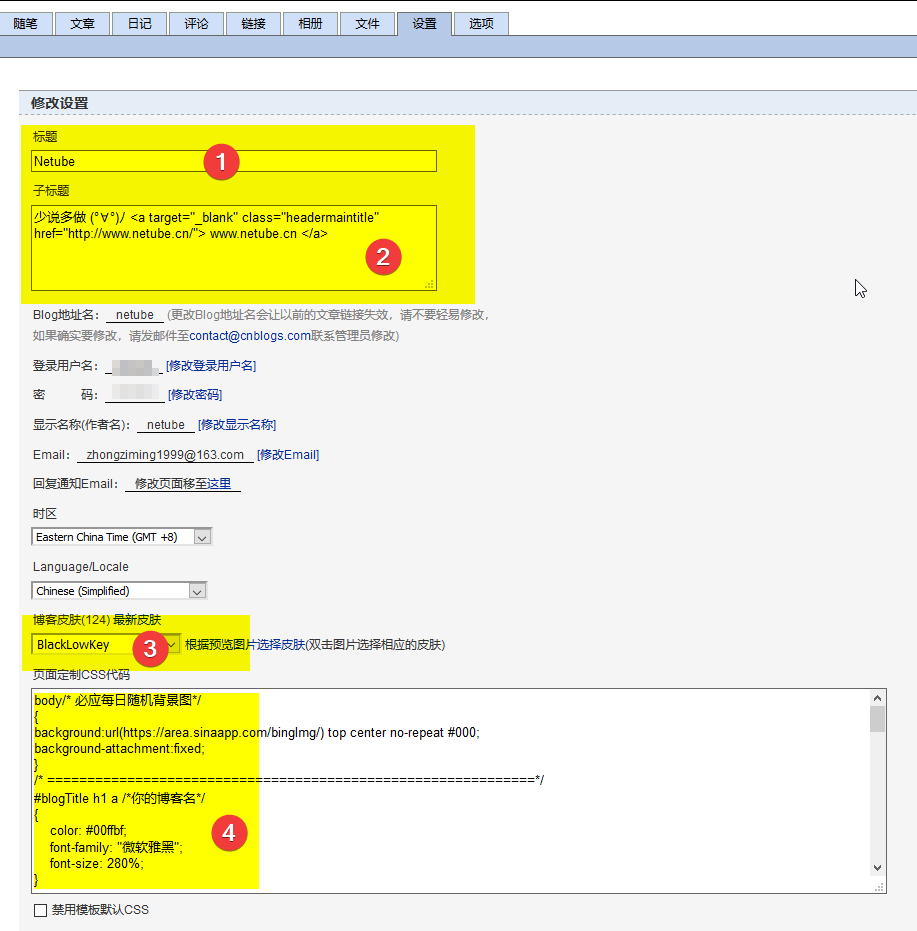
进入你博客园的设置界面
设置你的标题和小标题
博客皮肤选 BlackLowKey

把以下代码复制放入页面定制CSS代码框中
html/* 必应每日随机背景图*/ { background:url(https://area.sinaapp.com/bingImg/) top center no-repeat #000; background-attachment:fixed; } body { background: none; } /* =============================================================*/ #blogTitle h1 a /*你的博客名*/ { color: #00ffbf; font-family: "微软雅黑"; font-size: 260%; } #blogTitle h2/*你的博客小标题*/ { color: #00ffbf; font-family: "微软雅黑"; font-size: 120%; line-height: 1.5em; margin-left: 1em; margin-top: 10px; width: 70%; float: left; display: inline; letter-spacing: 1px; } #navigator { background-color: #0000001a; height: 60px; margin-top: 40px; } #main { width: auto; background: #fffc; /* 10% 透明背景*/ } #topics .postTitle { font-size: 200%; padding: 0; padding-bottom: 0.5em; border: 0; } .postTitle a:link, .postTitle a:visited, .postTitle a:active { color: #1c7791; } .day /* 个人主页文章之间空隙减小 */ { margin-bottom: 0; padding-bottom: 0; margin-top: 0; } #mainContent { background: #fff0; /* 导航菜单半透明*/ }.postTitle
{
font-size: 18px;/让个人主页随笔的标题更大/
}
.postSeparator
{
clear: both;
height: 1px;
clear: both;
float: right;
margin: 0 auto 2em auto;
}
div.commentform textarea /缩小评论输入框/
{
height: 100px;
}
.c_ad_block /关闭下方广告/
{
display: none;
}
.commentform/关闭下方广告/
{
display: none;
}
最后在最下面保存,去你的博客主页看看美化后效果吧!
<div class="clear"></div>
<div id="post_next_prev">

<a href="https://www.cnblogs.com/netube/p/10159729.html" class="p_n_p_prefix">« </a> 上一篇:    <a href="https://www.cnblogs.com/netube/p/10159729.html" title="发布于 2018-12-22 02:50">NanoPi NEO2 学习笔记 1:安装系统、首次开机和一些设置</a>
<br>
<a href="https://www.cnblogs.com/netube/p/10161632.html" class="p_n_p_prefix">» </a> 下一篇:    <a href="https://www.cnblogs.com/netube/p/10161632.html" title="发布于 2018-12-22 16:54">nanopi NEO2 学习笔记 2:安装 pip 和 pip 安装第三方模块</a>


