【Javaweb】基础开发流程与介绍
本文档写于2022年7月29日,由于个人水平有限,可能存在一些问题,因此仅供参考 @萌狼蓝天
JavaWeb基础开发流程
1.确定系统和功能
在此以“宠物管理系统”为例,要开发一个简单的宠物管理系统,功能如下:
(1)管理员需要通过登陆进入系统
(2)支持宠物信息的增加、查询、修改、删除
2.设计数据库
根据功能,分析应该存在两个数据表:一个用户信息表(此处的用户,指的是系统的使用者,也就是管理员)、一个宠物信息表

3.在IDEA中创建项目,导入所需Jar包
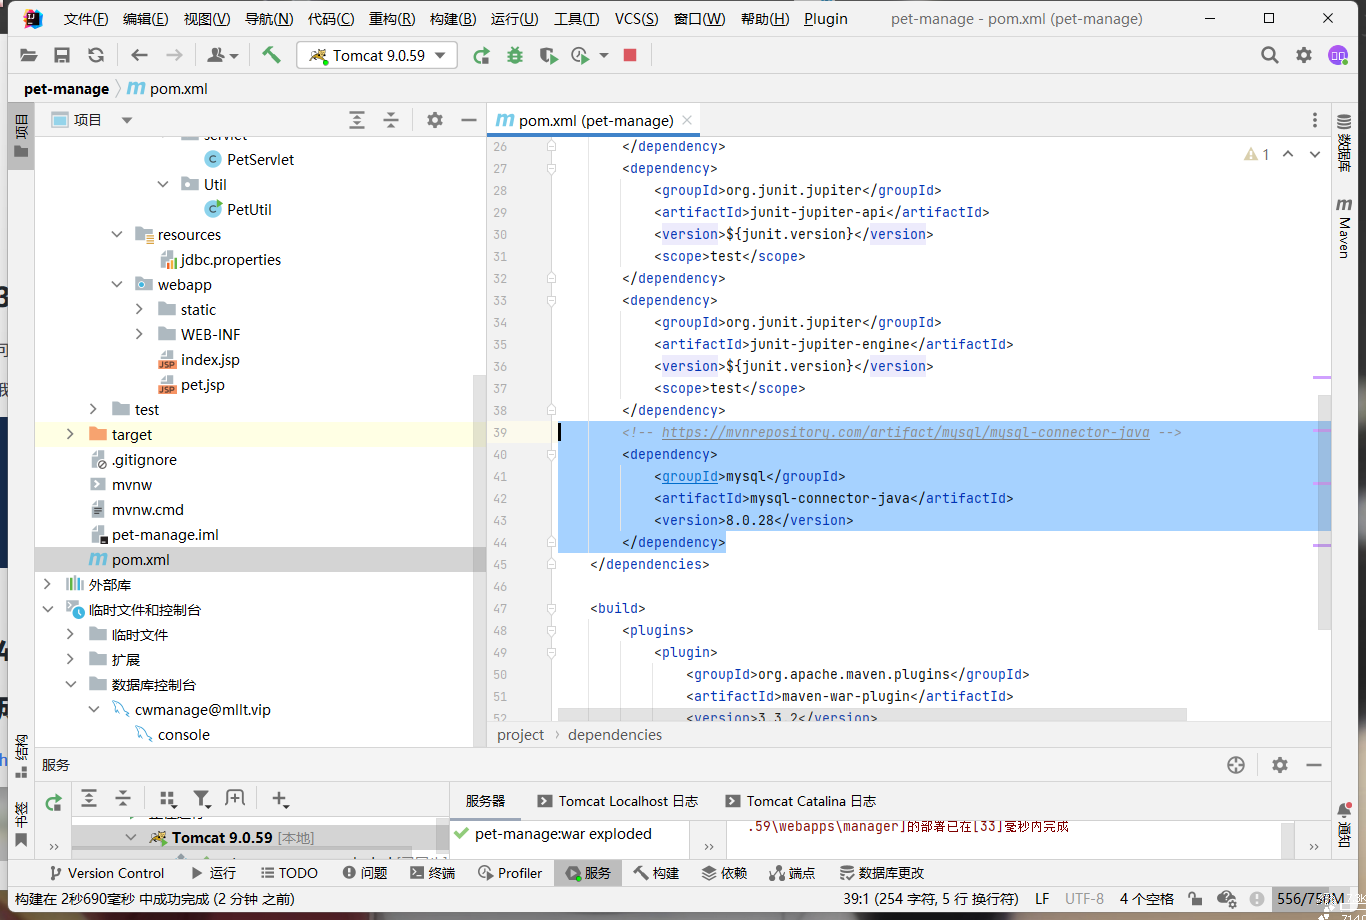
可以手动导入Jar包,如果使用了Maven管理工具的可以编辑pom.xml
我使用的Maven,需要添加
<!-- https://mvnrepository.com/artifact/mysql/mysql-connector-java -->
<dependency>
    <groupId>mysql</groupId>
    <artifactId>mysql-connector-java</artifactId>
    <version>8.0.28</version>
</dependency>

4.使用IDEA自带数据库工具的自带扩展脚本自动生成对象代码
https://www.bilibili.com/video/BV1od4y1m7vh
5.编辑配置文件,连接数据库
(1)在resource下创建jdbc.properties,内容如下
driverClass=com.mysql.cj.jdbc.Driver
jdbcUrl=jdbc:mysql://域名:3306/数据库名?zeroDateTimeBehavior=convertToNull
user=用户名
password=密码
zeroDateTimeBehavior=convertToNull是为了处理Date数据无效时产生的错误,写了这个之后,无效Date数据会自动转为Null
(2)创建JDBC工具类,用于连接数据库
package cc.mllt.jdbc;


import java.sql.*;
import java.util.ResourceBundle;

public class JDBCUtils {
    //私有化构造函数
    //防止外界直接创建对象
    private JDBCUtils(){}
    //提供静态方法getConnection
    //用来对外提供数据库连接对象

    /**
     *Connection 用来对外提供数据库连接对象
     * @return
     */
    public static Connection getConnection(){
        try{
            //0.读取文件属性
            ResourceBundle conf = ResourceBundle.getBundle("jdbc");
            //1.注册驱动
            Class.forName(conf.getString("driverClass"));
            //2.获取数据库连接
            String url = conf.getString("jdbcUrl");
            String user = conf.getString("user");
            String password = conf.getString("password");
            Connection conn = DriverManager.getConnection(url,user,password);
            return conn;
        }catch (Exception e){
            e.printStackTrace();
        }
        return null;
    }
    //提供静态方法close,用来释放资源

    /**
     *close 用来释放资源
     * @param rs
     * @param st
     * @param conn
     */
    public static void close(ResultSet rs, Statement st,Connection conn){
        //关闭结果资源集
        if(rs!=null){
            //防止空指针异常
            try{
                rs.close();
            }catch (SQLException e){
                e.printStackTrace();
            }finally {
                rs=null;//手动置空,等待GC回收
            }
        }
        //关闭传输器资源
        if(st!=null){
            //防止空指针异常
            try {
                st.close();
            }catch (SQLException e){
                e.printStackTrace();
            }finally {
                st = null;//手动置空,等待GC回收
            }
        }
        //关闭数据库连接资源
        if(conn!=null){
            //防止空指针异常
            try {
                conn.close();
            } catch (SQLException e) {
                e.printStackTrace();
            }finally {
                conn=null;//手动置空,等待GC回收
            }
        }
    }

}
6.编写功能模块
在此以查询为例,编写查询数据的代码
/**
 * 获取所有宠物信息
 * @return List<Pet> 成功返回以宠物对象构成的列表,失败返回null
 */
public static List<Pet> getPetInfo(){
    Connection connection = null;
    PreparedStatement ps = null;
    ResultSet rs =null;
    List<Pet> list = new ArrayList<Pet>() {
    };
    try {
        connection = JDBCUtils.getConnection();
        String sql = "select * from pet";
        ps = connection.prepareStatement(sql);
        rs = ps.executeQuery();
        while (rs.next()){
            Pet pet = new Pet();
            pet.setCode(rs.getString(1));
            //1对应的是数据表中第一列的数据
            pet.setType(rs.getString(2));
            //1对应的是数据表中第二列的数据
            pet.setName(rs.getString(3));
            pet.setKind(rs.getString(4));
            pet.setGender(rs.getLong(5));
            pet.setCharacter(rs.getString(6));
            pet.setHealth(rs.getString(7));
            pet.setBirth(rs.getDate(8));
            pet.setPic(rs.getString(9));
            pet.setState(rs.getLong(10));
            list.add(pet);
        }
    } catch (SQLException e) {
        System.out.println(e);
        return null;
    }
    return list;
}
7.编写前端页面
可以先使用HTML写好模板,再迁移入JSP
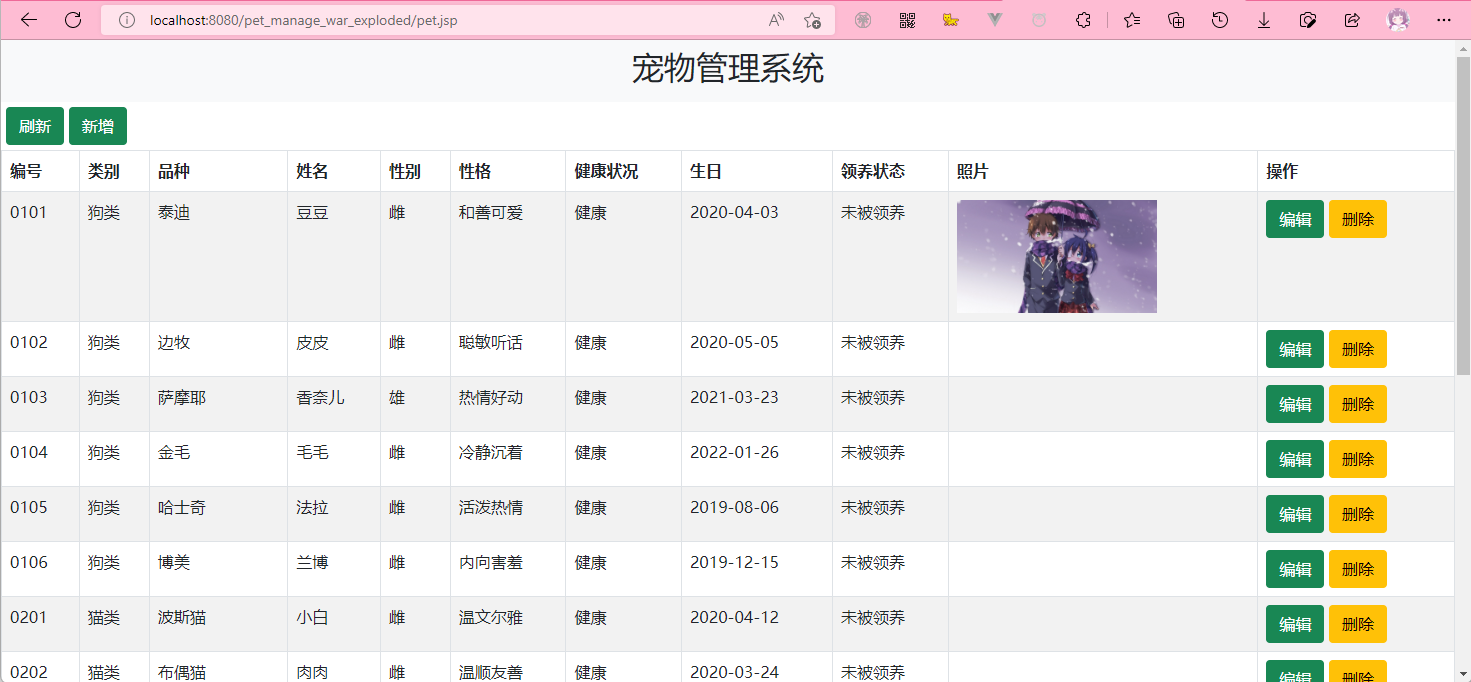
8.前端获取后端数据并显示
<%@ page import="cc.mllt.Util.PetUtil" %>
<%@ page import="java.util.List" %>
<%@ page import="cc.mllt.dao.Pet" %>
<%@ page contentType="text/html; charset=UTF-8" pageEncoding="UTF-8" %>
<!DOCTYPE html>
<html>
<head>
  <title>宠物管理系统</title>
  <!-- 新 Bootstrap5 核心 CSS 文件 -->
  <link rel="stylesheet" href="https://cdn.staticfile.org/twitter-bootstrap/5.1.1/css/bootstrap.min.css">

  <!-- 最新的 Bootstrap5 核心 JavaScript 文件 -->
  <script src="https://cdn.staticfile.org/twitter-bootstrap/5.1.1/js/bootstrap.bundle.min.js"></script>
  <style>
    img{
      width:200px;
      height: auto;
      margin: 0 auto;
    }
    .control{
      margin:5px;
    }
  </style>
</head>
<body>
<%
  List<Pet> pets = PetUtil.getPetInfo();
  System.out.println(pets);
%>
<nav class="navbar navbar-expand-sm bg-light justify-content-center">
  <h2>宠物管理系统</h2>
</nav>
<div class="control">
<button type="button" class="btn btn-success">刷新</button>
<button type="button" class="btn btn-success">新增</button>
</div>
<table class="table table-striped table-bordered table-hover">
  <thead>

    <th>编号</th>
    <th>类别</th>
    <th>品种</th>
    <th>姓名</th>
    <th>性别</th>
    <th>性格</th>
    <th>健康状况</th>
    <th>生日</th>
    <th>领养状态</th>
    <th>照片</th>
    <th>操作</th>
  </thead>
<%
  for (Pet pet : pets) {
%>
  <tr>

    <td><%=pet.getCode()%>
    </td>
    <td><%=pet.getType()%>
    </td>
    <td><%=pet.getKind()%>
    </td>
    <td><%=pet.getName()%>
    </td>
    <td>
      <%
        String gender="";
        if(pet.getGender()==0){
          gender="雌";
        }
        if(pet.getGender()==1){
          gender="雄";
        }
        if(pet.getGender()==2){
          gender="雌雄共同";
        }
        if(pet.getGender()==3){
          gender="雌雄不分";
        }
      %>
      <%=gender%>
    </td>
    <td><%=pet.getCharacter()%>
    </td>
    <td><%=pet.getHealth()%>
    </td>
    <td><%=pet.getBirth()%>
    </td>
    <td>
      <%
        String state="";
        if(pet.getState()==0){
        state="未被领养";
      }
        if(pet.getState()==1){
          state="已被领养";
        }

      %>
      <%=state%>
    </td>
    <td><img src=<%=pet.getPic()%> >
    </td>
    <td>
      <button type="button" class="btn btn-success">编辑</button>
      <button type="button" class="btn btn-warning">删除</button>
    </td>
  </tr>
  <%
    }
  %>
</table>
</body>
</html>

9.美化前端
可以使用Bootstrap或者自己编写样式美化前端。
10.优化后端代码(逻辑算法等)
版 权 声 明


