springboot2.2.0.RELEASE版本之前的配置和2.2.0之后的配置等发生了改变。这里讲解2.1.0版本的。
springboot.rabbitmq.publisher-confirms 新版本已被弃用,现在使用 spring.rabbitmq.publisher-confirm-type = correlated 实现相同效果。在springboot2.2.0.RELEASE版本之前是amqp正式支持的属性,用来配置消息发送到交换器之后是否触发回调方法,在2.2.0及之后该属性过期使用spring.rabbitmq.publisher-confirm-type属性配置代替,用来配置更多的确认类型;如果该属性为true,则会触发confirm方法。
一、搭建父工程和生产者子模块和消费者子模块
1、搭建父工程
添加依赖如下:
<parent>
        <groupId>org.springframework.boot</groupId>
        <artifactId>spring-boot-starter-parent</artifactId>
        <version>2.1.0.RELEASE</version>
        <relativePath/>
    </parent>
    <properties>
        <java.version>1.8</java.version>
        <maven.compiler.source>8</maven.compiler.source>
        <maven.compiler.target>8</maven.compiler.target>
    </properties>
    <dependencies>
        <dependency>
            <groupId>org.springframework.boot</groupId>
            <artifactId>spring-boot-starter-web</artifactId>
        </dependency>
        <dependency>
            <groupId>org.springframework.boot</groupId>
            <artifactId>spring-boot-starter-test</artifactId>
            <scope>test</scope>
        </dependency>
    </dependencies>
2、添加生产者子模块
我们选择基于Spring-Rabbit去操作RabbitMQ。使用 spring-boot-starter-amqp会自动添加spring-rabbit依赖,如下:
<dependencies>
        <dependency>
            <groupId>org.springframework.boot</groupId>
            <artifactId>spring-boot-starter-amqp</artifactId>
        </dependency>
        <dependency>
            <groupId>org.springframework.boot</groupId>
            <artifactId>spring-boot-starter-logging</artifactId>
        </dependency>
        <dependency>
            <groupId>org.projectlombok</groupId>
            <artifactId>lombok</artifactId>
        </dependency>
    </dependencies>
3、添加消费者子模块
添加依赖
<dependencies>
        <dependency>
            <groupId>org.springframework.boot</groupId>
            <artifactId>spring-boot-starter-amqp</artifactId>
        </dependency>
        <dependency>
            <groupId>org.springframework.boot</groupId>
            <artifactId>spring-boot-starter-logging</artifactId>
        </dependency>
        <dependency>
            <groupId>org.projectlombok</groupId>
            <artifactId>lombok</artifactId>
        </dependency>
    </dependencies>
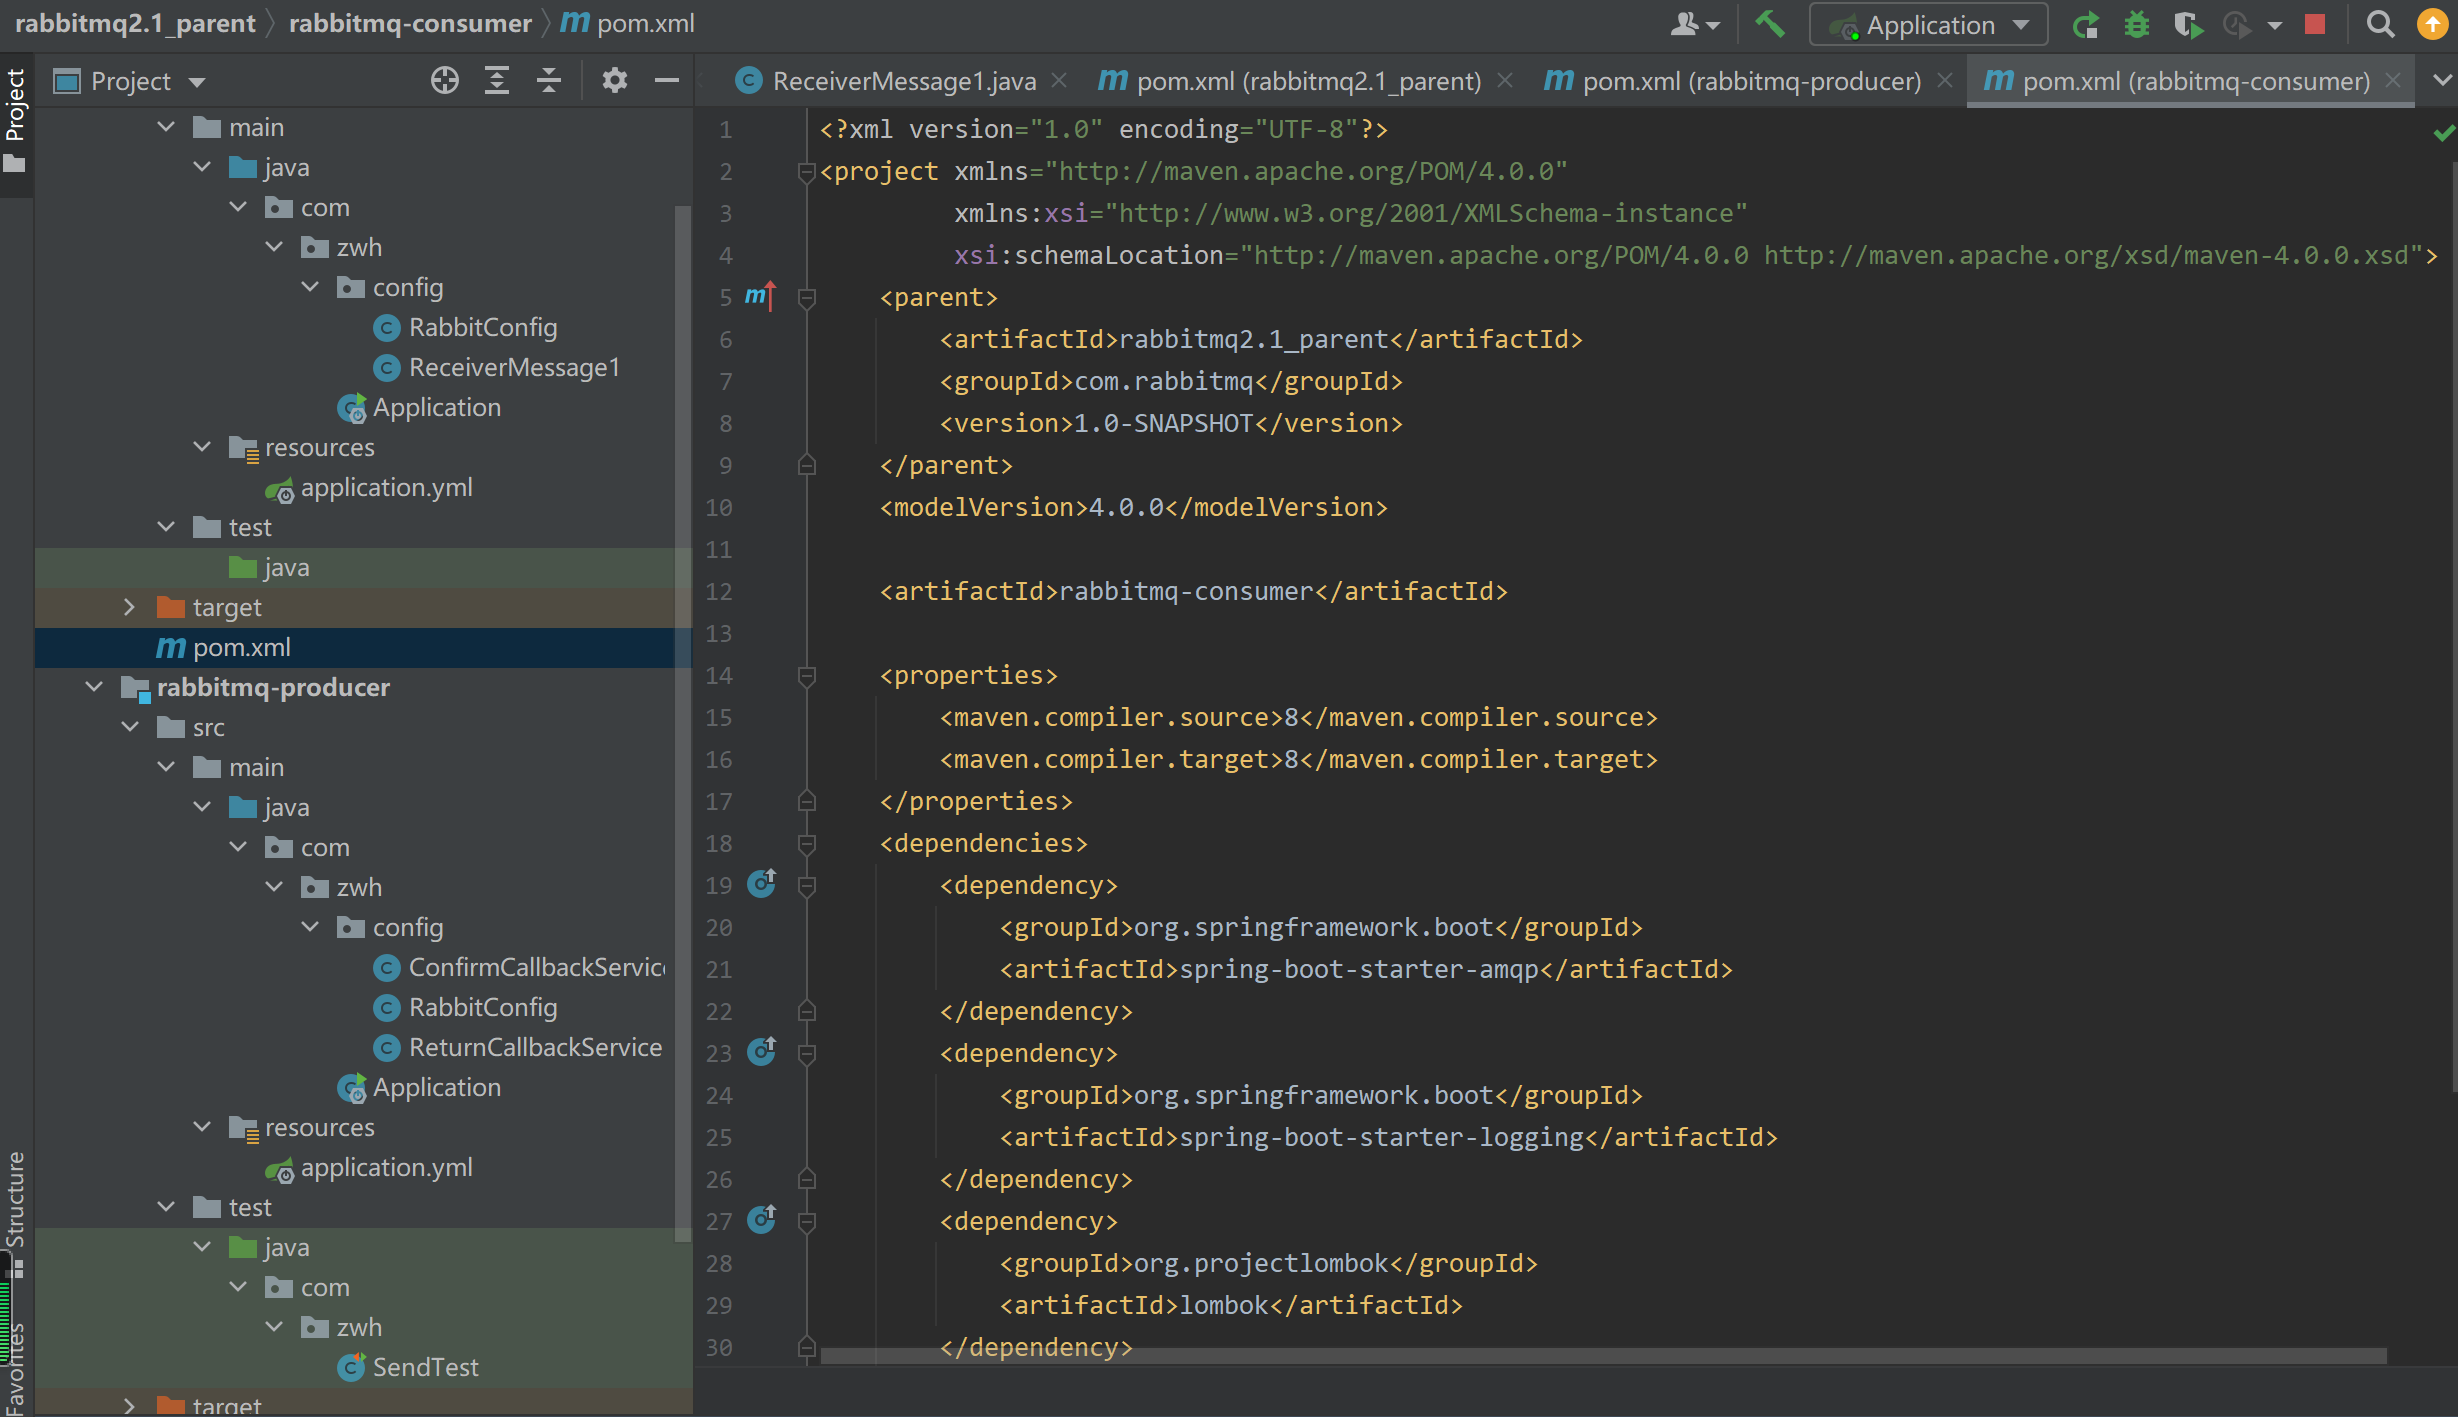
搭建完成后效果如下:
二、生产者
1、创建启动类
@SpringBootApplication
public class Application {
    public static void main(String[] args) {
        SpringApplication.run(Application.class);
    }
}
2、创建application.yml
server:
  port: 45000
spring:
  application:
    name: test‐rabbitmq‐producer
  rabbitmq:
    host: 127.0.0.1
    port: 5672
    username: guest
    password: guest
    virtual-host: /
    # 开启消息是否已经发送到交换机的确认机制
    publisher-confirms: true
    # 开启消息未成功投递到目标队列时将消息返回
    publisher-returns: true
3、定义RabbitConfig类,配置Exchange、Queue、及绑定交换机。
本例配置Fanout交换机。
import org.springframework.amqp.core.*;
import org.springframework.beans.factory.annotation.Qualifier;
import org.springframework.context.annotation.Bean;
import org.springframework.context.annotation.Configuration;

@Configuration
public class RabbitConfig {

    @Bean(name = "confirmTestQueue")
    public Queue confirmTestQueue() {
        return new Queue("confirm_test_queue", true, false, false);
    }

    @Bean(name = "confirmTestExchange")
    public FanoutExchange confirmTestExchange() {
        return new FanoutExchange("confirm_test_exchange");
    }

    @Bean
    public Binding confirmTestFanoutExchangeAndQueue(
            @Qualifier("confirmTestExchange") FanoutExchange confirmTestExchange,
            @Qualifier("confirmTestQueue") Queue confirmTestQueue) {
        return BindingBuilder.bind(confirmTestQueue).to(confirmTestExchange);
    }
}
共声明了 1 个队列,交换器类型为 FanoutExchange, 并与队列绑定。
3、消息发送确认
rabbitmq 的消息确认分为两部分:发送消息确认 和 消息接收确认。
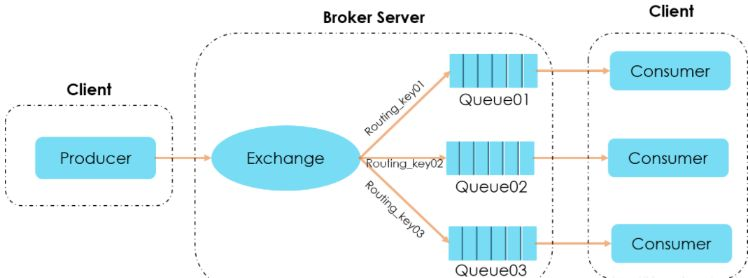
发送消息确认:用来确认生产者 producer 将消息发送到 broker ,broker 上的交换机 exchange 再投递给队列 queue的过程当中,消息是否成功投递。
消息从 producer 到 rabbitmq broker有一个 confirmCallback 确认模式。app
消息从 exchange 到 queue 投递失败有一个 returnCallback 退回模式。
咱们能够利用这两个Callback来确保消的100%送达。
ConfirmCallback确认模式
消息无论是否成功到达交换机都会调用confirm方法。
import lombok.extern.slf4j.Slf4j;
import org.springframework.amqp.rabbit.connection.CorrelationData;
import org.springframework.amqp.rabbit.core.RabbitTemplate;
import org.springframework.stereotype.Component;

@Slf4j
@Component
public class ConfirmCallbackService implements RabbitTemplate.ConfirmCallback {

    @Override
    public void confirm(CorrelationData correlationData, boolean ack, String cause) {
        if (!ack) {
            log.error("消息发送到交换机失败!");
        } else {
            log.info("消息已经发送到交换机,correlationData={} ,ack={}, cause={}", correlationData.getId(), ack, cause);
        }
    }
}
实现接口 ConfirmCallback ,重写其confirm()方法,方法内有三个参数correlationData、ack、cause。
correlationData:对象内部只有一个id属性,用来表示当前消息的惟一性。ack:消息投递到broker的状态,true表示成功。cause:表示投递失败的缘由。
但消息被 broker 接收到只能表示已经到达 MQ服务器,并不能保证消息必定会被投递到目标 queue 里。因此接下来须要用到 returnCallback 。
ReturnCallback 退回模式
若是消息未能投递到目标 queue 里将触发回调 returnCallback ,一旦向 queue 投递消息未成功,这里通常会记录下当前消息的详细投递数据,方便后续作重发或者补偿等操做
import lombok.extern.slf4j.Slf4j;
import org.springframework.amqp.core.Message;
import org.springframework.amqp.rabbit.core.RabbitTemplate;
import org.springframework.stereotype.Component;

@Slf4j
@Component
public class ReturnCallbackService implements RabbitTemplate.ReturnCallback {

    @Override
    public void returnedMessage(Message message, int replyCode, String replyText, String exchange, String routingKey) {
        log.info("returnedMessage ===> replyCode={} ,replyText={} ,exchange={} ,routingKey={}", replyCode, replyText, exchange, routingKey);
    }
}
returnedMessage方法只会在消息未成功投递到目标队列时被调用。
实现接口ReturnCallback,重写 returnedMessage() 方法,方法有五个参数message(消息体)、replyCode(响应code)、replyText(响应内容)、exchange(交换机)、routingKey(队列)。
4、在测试类中发送消息
下边是具体的消息发送,在rabbitTemplate中设置 Confirm 和 Return 回调,咱们经过setDeliveryMode()对消息作持久化处理
import com.zwh.config.ConfirmCallbackService;
import com.zwh.config.ReturnCallbackService;
import org.junit.Test;
import org.junit.runner.RunWith;
import org.springframework.amqp.core.MessageDeliveryMode;
import org.springframework.amqp.rabbit.connection.CorrelationData;
import org.springframework.amqp.rabbit.core.RabbitTemplate;
import org.springframework.beans.factory.annotation.Autowired;
import org.springframework.boot.test.context.SpringBootTest;
import org.springframework.test.context.junit4.SpringRunner;
import java.util.UUID;

@SpringBootTest
@RunWith(SpringRunner.class)
public class SendTest {
    @Autowired
    private RabbitTemplate rabbitTemplate;

    @Autowired
    private ConfirmCallbackService confirmCallbackService;

    @Autowired
    private ReturnCallbackService returnCallbackService;

    public void sendMessage(String exchange, String routingKey, Object msg) {

        /**
         * 确保消息发送失败后能够从新返回到队列中
         * 注意:yml须要配置 publisher-returns: true
         */
        rabbitTemplate.setMandatory(true);

        /**
         * 消费者确认收到消息后,手动ack回执回调处理
         */
        rabbitTemplate.setConfirmCallback(confirmCallbackService);

        /**
         * 消息投递到队列失败回调处理
         */
        rabbitTemplate.setReturnCallback(returnCallbackService);

        /**
         * 发送消息
         */
        rabbitTemplate.convertAndSend(exchange, routingKey, msg,
                message -> {
                    message.getMessageProperties().setDeliveryMode(MessageDeliveryMode.PERSISTENT);
                    return message;
                },
                new CorrelationData(UUID.randomUUID().toString()));
    }
    @Test
    public void testSendByFanout(){
        String message2 = "hello world";
        this.sendMessage("confirm_test_exchange",null,message2);
        System.out.println("Send Message is:'" + message2 + "'");
    }
}
改造代码:
@Component
public class Sender {
    @Autowired
    private RabbitTemplate rabbitTemplate;

    @Autowired
    private ConfirmCallbackService confirmCallbackService;

    @Autowired
    private ReturnCallbackService returnCallbackService;

    public void sendMessage(String exchange, String routingKey, Object msg) {

        /**
         * 确保消息发送失败后能够从新返回到队列中
         * 注意:yml须要配置 publisher-returns: true
         */
        rabbitTemplate.setMandatory(true);

        /**
         * 消费者确认收到消息后,手动ack回执回调处理
         */
        rabbitTemplate.setConfirmCallback(confirmCallbackService);

        /**
         * 消息投递到队列失败回调处理
         */
        rabbitTemplate.setReturnCallback(returnCallbackService);

        /**
         * 发送消息
         */
        rabbitTemplate.convertAndSend(exchange, routingKey, msg,
                message -> {
                    message.getMessageProperties().setDeliveryMode(MessageDeliveryMode.PERSISTENT);
                    return message;
                },
                new CorrelationData(UUID.randomUUID().toString()));
    }
}
在测试类中调用:
@SpringBootTest
@RunWith(SpringRunner.class)
public class SendTest {
    @Autowired
    private Sender sender;
    @Test
    public void testSendByFanout(){
        String message2 = "hello world";
        sender.sendMessage("confirm_test_exchange",null,message2);
        System.out.println("Send Message is:'" + message2 + "'");
    }
}
三、消费者
1、创建启动类
@SpringBootApplication
public class Application {
    public static void main(String[] args) {
        SpringApplication.run(Application.class);
    }
}
2、编写配置文件
server:
  port: 45001
spring:
  application:
    name: test‐rabbitmq‐consumer
  rabbitmq:
    host: 127.0.0.1
    port: 5672
    username: guest
    password: guest
    virtual-host: /
    # 设置消费者需要手动确认消息
    listener:
      simple:
        acknowledge-mode: manual
      direct:
        acknowledge-mode: manual
3、定义RabbitConfig类,配置Exchange、Queue、及绑定交换机。
import org.springframework.amqp.core.Binding;
import org.springframework.amqp.core.BindingBuilder;
import org.springframework.amqp.core.FanoutExchange;
import org.springframework.amqp.core.Queue;
import org.springframework.beans.factory.annotation.Qualifier;
import org.springframework.context.annotation.Bean;
import org.springframework.context.annotation.Configuration;

@Configuration
public class RabbitConfig {

    @Bean(name = "confirmTestQueue")
    public Queue confirmTestQueue() {
        return new Queue("confirm_test_queue", true, false, false);
    }

    @Bean(name = "confirmTestExchange")
    public FanoutExchange confirmTestExchange() {
        return new FanoutExchange("confirm_test_exchange");
    }

    @Bean
    public Binding confirmTestFanoutExchangeAndQueue(
            @Qualifier("confirmTestExchange") FanoutExchange confirmTestExchange,
            @Qualifier("confirmTestQueue") Queue confirmTestQueue) {
        return BindingBuilder.bind(confirmTestQueue).to(confirmTestExchange);
    }
}
4、消息接收确认
消息接收确认要比消息发送确认简单一点,由于只有一个消息回执(ack)的过程。使用@RabbitHandler注解标注的方法要增加 channel(信道)、message 两个参数。
@Slf4j
@Component
@RabbitListener(queues = "confirm_test_queue")
public class ReceiverMessage1 {
    @RabbitHandler
    public void processHandler(String msg, Channel channel, Message message) throws IOException {
        try {
            int i = 1/0;
            //TODO 具体业务
            channel.basicAck(message.getMessageProperties().getDeliveryTag(), false);
            log.info("消费者确认收到消息:{}", msg);
        }  catch (Exception e) {
            try {
                // 拒绝消息
                log.error("消费者拒绝消息:{}", msg);
                channel.basicNack(message.getMessageProperties().getDeliveryTag(), false, false);
            } catch (IOException ioException) {
                ioException.printStackTrace();
            }
        }
    }
}
消费消息有三种回执方法,咱们来分析一下每种方法的含义。
1)、basicAck
basicAck:表示成功确认,使用此回执方法后,消息会被rabbitmq broker 删除。
void basicAck(long deliveryTag, boolean multiple)
deliveryTag:表示消息投递序号,每次消费消息或者消息从新投递后,deliveryTag都会增长。手动消息确认模式下,咱们能够对指定deliveryTag的消息进行ack、nack、reject等操做。
multiple:是否批量确认,值为 true 则会一次性 ack全部小于当前消息 deliveryTag 的消息。
举个栗子: 假设我先发送三条消息deliveryTag分别是五、六、7,可它们都没有被确认,当我发第四条消息此时deliveryTag为8,multiple设置为 true,会将五、六、七、8的消息所有进行确认。
2)、basicNack
basicNack :表示失败确认,通常在消费消息业务异常时用到此方法,能够将消息从新投递入队列。
void basicNack(long deliveryTag, boolean multiple, boolean requeue)
deliveryTag:表示消息投递序号。
multiple:是否批量确认。
requeue:值为 true 消息将从新入队列。
3)、basicReject
basicReject:拒绝消息,与basicNack区别在于不能进行批量操做,其余用法很类似。
void basicReject(long deliveryTag, boolean requeue)
deliveryTag:表示消息投递序号。
requeue:值为 true 消息将从新入队列。
四、测试
1、正常情况
发送消息
Send Message is:'hello world'
2022-05-14 14:04:28.222  INFO 6284 --- [ 127.0.0.1:5672] com.zwh.config.ConfirmCallbackService    : 消息已经发送到交换机,correlationData=321db8f8-afee-45a7-b5b0-3764fffab26e ,ack=true, cause=null
此时,

启动消费者
消费者确认收到消息:hello world

2、拒绝消息
修改代码
@Slf4j
@Component
@RabbitListener(queues = "confirm_test_queue")
public class ReceiverMessage1 {
    @RabbitHandler
    public void processHandler(String msg, Channel channel, Message message) throws IOException {
        try {
            int i = 1/0;
            //TODO 具体业务
            channel.basicAck(message.getMessageProperties().getDeliveryTag(), false);
            log.info("消费者确认收到消息:{}", msg);
        }  catch (Exception e) {
            try {
                // 拒绝消息
                log.error("消费者拒绝消息:{}", msg);
                channel.basicNack(message.getMessageProperties().getDeliveryTag(), false, false);
            } catch (IOException ioException) {
                ioException.printStackTrace();
            }
        }
    }
}
发送消息

启动消费者
消费者拒绝消息:hello world
此时消息被删除

3、测试消息不能成功发送到交换机
要测试消息不能成功发送到交换机的情况,只需要发送消息时指定一个不存在的交换机即可。
@SpringBootTest
@RunWith(SpringRunner.class)
public class SendTest {
    @Autowired
    private RabbitTemplate rabbitTemplate;

    @Autowired
    private ConfirmCallbackService confirmCallbackService;

    @Autowired
    private ReturnCallbackService returnCallbackService;

    public void sendMessage(String exchange, String routingKey, Object msg) {

        /**
         * 确保消息发送失败后能够从新返回到队列中
         * 注意:yml须要配置 publisher-returns: true
         */
        rabbitTemplate.setMandatory(true);

        /**
         * 消费者确认收到消息后,手动ack回执回调处理
         */
        rabbitTemplate.setConfirmCallback(confirmCallbackService);

        /**
         * 消息投递到队列失败回调处理
         */
        rabbitTemplate.setReturnCallback(returnCallbackService);

        /**
         * 发送消息
         */
        rabbitTemplate.convertAndSend(exchange, routingKey, msg,
                message -> {
                    message.getMessageProperties().setDeliveryMode(MessageDeliveryMode.PERSISTENT);
                    return message;
                },
                new CorrelationData(UUID.randomUUID().toString()));
    }
    @Test
    public void testSendByFanout(){
        String message2 = "hello world";
        this.sendMessage("confirm_test_exchange1",null,message2);
        System.out.println("Send Message is:'" + message2 + "'");
    }
}
指定一个不存在的交换机confirm_test_exchange1,然后发送下消息:
消息发送到交换机失败!
4、测试消息未成功投递到目标队列
由于RabbitTemplate.ReturnsCallback的returnedMessage方法只会在消息未成功投递到目标队列时被调用,所以要测试消息是否成功的从交换机投放到目标队列,可以注释掉交换机和队列绑定的代码,这样消息自然不能成功的从交换机投放到队列。
先删除掉原来的交换机,否则原来的交换机已经与队列进行绑定,不会调用returnMessage方法。
returnedMessage ===> replyCode=312 ,replyText=NO_ROUTE ,exchange=confirm_test_exchange ,routingKey=
消息已经发送到交换机,correlationData=ce0b9a13-de2d-4711-ab19-b1c121c15555 ,ack=true, cause=null

