参考文章:https://www.cnblogs.com/zhangyjblogs/p/14163702.html
一、官方参考指南
二、执行流程
执行流程图如下:
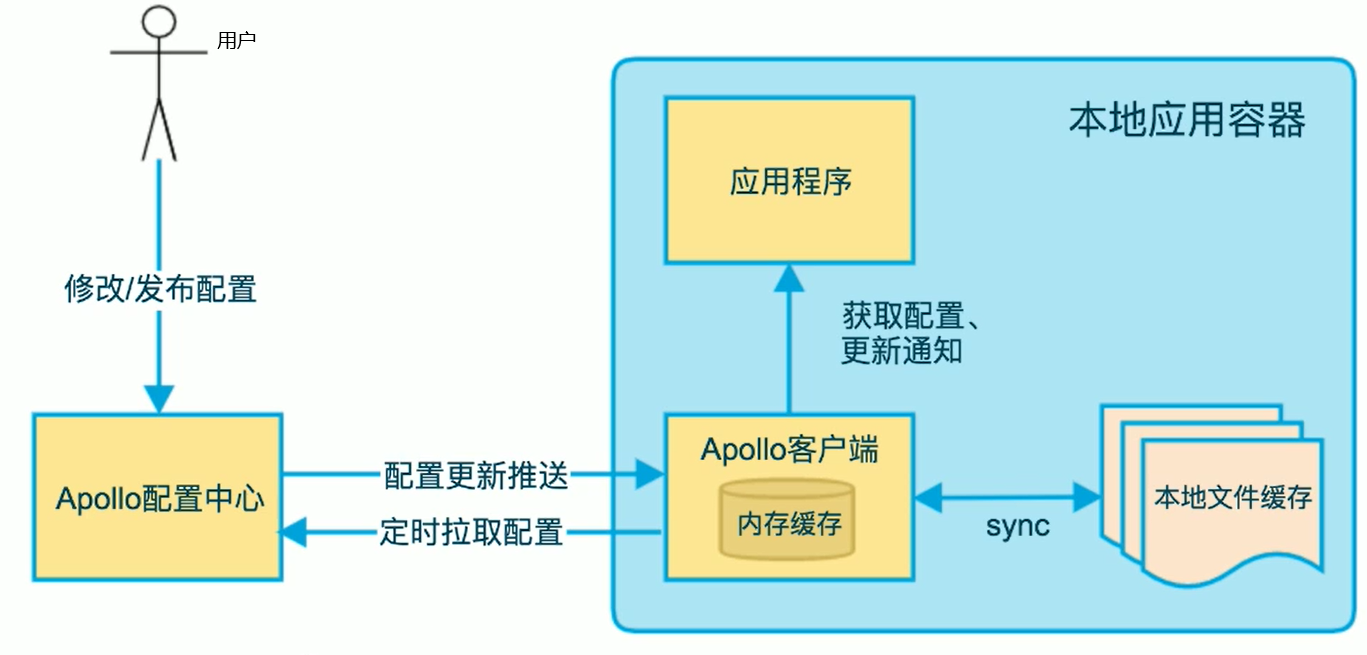
流程说明:
A:用户在配置中心发布或修改配置
B:Apollo客户端定时拉取配置中心的配置。若配置中心发生故障,则apollo客户端会从本地缓存中获取配置信息
C:应用程序从客户端获取配置信息并更新通知
D:除了apollo客户端定时从配置中心拉取之外,配置中心还可以实时的推送配置更新信息到apollo客户端,那么客户端再把配置给应用程序。
本地文件缓存位置在:C:\opt\data目录下。可以通过获取别人的本地文件中的配置信息,然后将配置一个接一个的拷贝到自己的apollo中。
注意:拷贝的时候要删除转义符\,否则,你本地生成的配置文件就会有三个\\\,导致你找不到数据库。
三、虚拟机部署
1、创建数据库
Apollo的唯一依赖是数据库,所以需要首先把数据库准备好。Apollo服务端共需要两个数据库:ApolloPortalDB和ApolloConfigDB
1)、创建ApolloPortalDB数据库
2)、创建ApolloConfigDB数据库
注意:apollo-configservice不以8080端口启动的情况下,要修改ApolloConfigDB库的ServerConfig表的eureka.service.url的value值为http://localhost:18080/eureka/,我是单机环境,因此是localhost,端口从数据库默认的8080改为18080。
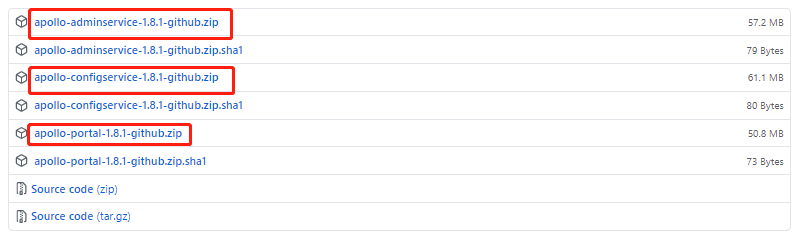
2、下载安装包
从GitHub Release页面下载最新版本的apollo-configservice-x.x.x-github.zip、apollo-adminservice-x.x.x-github.zip和apollo-portal-x.x.x-github.zip即可。
3、配置数据库连接信息
Apollo服务端需要知道如何连接到你前面创建的数据库,数据库连接串信息位于上一步下载的压缩包中的config/application-github.properties中。
1)、配置apollo-configservice的数据库连接信息
# DataSource
spring.datasource.url = jdbc:mysql://192.168.21.138:3306/ApolloConfigDB?characterEncoding=utf8
spring.datasource.username = root
spring.datasource.password = root
2)、配置apollo-adminservice的数据库连接信息
# DataSource
spring.datasource.url = jdbc:mysql://192.168.21.138:3306/ApolloConfigDB?characterEncoding=utf8
spring.datasource.username = root
spring.datasource.password = root
3)、 配置apollo-portal的数据库连接信息
# DataSource
spring.datasource.url = jdbc:mysql://192.168.21.138:3306/ApolloPortalDB?characterEncoding=utf8
spring.datasource.username = root
spring.datasource.password = root
4)、修改三个服务端口,端口设置如下
apollo-configservice 18080 注册中心地址
apollo-adminservice 18090
apollo-portal 18070 门户登陆端口
打开apollo-configservice-1.8.1-github/scripts/startup.sh文件,修改如下:
SERVER_PORT=${SERVER_PORT:=18080}
打开apollo-adminservice-1.8.1-github/scripts/startup.sh文件,修改如下:
SERVER_PORT=${SERVER_PORT:=18090}
打开apollo-portal-1.8.1-github/scripts/startup.sh文件,修改如下:
SERVER_PORT=${SERVER_PORT:=18070}
注意:apollo-configservice不以8080端口启动的情况下,要修改ApolloConfigDB库的ServerConfig表的eureka.service.url的value值为http://localhost:18080/eureka/,我是单机环境,因此是localhost,端口从数据库默认的8080改为18080。
5)、配置apollo-portal的meta service信息
打开apollo-portal-1.8.1-github.zip中config目录下的apollo-env.properties文件。我自己只是使用了dev环境,其他没使用。
local.meta=http://localhost:18080
dev.meta=http://localhost:18080
#fat.meta=http://fill-in-fat-meta-server:8080
#uat.meta=http://fill-in-uat-meta-server:8080
lpt.meta=${lpt_meta}
#pro.meta=http://fill-in-pro-meta-server:8080
4、部署Apollo服务端
先确保mysql容器启动,否则下面的服务启动失败。mysql容器服务在另外一台虚拟机上面,即CentOS7-protainer+mysql,ip为192.168.21.138.
注意:MySQL服务一定要与apollo服务分别放到两个服务器,因为我放到一个服务器时,apollo服务总是无法启动。
启动顺序configservice->adminservice->portal,每个命令输入后等2min再启动下一个服务,因为有依赖关系。
启动方式一:如果不是云服务器可以按如下启动:
1)、部署apollo-configservice
将对应环境的apollo-configservice-1.8.1-github.zip上传到服务器上,解压后执行scripts/startup.sh即可。如需停止服务,执行scripts/shutdown.sh.
cd apollo-configservice-1.8.1-github/scripts
./startup.sh
如果报如下错:

chmod u+x *.sh
这里的u 这里指文件所有者,+x 添加可执行权限,*.sh表示所有的sh文件。
如果报错如下:

查看日志发现mysql服务未启动。
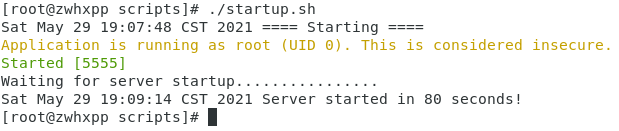
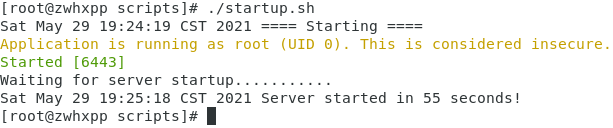
启动需要几分钟,看到下图的执行结果说明启动成功!
停止服务
./shutdown.sh
2)、部署apollo-adminservice
将对应环境的apollo-adminservice-1.8.1-github.zip上传到服务器上,解压后执行scripts/startup.sh即可。如需停止服务,执行scripts/shutdown.sh.
cd apollo-adminservice-1.8.1-github/scripts
./startup.sh

3)、部署apollo-portal
将apollo-portal-1.8.1-github.zip上传到服务器上,解压后执行scripts/startup.sh即可。如需停止服务,执行scripts/shutdown.sh.
cd apollo-portal-1.8.1-github/scripts
./startup.sh
启动方式二:如果是云服务器,按如下方法启动
注意:1、先要检查数据库所在的服务器能否ping通,如果ping不同,项目即使启动了也无法正常运行。2、安全组和服务器都要放开端口。3、尽量用热点,有些公司的内网禁用了22端口。
cd /root/apollo-configservice-1.8.1-github/
nohup java -Xmx256m -Xms256m -Xmn128m -Dserver.port=18080 -Deureka.instance.ip-address=云服务器公网IP  -jar apollo-configservice-1.8.1.jar &

cd /root/apollo-adminservice-1.8.1-github/
nohup java -Xmx256m -Xms256m -Xmn128m -Dserver.port=18090 -Deureka.instance.ip-address=云服务器公网IP -jar apollo-adminservice-1.8.1.jar &
IP
cd /root/apollo-portal-1.8.1-github/
nohup java -Xmx512m -Xms512m -Xmn256m -Dserver.port=18070 -jar apollo-portal-1.8.1.jar &
当出现如下内容:nohup: ignoring input and appending output to ‘nohup.out’,点击回车即可。
执行结果:
[root@VM-0-10-centos apollo-configservice-1.8.1-github]# nohup java -Xmx256m -Xms256m -Xmn128m -Dserver.port=18080 -Deureka.instance.ip-address=云服务器公网IP  -jar apollo-configservice-1.8.1.jar &
[1] 27729
[root@VM-0-10-centos apollo-configservice-1.8.1-github]# nohup: ignoring input and appending output to ‘nohup.out’

[root@VM-0-10-centos apollo-configservice-1.8.1-github]#
[root@VM-0-10-centos apollo-configservice-1.8.1-github]# cd /root/apollo-adminservice-1.8.1-github/
[root@VM-0-10-centos apollo-adminservice-1.8.1-github]# nohup java -Xmx256m -Xms256m -Xmn128m -Dserver.port=18090 -Deureka.instance.ip-address=云服务器公网IP -jar apollo-adminservice-1.8.1.jar &
[2] 28235
[root@VM-0-10-centos apollo-adminservice-1.8.1-github]# nohup: ignoring input and appending output to ‘nohup.out’

[root@VM-0-10-centos apollo-adminservice-1.8.1-github]# cd /root/apollo-portal-1.8.1-github/
[root@VM-0-10-centos apollo-portal-1.8.1-github]# nohup java -Xmx512m -Xms512m -Xmn256m -Dserver.port=18070 -jar apollo-portal-1.8.1.jar &
[3] 28523
[root@VM-0-10-centos apollo-portal-1.8.1-github]# nohup: ignoring input and appending output to ‘nohup.out’

[root@VM-0-10-centos apollo-portal-1.8.1-github]#
注意:当在云服务器中部署apollo时,需要指定公网Ip,否则应用程序无法获取配置文件。这就是虚拟机中可以通过startup.sh进行启动,而云服务器需要通过java -jar的方式启动的原因,java -jar 方式可以指定jvm参数。
-Deureka.instance.ip-address=云服务器公网IP
其中nohup是no hangup的缩写。
(1)、nohup:不挂断地运行命令
语法:nohup Command [ Arg … ] [ & ]
无论是否将 nohup 命令的输出重定向到终端,输出都将附加到当前目录的 nohup.out 文件中。
如果当前目录的 nohup.out 文件不可写,输出重定向到 $HOME/nohup.out 文件中。
如果没有文件能创建或打开以用于追加,那么 Command 参数指定的命令不可调用。
一般两个一起用
nohup command &
configService启动成功后,输入命令查看日志
tail -f nohup.out
结果如下:
2022-06-15 14:06:55.645  INFO 18112 --- [freshExecutor-0] com.netflix.discovery.DiscoveryClient    : Application is null : false
2022-06-15 14:06:55.645  INFO 18112 --- [freshExecutor-0] com.netflix.discovery.DiscoveryClient    : Registered Applications size is zero : true
2022-06-15 14:06:55.645  INFO 18112 --- [freshExecutor-0] com.netflix.discovery.DiscoveryClient    : Application version is -1: true
2022-06-15 14:06:55.645  INFO 18112 --- [freshExecutor-0] com.netflix.discovery.DiscoveryClient    : Getting all instance registry info from the eureka server
2022-06-15 14:06:55.674  INFO 18112 --- [freshExecutor-0] com.netflix.discovery.DiscoveryClient    : The response status is 200
2022-06-15 14:06:55.898  INFO 18112 --- [      Thread-13] c.n.e.registry.AbstractInstanceRegistry  : Registered instance APOLLO-CONFIGSERVICE/172.17.0.10:apollo-configservice:18080 with status UP (replication=true)
2022-06-15 14:06:55.898  INFO 18112 --- [      Thread-13] c.n.e.r.PeerAwareInstanceRegistryImpl    : Got 1 instances from neighboring DS node
2022-06-15 14:06:55.898  INFO 18112 --- [      Thread-13] c.n.e.r.PeerAwareInstanceRegistryImpl    : Renew threshold is: 1
2022-06-15 14:06:55.898  INFO 18112 --- [      Thread-13] c.n.e.r.PeerAwareInstanceRegistryImpl    : Changing status to UP
2022-06-15 14:06:55.905  INFO 18112 --- [      Thread-13] e.s.EurekaServerInitializerConfiguration : Started Eureka Server
2022-06-15 14:07:25.548  INFO 18112 --- [trap-executor-0] c.n.d.s.r.aws.ConfigClusterResolver      : Resolving eureka endpoints via configuration
adminservice启动后,查看日志
tail -f nohup.out
结果如下:
2022-06-15 14:09:46.630  INFO 18656 --- [           main] c.n.discovery.InstanceInfoReplicator     : InstanceInfoReplicator onDemand update allowed rate per min is 4
2022-06-15 14:09:46.635  INFO 18656 --- [           main] com.netflix.discovery.DiscoveryClient    : Discovery Client initialized at timestamp 1655273386634 with initial instances count: 1
2022-06-15 14:09:46.644  INFO 18656 --- [           main] o.s.c.n.e.s.EurekaServiceRegistry        : Registering application APOLLO-ADMINSERVICE with eureka with status UP
2022-06-15 14:09:46.644  INFO 18656 --- [           main] com.netflix.discovery.DiscoveryClient    : Saw local status change event StatusChangeEvent [timestamp=1655273386644, current=UP, previous=STARTING]
2022-06-15 14:09:46.645  WARN 18656 --- [           main] c.n.discovery.InstanceInfoReplicator     : Ignoring onDemand update due to rate limiter
2022-06-15 14:09:46.681  INFO 18656 --- [           main] o.s.b.w.embedded.tomcat.TomcatWebServer  : Tomcat started on port(s): 18090 (http) with context path ''
2022-06-15 14:09:46.682  INFO 18656 --- [           main] .s.c.n.e.s.EurekaAutoServiceRegistration : Updating port to 18090
2022-06-15 14:09:46.709  INFO 18656 --- [           main] c.c.f.a.a.AdminServiceApplication        : Started AdminServiceApplication in 11.695 seconds (JVM running for 12.81)
2022-06-15 14:09:46.807  INFO 18656 --- [nfoReplicator-0] com.netflix.discovery.DiscoveryClient    : DiscoveryClient_APOLLO-ADMINSERVICE/172.17.0.10:apollo-adminservice:18090: registering service...
2022-06-15 14:09:46.867  INFO 18656 --- [nfoReplicator-0] com.netflix.discovery.DiscoveryClient    : DiscoveryClient_APOLLO-ADMINSERVICE/172.17.0.10:apollo-adminservice:18090 - registration status: 204
2022-06-15 14:10:46.384  INFO 18656 --- [trap-executor-0] c.n.d.s.r.aws.ConfigClusterResolver      : Resolving eureka endpoints via configuration
portal启动后,查看日志:
tail -f nohup.out
结果:
2022-06-15 14:11:53.927  INFO 19009 --- [           main] f.a.p.e.DatabasePortalMetaServerProvider : Loaded meta server addresses from portal config: {}
2022-06-15 14:11:53.929  INFO 19009 --- [           main] .f.a.p.e.DefaultPortalMetaServerProvider : Loaded meta server addresses from system property, os environment and properties file: {DEV=http://localhost:18080, LOCAL=http://localhost:18080, LPT=${lpt_meta}}
2022-06-15 14:11:54.588  WARN 19009 --- [           main] JpaBaseConfiguration$JpaWebConfiguration : spring.jpa.open-in-view is enabled by default. Therefore, database queries may be performed during view rendering. Explicitly configure spring.jpa.open-in-view to disable this warning
2022-06-15 14:11:54.663  INFO 19009 --- [erviceLocator-1] c.c.f.a.p.e.PortalMetaDomainService      : Located meta server address [http://localhost:18080] for env [DEV]
2022-06-15 14:11:55.025  INFO 19009 --- [           main] o.s.s.web.DefaultSecurityFilterChain     : Will secure any request with [org.springframework.security.web.context.request.async.WebAsyncManagerIntegrationFilter@344426bf, org.springframework.security.web.context.SecurityContextPersistenceFilter@4441d567, org.springframework.security.web.header.HeaderWriterFilter@616b241a, org.springframework.security.web.authentication.logout.LogoutFilter@79d743e6, org.springframework.security.web.authentication.UsernamePasswordAuthenticationFilter@17b64941, org.springframework.security.web.authentication.www.BasicAuthenticationFilter@26a4551a, org.springframework.security.web.savedrequest.RequestCacheAwareFilter@62b969c4, org.springframework.security.web.servletapi.SecurityContextHolderAwareRequestFilter@47ec7422, org.springframework.security.web.authentication.AnonymousAuthenticationFilter@5411dd90, org.springframework.security.web.session.SessionManagementFilter@1f387978, org.springframework.security.web.access.ExceptionTranslationFilter@2116b68b, org.springframework.security.web.access.intercept.FilterSecurityInterceptor@4992613f]
2022-06-15 14:11:55.114  INFO 19009 --- [           main] o.s.s.concurrent.ThreadPoolTaskExecutor  : Initializing ExecutorService 'applicationTaskExecutor'
2022-06-15 14:11:55.246  INFO 19009 --- [           main] o.s.b.a.w.s.WelcomePageHandlerMapping    : Adding welcome page: class path resource [static/index.html]
2022-06-15 14:11:55.698  INFO 19009 --- [           main] o.s.b.a.e.web.EndpointLinksResolver      : Exposing 4 endpoint(s) beneath base path ''
2022-06-15 14:11:55.789  INFO 19009 --- [           main] o.s.b.w.embedded.tomcat.TomcatWebServer  : Tomcat started on port(s): 18070 (http) with context path ''
2022-06-15 14:11:55.814  INFO 19009 --- [           main] c.c.f.apollo.portal.PortalApplication    : Started PortalApplication in 9.382 seconds (JVM running for 10.374)
4)、启动configservice服务后,浏览器输入http://192.168.21.136:18080/ 就可以看到信息
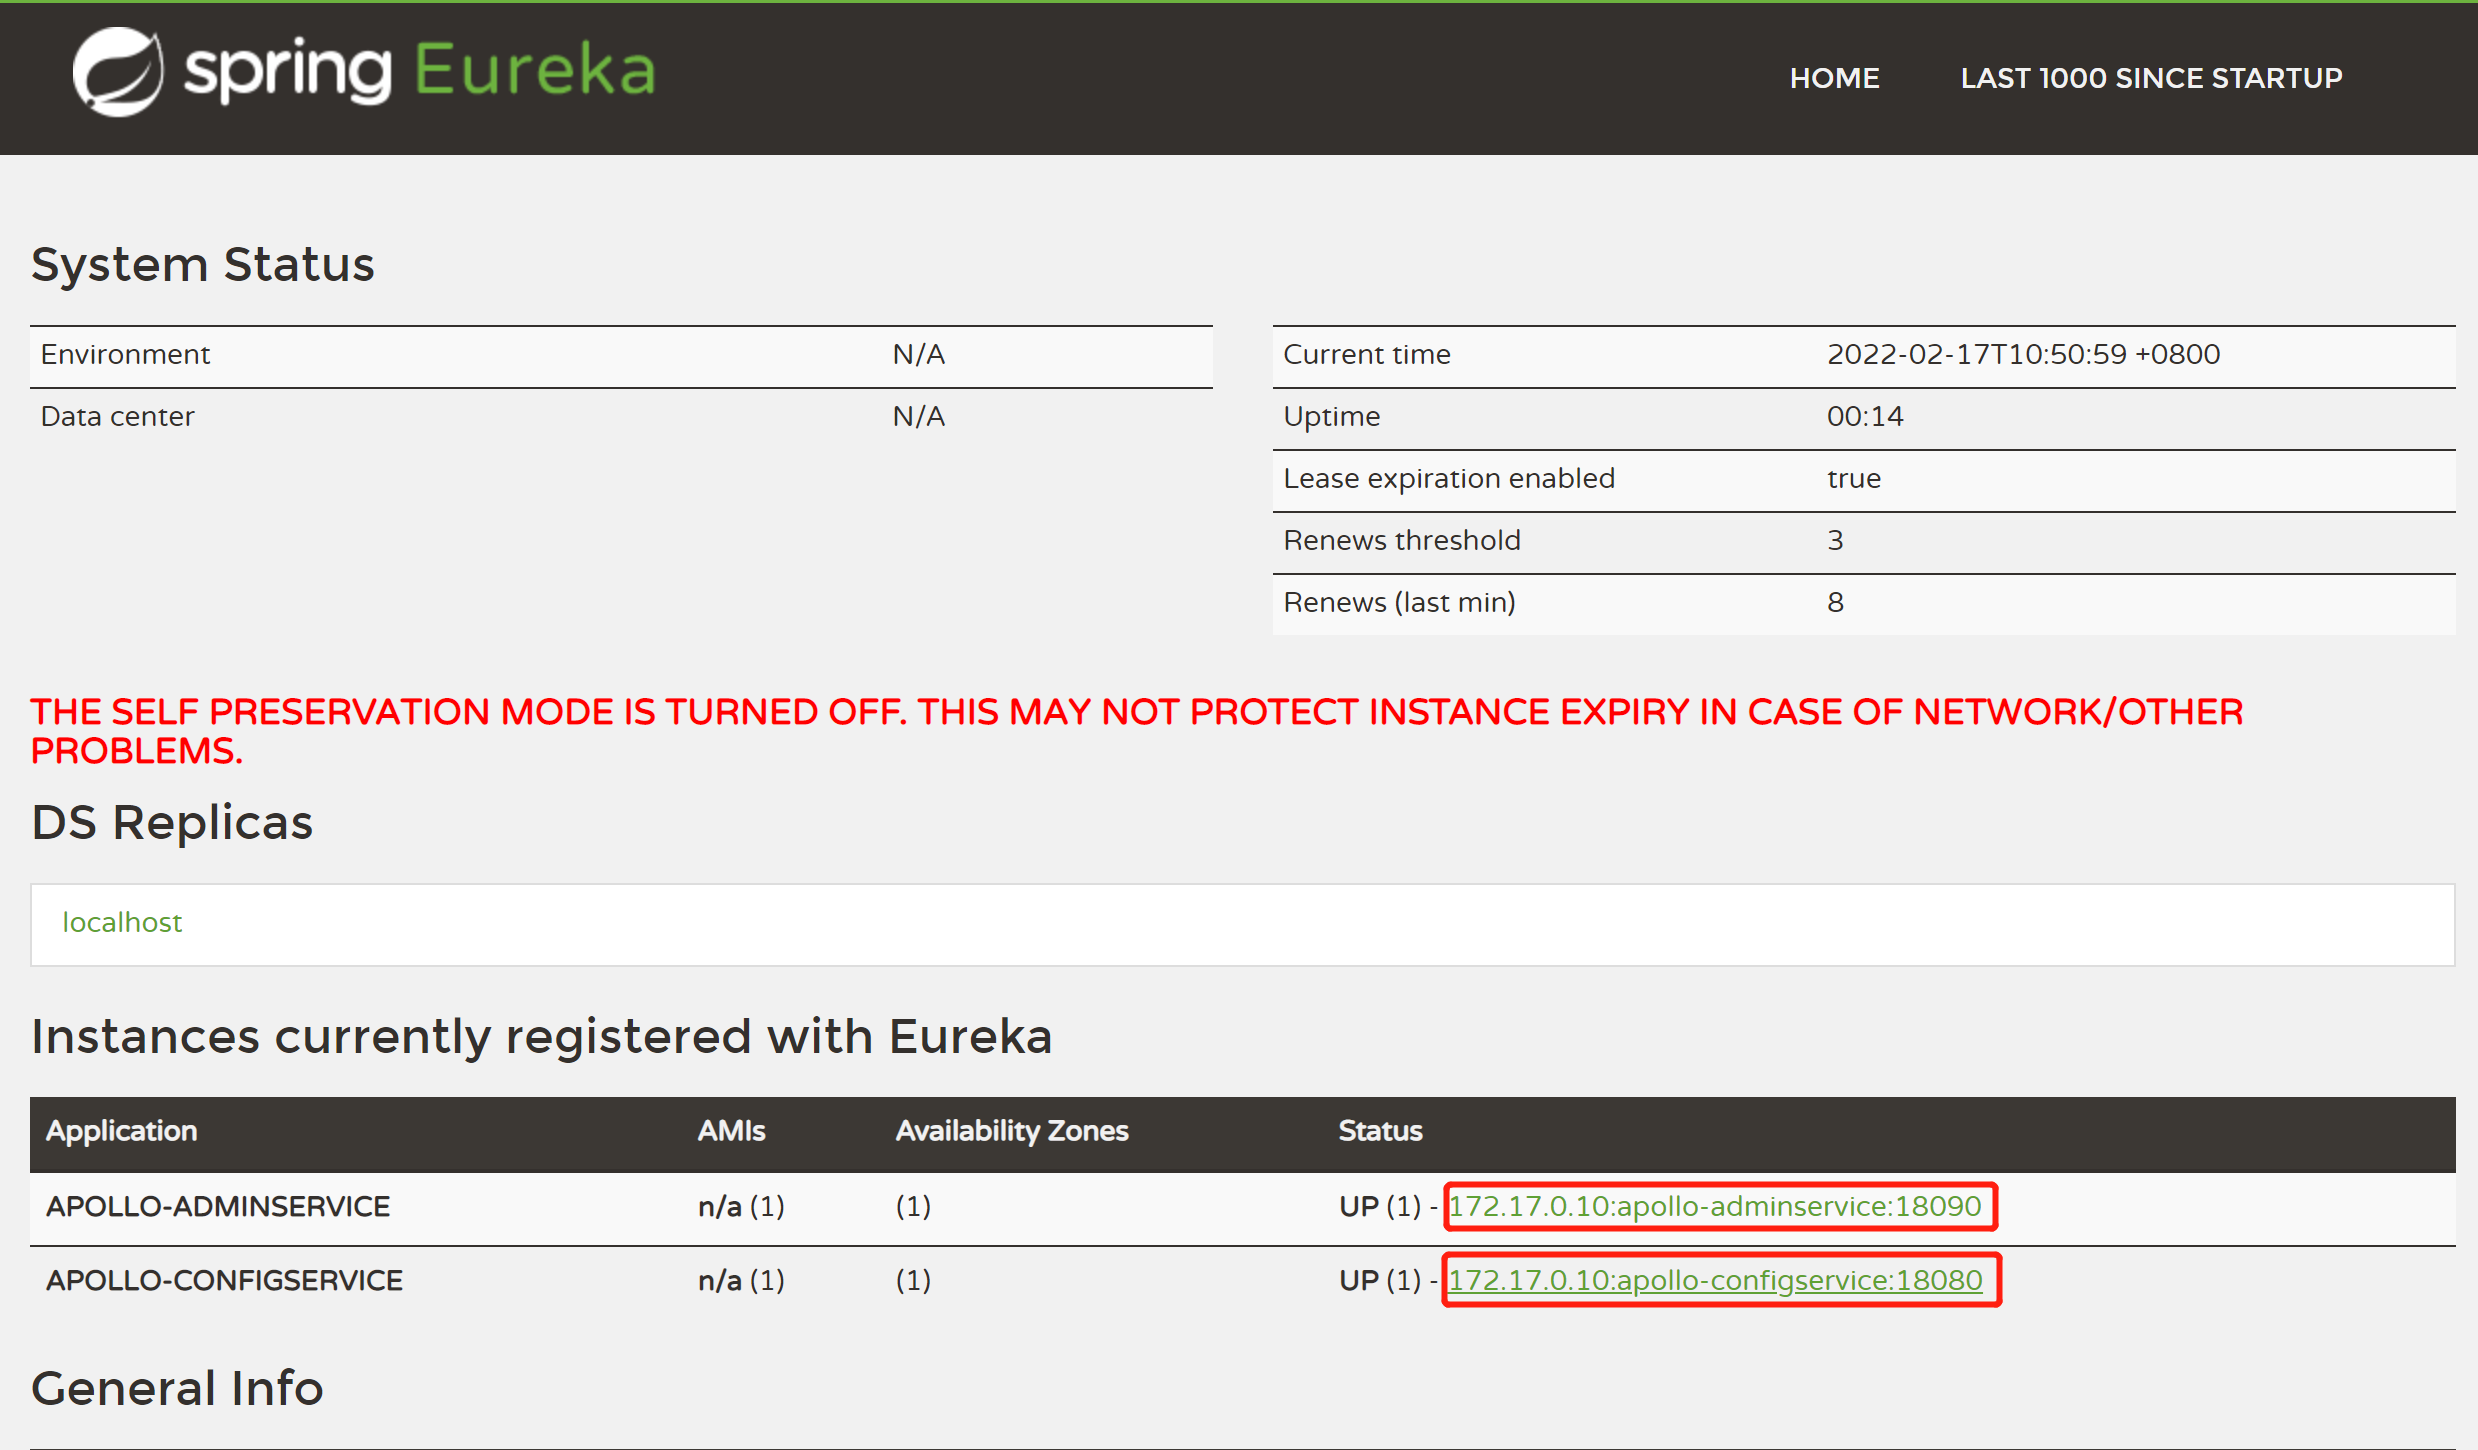
如果启动成功,那么点击上图中红框内的内容,会显示如下内容,则说明config或admin启动成功。

5)、登录Apollo
访问http://192.168.21.136:18070/,这里的ip是虚拟机的ip。看到apollo的登录页面,说明服务均部署成功。
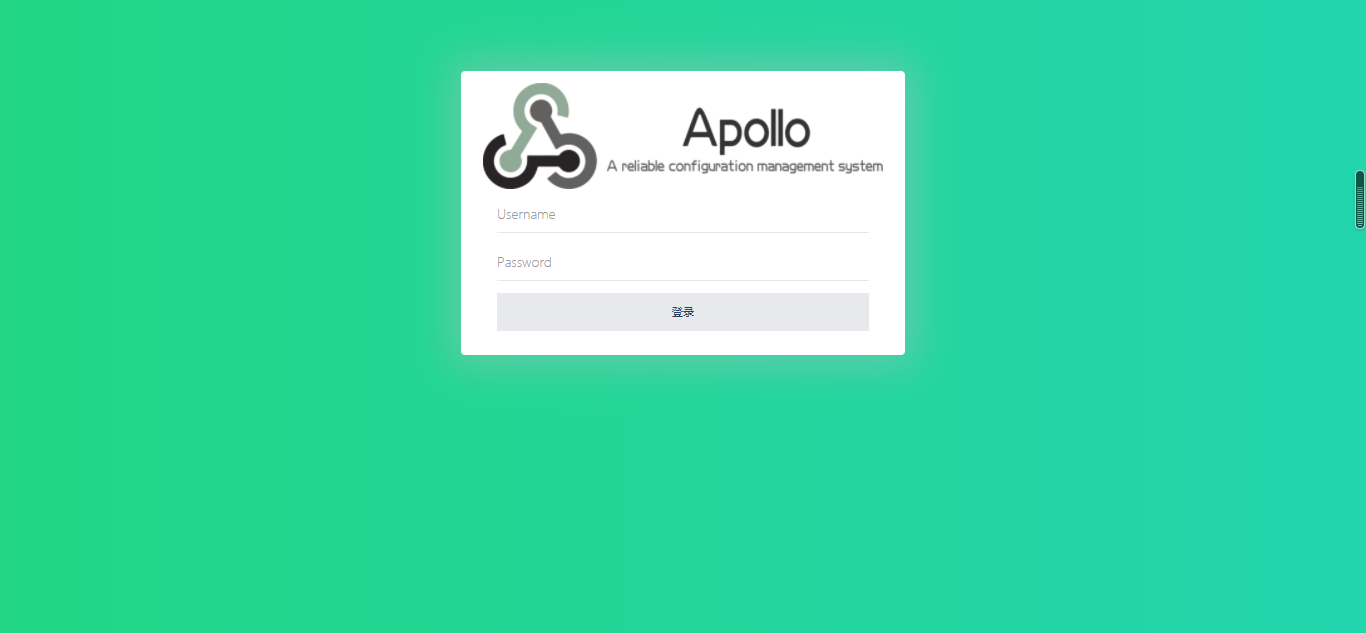
用户默认密码是apollo/admin,用户名和密码存储在apolloportaldb数据库的Users表中,可修改。
登录成功后进入如下界面:

Apollo在docker中部署和在kubernetes中部署这里省略,可以参考https://www.cnblogs.com/zys2019/p/14798944.html
四、使用Apollo
点击创建项目,进入如下页面
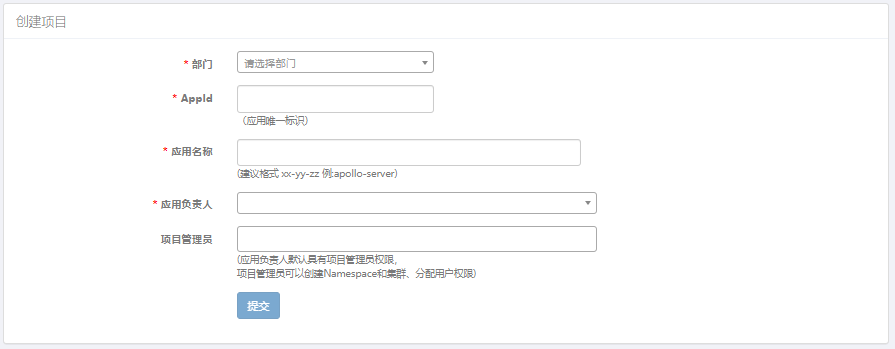
输入如下内容后点击提交
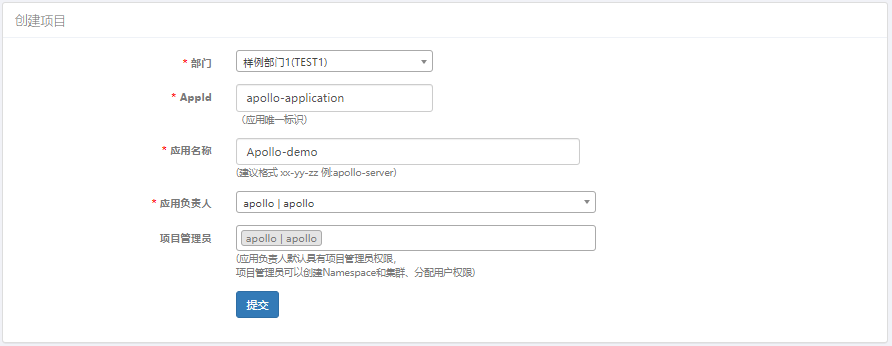
部门:选择应用所在的部门。
应用AppId:用来标识应用身份的唯一id,格式为string
应用名称:应用名,仅用于界面展示。
应用负责人:选择的人默认会成为该项目的管理员,具备项目权限管理、集群创建、Namespace创建等权限。
进入如下页面:
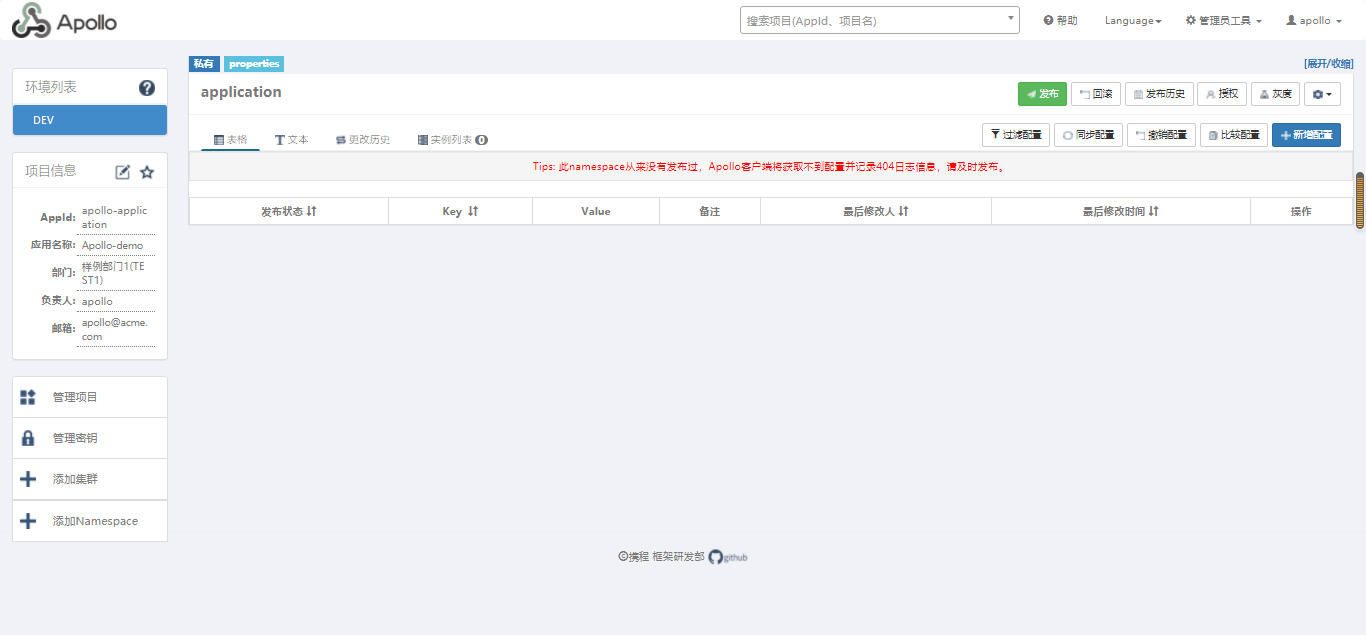
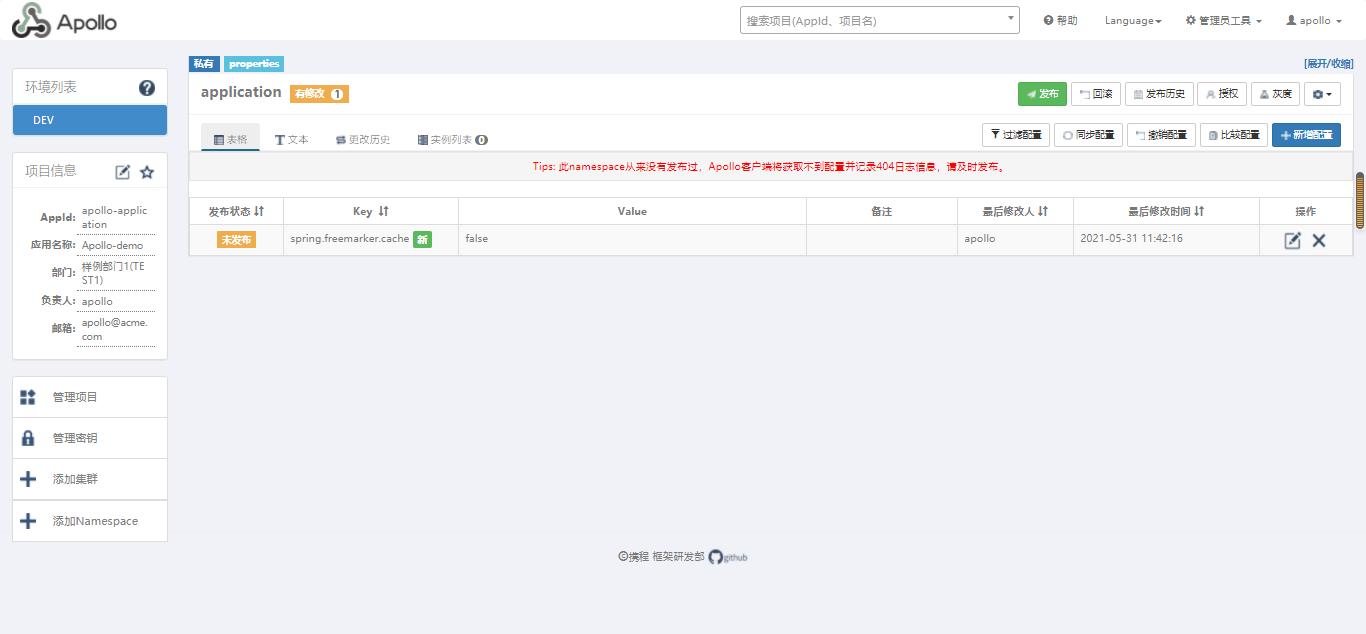
点击新增配置按钮,配置需要管理的 application.properties 中的属性
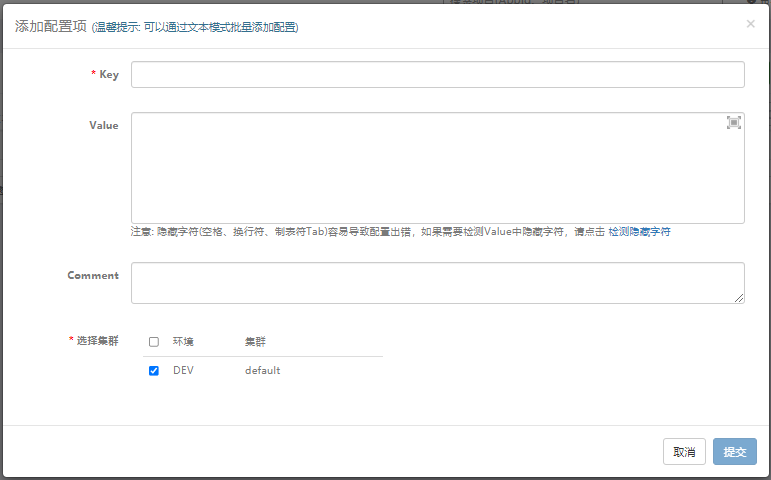
在弹框中输入key和value,这里以spring.freemarker.cache=false为例,点击提交
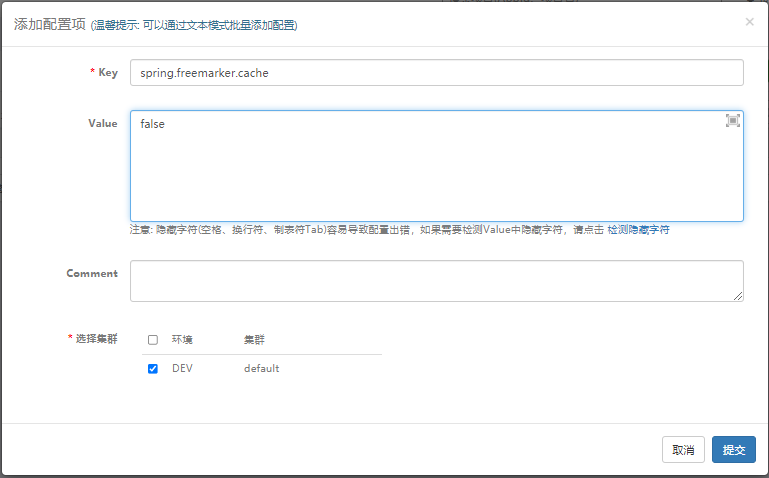
提交后列表会展示出来:
发布配置
选择发布按钮,发布配置,在发布的弹框中选择发布按钮即可
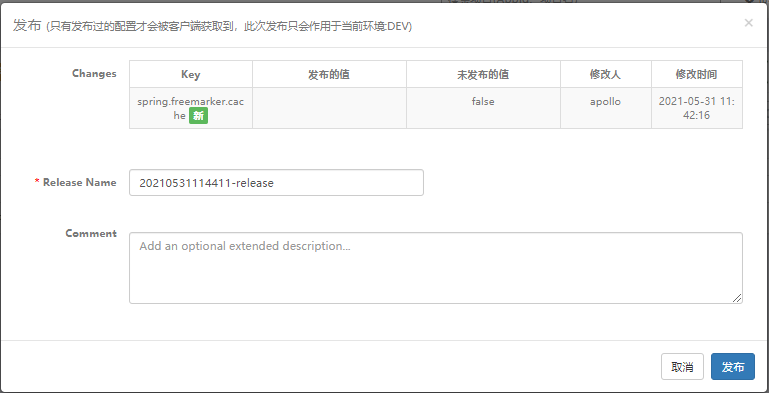
发布后界面就会显示已发布

添加Namespace
点击“添加Namespace”,进入如下界面
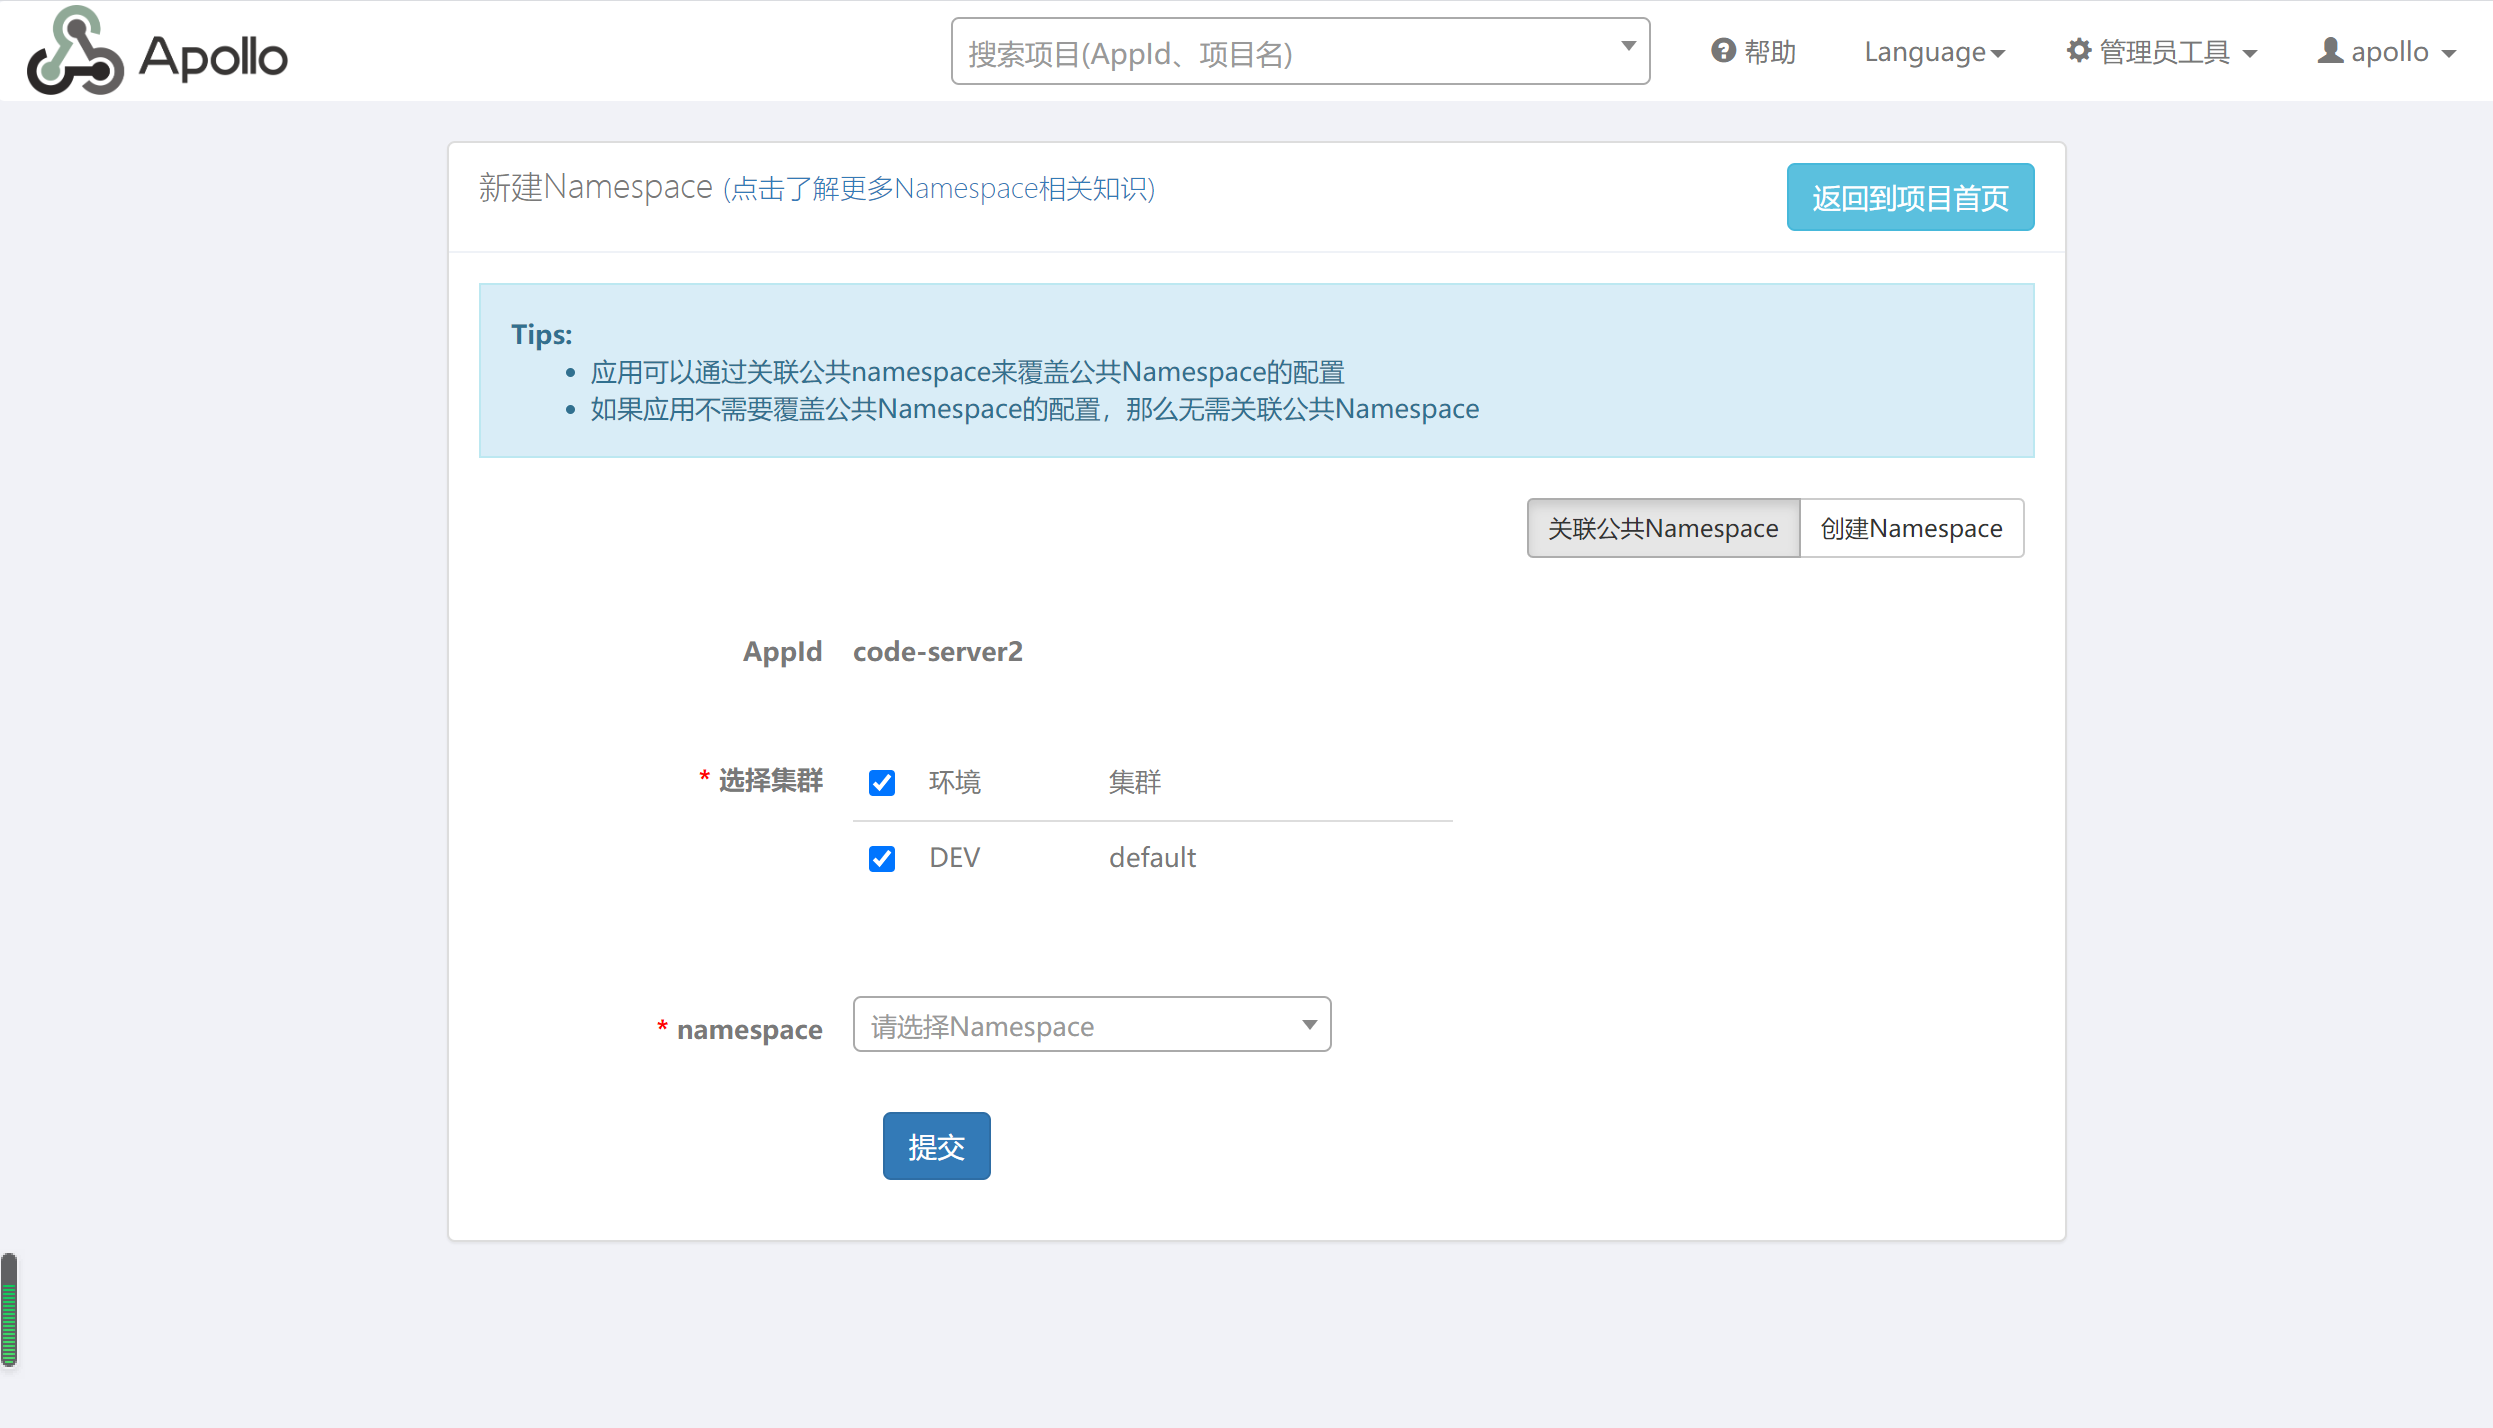
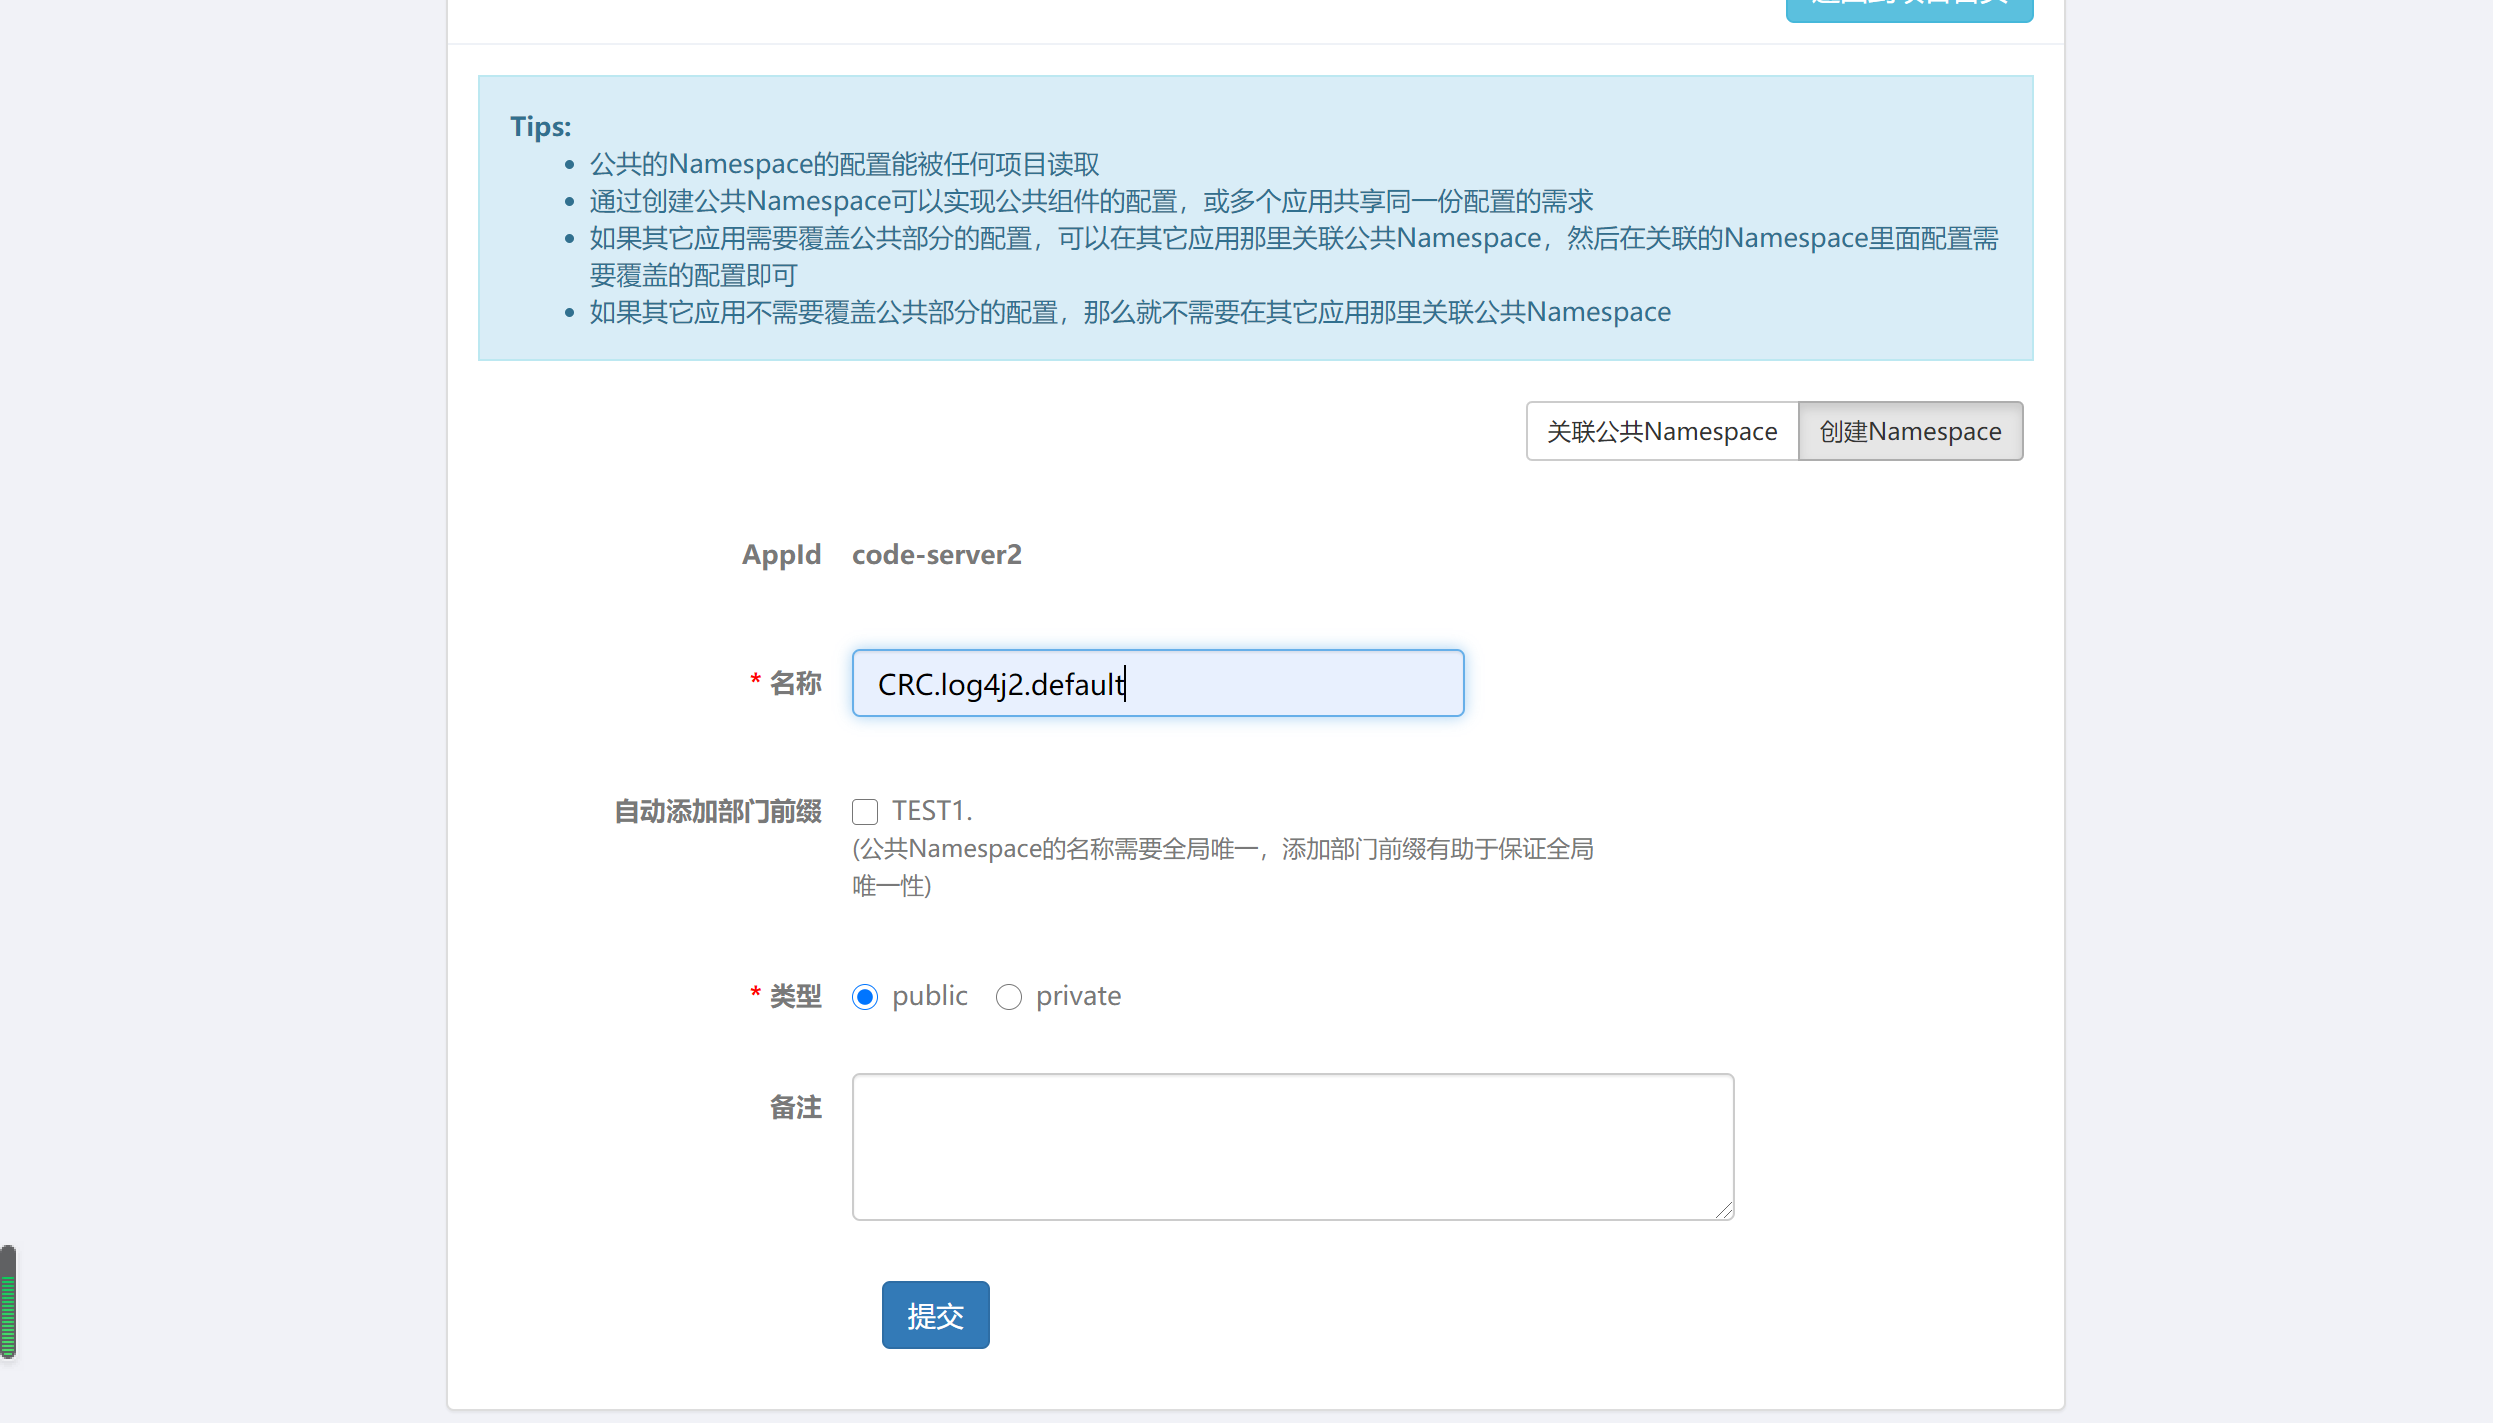
点击“创建Namespace”,进入如下界面
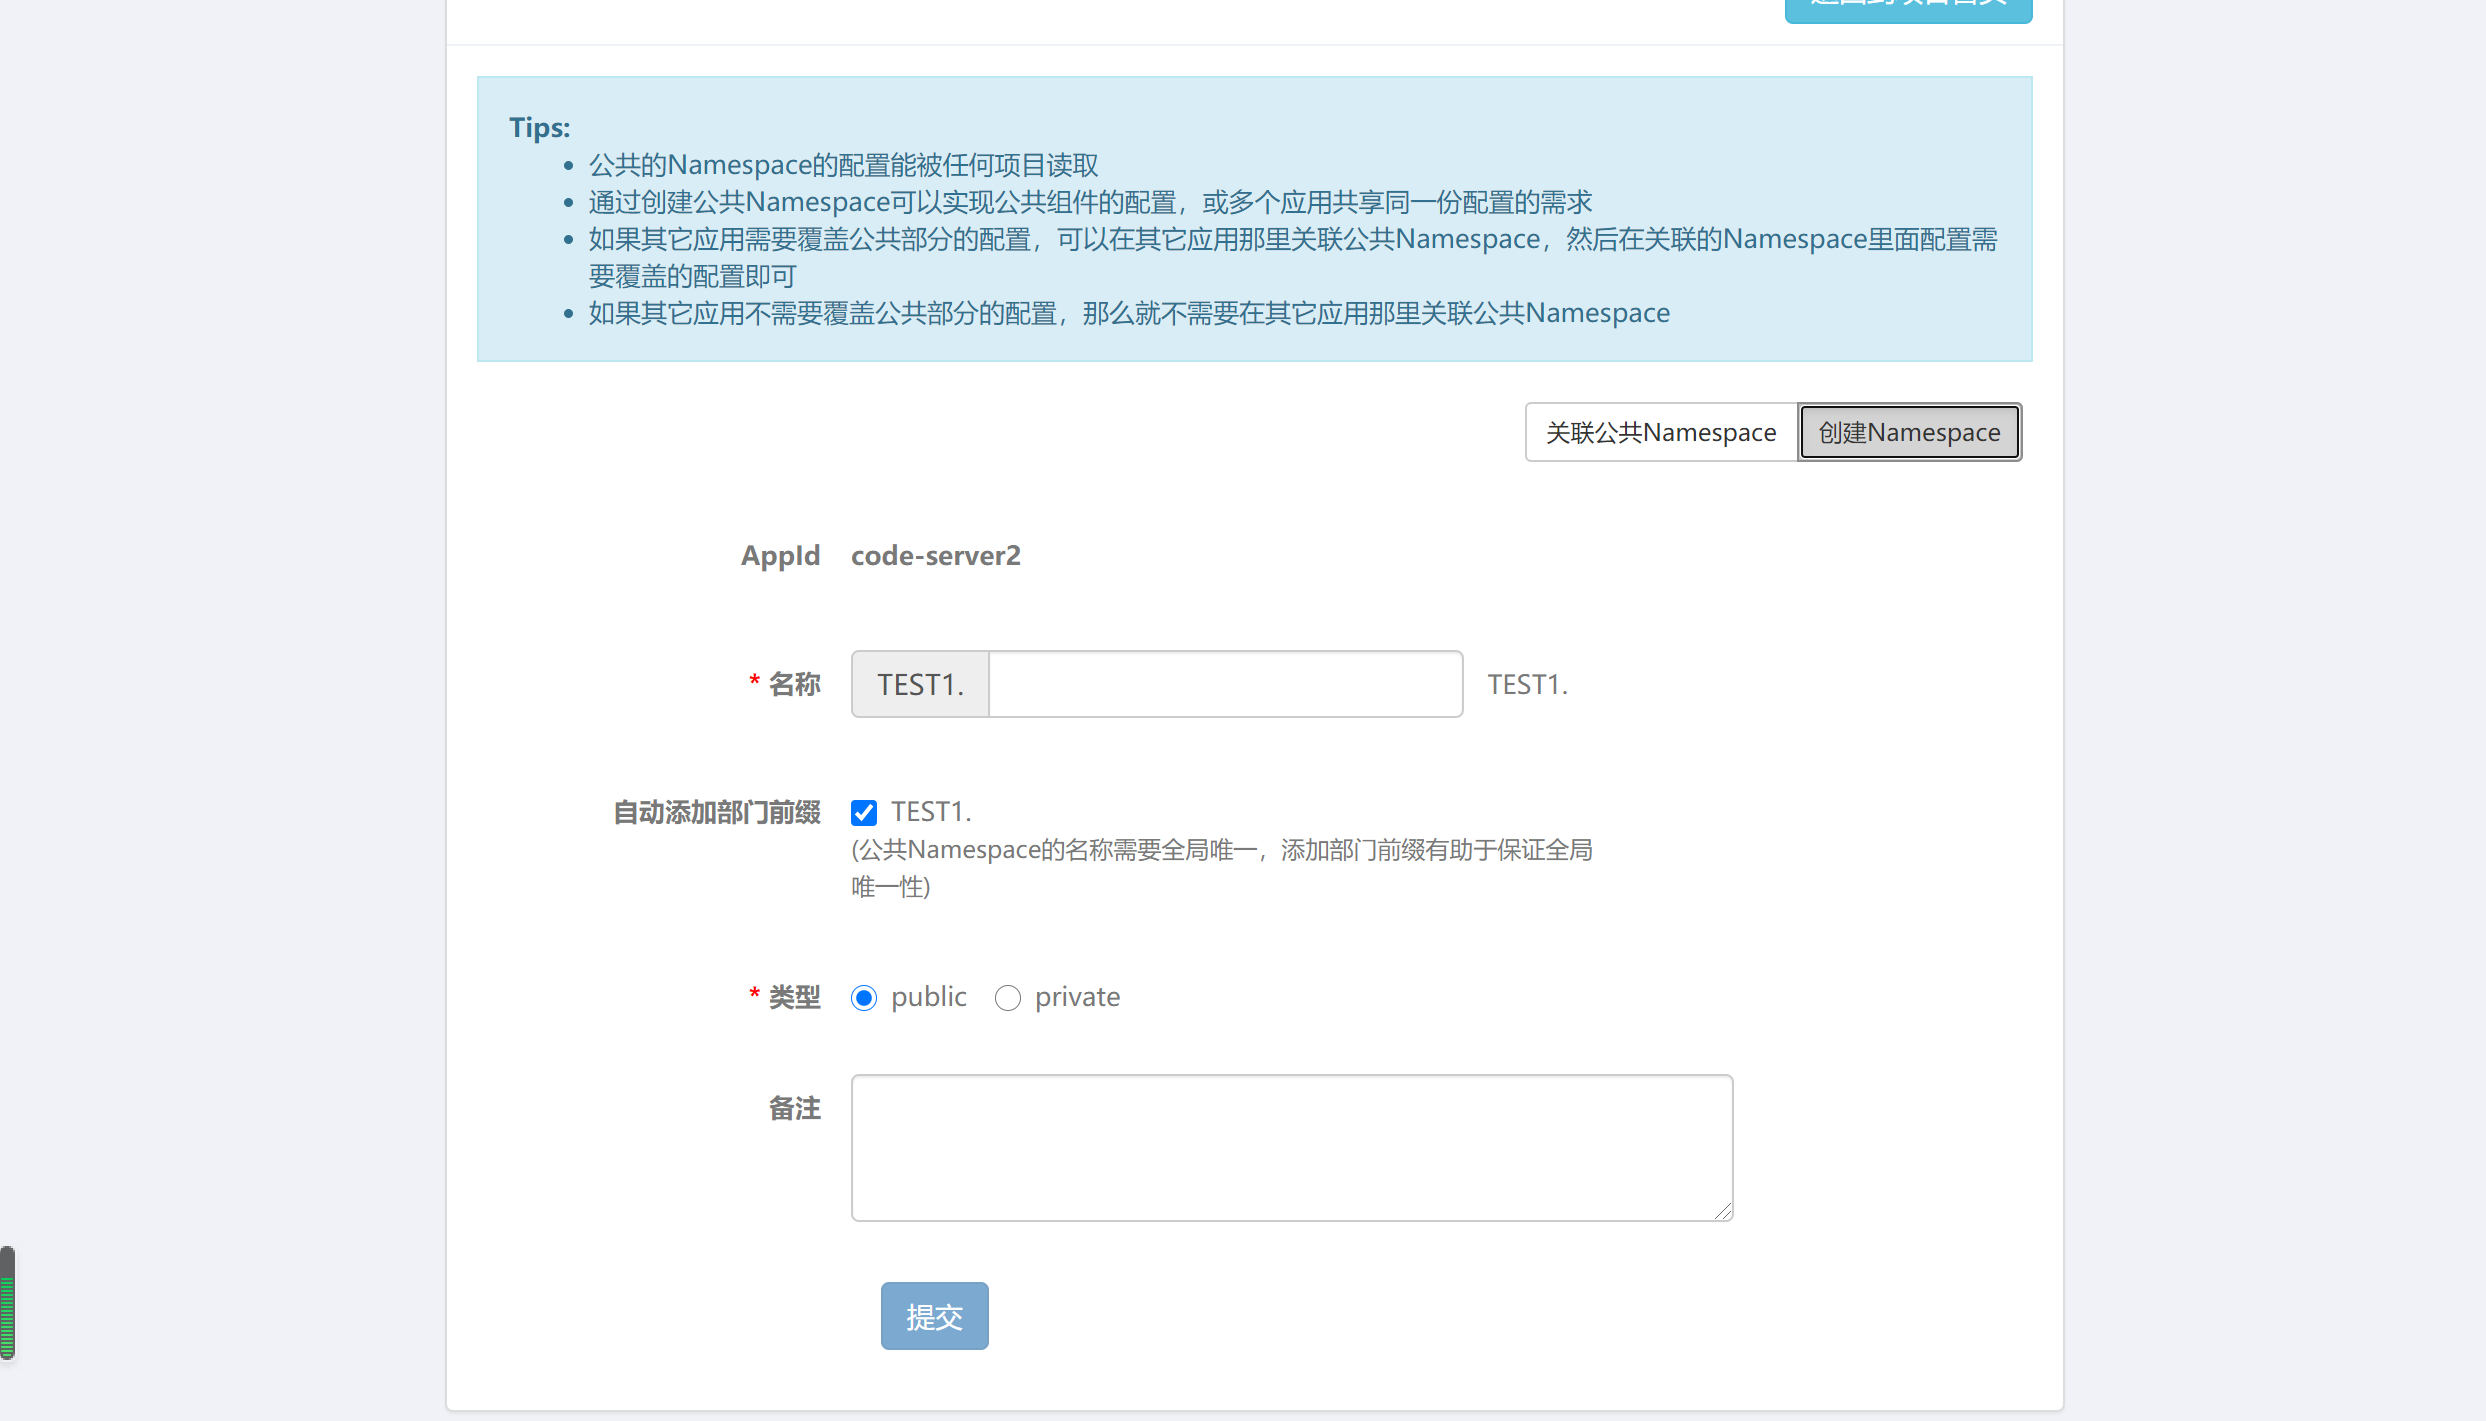
输入名称,点击提交,如下所示:
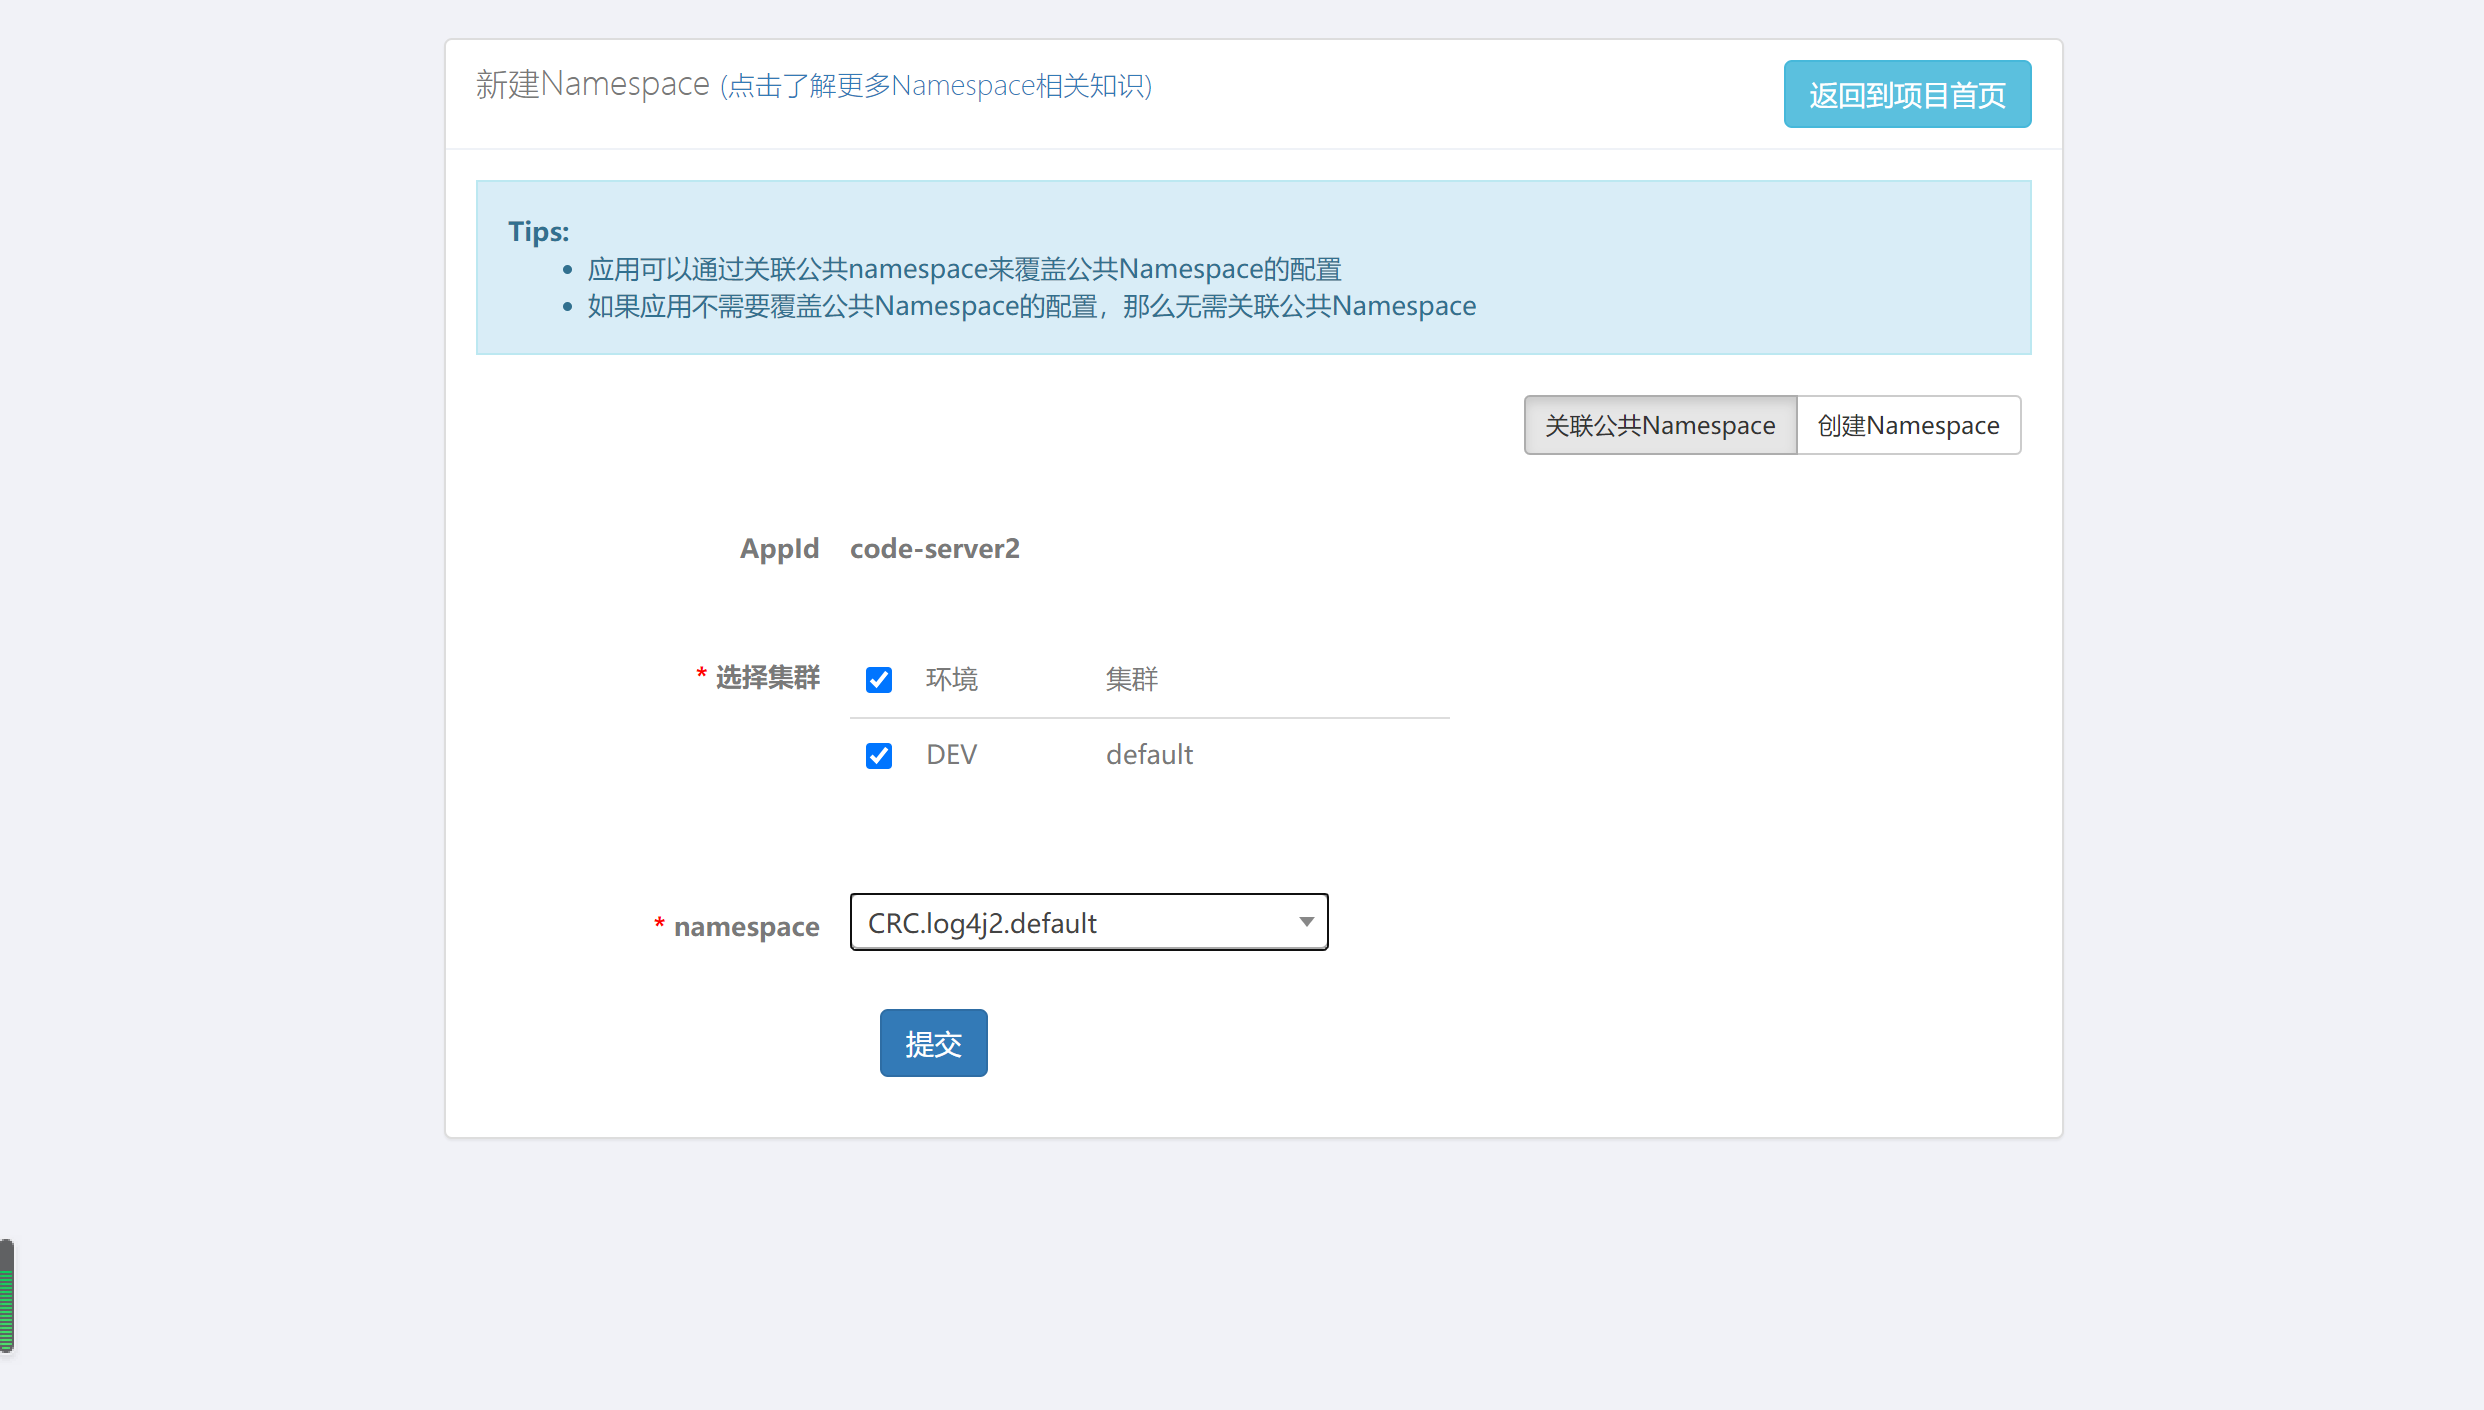
关联公共Namespace
五、项目使用Apollo
项目地址:F:\prism\svn\springboot
1、添加Apollo依赖
<dependency>
            <groupId>com.ctrip.framework.apollo</groupId>
            <artifactId>apollo-client</artifactId>
            <version>1.3.0</version>
        </dependency>
2、在配置文件application.properties配置apollo的相关信息
#阿波罗配置
app.id = apollo-application
apollo.meta=http://192.168.21.136:18080
apollo.bootstrap.enabled = true
apollo.bootstrap.eagerLoad.enabled=true
app.id:AppId是应用的身份信息,是配置中心获取配置的一个重要信息。这个必须和配置中心保持一致
apollo.meta:指定config服务地址
apollo.bootstrap.enabled:在应用启动阶段,向Spring容器注入被托管的application.properties文件的配置信息。
apollo.bootstrap.eagerLoad.enabled:将Apollo配置加载提到初始化日志系统之前。
3、在启动类上添加注解@EnableApolloConfig
@SpringBootApplication
@EnableApolloConfig
public class MySpringBootApplication extends SpringBootServletInitializer {
    public static void main(String[] args) {
        SpringApplication.run(MySpringBootApplication.class);

    }
    @Override
    protected SpringApplicationBuilder configure(SpringApplicationBuilder builder) {
        return builder.sources(this.getClass());
    }
}
4、编写一个Controller
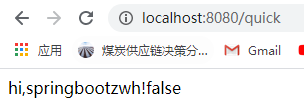
@Controller
public class QuickController {
    @Value("${spring.freemarker.cache}")
    private Boolean cache;
    @RequestMapping("/quick")
    @ResponseBody
    public String quick(){
        return "hi,springbootzwh!"+cache;
    }
}
5、启动项目,访问http://localhost:8080/quick,结果如下:
注意:项目启动后,在C:\opt\data\apollo-application-test\config-cache目录下生成一个文件,则说明apollo获取到配置文件了。
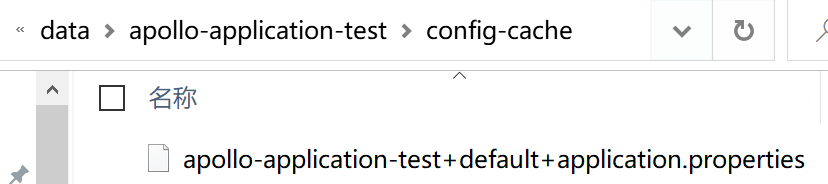
否则获取配置文件失败。
6、在配置中心修改spring.freemarker.cache的值,将其改为true并发布
六、使用本地电脑的mysql
1、修改数据库连接信息
# DataSource
spring.datasource.url = jdbc:mysql://192.168.21.1:3306/ApolloPortalDB?characterEncoding=utf8&serverTimezone=CTT
spring.datasource.username = root
spring.datasource.password = 123456
注意:
1)、本地电脑的ip的网段要与虚拟机的网段保持一致。
2)、由于数据库驱动是com.mysql.cj.jdbc.Driver,故要添加时区。
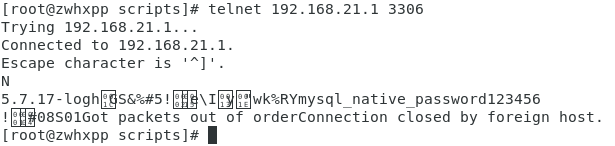
3)、先关闭防火墙才能ping 192.168.21.1通。telnet查某个ip的某个端口是否打开:telnet 192.168.21.1 3306,安装Telnet的命令为:yum install -y telnet
2、如果报错:java.sql.SQLException: Access denied for user 'root'@'192.168.21.139' (using password: YES),则要创建远程登陆用户并授权
1)、在本地电脑打开cmd,输入命令mysql -u root -p,输入密码123456,输入命令:
GRANT ALL PRIVILEGES ON *.* TO 'root'@'192.168.21.139' IDENTIFIED BY '123456' WITH GRANT OPTION;
第一个*表示本地数据库的数据库名 *.*号表示而本地的所有数据库都授权 test.*表示授权test数据库里面的所有表。root是用户名,123456表示root对应的密码。192.168.21.136表示host主机IP,这里的%表示正常的IP地址都可以
2)、执行 flush privileges;
3)、执行exit
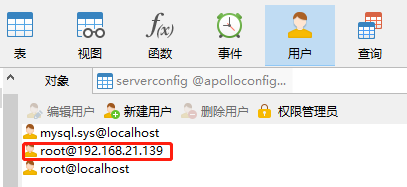
此时,Navicat中会多出一个用户
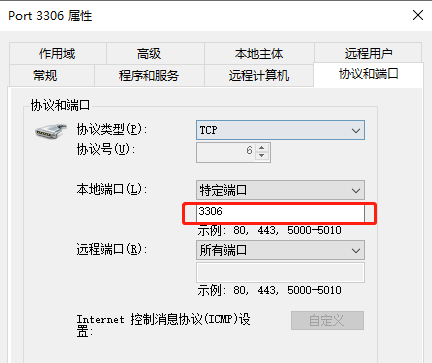
3、本地防火墙已经开启了3306端口
控制面板----系统和安全----windows Defender 防火墙----高级设置----点击左边的“入站规则”----在列表中找到“port 3306”