
《vue-element实现图片上传裁剪功能》
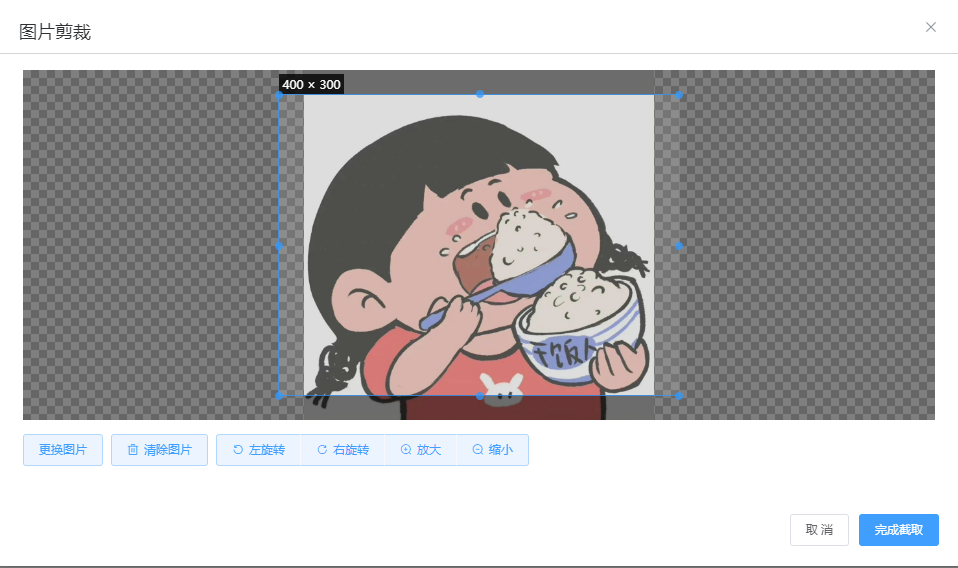
效果图
1.安装插件
npm install vue-cropper // npm 安装yarn add vue-cropper // yarn 安装
2.引用
// 全局引用 main.js
import VueCropper from 'vue-cropper'
Vue.use(VueCropper)
// 局部引用
import VueCropper from 'vue-cropper'
components: {
VueCropper
},
3. vue界面中
3-1.上传按钮和裁剪完成后的图片预览
<el-form-item label="产品图片:" label-width="100px">
<el-upload
class="avatar-uploader"
accept=".png,.jpeg,.jpg,.JPG,.JPEG,"
action=""
:auto-upload="false"
:show-file-list="false"
:on-change='handleChangeUpload'>
<el-button size="small" type="primary">选择图片</el-button>
</el-upload>
</el-form-item>
<el-form-item label="图片预览:" class="box" label-width="100px">
<div class="crop-img-box">
<img v-else :src="form.imgFile" />
</div>
</el-form-item>
3-2.设置一个弹出层,放剪裁图片的cropper
<el-dialog title="图片剪裁" :visible.sync="imgdialogVisible" class="crop-dialog" append-to-body>
<div class="cropper-content">
<div class="cropper" style="text-align:center">
<vueCropper
ref="cropper"
:img="option.img"
:outputSize="option.size"
:outputType="option.outputType"
:info="true"
:full="option.full"
:canMove="option.canMove"
:canMoveBox="option.canMoveBox"
:original="option.original"
:autoCrop="option.autoCrop"
:fixed="option.fixed"
:fixedNumber="option.fixedNumber"
:centerBox="option.centerBox"
:infoTrue="option.infoTrue"
:fixedBox="option.fixedBox"
:autoCropWidth="option.autoCropWidth"
:autoCropHeight="option.autoCropHeight"
@realTime="getCropImg"
/>
</div>
</div>
<div class="action-box">
<el-upload class="upload-demo"
style="margin-right:8px"
action=""
:auto-upload="false"
:show-file-list="false"
:on-change='handleChangeUpload'>
<el-button type="primary" plain>更换图片</el-button>
</el-upload>
<el-button style="margin-right:8px" type="primary" icon="el-icon-delete" plain @click="clearImgHandle">清除图片</el-button>
<el-button-group>
<el-button type="primary" icon="el-icon-refresh-left" plain @click="rotateLeftHandle">左旋转</el-button>
<el-button type="primary" icon="el-icon-refresh-right" plain @click="rotateRightHandle">右旋转</el-button>
<el-button type="primary" icon="el-icon-zoom-in" plain @click="changeScaleHandle(1)">放大</el-button>
<el-button type="primary" icon="el-icon-zoom-out" plain @click="changeScaleHandle(-1)">缩小</el-button>
</el-button-group>
</div>
<div slot="footer" class="dialog-footer">
<el-button @click="imgdialogVisible = false">取 消</el-button>
<el-button type="primary" @click="finish" :loading="loading">完成截取</el-button>
</div>
</el-dialog>
3-3.裁剪框的样式
.cropper-content {
.cropper {
width: auto;
height: 350px;
}
}
4.js方法
注:option是剪裁插件的属性配置,具体更多含义查看官网介绍
<script>
export default {
data() {
return {
form:{
imgFile:"",
},
isPreview: false,
imgdialogVisible: false,
previewImg: '', // 预览图片地址
// 裁剪组件的基础配置option
option: {
img: 'https://pic1.zhimg.com/80/v2-366c0aeae2b4050fa2fcbfc09c74aad4_720w.jpg', // 裁剪图片的地址
info: true, // 裁剪框的大小信息
outputSize: 1, // 裁剪生成图片的质量
outputType: 'png', // 裁剪生成图片的格式
// outputType:'blob',
canScale: true, // 图片是否允许滚轮缩放
autoCrop: true, // 是否默认生成截图框
canMoveBox: true, // 截图框能否拖动
autoCropWidth: 400, // 默认生成截图框宽度
autoCropHeight: 300, // 默认生成截图框高度
fixedBox: false, // 固定截图框大小 不允许改变
fixed: false, // 是否开启截图框宽高固定比例
fixedNumber: [3,2], // 截图框的宽高比例
full: false, // 是否输出原图比例的截图
original: false, // 上传图片按照原始比例渲染
centerBox: false, // 截图框是否被限制在图片里面
infoTrue: true // true 为展示真实输出图片宽高 false 展示看到的截图框宽高
},
// 防止重复提交
loading: false,
};
},
methods: {
// 上传按钮 限制图片大小和类型
handleChangeUpload(file) {
this.$nextTick(async () => {
// base64方式
// this.option.img = await fileByBase64(file.raw)
this.option.img = URL.createObjectURL(file.raw)
this.loading = false
this.imgdialogVisible = true;
})
},
//更换图片
changeScaleHandle(num) {
num = num || 1;
this.$refs.cropper.changeScale(num);
},
//左右旋转
rotateLeftHandle() {
this.$refs.cropper.rotateLeft();
},
rotateRightHandle() {
this.$refs.cropper.rotateRight();
},
//清除图片
clearImgHandle() {
this.option.img = '';
this.form.imgFile= "";
},
//这里是点击确定之后预览图片
getCropImg () {
if (this.option.outputType === "blob") {
this.$refs.cropper.getCropBlob(data => {
// var img = window.URL.createObjectURL(data);
var img = data;
this.form.imgFile = img;
});
} else {
this.$refs.cropper.getCropData(data => {
this.form.imgFile = data;
this.form.imgFile = this.base64ToFile(data, 'docpic.jpg')
});
}
},
//完成裁剪时的确定按钮,
finish() {
// 获取截图的 blob 数据
this.$refs.cropper.getCropBlob((blob) => {
this.loading = true
this.imgdialogVisible = false
this.previewImg = URL.createObjectURL(blob)
this.isPreview = true
// console.log("获取blob:",this.previewImg)
})
// 获取截图的 base64 数据
this.$refs.cropper.getCropData(data => {
// console.log("获取 base64 数据:", data)
})
},
//将base64格式转换为文件格式,因为我这向后台提交数据时需要文件格式
base64ToFile(urlData, fileName) {
let arr = urlData.split(',');
let mime = arr[0].match(/:(.*?);/)[1];
let bytes = atob(arr[1]); // 解码base64
let n = bytes.length
let ia = new Uint8Array(n);
while (n--) {
ia[n] = bytes.charCodeAt(n);
}
return new File([ia], fileName, { type: mime });
},
},
};
</script>
