


vuejs3.0 从入门到精通——网页图形绘制:登录页面安全升级,JS动态生成图片验证码功能
网页图形绘制:登录页面安全升级,JS动态生成图片验证码功能
一、实验目标
- 掌握 Canvas 的基本用法。
- 掌握使用 Canvas 绘制文本的方法。
- 掌握使用 Canvas 绘制线段的方法。
- 掌握使用 Canvas 导出图片的方法。
- 掌握 JS 的基本语法和程序结构。
- 掌握 JS 函数的定义和应用。
- 掌握 JS 数组的定义和应用。
- 掌握 JS 面向对象编程方法。
- 掌握 JS DMO 操作。
- 综合应用 JS 编程技术和 Canvas 绘图,实现图片验证码功能。
二、实验任务
- 通过 JS 生成图片验证码。
- 使用 HTML5 编写登录页面并应用图片验证码。
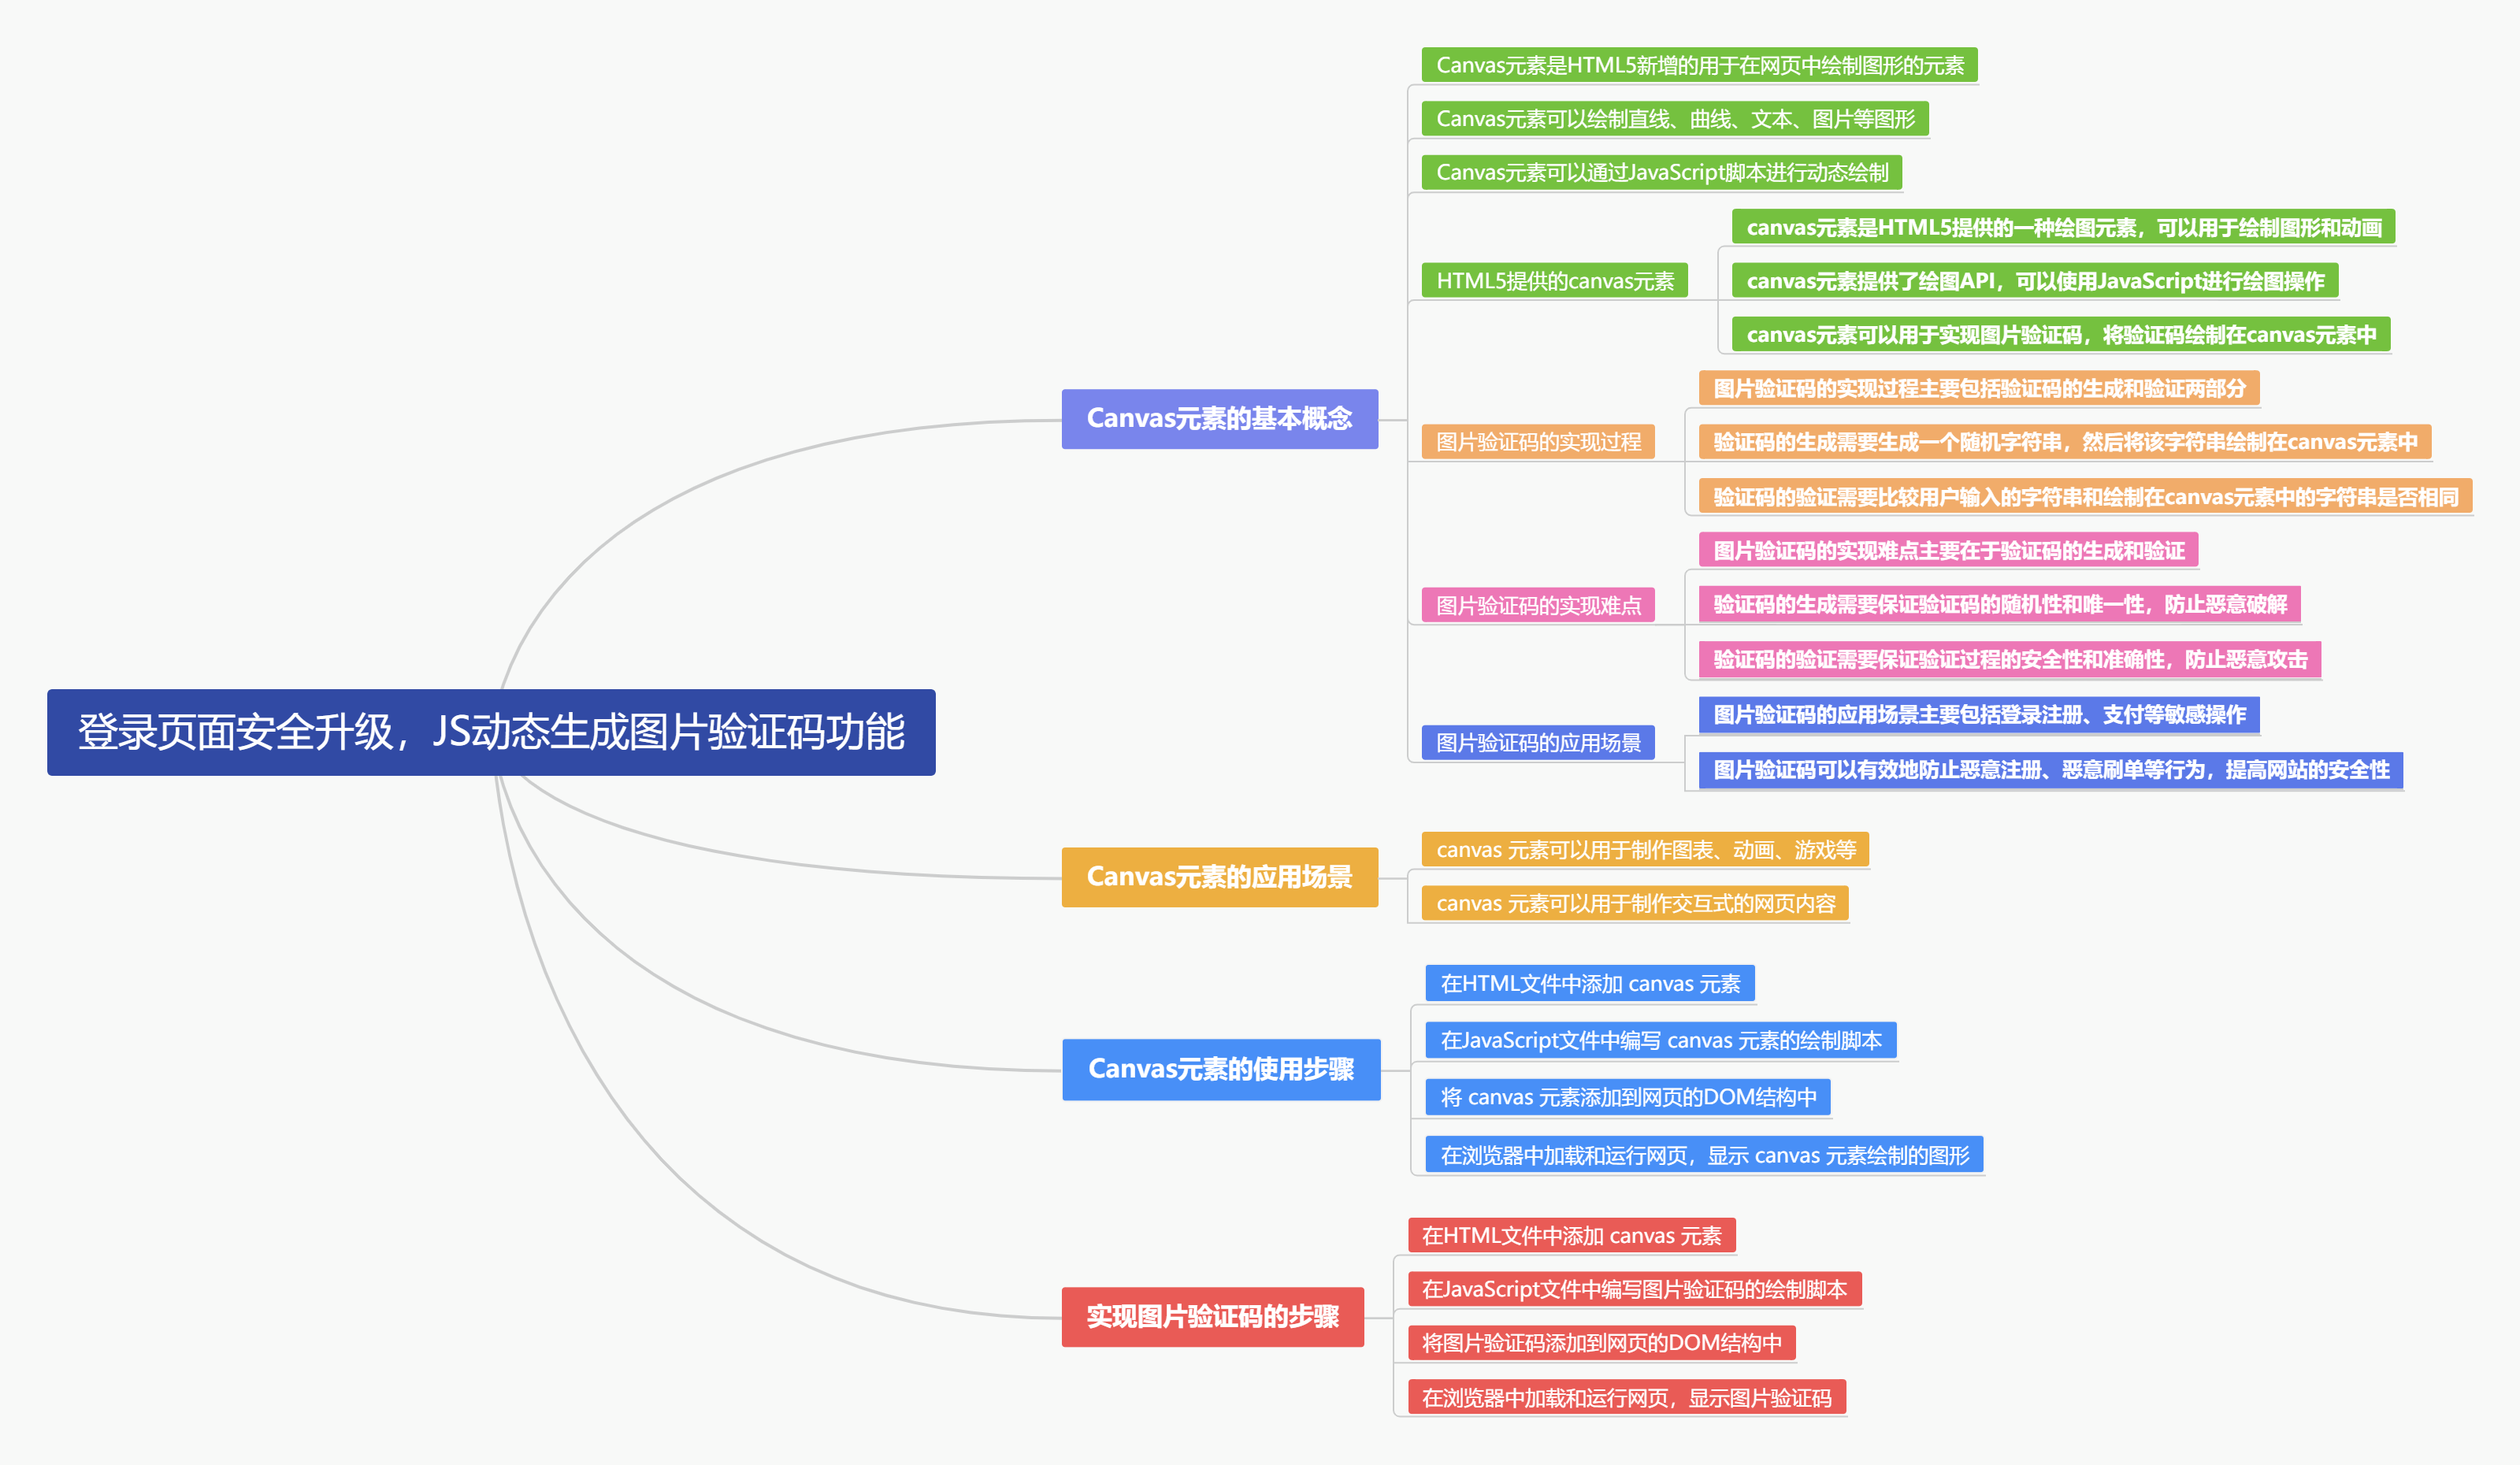
三、设计思路
我们运用HTML5强大的Canvas元素,结合JavaScript脚本,精心绘制出一张富含随机文本、随机直线(干扰线)以及随机点(干扰点)的图片验证码。这一过程中,我们巧妙地借助了Math.random()函数,赋予图片验证码出色的随机性,使得每张验证码都独一无二,极大地提升了其安全性和防机器识别能力。这样的设计不仅保障了用户登录的安全性,也为用户带来了更流畅、更安全的登录体验。
四、实现实施(跟我做)
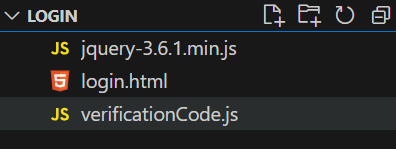
目录结构:
Jquery下载地址:https://code.jquery.com/jquery-3.6.1.min.js
4.1、步骤一:通过 JS 生成图片验证码
创建一个 JS 脚本,将其命名为 "verificationCode.js"。代码如下:
1 2 3 4 5 6 7 8 9 10 11 12 13 14 15 16 17 18 19 20 21 22 23 24 25 26 27 28 29 30 31 32 33 34 35 36 37 38 39 40 41 42 43 44 45 46 47 48 49 50 51 52 53 54 55 56 57 58 59 60 61 62 63 64 65 66 67 68 69 70 71 72 73 74 75 76 77 78 79 80 81 82 83 84 85 86 87 88 89 90 91 92 93 94 95 96 97 98 99 100 101 102 103 104 105 106 107 108 109 110 111 112 113 114 115 116 117 118 119 120 121 122 123 124 125 126 127 128 129 130 131 132 133 134 135 136 137 138 139 140 141 142 143 144 145 146 147 148 149 150 151 152 153 154 155 156 157 158 159 160 161 162 163 164 165 166 167 168 169 170 171 172 173 174 175 176 177 178 179 180 181 182 183 184 185 186 187 188 189 190 191 192 193 194 195 196 197 198 199 200 201 202 203 204 205 206 207 208 209 210 211 212 213 214 215 216 217 218 219 220 221 222 223 | var nums = [ "1", "2", "3", "4", "5", "6", "7", "8", "9", "0", "A", "B", "C", "D", "E", "F", "G", "H", "I", "J", "K", "L", "M", "N", "O", "P", "Q", "R", "S", "T", "U", "V", "W", "X", "Y", "Z", "a", "b", "c", "d", "e", "f", "g", "h", "i", "j", "k", "l", "m", "n", "o", "p", "q", "r", "s", "t", "u", "v", "w", "x", "y", "z",];var colors = [ "red", "blue", "green", "yellow", "orange", "purple", "pink", "brown", "gray", "black", "white",];var str = "";//调用 drawCode()方法获取验证码,将验证码保存在全局变量 verVal 中var verVal = drawCode();//绘制验证码函数function drawCode() { //获取 HTML 网页中的画布 var canvas = document.getElementById("verifyCanvas"); if (!canvas) { console.error("验证码画布元素不存在"); } else { //获取画布 2D 上下文 var context = canvas.getContext("2d"); //设置画布填充色 context.fillStyle = "white"; //清空画布 context.fillRect(0, 0, canvas.width, canvas.height); //设置字体和字号 context.font = "bold 30px 'Arial Black'"; //定义3个数组,用于存储坐标 var rand = new Array(); var x = new Array(); var y = new Array(); for (var i = 0; i < 4; i++) { rand.push(rand[i]); //这行代码将 rand 数组中当前索引 i 的元素添加到 rand 数组的末尾。 rand[i] = nums[Math.floor(Math.random() * nums.length)]; x[i] = i * 20 + 10; y[i] = Math.random() * 20 + 10; //设置字体颜色 context.fillStyle = colors[Math.floor(Math.random() * colors.length)]; //在指定位置上绘制文本 context.fillText(rand[i], x[i], y[i]); } //将数组转换为字符串并转换为大写形式 var str = rand.join("").toUpperCase(); //绘制 3条随机线 for (var i = 0; i < 3; i++) { //设置线条颜色 context.strokeStyle = colors[Math.floor(Math.random() * colors.length)]; //设置线条宽度 context.lineWidth = 1; //绘制一条随机线 context.beginPath(); context.moveTo( Math.floor(Math.random() * canvas.width), Math.floor(Math.random() * canvas.height) ); context.lineTo( Math.floor(Math.random() * canvas.width), Math.floor(Math.random() * canvas.height) ); context.stroke(); } //绘制 30个 随机点 for (var i = 0; i < 30; i++) { //设置点颜色 context.fillStyle = colors[Math.floor(Math.random() * colors.length)]; //绘制一个随机点 context.fillRect( Math.floor(Math.random() * canvas.width), Math.floor(Math.random() * canvas.height), 1, 1 ); } //绘制图片 convertCanvasToImage(canvas); return str; }}//绘制随机线函数function drawline(canvas, context) { //设置路径起点 context.moveTo( Math.floor(Math.random() * canvas.width), Math.floor(Math.random() * canvas.height) ); //绘制直线路径 context.lineTo( Math.floor(Math.random() * canvas.width), Math.floor(Math.random() * canvas.height) ); //设置线条宽带 context.lineWidth = 0.25; //设置线条描边颜色 context.strokeStyle = "rgb(168,168,168,0.3)"; //对路径进行描边 context.stroke();}// 绘制随机点函数function drawDot(canvas, context) { // 根据画布的宽度生成一个随机整数作为x坐标 var px = Math.floor(Math.random() * canvas.width); // 根据画布的高度生成一个随机整数作为y坐标 var py = Math.floor(Math.random() * canvas.height); // 将画笔移动到指定的随机点位置 context.moveTo(px, py); // 从当前位置(即随机点)画一条到稍微偏离一点的线的终点,这里是为了形成一个点的效果 // 因为线的宽度是0.5,所以这样画出来的效果是一个小圆圈,看起来像是一个点 context.lineTo(px + 1, py + 1); // 设置线的宽度为0.5 context.lineWidth = 0.5; // 对之前定义的路径进行描边,也就是画出从moveTo到lineTo的那条小线段,从而形成一个点 context.stroke();}//绘制图片函数function convertCanvasToImage(canvas) { //隐藏画布 document.getElementById("verifyCanvas").style.display = "none"; var image = document.getElementById("code_img"); //将画布导出为图片,并设置图片的来源 URL image.src = canvas.toDataURL("image/png"); return image;}//单机图片刷新验证码$("#code_img").click(function () { //移除画布 $("#verifyCanvas").remove(); //在 img 前面添加画布 $("#code_img").before( '<canvas id="verifyCanvas" width="100" height="40"></canvas>' ); //调用 drawCode()方法获取验证码,将验证码保存在全局变量 verVal 中 var verVal = drawCode();}); |
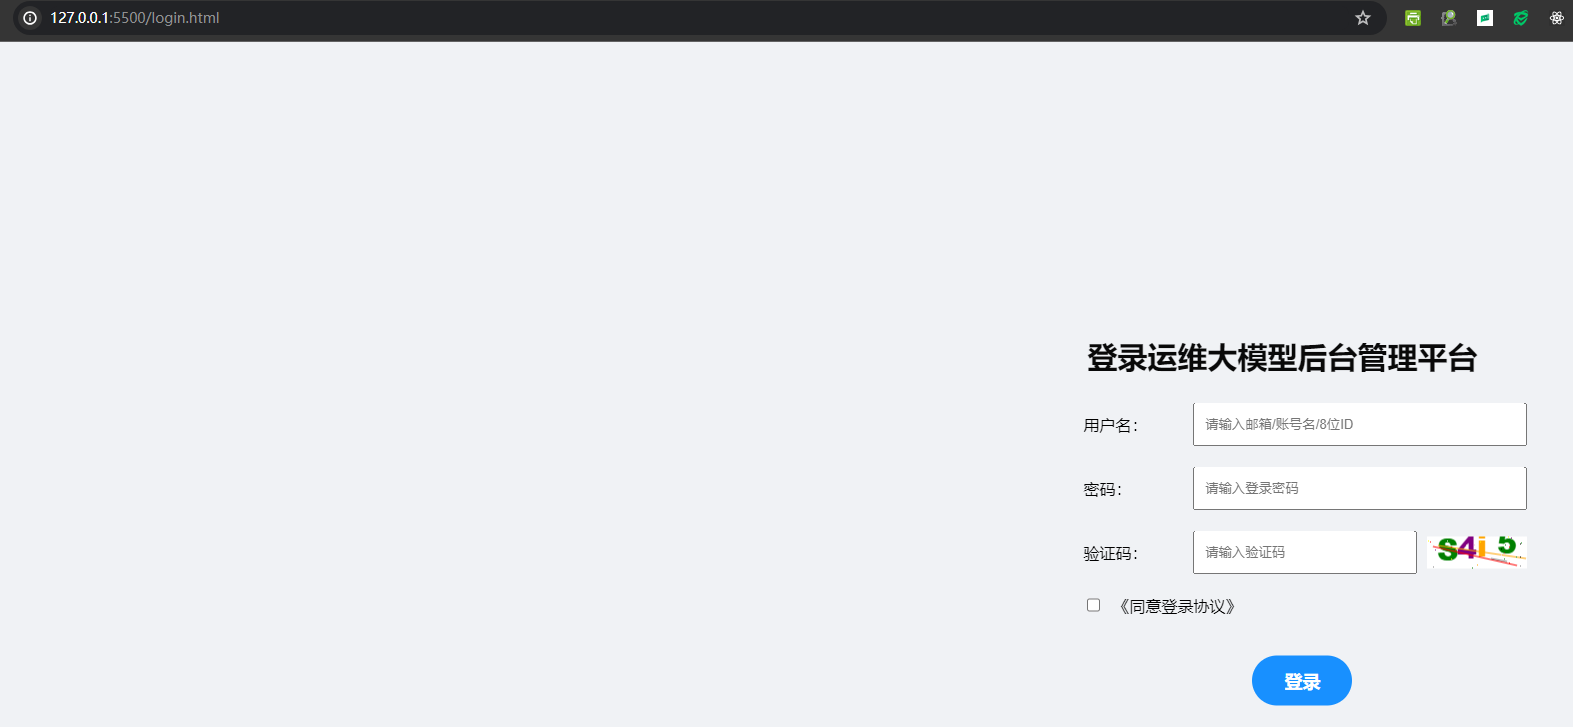
4.2、步骤二:在登录页面中应用图片验证码
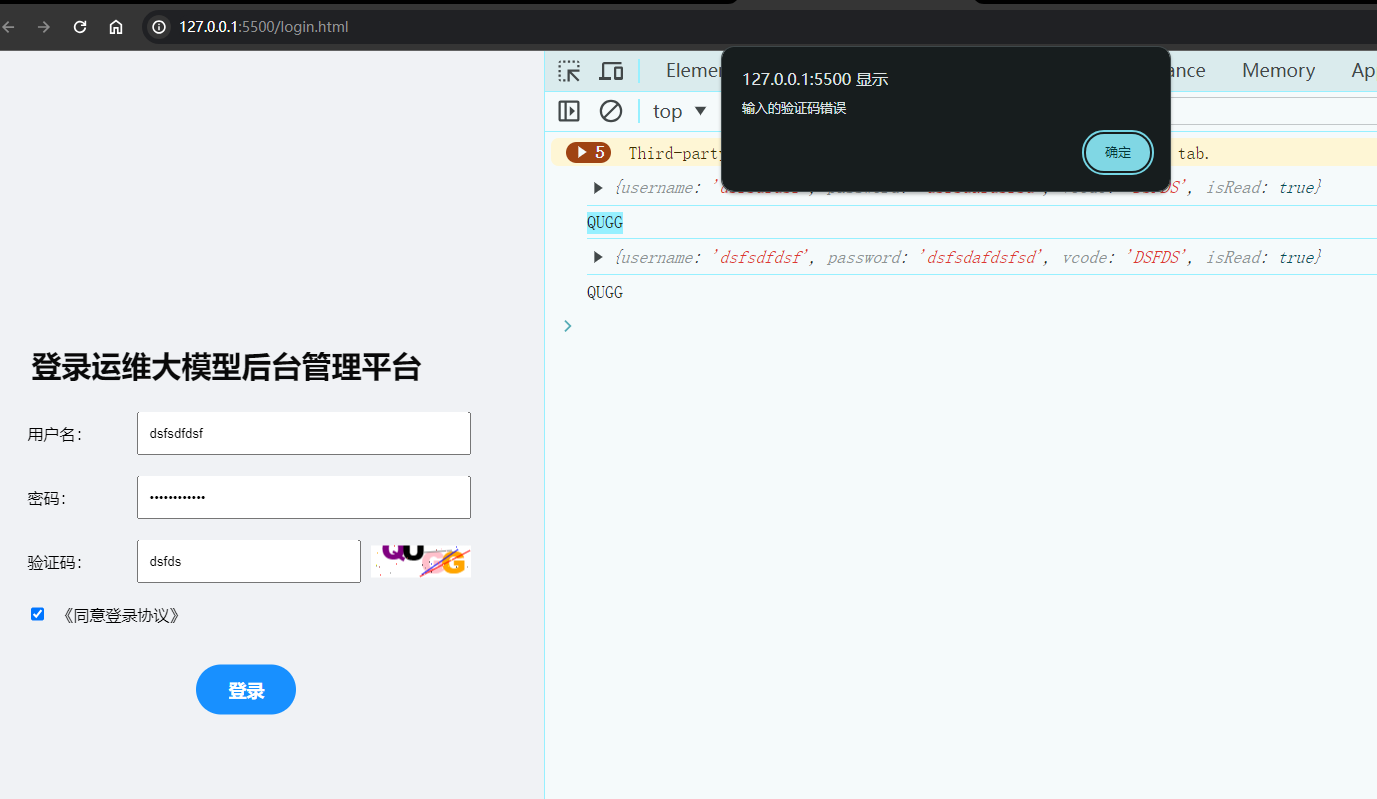
创建一个名为 login.html 的 HTML 静态网页,在该页面中创建一个登录表单,并通过 <script> 标签引入前面的 verificationCode.js 脚本文件,以添加图片验证码。创建 submit 事件处理程序,对输入的验证码进行检查,如果输入的验证码与图片验证码匹配,则允许登录,否则阻止登录。代码如下:
1 2 3 4 5 6 7 8 9 10 11 12 13 14 15 16 17 18 19 20 21 22 23 24 25 26 27 28 29 30 31 32 33 34 35 36 37 38 39 40 41 42 43 44 45 46 47 48 49 50 51 52 53 54 55 56 57 58 59 60 61 62 63 64 65 66 67 68 69 70 71 72 73 74 75 76 77 78 79 80 81 82 83 84 85 86 87 88 89 90 91 92 93 94 95 96 97 98 99 100 101 102 103 104 105 106 107 108 109 110 111 112 113 114 115 116 117 118 119 120 121 122 123 124 125 126 127 128 129 130 131 132 133 134 135 136 137 138 139 140 141 142 143 144 145 146 147 148 149 150 151 152 153 154 155 156 157 158 159 160 161 162 163 164 165 166 167 168 169 170 171 172 173 174 175 176 177 178 179 180 181 182 183 184 | <!DOCTYPE html><html lang="en"> <head> <meta charset="UTF-8" /> <meta name="viewport" content="width=device-width, initial-scale=1.0" /> <title>登录运维大模型后台管理平台</title> <style> .login-form { position: fixed; top: 50%; right: 13%; transform: translateY(-50%); width: 500px; height: 500px; max-width: 1000px; height: auto; display: flex; flex-direction: column; justify-content: center; align-items: flex-end; } .large-input { width: 450px; height: 50px; } .login-btn { position: fixed; width: 100px; height: 50px; right: 35%; background-color: #1890ff; border-radius: 30px; display: flex; justify-content: center; align-items: center; color: #fff; border: none; font-size: 18px; font-weight: bold; } .login-title { position: fixed; right: 10%; font-size: 30px; color: #090909; font-weight: bold; width: auto; max-width: 100%; height: auto; margin-bottom: 350px; } body { margin: 0; padding: 0; display: flex; justify-content: center; align-items: center; min-height: 100vh; background-color: #f0f2f5; } .form-item { display: flex; flex-direction: row; align-items: center; margin-bottom: 20px; } .form-label { width: 100px; /* 根据需要调整 label 的宽度 */ margin-right: 10px; /* 在 label 和 input 之间增加间距 */ } .form-item input[type="text"], .form-item input[type="password"] { flex-grow: 1; /* 让 input 根据剩余空间自适应宽度 */ margin-left: 0; /* 去除默认的左右间距 */ padding: 10px; } input[type="text"], input[type="password"] { width: 200px; height: 20px; padding: 10px; } .checkbox-label { display: inline-block; margin-left: 10px; } #code_img { cursor: pointer; margin-left: 10px; } button[type="submit"] { width: 100px; height: 50px; background-color: #1890ff; border-radius: 30px; color: #fff; border: none; font-size: 18px; font-weight: bold; cursor: pointer; margin-top: 20px; } </style> </head> <body> <div class="login-form"> <h2 class="login-title">登录运维大模型后台管理平台</h2> <form onsubmit="handleSubmit(event)"> <div class="form-item"> <label for="username" class="form-label">用户名:</label> <input type="text" id="username" placeholder="请输入邮箱/账号名/8位ID" required /> </div> <div class="form-item"> <label for="password" class="form-label">密码:</label> <input type="password" id="password" placeholder="请输入登录密码" required /> </div> <div class="form-item"> <label for="vcode" class="form-label">验证码:</label> <input type="text" id="vcode" placeholder="请输入验证码" required /> <canvas width="100" height="32" id="verifyCanvas"></canvas> <img id="code_img" title="单击刷新验证码" alt="vcode" /> </div> <div class="form-item"> <input type="checkbox" id="isRead" /> <label for="isRead" class="checkbox-label">《同意登录协议》</label> </div> <button type="submit" class="login-btn">登录</button> </form> </div> <script src="jquery-3.6.1.min.js"></script> <script src="verificationCode.js"></script> <script> function handleSubmit(event) { event.preventDefault(); // 阻止表单默认提交行为 const form = { username: document.getElementById("username").value, password: document.getElementById("password").value, vcode: document.getElementById("vcode").value.toUpperCase(), isRead: document.getElementById("isRead").checked, }; console.log(form); console.log(verVal); if (form.vcode !== verVal) { alert("输入的验证码错误"); document.getElementById("vcode").focus(); // 将焦点定位到验证码输入框 return false; } else { alert("登录成功"); // 实际情况下,这里会发起Ajax请求或执行其他登录逻辑 return true; } } </script> </body></html> |
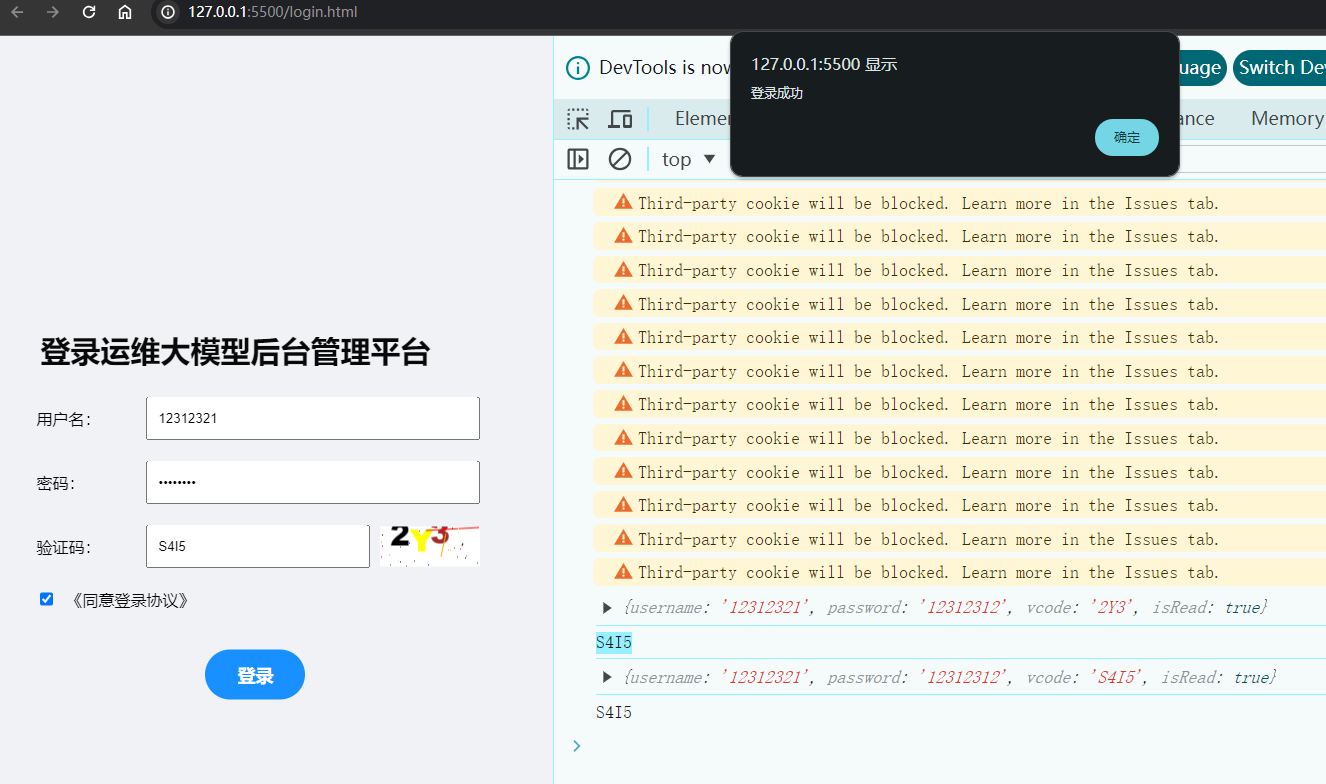
4.3、步骤三:测试图片验证码
分类:
Vue3专题精讲


【推荐】国内首个AI IDE,深度理解中文开发场景,立即下载体验Trae
【推荐】编程新体验,更懂你的AI,立即体验豆包MarsCode编程助手
【推荐】抖音旗下AI助手豆包,你的智能百科全书,全免费不限次数
【推荐】轻量又高性能的 SSH 工具 IShell:AI 加持,快人一步
· 阿里最新开源QwQ-32B,效果媲美deepseek-r1满血版,部署成本又又又降低了!
· 开源Multi-agent AI智能体框架aevatar.ai,欢迎大家贡献代码
· Manus重磅发布:全球首款通用AI代理技术深度解析与实战指南
· 被坑几百块钱后,我竟然真的恢复了删除的微信聊天记录!
· AI技术革命,工作效率10个最佳AI工具