
Istio从入门到精通——Istio Getting Started
Istio Getting Started
https://istio.io/latest/docs/setup/getting-started/
This guide lets you quickly evaluate Istio. If you are already familiar with Istio or interested in installing other configuration profiles or advanced deployment models, refer to our which Istio installation method should I use? FAQ page.
(本指南允许您快速评估 Istio。如果您已经熟悉 Istio,或者对安装其他配置文件或高级部署模型感兴趣,请参考我们应该使用哪种 Istio 安装方法?常见问题页面。)
These steps require you to have a cluster running a supported version of Kubernetes (1.22, 1.23, 1.24, 1.25). You can use any supported platform, for example Minikube or others specified by the platform-specific setup instructions.
(这些步骤要求您拥有 一个运行受支持的 Kubernetes 版本(1.22、1.23、1.24、1.25)的集群 。您可以使用任何受支持的平台,例如 Minikube 或由平台特定的设置说明指定的其他平台。)
(笔者用的是当下 Kubernetes 最新版 ,Kubernetes version 1.26):
WARNING: This version information is deprecated and will be replaced with the output from kubectl version --short.  Use --output=yaml|json to get the full version.
Client Version: version.Info{Major:"1", Minor:"26", GitVersion:"v1.26.0", GitCommit:"b46a3f887ca979b1a5d14fd39cb1af43e7e5d12d", GitTreeState:"clean", BuildDate:"2022-12-08T19:58:30Z", GoVersion:"go1.19.4", Compiler:"gc", Platform:"linux/amd64"}
Kustomize Version: v4.5.7
Server Version: version.Info{Major:"1", Minor:"26", GitVersion:"v1.26.0", GitCommit:"b46a3f887ca979b1a5d14fd39cb1af43e7e5d12d", GitTreeState:"clean", BuildDate:"2022-12-08T19:51:45Z", GoVersion:"go1.19.4", Compiler:"gc", Platform:"linux/amd64"}
一、Download and install Istio
1.1、下载 Istio
Go to the Istio release( https://github.com/istio/istio/releases ) page to download the installation file for your OS, or download and extract the latest release automatically (Linux or macOS):
curl -L https://istio.io/downloadIstio | sh -
或者,用上面的命令下载 Istio 的最新版本(release tags),比如:
[root@iZj6cdj8nbj0zla2lnq2g9Z ~]# curl -L https://istio.io/downloadIstio | ISTIO_VERSION=1.16.2 TARGET_ARCH=x86_64 sh -
  % Total    % Received % Xferd  Average Speed   Time    Time     Time  Current
                                 Dload  Upload   Total   Spent    Left  Speed
100   102  100   102    0     0    250      0 --:--:-- --:--:-- --:--:--   251
100  4856  100  4856    0     0  11387      0 --:--:-- --:--:-- --:--:-- 11387

Downloading istio-1.16.2 from https://github.com/istio/istio/releases/download/1.16.2/istio-1.16.2-linux-amd64.tar.gz ...

Istio 1.16.2 Download Complete!

Istio has been successfully downloaded into the istio-1.16.2 folder on your system.

Next Steps:
See https://istio.io/latest/docs/setup/install/ to add Istio to your Kubernetes cluster.

To configure the istioctl client tool for your workstation,
add the /root/istio-1.16.2/bin directory to your environment path variable with:
	 export PATH="$PATH:/root/istio-1.16.2/bin"

Begin the Istio pre-installation check by running:
	 istioctl x precheck

Need more information? Visit https://istio.io/latest/docs/setup/install/
[root@iZj6cdj8nbj0zla2lnq2g9Z ~]#
1.2、安装 Istio
1.2.1、添加环境变量
创建 istio 程序目录和软连接以及环境变量。(因为我做实验的环境是台pc电脑无法访问国外网站,上面下载的linux是香港的服务器,所以你能发现linux的hostname发生了变化,这个不用管。)
[root@localhost istio-1.16.2]# cd
[root@localhost ~]# ll
total 126576
-rw-------.  1 root root     1500 Feb  7 00:23 anaconda-ks.cfg
-rw-r--r--.  1 root root 99869470 Feb  2 03:04 go1.20.linux-amd64.tar.gz
drwxr-x---.  6 root root      115 Jan 27 23:59 istio-1.16.2
drwxrwxr-x. 19 root root     4096 Nov  1 20:36 openssl-1.1.1s
-rw-r--r--.  1 root root  9868981 Nov  1 23:36 openssl-1.1.1s.tar.gz
drwxr-xr-x. 16 1000 1000     4096 Dec  7 03:20 Python-3.11.1
-rw-r--r--.  1 root root 19856648 Dec  7 03:26 Python-3.11.1.tar.xz
[root@localhost ~]# mkdir -pv /usr/local/istio/release
mkdir: created directory ‘/usr/local/istio’
mkdir: created directory ‘/usr/local/istio/release’
[root@localhost ~]# mv istio-1.16.2 /usr/local/istio/release/
[root@localhost ~]# cd /usr/local/istio/
[root@localhost istio]# ln -svfn release/istio-1.16.2 current
‘current’ -> ‘release/istio-1.16.2’
[root@localhost istio]# ls -al
total 0
drwxr-xr-x.  3 root root  36 Feb 18 00:39 .
drwxr-xr-x. 15 root root 169 Feb 18 00:39 ..
lrwxrwxrwx.  1 root root  20 Feb 18 00:39 current -> release/istio-1.16.2
drwxr-xr-x.  3 root root  26 Feb 18 00:39 release
[root@localhost istio]#
[root@localhost istio]# cat /etc/profile.d/istio.sh
export PATH=/usr/local/istio/current//bin:$PATH
[root@localhost istio]# source /etc/profile
1.2.2、执行 istio 安装命令
[root@localhost istio]# istioctl install --set profile=demo
This will install the Istio 1.16.2 demo profile with ["Istio core" "Istiod" "Ingress gateways" "Egress gateways"] components into the cluster. Proceed? (y/N) y
✔ Istio core installed
✔ Istiod installed
✔ Ingress gateways installed
✔ Egress gateways installed
✔ Installation completeMaking this installation the default for injection and validation.

Thank you for installing Istio 1.16.  Please take a few minutes to tell us about your install/upgrade experience!  https://forms.gle/99uiMML96AmsXY5d6
[root@localhost istio]#
1.2.3、添加 namespace label
Add a namespace label to instruct Istio to automatically inject Envoy sidecar proxies when you deploy your application later:
(添加一个名称空间标签,以指示 Istio 在稍后部署应用程序时自动注入特使边车代理):
[root@localhost istio]# kubectl label namespace default istio-injection=enabled
namespace/default labeled
[root@localhost istio]#
二、Deploy the sample application
2.1、部署 Bookinfo示例应用程序:
[root@k8s-master-153 ~]# cd /usr/local/istio/current/
[root@k8s-master-153 current]# kubectl apply -f samples/bookinfo/platform/kube/bookinfo.yaml
service/details created
serviceaccount/bookinfo-details created
deployment.apps/details-v1 created
service/ratings created
serviceaccount/bookinfo-ratings created
deployment.apps/ratings-v1 created
service/reviews created
serviceaccount/bookinfo-reviews created
deployment.apps/reviews-v1 created
deployment.apps/reviews-v2 created
deployment.apps/reviews-v3 created
service/productpage created
serviceaccount/bookinfo-productpage created
deployment.apps/productpage-v1 created
[root@k8s-master-153 current]#
2.2、等待程序启动
The application will start. As each pod becomes ready, the Istio sidecar will be deployed along with it.
(应用程序将启动。当每个 pod 准备就绪时,istio sidecar 将随之部署。)
[root@k8s-master-153 current]# kubectl get services,pods
NAME                  TYPE        CLUSTER-IP      EXTERNAL-IP   PORT(S)    AGE
service/details       ClusterIP   10.233.54.204   <none>        9080/TCP   8m22s
service/kubernetes    ClusterIP   10.233.0.1      <none>        443/TCP    24h
service/productpage   ClusterIP   10.233.22.140   <none>        9080/TCP   8m3s
service/ratings       ClusterIP   10.233.48.148   <none>        9080/TCP   8m15s
service/reviews       ClusterIP   10.233.62.50    <none>        9080/TCP   8m7s

NAME                                 READY   STATUS    RESTARTS   AGE
pod/details-v1-6997d94bb9-j5ncq      2/2     Running   0          4m37s
pod/productpage-v1-d4f8dfd97-56b7h   2/2     Running   0          4m37s
pod/ratings-v1-b8f8fcf49-442dh       2/2     Running   0          4m27s
pod/reviews-v1-5896f547f5-q7s2x      2/2     Running   0          4m37s
pod/reviews-v2-5d99885bc9-7wvfb      2/2     Running   0          4m37s
pod/reviews-v3-589cb4d56c-x4m7j      2/2     Running   0          4m36s
[root@k8s-master-153 current]#
Re-run the previous command and wait until all pods report READY2/2and STATUSRunningbefore you go to the next step. This might take a few minutes depending on your platform.(重新运行前面的命令,并等到所有 pods 都报告 READY 2/2和 STATUS Run 之后再进入下一步。这可能需要几分钟,这取决于您的平台。)(pods 的 STATUS 如果是 PodInitializing,请不要着急,要看运行的平台情况,比如我本次笔记本pc上全部变 Running 花费了 4min)
2.3、验证是否运行正常
Verify everything is working correctly up to this point.
Run this command to see if the app is running inside the cluster and serving HTML pages by checking for the page title in the response:
(验证到目前为止一切正常工作。)
(运行此命令,通过检查响应中的 page title,查看 app 是否在集群内部运行并提供 HTML 页面):
root@k8s-master-153 current]# kubectl exec "$(kubectl get pod -l app=ratings -o jsonpath='{.items[0].metadata.name}')" -c ratings -- curl -sS productpage:9080/productpage | grep -o "<title>.*</title>"
<title>Simple Bookstore App</title>
[root@k8s-master-153 current]#
三、Open the application to outside traffic
3.1、部署 Bookinfo app,并提供外部访问
The Bookinfo application is deployed but not accessible from the outside.
(Bookinfo 应用程序已部署,但无法从外部访问。)
To make it accessible, you need to create an Istio Ingress Gateway, which maps a path to a route at the edge of your mesh.
(为了使其可访问,您需要创建一个 Istio 入口网关,它将路径映射到网格边缘的路由。)
3.1.1、app 关联 istio gateway
[root@k8s-master-153 current]# cd /usr/local/istio/current/
[root@k8s-master-153 current]# ls -al
total 28
drwxr-x---.  6 root root   115 Jan 27 23:59 .
drwxr-xr-x.  3 root root    26 Feb 18 00:39 ..
drwxr-x---.  2 root root    22 Jan 27 23:59 bin
-rw-r--r--.  1 root root 11348 Jan 27 23:59 LICENSE
drwxr-xr-x.  5 root root    52 Jan 27 23:59 manifests
-rw-r-----.  1 root root   925 Jan 27 23:59 manifest.yaml
-rw-r--r--.  1 root root  6595 Jan 27 23:59 README.md
drwxr-xr-x. 24 root root  4096 Jan 27 23:59 samples
drwxr-xr-x.  3 root root    57 Jan 27 23:59 tools
[root@k8s-master-153 current]#
[root@k8s-master-153 current]# cat samples/bookinfo/networking/bookinfo-gateway.yaml
apiVersion: networking.istio.io/v1alpha3
kind: Gateway
metadata:
  name: bookinfo-gateway
spec:
  selector:
    istio: ingressgateway # use istio default controller
  servers:
  - port:
      number: 80
      name: http
      protocol: HTTP
    hosts:
    - "*"
---
apiVersion: networking.istio.io/v1alpha3
kind: VirtualService
metadata:
  name: bookinfo
spec:
  hosts:
  - "*"
  gateways:
  - bookinfo-gateway
  http:
  - match:
    - uri:
        exact: /productpage
    - uri:
        prefix: /static
    - uri:
        exact: /login
    - uri:
        exact: /logout
    - uri:
        prefix: /api/v1/products
    route:
    - destination:
        host: productpage
        port:
          number: 9080
[root@k8s-master-153 current]# kubectl apply -f samples/bookinfo/networking/bookinfo-gateway.yaml
gateway.networking.istio.io/bookinfo-gateway created
virtualservice.networking.istio.io/bookinfo created
[root@k8s-master-153 current]#
3.1.2、验证是否运行正常
[root@k8s-master-153 current]# istioctl --help
Istio configuration command line utility for service operators to
debug and diagnose their Istio mesh.

Usage:
  istioctl [command]

Available Commands:
  admin                Manage control plane (istiod) configuration
  analyze              Analyze Istio configuration and print validation messages(分析Istio配置并打印验证消息)
  authz                (authz is experimental. Use `istioctl experimental authz`)
  bug-report           Cluster information and log capture support tool.
  completion           Generate the autocompletion script for the specified shell
  create-remote-secret Create a secret with credentials to allow Istio to access remote Kubernetes apiservers
  dashboard            Access to Istio web UIs
  experimental         Experimental commands that may be modified or deprecated
  help                 Help about any command
  install              Applies an Istio manifest, installing or reconfiguring Istio on a cluster.
  kube-inject          Inject Istio sidecar into Kubernetes pod resources
  manifest             Commands related to Istio manifests
  operator             Commands related to Istio operator controller.
  profile              Commands related to Istio configuration profiles
  proxy-config         Retrieve information about proxy configuration from Envoy [kube only]
  proxy-status         Retrieves the synchronization status of each Envoy in the mesh [kube only]
  remote-clusters      Lists the remote clusters each istiod instance is connected to.
  tag                  Command group used to interact with revision tags
  uninstall            Uninstall Istio from a cluster
  upgrade              Upgrade Istio control plane in-place
  validate             Validate Istio policy and rules files
  verify-install       Verifies Istio Installation Status
  version              Prints out build version information

Flags:
      --context string          The name of the kubeconfig context to use
  -h, --help                    help for istioctl
  -i, --istioNamespace string   Istio system namespace (default "istio-system")
  -c, --kubeconfig string       Kubernetes configuration file
  -n, --namespace string        Config namespace
      --vklog Level             number for the log level verbosity. Like -v flag. ex: --vklog=9

Additional help topics:
  istioctl options                           Displays istioctl global options

Use "istioctl [command] --help" for more information about a command.
[root@k8s-master-153 current]#
[root@k8s-master-153 current]# istioctl analyze
✔ No validation issues found when analyzing namespace: default.
3.2、添加 ingress IP 和 ports
Follow these instructions to set the INGRESS_HOST and INGRESS_PORT variables for accessing the gateway. Use the tabs to choose the instructions for your chosen platform:
(按照以下说明设置 INGRESS_HOST 和 INGRESS_PORT 变量以访问网关。使用选项卡选择所选平台的说明):
(我的实验环境系统是 CentOS Linux release 7.9.2009 (Core),官网举了多个平台的说明例子,如果读者和我的不一样,可以访问官方:https://istio.io/latest/docs/setup/getting-started/)
3.2.1、查看是否支持 external load balancers
Execute the following command to determine if your Kubernetes cluster is running in an environment that supports external load balancers:
(执行以下命令以确定 Kubernetes 集群是否在支持外部负载均衡器的环境中运行):
[root@k8s-master-153 current]# kubectl get svc istio-ingressgateway -n istio-system
NAME                   TYPE           CLUSTER-IP      EXTERNAL-IP   PORT(S)                            AGE
istio-ingressgateway   LoadBalancer   10.233.30.227   <pending>     15021:30040/TCP,80:30467/TCP,443:30923/TCP,31400:32159/TCP,15443:32127/TCP   16h
[root@k8s-master-153 current]#
If theEXTERNAL-IPvalue is set, your environment has an external load balancer that you can use for the ingress gateway.
(如果设置了 EXTERNAL-IP 值,则您的环境具有一个外部负载平衡器,您可以将其用于入口网关。)
If theEXTERNAL-IPvalue is<none> (or perpetually <pending>), your environment does not provide an external load balancer for the ingress gateway. In this case, you can access the gateway using the service’s node port.
(如果 EXTERNAL-IP 值为 < none > (或者永久性地“<pending>”) ,则您的环境不会为入口网关提供外部负载平衡器。在这种情况下,您可以使用服务的节点端口访问网关。)
3.2.2、当外部有 external load balancer
Follow these instructions if you have determined that your environment has an external load balancer.
(如果确定环境具有外部负载平衡,请遵循以下说明。)
(笔者这里没有外部负载均衡,就直接复制官网内容了。)
3.2.2.1、设置入口IP和端口
export INGRESS_HOST=$(kubectl -n istio-system get service istio-ingressgateway -o jsonpath='{.status.loadBalancer.ingress[0].ip}')
export INGRESS_PORT=$(kubectl -n istio-system get service istio-ingressgateway -o jsonpath='{.spec.ports[?(@.name=="http2")].port}')
export SECURE_INGRESS_PORT=$(kubectl -n istio-system get service istio-ingressgateway -o jsonpath='{.spec.ports[?(@.name=="https")].port}')
在某些环境中,可以使用主机名而不是 IP 地址作为 load balancer。
在这种情况下,INGRESS 网关的 EXTERNAL-IP 值将不是一个 IP 地址,而是一个主机名,并且上面的命令将无法设置 INGRESS _ HOST 环境变量。使用以下命令更正 INGRESS_HOST 值:
export INGRESS_HOST=$(kubectl -n istio-system get service istio-ingressgateway -o jsonpath='{.status.loadBalancer.ingress[0].hostname}')
3.2.3、当外部没有 external load balancer
Follow these instructions if your environment does not have an external load balancer and choose a node port instead.
(如果您的环境没有外部负载平衡器,请按照以下说明选择节点端口。)
3.2.3.1、设置入口IP和端口
export INGRESS_PORT=$(kubectl -n istio-system get service istio-ingressgateway -o jsonpath='{.spec.ports[?(@.name=="http2")].nodePort}')
export SECURE_INGRESS_PORT=$(kubectl -n istio-system get service istio-ingressgateway -o jsonpath='{.spec.ports[?(@.name=="https")].nodePort}')
You need to create firewall rules to allow the TCP traffic to the ingress gateway service’s ports.
Run the following commands to allow the traffic for the HTTP port, the secure port (HTTPS) or both:
(您需要创建防火墙规则,以允许传输 TCP 流量到 Ingress Gateway 服务的端口。)
(运行以下命令以允许 HTTP 端口、安全端口(HTTPS)或两者的通信量,我非云端,本地运行如下命令):
export INGRESS_HOST=$(kubectl get po -l istio=ingressgateway -n istio-system -o jsonpath='{.items[0].status.hostIP}')
3.2.3.2、设置 gateway_url
[root@k8s-master-153 current]# export GATEWAY_URL=$INGRESS_HOST:$INGRESS_PORT
3.2.3.3 验证 gateway_url 设置是否成功
[root@k8s-master-153 current]# echo "$GATEWAY_URL"
192.168.153.146:30467
[root@k8s-master-153 current]#
3.2.4、验证kubernetes集群外访问
Confirm that the Bookinfo application is accessible from outside by viewing the Bookinfo product page using a browser.
(通过使用浏览器查看 Bookinfo 产品页面,确认可以从外部访问 Bookinfo 应用程序。)
3.2.4.1、获取集群外部访问地址
Run the following command to retrieve the external address of the Bookinfo application.
(运行以下命令检索 Bookinfo 应用程序的外部地址。)
[root@k8s-master-153 current]# echo "http://$GATEWAY_URL/productpage"
http://192.168.153.146:30467/productpage
[root@k8s-master-153 current]#
3.2.4.2、验证集群外部访问

四、View the dashboard
Istio integrates with several different telemetry applications.
(Istio 集成了几种不同的遥测应用。)
These can help you gain an understanding of the structure of your service mesh, display the topology of the mesh, and analyze the health of your mesh.
(这些可以帮助您理解服务网格的结构,显示网格的拓扑结构,并分析网格的健康状况。)
Use the following instructions to deploy the Kiali dashboard, along withPrometheus,Grafana, andJaeger.
(使用以下说明来部署 Kiali 仪表板,以及 Prometheus、 Grafana 和 Jaeger。)
4.1、安装 Kiali
Install Kiali and the other addons and wait for them to be deployed.
(安装 Kiali 和其他插件,并等待他们被部署。)
[root@k8s-master-153 current]# kubectl apply -f samples/addons
serviceaccount/grafana created
configmap/grafana created
service/grafana created
deployment.apps/grafana created
configmap/istio-grafana-dashboards created
configmap/istio-services-grafana-dashboards created
deployment.apps/jaeger created
service/tracing created
service/zipkin created
service/jaeger-collector created
serviceaccount/kiali created
configmap/kiali created
clusterrole.rbac.authorization.k8s.io/kiali-viewer created
clusterrole.rbac.authorization.k8s.io/kiali created
clusterrolebinding.rbac.authorization.k8s.io/kiali created
role.rbac.authorization.k8s.io/kiali-controlplane created
rolebinding.rbac.authorization.k8s.io/kiali-controlplane created
service/kiali created
deployment.apps/kiali created
serviceaccount/prometheus created
configmap/prometheus created
clusterrole.rbac.authorization.k8s.io/prometheus created
clusterrolebinding.rbac.authorization.k8s.io/prometheus created
service/prometheus created
deployment.apps/prometheus created
[root@k8s-master-153 current]# kubectl rollout status deployment/kiali -n istio-system
Waiting for deployment "kiali" rollout to finish: 0 of 1 updated replicas are available...
deployment "kiali" successfully rolled out
[root@k8s-master-153 current]#
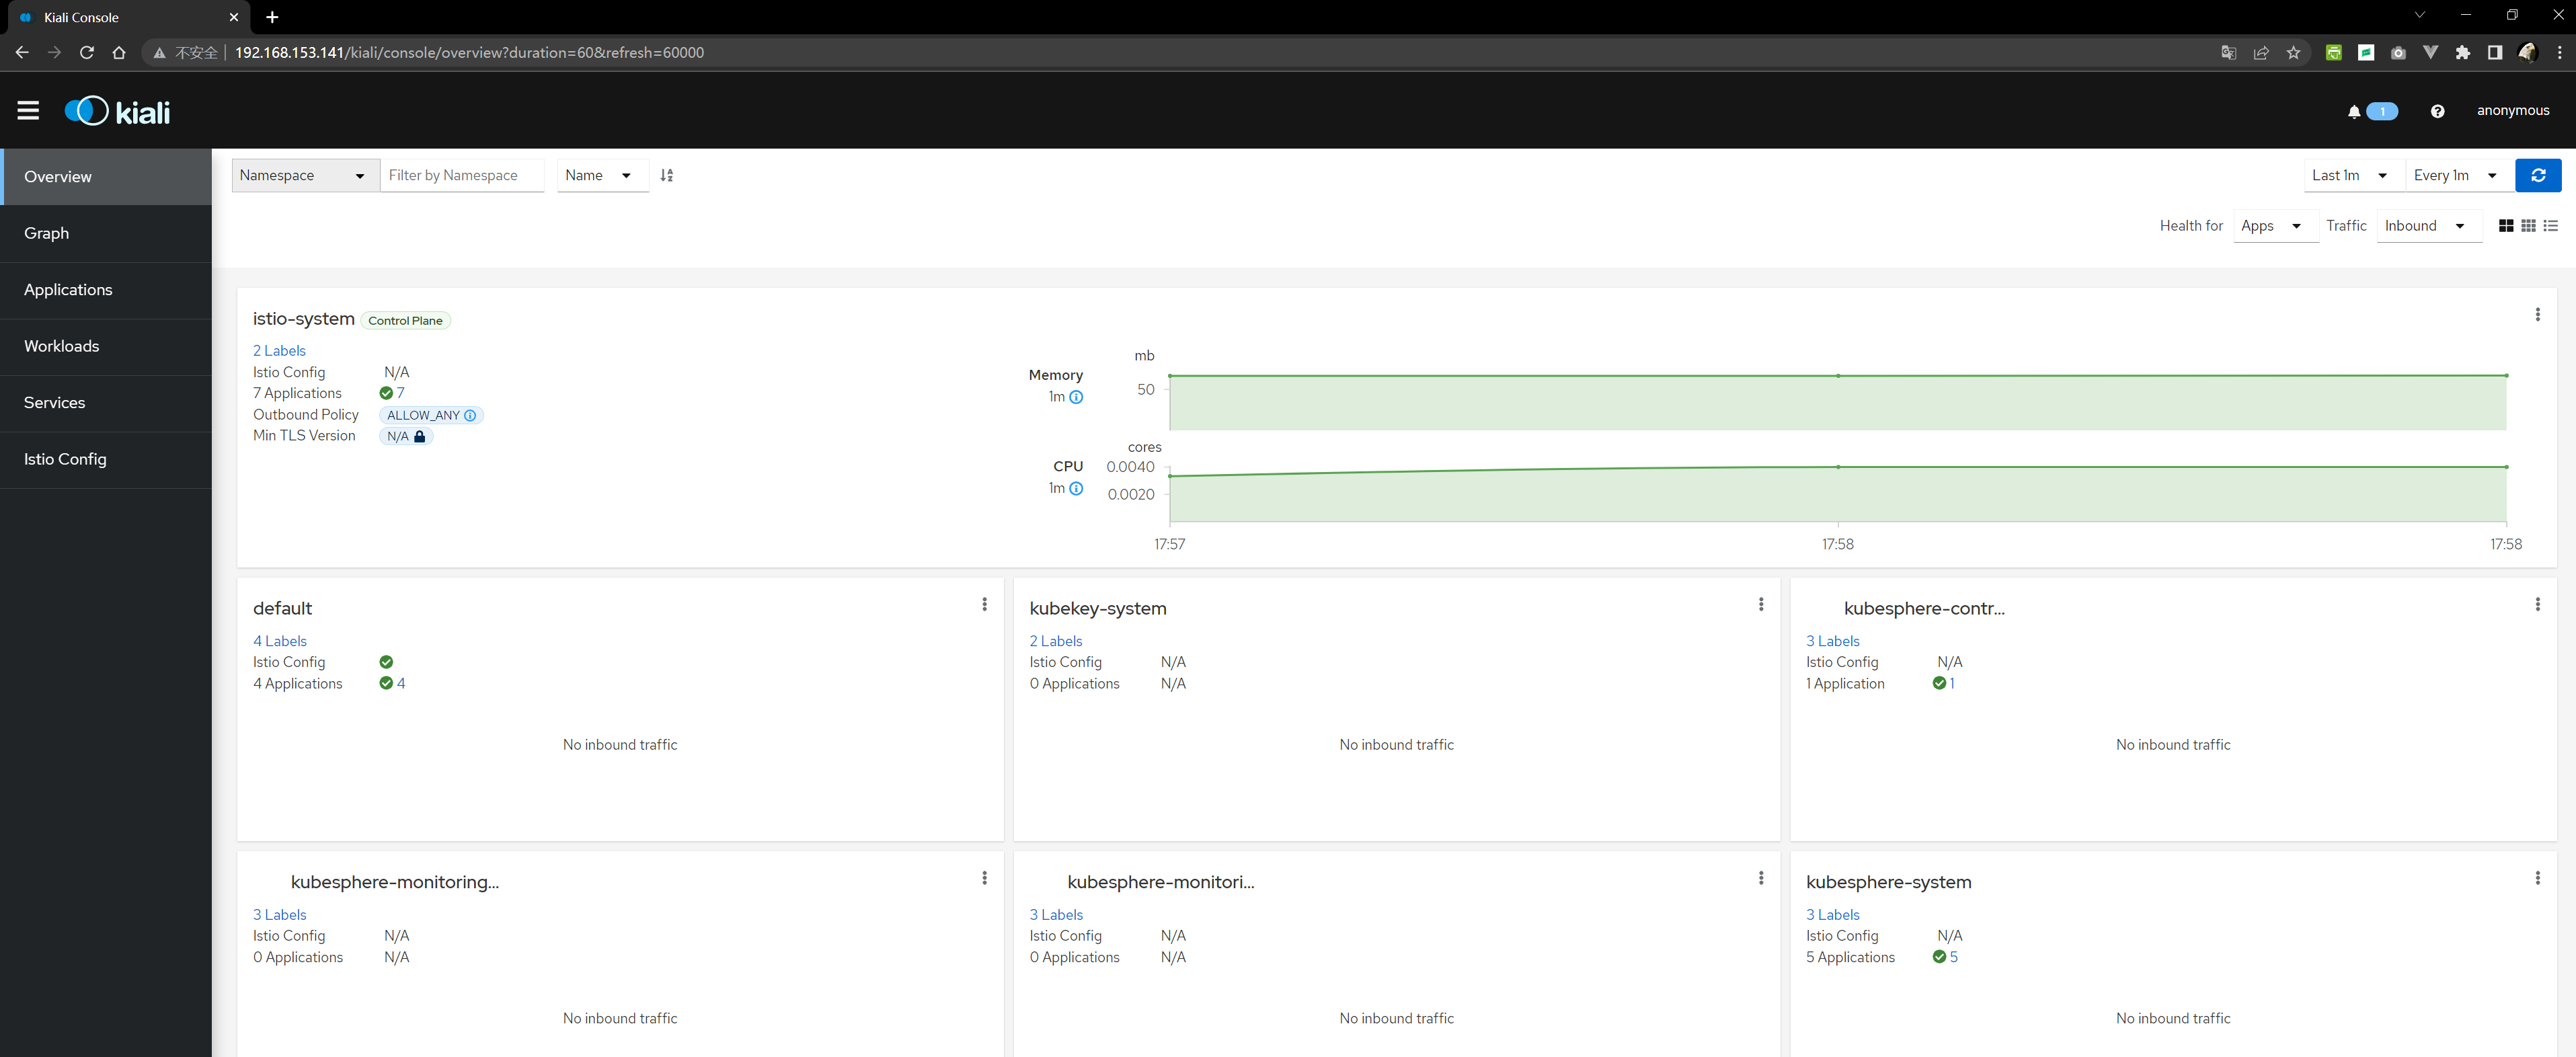
4.2、访问 Kiali Dashboard
[root@k8s-master-153 current]# istioctl dashboard kiali
http://localhost:20001/kiali
Failed to open browser; open http://localhost:20001/kiali in your browser.
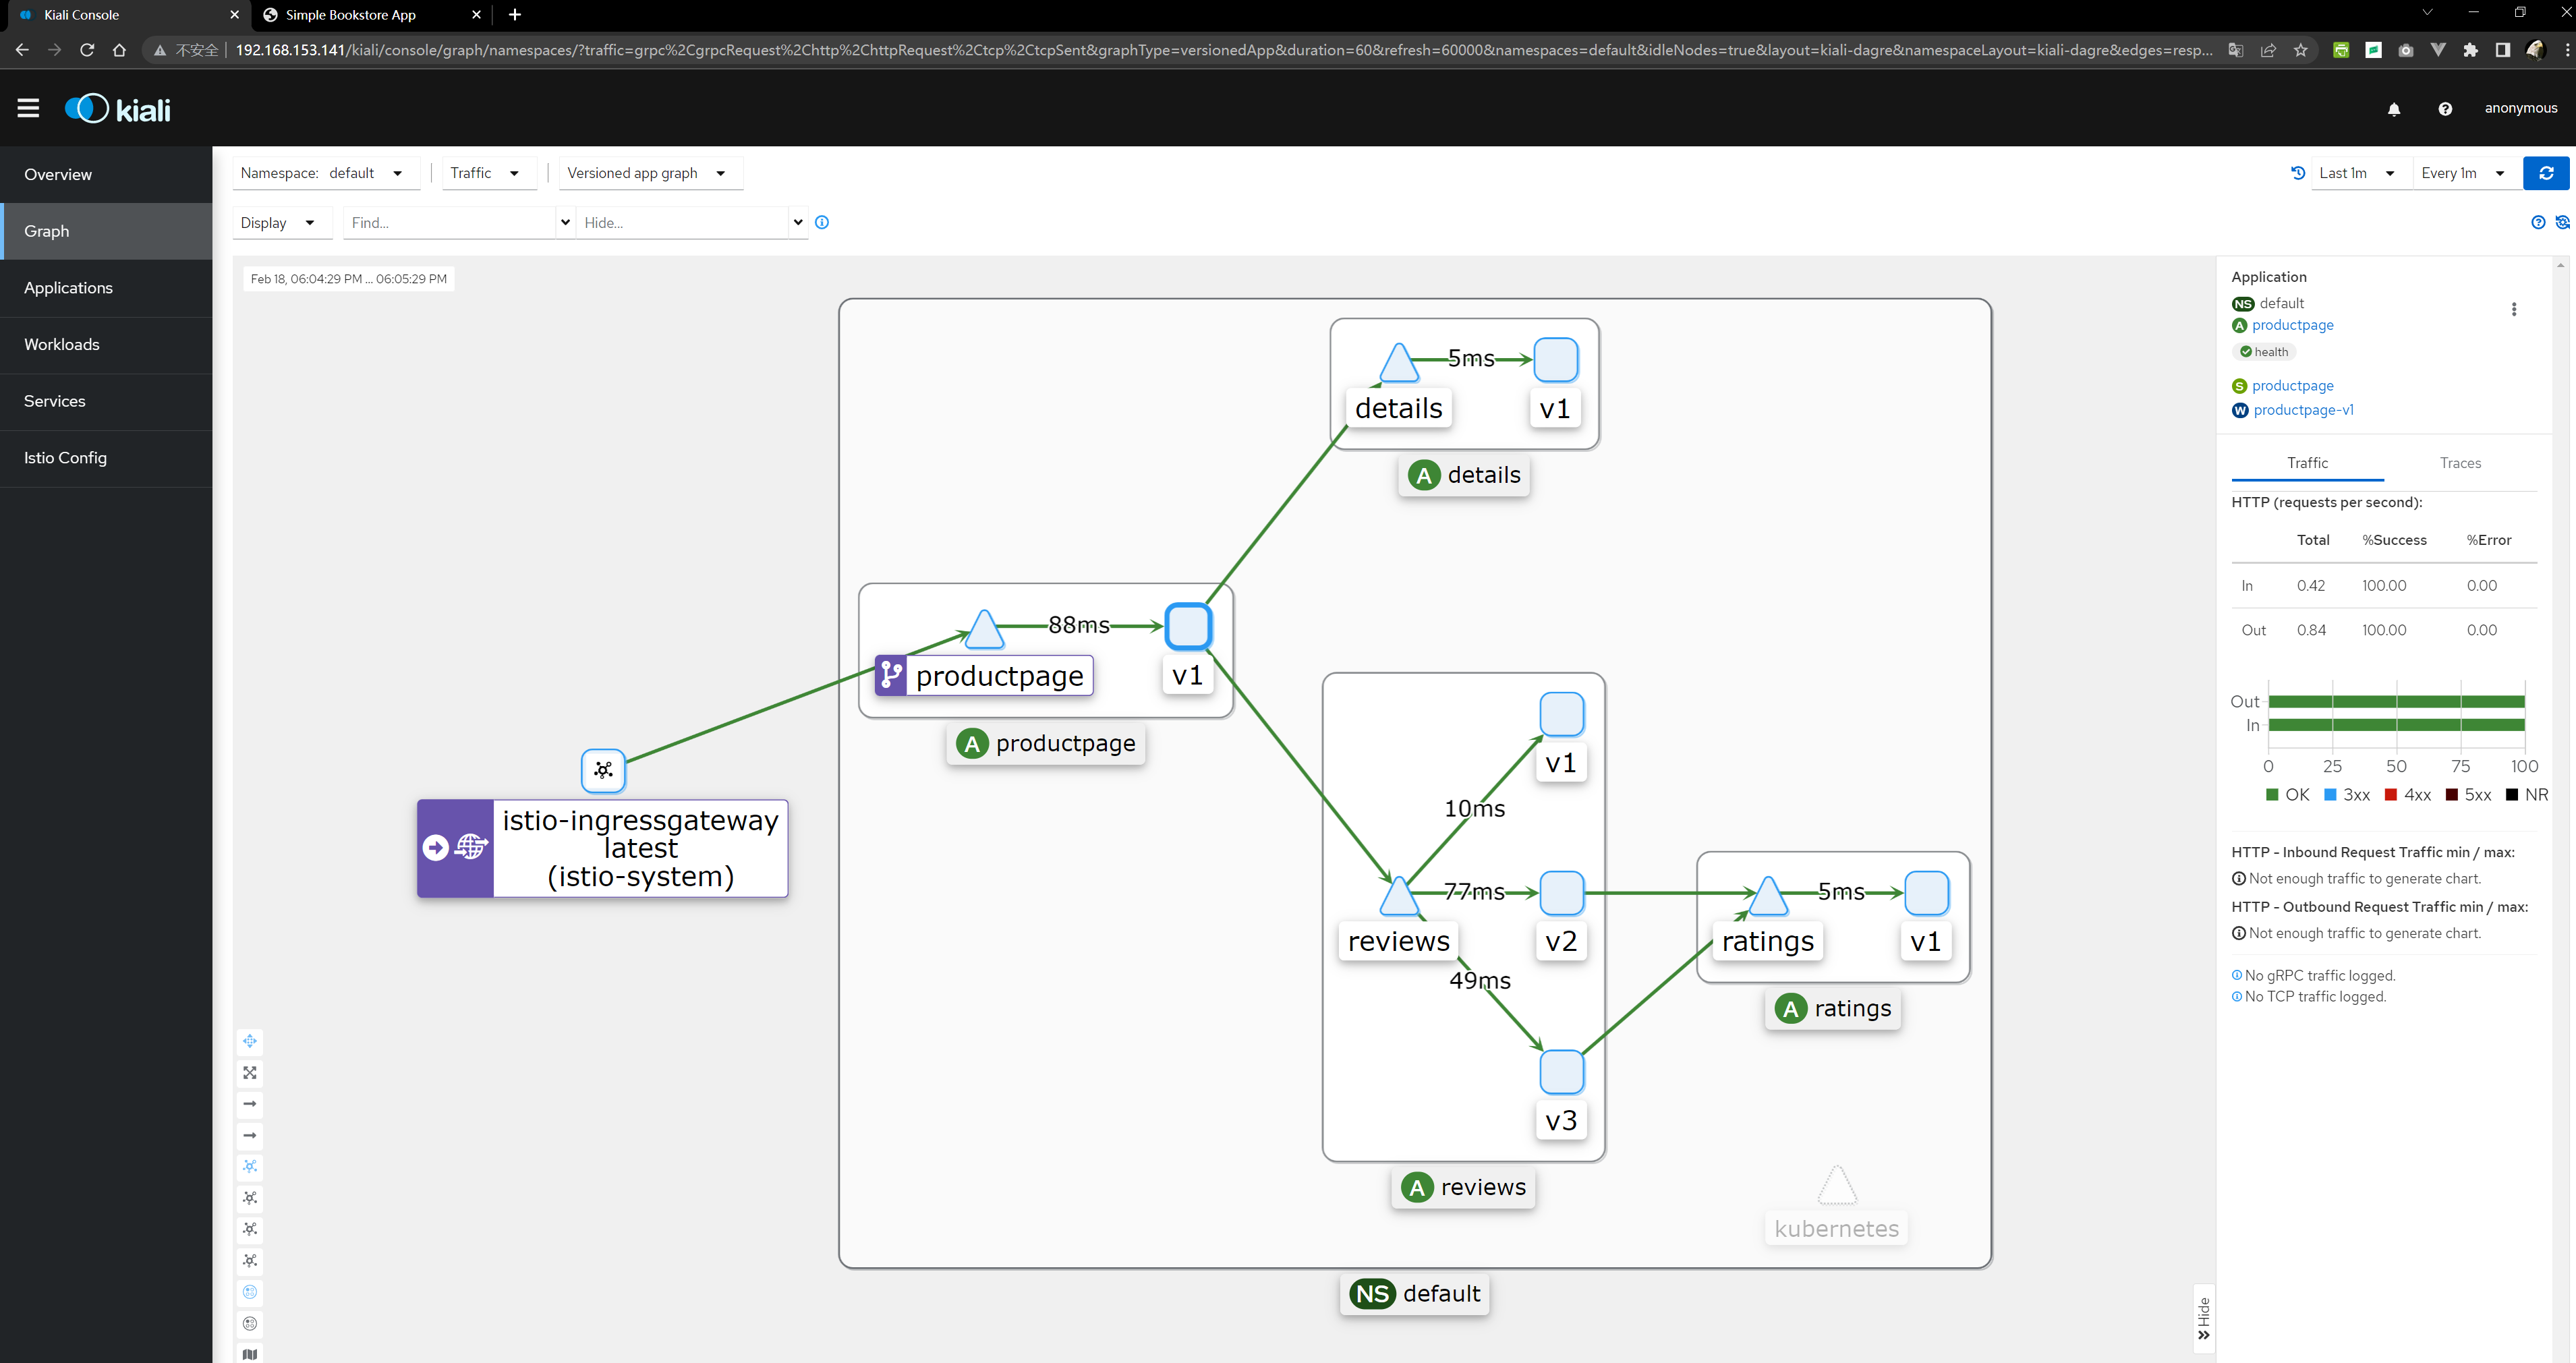
4.3、查看 Graph
In the left navigation menu, select Graph and in the Namespace drop down, select default.
(在左侧导航菜单中,选择 Graph,在 Namespace 下拉菜单中,选择 default。)
To see trace data, you must send requests to your service. The number of requests depends on Istio’s sampling rate and can be configured using the Telemetry API. With the default sampling rate of 1%, you need to send at least 100 requests before the first trace is visible. To send a 100 requests to the productpage service, use the following command:
(若要查看跟踪数据,必须向服务发送请求。请求的数量取决于 Istio 的采样率,可以使用遥测 API 进行配置。在默认采样率为1% 的情况下,您需要在第一个跟踪可见之前发送至少100个请求。要向 productpage 服务发送100个请求,请使用以下命令):
[root@k8s-master-153 conf.d]# for i in $(seq 1 100); do curl -s -o /dev/null "http://192.168.153.146:30467/productpage"; done
[root@k8s-master-153 conf.d]# kubectl get pods
NAME                             READY   STATUS    RESTARTS   AGE
details-v1-6997d94bb9-j5ncq      2/2     Running   0          120m
productpage-v1-d4f8dfd97-56b7h   2/2     Running   0          120m
ratings-v1-b8f8fcf49-442dh       2/2     Running   0          120m
reviews-v1-5896f547f5-q7s2x      2/2     Running   0          120m
reviews-v2-5d99885bc9-7wvfb      2/2     Running   0          120m
reviews-v3-589cb4d56c-x4m7j      2/2     Running   0          120m
[root@k8s-master-153 conf.d]#

 浙公网安备 33010602011771号