


直接写,创建一个接口,然后在创建实现类
public interface SomeService {
    public void select();
}
实现类
public class SomeServiceImpl implements SomeService {
    public void select() {
        System.out.println("someService");
    }
}
1.第一种自动代理
<!--自动代理器-->
   <bean id="someService" class="cn.dome02.SomeServiceImpl"></bean>

   <bean id="beforeAdvice" class="cn.dome02.BeforeAdvice"></bean>

   <bean id="advisor" class="org.springframework.aop.support.RegexpMethodPointcutAdvisor">
       <property name="advice" ref="beforeAdvice"></property>
       <property name="pattern" value=".*e.*"></property>
   </bean>

   <bean class="org.springframework.aop.framework.autoproxy.DefaultAdvisorAutoProxyCreator"></bean>
2.名称自动代理
 <!--名称自动代理-->
    <bean id="someService" class="cn.dome02.SomeServiceImpl"></bean>

    <bean id="beforeAdvice" class="cn.dome02.BeforeAdvice"></bean>

    <bean id="advisor" class="org.springframework.aop.support.RegexpMethodPointcutAdvisor">
        <property name="advice" ref="beforeAdvice"></property>
        <property name="pattern" value=".*e.*"></property>
    </bean>

    <bean class="org.springframework.aop.framework.autoproxy.BeanNameAutoProxyCreator">
        <property name="beanNames" value="someService"></property>
        <property name="interceptorNames" value="advisor"></property>
    </bean>
Aspectj注解版
编写MyAspectj类
@Aspect
public class MyAspectj {
    @Pointcut("execution(* *..dome03.*.insert(..))")
    public void insert(){

    }
    @Before("insert()")
    public void Before(){
        System.out.println("前置增强");
    }

//    @AfterReturning("execution(* *..dome03.*.select(..))")
//    public void AfterReturning(){
//        System.out.println("后置增强");
//    }
    @AfterThrowing("execution(* *..dome03.*.delete(..))")
    public void AfterThrowing(){
        System.out.println("哈哈???????????哈哈");
    }
    @Around("execution(* *..dome03.*.update(..))")
    public void AroundAspectj(ProceedingJoinPoint pj) throws Throwable {
        System.out.println("环绕前");
        pj.proceed();
        System.out.println("环绕后");
    }
    @After("execution(* *..dome03.*.select(..))")
    public void After(){
        System.out.println("最后的最后,渴望变成天使");
    }


}
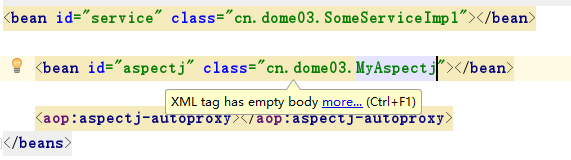
这样写法简化了xml配置文件的内容,出来正常的bean节点外,只需添加
xml版:
同样也需要创建MyAspectj类,但只需要创建普通类即可
public class MyAspectj {

    public void before(){
        System.out.println("前置增强");
    }

    public void afterReturning(){
        System.out.println("后置增强");
    }

    public void around(ProceedingJoinPoint pj) throws Throwable {
        System.out.println("环绕前");
        pj.proceed();
        System.out.println("环绕后");
    }

    public void afterThrow(Exception e){
        System.out.println("你为什么出异常?????????");
    }

    public void after(){
        System.out.println("最后的最后");
    }
}
主要就是xml中的内容
<?xml version="1.0" encoding="UTF-8"?>
<beans xmlns="http://www.springframework.org/schema/beans"
       xmlns:xsi="http://www.w3.org/2001/XMLSchema-instance" xmlns:aop="http://www.springframework.org/schema/aop"
       xsi:schemaLocation="http://www.springframework.org/schema/beans http://www.springframework.org/schema/beans/spring-beans.xsd http://www.springframework.org/schema/aop http://www.springframework.org/schema/aop/spring-aop.xsd">
   <bean id="service" class="cn.dome04.UserServiceImpl"></bean>

    <bean id="aspectj" class="cn.dome04.MyAspectj"></bean>

    <aop:config>
        <aop:pointcut id="aop" expression="execution(* *..dome04.*.*(..))"></aop:pointcut>
        <aop:aspect ref="aspectj">
            <!--<aop:before method="before" pointcut-ref="aop"></aop:before>-->
            <!--<aop:after-returning method="afterReturning" pointcut-ref="aop"></aop:after-returning>-->
            <!--<aop:around method="around" pointcut-ref="aop"></aop:around>-->
            <!--<aop:after-throwing method="afterThrow" pointcut-ref="aop"></aop:after-throwing>-->
            <aop:after method="after" pointcut-ref="aop"></aop:after>
        </aop:aspect>
    </aop:config>
</beans>
...

