

CentOS的KVM实践(虚拟机创建、网桥配置、Spice)
http://www.cnblogs.com/qpanda/p/4360989.html
最近公司准备上一套基于openstack的虚拟桌面系统,作为该项目的负责人,觉得有必要自己实践一下,该系统的搭建。最基础的就是需要了解基于linux的kvm的实践。
一、基础软件包准备
系统是采用pxe安装的,下面将pxe的ks.cfg文档公布出来,供大家参考,由于是实验,所以安装了图形界面,方便操作和查找问题。
- #platform=x86, AMD64, 或 Intel EM64T
- #skip input subscribe number
- key --skip
- #version=DEVEL
- # Firewall configuration
- firewall --disabled
- # Install OS instead of upgrade
- install
- # Use network installation
- url --url="http://10.0.0.100:8080/pxe/centos"
- # Root password
- rootpw --iscrypted bIZz5.0G$okfXTZMuvK32r3gSIY6Rv/
- user --name="os" --password="os123"
- # System authorization information
- auth --useshadow --passalgo=sha512
- # Use graphical install
- graphical
- firstboot --disable
- # System keyboard
- keyboard us
- # System language
- lang zh_CN.UTF-8
- # SELinux configuration
- selinux --disabled
- # Installation logging level
- logging --level=info
- # Partition clearing information
- clearpart --all --initlabel
- # Reboot after installation
- reboot
- # Network information
- network --onboot no --device eth0 --bootproto dhcp --noipv6
- # Disk partitioning information
- part /boot --asprimary --bytes-per-inode=4096 --fstype="ext4" --size=200
- part swap --asprimary --bytes-per-inode=4096 --fstype="swap" --size=512
- #part / --asprimary --bytes-per-inode=4096 --fstype="ext4" --grow --size=1
- #vol information
- part pv.100 --size=20480 --grow
- volgroup myvg pv.100
- logvol / --fstype="ext4" --name=root --vgname=myvg --size=5120 --grow
- logvol /usr --fstype="ext4" --name=usr --vgname=myvg --size=5120 --grow
- logvol /home --fstype="ext4" --name=home --vgname=myvg --size=5120 --grow
- # System timezone
- timezone Asia/Shanghai
- # System bootloader configuration
- bootloader --location=mbr
- # Partition clearing information
- clearpart --all
- %packages
- ####### CentOS mini desktop packages ############
- @base
- @basic-desktop
- @chinese-support
- @desktop-debugging
- @desktop-platform
- @directory-client
- @fonts
- @input-methods
- @internet-browser
- @java-platform
- @legacy-x
- @network-file-system-client
- @remote-desktop-clients
- @server-platform
- @x11
- ######## graphic admin tools #############
- @graphical-admin-tools
- audit-viewer
- firstaidkit-gui
- policycoreutils-gui
- sabayon
- setroubleshoot
- #system-config-kickstart
- system-config-lvm
- #wireshark-gnome
- ############ virtualization tools ########
- @virtualization
- @virtualization-client
- @virtualization-platform
- @virtualization-tools
- fence-virtd-libvirt
- fence-virtd-multicast
- fence-virtd-serial
- libguestfs-java
- libguestfs-tools
- libvirt-cim
- libvirt-java
- libvirt-qmf
- libvirt-snmp
- perl-Sys-Virt
- #qemu-guest-agent
- qemu-kvm-tools
- virt-v2v
- %end
大家如果不是采用pxe安装,请参考后半部分的virtualization tools包列表进行手工安装。
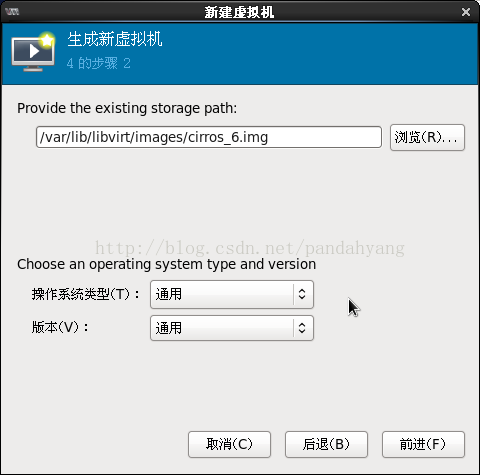
二、虚拟机创建
系统安装完成后,在菜单中,会有虚拟机管理的菜单,按照步骤提示,可方便的完成虚拟机创建
虚拟机测试可以使用cirros系统,该系统非常小,运行起来非常快(下载)


如果是winxp系统,系统安装完成后,会提示你又两个驱动无法安装,分别为显卡和网卡
- http://alt.fedoraproject.org/pub/alt/virtio-win/latest #网卡
- http://www.spice-space.org/download/windows/qxl/ #显卡,在安装spice后,需要安装qxl的显卡驱动
三、网桥配置
首先要理解NAT和网桥的概念,网上文章很多了,这里就不多说了,下面只说下网桥配置方面的东西。
1、增加网桥
需要在网络配置文件中,增加一个网桥的配置
- nano /etc/sysconfig/network-scripts/ifcfg-br0
- DEVICE="br0" #网桥名称
- TYPE="Bridge" #类型
- ONBOOT="yes"
- BOOTPROTO=static
- IPADDR=192.168.1.21 #网桥地址,该地址即为宿主机地址
- PREFIX=24
- GATEWAY=192.168.1.1
- DNS1=192.168.1.1
- DELAY=0
2、修改网卡配置
- nano /etc/sysconfig/network-scripts/ifcfg-eth0
在网卡配置中修改
- DEVICE="eth0"
- <span style="color:#ff0000;">BOOTPROTO=none #修改为none 下面的ip地址都可以不进行配置</span>
- IPADDR=192.168.1.11
- PREFIX=24
- GATEWAY=192.168.1.1
- DNS1=192.168.1.1
- DELAY=0
- IPV6INIT="no"
- NM_CONTROLLED="yes"
- ONBOOT=yes
- TYPE="Ethernet"
- <span style="color:#ff6666;">BRIDGE="br0" #增加网卡对网桥的识别</span>
- UUID="0f50002a-498c-477c-8e7e-122575acc077"
- DEFROUTE=yes
- IPV4_FAILURE_FATAL=yes
- NAME="System eth0"
- HWADDR=00:23:54:CB:DA:56
- MTU=1500
- PEERDNS=yes
- PEERROUTES=yes
- LAST_CONNECT=1421975568
3、禁用网络管理器
- # chkconfig NetworkManager off
- # service NetworkManager stop
4、重启网络
- # service network restart
网桥的配置就基本完成,此时需要在虚拟机的网络配置处修改配置。

具体网络配置如下

设置完成后,宿主机的地址为网桥的地址,虚拟机的地址为自动获取,可以在虚拟机中进行修改。经实验,外网和虚拟机之间的通信、虚拟机与宿主机之间的通信均正常。
四、Spice设置
spice是一种远程桌面协议,其支持的桌面色彩和周边设备的能力远远大于vnc,更适合做云桌面的使用。
1、安装spice服务器端
- #yum -y install spice-server
- #yum -y install spice-protocol xorg-x11-drv-qxl
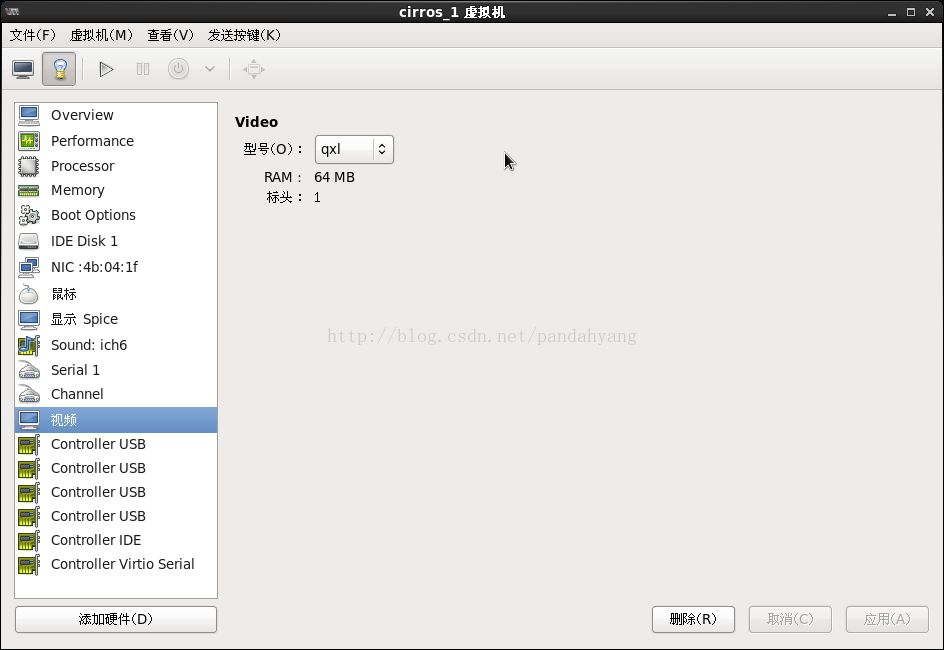
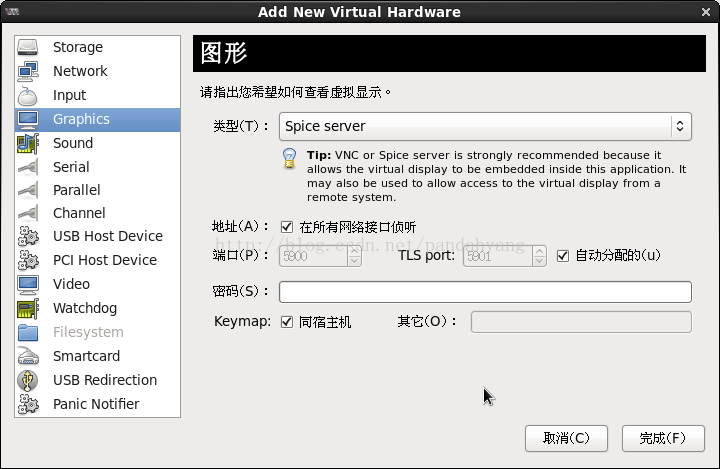
2、更改虚拟机显示设置
由于默认设置的问题,我们需要把原有的显示设置删掉,重新添加一个,并选选择在所有端口监听,才能让大家在非宿主机上链接到spice

3、客户端安装、使用
linux下的客户端,可以使用以下命令安装
- #yum -y install spice-client
连接
- # /usr/libexec/spicec -h 192.168.0.13 -p 5930 -w password
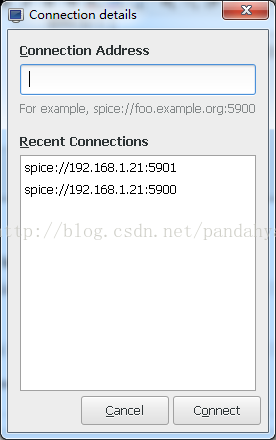
windows客户端,请下载virt-viewer Windows installer (下载)
直接运行,输入地址即可。


【推荐】国内首个AI IDE,深度理解中文开发场景,立即下载体验Trae
【推荐】编程新体验,更懂你的AI,立即体验豆包MarsCode编程助手
【推荐】抖音旗下AI助手豆包,你的智能百科全书,全免费不限次数
【推荐】轻量又高性能的 SSH 工具 IShell:AI 加持,快人一步
· 基于Microsoft.Extensions.AI核心库实现RAG应用
· Linux系列:如何用heaptrack跟踪.NET程序的非托管内存泄露
· 开发者必知的日志记录最佳实践
· SQL Server 2025 AI相关能力初探
· Linux系列:如何用 C#调用 C方法造成内存泄露
· 无需6万激活码!GitHub神秘组织3小时极速复刻Manus,手把手教你使用OpenManus搭建本
· Manus爆火,是硬核还是营销?
· 终于写完轮子一部分:tcp代理 了,记录一下
· 别再用vector<bool>了!Google高级工程师:这可能是STL最大的设计失误
· 单元测试从入门到精通