
【nginx】反向代理动静分离-nginx代理ssl证书配置
1.源码安装环境安装
[root@xuegod63 ~]#yum -y install gcc gcc-c++ autoconf automake
[root@xuegod63 ~]#yum -y install zlib zlib-devel openssl openssl-devel pcre pcre-devel
编译安装
[root@xuegod63 ~]#tar -zxvf nginx-1.8.0.tar.gz -C /usr/local/src/
tar zxf nginx-1.12.2.tar.gz
[root@206 ~]# cd nginx-1.12.2
[root@206 nginx-1.12.2]#
[root@xuegod63 ~]# ./configure --prefix=/usr/local/nginx --with-http_dav_module --with-http_stub_status_module --with-http_addition_module --with-http_sub_module --with-http_flv_module --with-http_mp4_module
查看参数:
[root@xuegod63 nginx-1.8.0]# ./configure --help | grep mp4
[root@206 nginx-1.12.2]# cat /proc/cpuinfo | grep processor | wc -l
[root@xuegod63 ~]#make -j 4
[root@xuegod63 ~]#make &&make install
[root@xuegod63 nginx-1.8.0]# useradd -u 8000 -s /sbin/nologin nginx
[root@xuegod63 nginx-1.8.0]# id !$
[root@206 nginx-1.12.2]# cd /usr/local/nginx/
[root@206 nginx]# ./sbin/nginx
[root@206 nginx]# netstat -antup | grep :80
echo '/usr/local/nginx/sbin/nginx & '>>/etc/rc.local
nginx服务日常操作:
测试配置文件语法:
[root@xuegod63 nginx-1.8.0]# /usr/local/nginx/sbin/nginx -t
nginx: the configuration file /server/nginx-1.8.0/conf/nginx.conf syntax is ok
nginx: configuration file /server/nginx-1.8.0/conf/nginx.conf test is successful
重新加载配置文件
[root@xuegod63 nginx-1.8.0]# /usr/local/nginx/sbin/nginx -s reload
关闭nginx
[root@xuegod63 /]# /usr/local/nginx/sbin/nginx -s stop
[root@206 nginx]# cp conf/nginx.conf conf/nginx.conf.bak
vim conf/nginx.conf
:set nu
user nginx nginx;
43
location / {
root html;
index index.html index.htm; #在location / { 。。。} 中添加以下内容 #定义分发策略
location / {
root html;
index index.html index.htm;
if ($request_uri ~* \.html$){
proxy_pass http://htmlservers;
}
if ($request_uri ~* \.php$){
proxy_pass http://phpservers;
}
proxy_pass http://picservers;
}
把以下内容注释掉,否则php文件直接在nginx服务器上解析了,不再解析给后端服务器:
# location ~ \.php$ {
73 # root html;
74 # fastcgi_pass 127.0.0.1:9000;
75 # fastcgi_index index.php;
76 # fastcgi_param SCRIPT_FILENAME /server/nginx-1.8.0/html$fastcgi_script_name;
77 # include fastcgi_params;
78 # }
#定义负载均衡设备的 Ip
#定义负载均衡设备的 Ip
在配置文件nginx.conf的最后一行}前,添加以下内容:
upstream htmlservers { #定义负载均衡服务器组名称
124 server 192.168.1.2:80;
125 server 192.168.1.3:80;
126 }
127 upstream phpservers{
128 server 192.168.1.2:80;
129 server 192.168.1.3:80;
130 }
131 upstream picservers {
132 server 192.168.1.2:80;
133 server 192.168.1.3:80;
134 }
[root@206 nginx]# /usr/local/nginx/sbin/nginx -s reload
配置web服务器:
[root@12 ~]# yum install httpd php -y
生成静态测试文件:
root@xuegod62 html]#echo 192.168.1.62 > /var/www/html/index.html
生成动态测试文件:
[root@xuegod62 html]#vim /var/www/html/test.php #写如以下内容:
192.168.1.62-php
<?php
phpinfo();
?>
rz pc.png 到2和3主机
[root@13 html]# ls
index.html pc.png test.php
[root@13 html]# systemctl restart httpd
Warning: httpd.service changed on disk. Run 'systemctl daemon-reload' to reload units.
[root@13 html]# systemctl daemon-reload
[root@13 html]# systemctl restart httpd #重启慢改servername为本机ip 关闭dns 加快速度
systemctl enable httpd
测试
http://192.168.1.1/
http://192.168.1.1/test.php
http://192.168.1.1/pc.png
[root@xuegod64 html]# ab -n 1000 -c 1000 http://192.168.1.62/index.html #运行正常
[root@xuegod64 html]# ab -n 2000 -c 2000 http://192.168.1.62/index.html
ulimit -a #查看
ulimit -n 10240
Nginx负载的5种策略设置方法:
1、轮询(默认)
每个请求按时间顺序逐一分配到不同的后端服务器,如果后端服务器down掉,能自动剔除。
upstream backserver {
server 192.168.1.62;
server 192.168.1.64;
}
2、指定权重
指定轮询几率,weight和访问比率成正比,用于后端服务器性能不均的情况。
upstream backserver {
server 192.168.1.62 weight=1;
server 192.168.1.64 weight=2;
}
3、IP绑定 ip_hash
每个请求按访问ip的hash结果分配,这样每个访客固定访问一个后端服务器,可以解决session的问题。
upstream backserver {
ip_hash;
server 192.168.1.62:80;
server 192.168.1.64:80;
}
4、fair(第三方)
按后端服务器的响应时间来分配请求,响应时间短的优先分配。
upstream backserver {
server server1;
server server2;
fair;
}
5、url_hash(第三方)
按访问url的hash结果来分配请求,使每个url定向到同一个后端服务器,后端服务器为缓存时比较有效。
upstream backserver {
server squid1:3128;
server squid2:3128;
hash $request_uri;
hash_method crc32;
}
总结,扩展:
如有tomcat ,apache,squid 配置为如下:
[root@xuegod63 conf]# vim nginx.conf # 在最后添加以下内容。 定义服务器组 名字也可以自定义
upstream tomcat_servers {
server 192.168.1.2:8080;
server 192.168.1.1:8080;
server 192.168.1.11:8080;
}
upstream apache_servers {
server 192.168.1.5:80;
server 192.168.1.177:80;
server 192.168.1.15:80;
}
upstream squid_servers {
server 192.168.1.26:3128;
server 192.168.1.55:3128;
server 192.168.1.18:3128;
}
转载自
https://www.cnblogs.com/Miss-mickey/p/6734831.html
四、nginx反向代理】
本地起两个项目,源码在此。
分别在这两个文件夹下面运行

npm install
node server.js
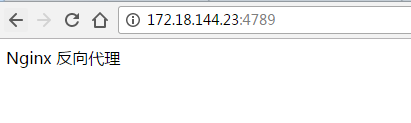
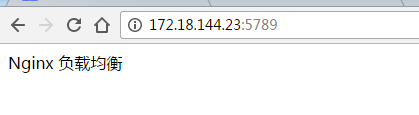
在浏览器输入
本机ip:4789
本机ip:5789
可以访问到这两个页面
接着我们想使用
172.18.144.23 test.nginx.com
然后在 nginx 的 http 模块上添加一个 server

server {
        listen       80;
        server_name  test.nginx.com;

        location / {
            proxy_pass   http://172.18.144.23:4789/;
        }

        location /buy {
            proxy_pass   http://172.18.144.23:5789/;
        }

        error_page   500 502 503 504  /50x.html;
        location = /50x.html {
            root   html;
        }

    }
然后重启nginx
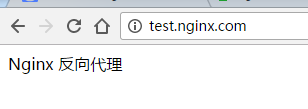
在浏览器输入 test.nginx.com
在浏览器输入 test.nginx.com/bug
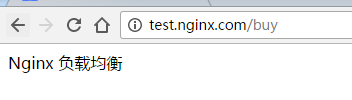
反向代理就这样子啦。
【五、nginx负载均衡】
在nginx中配置http
首先配置负载均衡的服务
在http模块中添加如下配置
upstream webservers {
        server 172.18.144.23:4789 weight=10;
        server 172.18.144.23:5789 weight=10;
    }
把server改为
server {
        listen       80;
        server_name  test.nginx.com;

        location / {
            proxy_pass   http://webservers;
        }

        location /buy {
            proxy_pass   http://172.18.144.23:5789/;
        }

        error_page   500 502 503 504  /50x.html;
        location = /50x.html {
            root   html;
        }

    }
在浏览器输入 test.nginx.com,刷新,我们可以看到两种页面,说明nginx已经把我们的请求分发到不同的地方去了。

   11  rpm -Uvh http://nginx.org/packages/centos/7/noarch/RPMS/nginx-release-centos-7-0.el7.ngx.noarch.rpm
   12  yum install -y nginx
   13  systemctl restart nginx.service
nginx证书代理配置 pfx证书格式转换
[root@localhost ~]# openssl pkcs12 -in /root/2799289_www.xxx.com.pfx -clcerts -nokeys -out /etc/nginx/ssl/www.xxx.com.crt
Enter Import Password:
MAC verified OK
[root@localhost ~]# openssl pkcs12 -in /root/2799289_www.xxx.com.pfx -nocerts -nodes -out /etc/nginx/ssl/www.xxx.com.rsa
Enter Import Password:
MAC verified OK
vi /etc/nginx/conf.d/default.conf
server {
 listen 80;
 server_name www.xxx.com;
rewrite ^(.*)$ https://$host$1 permanent;
 location / {
index index.html index.htm;
}
}
server {
    listen 443;
    server_name www.xxx.com;
    ssl on;
    ssl_certificate /etc/nginx/ssl/www.xxx.com.crt;
    ssl_certificate_key /etc/nginx/ssl/www.xxx.com.rsa;
    ssl_session_timeout 5m;
    ssl_protocols SSLv2 SSLv3 TLSv1;
    ssl_ciphers ALL:!ADH:!EXPORT56:RC4+RSA:+HIGH:+MEDIUM:+LOW:+SSLv2:+EXP;
    ssl_prefer_server_ciphers on;
location / {
            proxy_pass   http://192.168.120.60/;
        }
}
vi /etc/nginx/conf.d/default.conf #不跳转的配置
server {
 listen 80;
 server_name www.chengshizhichuang.com;
 location / {
     proxy_pass   http://192.168.1.152/;
}
}
server {
    listen 443;
    server_name www.chengshizhichuang.com;
    ssl on;
    ssl_certificate /etc/nginx/ssl/www.chengshizhichuang.com.crt;
    ssl_certificate_key /etc/nginx/ssl/www.chengshizhichuang.com.rsa;
    ssl_session_timeout 5m;
    ssl_protocols SSLv2 SSLv3 TLSv1;
    ssl_ciphers ALL:!ADH:!EXPORT56:RC4+RSA:+HIGH:+MEDIUM:+LOW:+SSLv2:+EXP;
    ssl_prefer_server_ciphers on;
location / {
     proxy_pass   http://192.168.1.152/;
        }
}
nginx代理css样式无法加载
server {
 listen 80;
 server_name www.chengshizhichuang.com;
 client_max_body_size 100M;
 location / {
     proxy_pass   http://192.168.1.134/;
}
# 注意下面三个行不加可能无法正常访问js资源
proxy_set_header Host $host;
proxy_set_header X-Real-IP $remote_addr;
proxy_set_header X-Forwarded-For $proxy_add_x_forwarded_for;

 location /pay/ { #代理目录的时候注意css文件是在代理目录下面还是和代理目录同级 如果同级需要再次代理一下同级目录
     proxy_pass   http://192.168.1.212:21612/pay/;
}
# location /pay/static/ {
#            proxy_pass http://192.168.1.212:21612/pay/static/;
#            }

}
server {
    listen 443;
    server_name www.chengshizhichuang.com;
    ssl on;
    ssl_certificate /etc/nginx/ssl/www.chengshizhichuang.com.crt;
    ssl_certificate_key /etc/nginx/ssl/www.chengshizhichuang.com.rsa;
    ssl_session_timeout 5m;
    ssl_protocols SSLv2 SSLv3 TLSv1;
    ssl_ciphers ALL:!ADH:!EXPORT56:RC4+RSA:+HIGH:+MEDIUM:+LOW:+SSLv2:+EXP;
    ssl_prefer_server_ciphers on;
location / {
     proxy_pass   http://192.168.1.134/;
        }
 location /pay/ {
     proxy_pass   http://192.168.1.212:21612/pay/;
}

}
如果项目路径和代理路径不同各图片,css样式目录需要重新代理一遍如
server {
 listen 80;
 server_name localhost;
 client_max_body_size 100M;
 proxy_set_header Host $host;
 proxy_set_header X-Real-IP $remote_addr;
 proxy_set_header X-Forwarded-For $proxy_add_x_forwarded_for;
 location /donet {
     proxy_pass   http://192.168.130.151:8050/;
}
location /Content {
     proxy_pass   http://192.168.130.151:8050/Content/;
}
location /Login {
     proxy_pass   http://192.168.130.151:8050/Login/;
}

location /Home {
     proxy_pass   http://192.168.130.151:8050/Home/;
}


location /java {
     proxy_pass   http://192.168.130.132/;
}


}
场景 nginx 转发端口 路由器二次转发了,端口不一样 (shiro 或者其他一些权限控制架构会自动跳转,导致的端口不对。)

 proxy_set_header Host $host:$proxy_port;
参考
https://blog.csdn.net/zzhongcy/article/details/88801322
本机代理本机的其他端口
server{
    listen              80;
    server_name         www.aa.com www.bb.com;
    location / {
        proxy_pass http://localhost:8080;
        proxy_set_header   Host    $host;
        proxy_set_header   X-Real-IP   $remote_addr;
        proxy_set_header   X-Forwarded-For $proxy_add_x_forwarded_for;
    }
}
代理端口配置2
    server {
        listen       80;
        server_name  localhost;

        #charset koi8-r;

        #access_log  logs/host.access.log  main;

  location / {
  proxy_pass http://localhost:2151;
  proxy_http_version 1.1;
  proxy_set_header Upgrade $http_upgrade;
  proxy_set_header Connection keep-alive;
  proxy_set_header Host $host;
  proxy_cache_bypass $http_upgrade;
  }
参考
https://www.cnblogs.com/heartlifes/articles/6970858.html

 浙公网安备 33010602011771号