

Django(投票程序)
Django是一个web框架,python编写的。
MTV模式
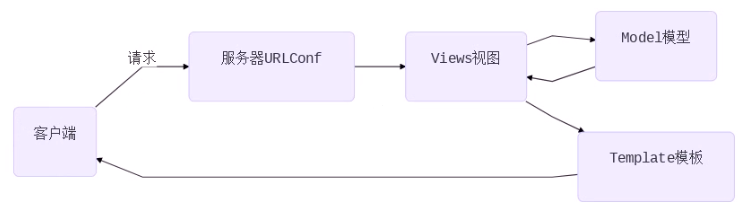
1 2 3 4 | Django的MTV模式本质上和MVC是一样的,也是为了各组件间保持松耦合关系,只是定义上有些许不同-M代表模型(Model ):负责业务对象和数据库的关系映射(ORM)-T代表模板(Template):负责如何把页面展示给用户(html)-V代表视图(View ) :负责业务逻辑,并在适当时候调用Model和Template |
client(客户端)-->请求(url)--> server(服务器的urlconf)-->views(视图,相当于函数,客户机访问url,每次的访问都有相应的函数对应)-->model(数据库,增删改查)-->views(修改数据库后再返回信息给视图,数据交互)-->Template(web页面)-->client
一、创建python的虚拟环境
(一)配置pip文件
1 2 3 4 5 | (django_env) [root@django ~]# cat .pip/pip.conf [global]index-url = http://pypi.douban.com/simple[install]trusted-host=pypi.douban.com |
(二)虚拟环境安装
1 2 3 4 5 6 7 8 9 10 11 12 | mkdir pyprojectcd pyproject/python3 -m venv django_env #在当前目录创建虚拟环境(Django_env 名字可以变)source django_env/bin/activate #激活虚拟环境pip install django==1.11.6 #在虚拟环境中安装Django==1.11.6 (django_env) [root@localhost pyproject]# python #验证 Python 3.6.4 (default, Apr 27 2018, 08:26:23) [GCC 4.8.5 20150623 (Red Hat 4.8.5-16)] on linux Type "help", "copyright", "credits" or "license" for more information. >>> import django >>> django.__version__ '1.11.6' |
二 、Django项目创建
1 2 3 4 5 6 7 8 9 10 | django-admin startproject mysite #创建项目 (django_env) [root@localhost pyproject]# cd mysite #Django的目录结构 (django_env) [root@localhost mysite]# tree . ├── manage.py └── mysite ├── __init__.py ├── settings.py ├── urls.py └── wsgi.py |
mysite:项目的容器。
manage.py:一个使用的命令行工具,可让你以各种方式与该django项目进行交互(项目的管理目录)
mysite/__init__.py:一个空文件,告诉python该目录是一个python包。(项目的初始化文件)
mysite/settings.py:该django项目的设置/配置。(项目的配置文件)
mysite/urls.py:该django项目的URL声明;一份由django驱动的网站“目录”。(项目的路由文件)
mysite/wsgi.py:一个WSGI兼容的Web服务器的入口,以便运行你的项目。(将网站部署到web服务器时使用的文件)
python manage.py runserver 0.0.0.0:8000 #运行项目
127.0.0.1:8000 #查看项目
三、Django配置
(一)创建数据库
1 | CREATE DATABASE django DEFAULT CHARSET 'UTF8'; |
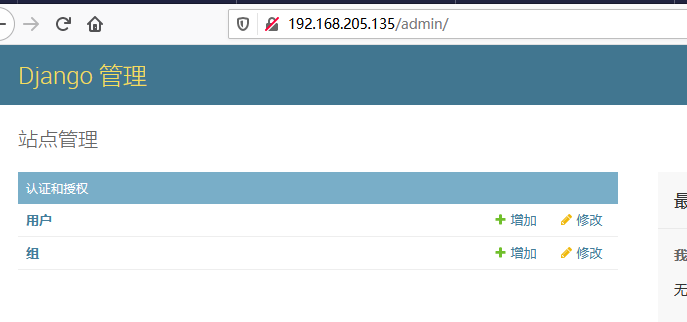
(二)配置 setting.py(配置完成后页面变成中文)
1 2 3 4 5 6 7 8 9 10 11 12 | ALLOWED_HOSTS = ['*'] # 允许所有的客户端访问DATABASES = { 'default': {'ENGINE': 'django.db.backends.mysql', 'NAME': 'django', 'USER': 'root', 'PASSWORD': '数据库root密码', 'HOST': '127.0.0.1', 'PORT': '3306', }}LANGUAGE_CODE ='zh-hans' #中文TIME_ZONE ='Asia/Shanghai'USE_TZ = False |
(三)配置__init__.py(要先安装pymysql模块)
1 2 | import pymysqlpymysql.install_as_MySQLdb() |
运行查看
1 2 3 | # 重新运行测试服务器,监听在0.0.0.0的80端口。注意:如果不是root,不能监听1024以下端口[root@room8pc16 mysite]# python manage.py runserver 0:80 |
(四)生成数据
1 2 | [root@room8pc16 mysite]#python manage.py makemigrations #会生成一些相应的sql语句[root@room8pc16 mysite]# python manage.py migrate #生成表 |
(五)创建管理员
1 | [root@room8pc16 mysite]# python manage.py createsuperuser #密码要求复杂度和长度 |
查看页面
四、使用Django创建应用
(一)创建应用(对应的一个个的功能模块,使用一个投票为例子)
1 | [root@room8pc16 mysite]# python manage.py startapp polls #创建应用(可以集成到任何的一个项目中) |
(二)在settings配置文件中声明应用(把应用集成在项目中)
1 2 3 4 5 6 7 8 9 | INSTALLED_APPS = [ 'django.contrib.admin', 'django.contrib.auth', 'django.contrib.contenttypes', 'django.contrib.sessions', 'django.contrib.messages', 'django.contrib.staticfiles', 'polls' #添加的应用] |
(三)授权,把应用的url交给投票应用处理,都在项目下的urls.py的这个文件就会特别大
1 2 3 4 5 6 7 8 | polls/urls.pyfrom django.conf.urls import url, includefrom django.contrib import adminurlpatterns = [# 正则匹配时,从http://x.x.x.x/后面开始算起 # 正则匹配时,从http://x.x.x.x/pollsurl(r'^admin/', admin.site.urls), url(r'^polls/', include('polls.urls')), #其中r意思真实字符串相当于shell中的单引号 ] |
在polls目录下没有urls.py文件就创建一个
1 2 | [root@django polls]# touch urls.py vim polls/urls.py <br>from django.conf.urls import url<br>urlpatterns = [<br>] |
五、创建投票首页
(一)编写url
1 2 3 4 5 6 | from django.conf.urls import url,includefrom django.contrib import admin<br>from . import views #.是当前目录的意思(和urls.py同级,也可以from polls import views)urlpatterns = [ url(r'^$', views.index,name='index'), #匹配到空白,都用views.index函数进行响应,那么为函数名字] |
(二)编写views视图函数
1 2 3 4 5 | def index(request):# 用户发起的请求将会作为第一个参数传给函数 (客户端发起请求时可能是 get,put,post,携带的参数或者数据等等 都会作为第一个参数 传给request)# 所以函数至少要定义一个参数来接收用户的请求# render负责找寻模板文件发送给用户return render(request, 'index.html') |
(三)编写页面(确定templates模板的位置)
1 2 3 4 5 6 7 8 9 10 11 12 | TEMPLATES = [ { 'BACKEND': 'django.template.backends.django.DjangoTemplates', 'DIRS': [os.path.join(BASE_DIR, 'templates')], #templates模板的位置,项目目录同级 'APP_DIRS': True, 'OPTIONS': { 'context_processors': [ 'django.template.context_processors.debug', 'django.template.context_processors.request', 'django.contrib.auth.context_processors.auth', 'django.contrib.messages.context_processors.messages', ], |
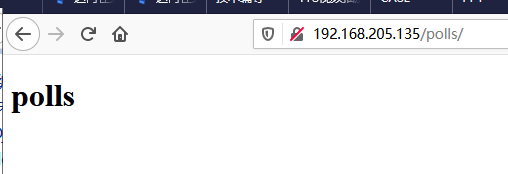
index.html
1 2 3 4 5 6 7 8 9 10 11 | <html lang="en"><head> <meta charset="UTF-8"> <title>polls</title></head><body><div class="container"> <h1>polls</h1></div></body></html> |
六、编写问题页面
(一)编写urls.py
1 2 3 4 5 6 | urlpatterns = [ url(r'^$', views.index,name='index'), url(r'(\d+)/$', views.a,name='a'), #\d+为匹配数字(+为至少匹配到一个数字) # ()为传参(把匹配到的数字作为视图函数a的参数 ) ] |
(二)编写views.py
1 2 3 4 5 6 7 | from django.shortcuts import renderdef index(request): return render(request,'index.html')def a(request,id): #在urls.py中匹配到的参数的值用变量id接受 return render(request,'a.html',{'id':id}) # 字典的内容将会成为模板文件的变量,字典的key是变量名,value是变量值(字典的值成为html的参数) |
(三)编写a.html
1 2 3 4 5 6 7 8 9 10 11 12 | <!DOCTYPE html><html lang="en"><head> <meta charset="UTF-8"> <title>Title</title></head><body><div class="container"> <h1>{{id}}question</h1> #在views.py文件中接受的参数,用{{}}表示</div></body></html> |

七、编写结果页面
(一)编写urls.py
1 2 3 4 5 | urlpatterns = [ url(r'^$', views.index,name='index'), #r‘’单引号里面什么也不填写那么就是匹配空串(在任何字符之间都有空串),不管在ip/polls/后面填写什么都将匹配首页 url(r'(\d+)/$', views.a,name='a'), url(r'(\d+)/result/$', views.result,name='result')] |
(二)编写views.py
1 2 3 4 5 6 7 8 9 | from django.shortcuts import render# Create your views here.def index(request): return render(request,'index.html')def a(request,id): return render(request,'a.html',{'id':id})def result(request,id): return render(request,'result.html',{'id':id}) |
(三)编写result.html
1 2 3 4 5 6 7 8 9 | <meta charset="UTF-8"> <title>Title</title></head><body><div> <h1>{{id}}result</h1></div></body></html> |
八、model模型
1 2 3 4 5 6 7 8 | ORMobject :对象﹐对应django模型中的classRelationship:关系﹐对应关系型数据库Mapping:映射一个class对应数据库中的一张表表中的字段与class中的类变量对应数据库中的数据类型也与django模型中的类映射表中的每个记录都与class的实例对应 |
(一)编写models.py
1 2 3 4 5 6 7 8 9 10 | from django.db import models# Create your models here.class Question(models.Model): question_text = models.CharField(max_length=200, unique=True) pub_date = models.DateTimeField() #不加Field,没有时分秒class Chioce(models.Model): chioce_text = models.CharField(max_length=200, unique=True) votes = models.IntegerField(default=0) question = models.ForeignKey(Question) #如果想要修改字段名,在配置文件中修改之后,重新生成表 |
(二)生成表
1 2 | python manage.py makemigrationspython manage.py migrate |
(三)将模型加入到后台页面
1 2 3 4 5 6 | # polls/admin.pyfrom django.contrib import admin# 在当前目录下的models模块中导入模型from .models import Question, Choice# Register your models here.admin.site.register(Question)admin.site.register(Choice) |

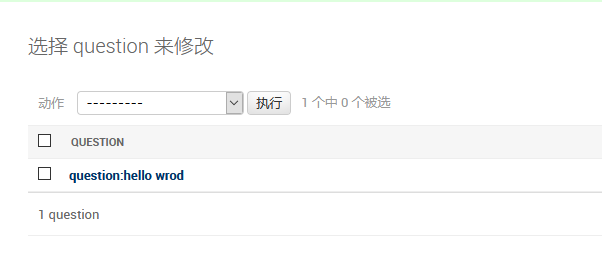
解决办法
1 2 3 4 5 6 7 8 9 10 11 | class Question(models.Model): question_text = models.CharField(max_length=200, unique=True) pub_date = models.DateTimeField() def __str__(self): return 'question:%s' % self.question_textclass Chioce(models.Model): chioce_text = models.CharField(max_length=200, unique=True) votes = models.IntegerField(default=0) question = models.ForeignKey(Question) def __str__(self): return '%s:%s' % return '%s:%s' % (self.question,self.chioce_text) |
九、Django API(首页)
(一)在views文件中把问题取出来传给html
1 2 3 4 5 6 | # polls/views.pyfrom django.shortcuts import renderfrom .models import Question def index(request): questions = Question.objects.order_by('-pub_date') returnrender(request, 'index.html', {'questions': questions}) |
(二)编辑index.html
1 2 3 4 5 6 7 8 9 10 11 12 13 14 15 16 17 18 19 20 21 22 23 | <!DOCTYPEhtml><htmllang="en"><head><metacharset="UTF-8"><title>投票首页</title></head><body><div class="container"> <div class="content"> <h1>投票首页</h1> <ol> {% for question in questions %} <li> <a href="{% url 'a' question.id %}" target="_blank"><br>#question_id是views.py中的\d+这个参数,数据库中没有指定主键时Django会自动创建主键,question_id就是问题的id号 {{ question.question_text }}</a> {{ question.pub_date }} </li> {%endfor%} </ol> </div></div></body></html> |
(三)可以添加轮播图
1 2 3 4 5 6 7 8 9 10 11 12 13 14 15 16 17 18 19 20 21 22 23 24 25 26 27 28 29 | <div class="container"> <div id="linux-carousel" class="carousel slide"> <ol class="carousel-indicators"> <li class="active" data-target="#linux-carousel" data-slide-to="0"></li> #轮播图下面的小圆点 <li data-target="#linux-carousel" data-slide-to="1"></li> <li data-target="#linux-carousel" data-slide-to="2"></li> </ol> <div class="carousel-inner"> <div class="item active"> <a href="http://www.sogou.com" target="_blank"> <img src="{% static 'imgs/first.jpg' %}"> </a> </div> <div class="item"> <img src="{% static 'imgs/second.jpg' %}"> </div> <div class="item"> <img src="{% static 'imgs/third.jpg' %}"> </div> </div> <a href="#linux-carousel" data-slide="prev" class="carousel-control left"> <span class="glyphicon glyphicon-chevron-left"></span> #向左翻制作投票详情页 </a> <a href="#linux-carousel" data-slide="next" class="carousel-control right"> <span class="glyphicon glyphicon-chevron-right"></span> #向右翻 </a> </div> <script src="{% static 'js/jquery.min.js' %}"></script> #要有JS代码才能实现轮播图<script src="{% static 'js/bootstrap.min.js' %}"></script> <script type="text/javascript"> |
(四)模板继承(为了避免一些网页的重复代码)
1.复制index.html一本命令为bak.html
1 2 3 4 5 6 7 8 9 10 11 12 13 14 15 16 17 18 19 20 21 22 23 24 25 26 27 28 29 30 31 32 33 34 35 36 37 38 39 40 41 42 | # 在basic.html中,将个性(不相同)内容用block替代 {% load static %} <!DOCTYPE html> <html lang="en"> <head><meta charset="UTF-8"> <title>{% block title %}{% endblock %}</title> <meta name="viewport" content="width=device-width, initial-scale=1"> <link rel="stylesheet" href="{% static 'css/bootstrap.min.css' %}"> </head> <body> <div class="container"> <div id="linux-carousel" class="carousel slide"> <ol class="carousel-indicators"> <li class="active" data-target="#linux-carousel" data-slide-to="0"></li> <li data-target="#linux-carousel" data-slide-to="1"></li> <li data-target="#linux-carousel" data-slide-to="2"></li> </ol> <div class="carousel-inner"> <div class="item active"> <a href="http://www.sogou.com" target="_blank"> <img src="{% static 'imgs/first.jpg' %}"> #图片放在polls下static目录的imgs目录中 </a> </div> <div class="item"> <img src="{% static 'imgs/second.jpg' %}"> </div> <div class="item"> <img src="{% static 'imgs/third.jpg' %}"> </div> </div> <a href="#linux-carousel" data-slide="prev" class="carousel-control left"> <span class="glyphicon glyphicon-chevron-left"></span>制作投票详情页 </a> <a href="#linux-carousel" data-slide="next" class="carousel-control right"> <span class="glyphicon glyphicon-chevron-right"></span> </a> </div> {% block content %}{% endblock %} <script src="{% static 'js/jquery.min.js' %}"></script> <script src="{% static 'js/bootstrap.min.js' %}"></script> <script type="text/javascript"></script> </body></html> |
2.index.html
1 2 3 4 5 6 7 8 9 10 11 12 13 14 15 | # 修改index.html,把共性内容删除,个性内容写到对应的block中 {% extends 'bak.html' %} #继承{% load static %} {% block title %}投票首页{% endblock %} {% block content %} <div class="content h4"> <h1 class="text-center text-warning">投票首页</h1> <ol style="margin: 20px 0"> {% for question in questions %} <li><a href="{% url 'detail' question.id %}" target="_blank"> {{ question.question_text }} </a> {{ question.pub_date }} </li> {% endfor %} </ol> </div> {% endblock %} |
十、制作a.html(第二个页面)
(一)编辑views.py
1 2 3 4 5 6 7 8 9 10 11 | from django.shortcuts import renderfrom .models import Question, Chioce# Create your views here.def index(request): d = Question.objects.order_by('-pub_date') return render(request,'index.html',{'d':d})def a(request,question_id): c = Question.objects.get(id=question_id) return render(request,'a.html',{'id':c})def result(request,id): return render(request,'result.html',{'id':id}) |
(二)编辑a.html(取出选项)
1 2 3 4 5 6 7 8 9 10 11 12 13 14 15 16 17 18 19 20 21 22 23 24 25 | {% extends 'bak.html'%}{% load static %}{% block title%}polls{%endblock%}{% block content%}<div class="container"> <h1>{{ id.id }}</h1></div><div class="content h4 text-warning" > <h1 class="text-center">chioce</h1> <h2>{{ id }}</h2> <form action=""><br> {% csrf_token %} #安全选项 {% for i in id.chioce_set.all %} <div class="radio"> <label > <input type="radio" name="chioce_id" value="{{ chioce_id }}"> {{ i.chioce_text }} </label> </div> {% endfor %} </form></div><div class="group"> <input class="btn btn-primary" tpye="submit" value="submit"> </div>{%endblock%} |
十一、实现投票功能(数据库添加删除)
实现数据库的增删改查。执行函数对model模型的操作(url-->views-->model)
(一)配置urls.py
1 2 3 4 5 6 7 8 9 10 | from django.conf.urls import url,includefrom django.contrib import adminfrom . import viewsurlpatterns = [ url(r'^$', views.index,name='index'), url(r'(\d+)/$', views.a,name='a'), url(r'(\d+)/result/$', views.result,name='result'), url(r'(\d+)/vote/$', views.vote,name='vote'),] |
(二)配置views.py
1 2 3 4 5 6 7 8 9 10 11 12 13 14 15 16 17 18 19 20 21 | from django.shortcuts import render, redirectfrom .models import Question, Chioce# Create your views here.def index(request): d = Question.objects.order_by('-pub_date') return render(request,'index.html',{'d':d})def a(request,question_id): c = Question.objects.get(id=question_id) return render(request,'a.html',{'id':c})def result(request,id): return render(request,'result.html',{'id':id})def vote(request,id): d = Question.objects.get(id=id) #取出问题# 当用户提交表单时,request.POST是一个字典,里面记录了与POST相关的数据 # choice_id是detail.html页面中单选按钮的name,值是选项的id(value的值) chioce_id = request.POST.get('chioce_id') #取出name的值 chioce = d.chioce_set.get(id=chioce_id) #取出对用id的项 chioce.votes += 1 chioce.save()# 这里返回使用的不是render,因为render直接返回页面,URL不变,也就是http://x.x.x.x/polls/2/vote显示的是2号问题的投票结果,这是不合理的应该由http://x.x.x.x/polls/2/result/显示投票结果。所以使用redirect return redirect('result',id) |
(三)配置a.html
1 2 3 4 5 6 7 8 9 10 11 12 13 14 15 16 17 18 19 20 21 22 23 24 25 26 27 | {% extends 'bak.html'%}{% load static %}{% block title%}polls{%endblock%}{% block content%}<div class="container"> <h1>{{ id.id }}</h1></div><div class="content h4 text-warning" > <h1 class="text-center">chioce</h1> <h2>{{ id }}</h2> <form action="{% url 'vote' id.id %}" method="post"> {% csrf_token %} {% for i in id.chioce_set.all %} <div class="radio"> <label > <input type="radio" name="chioce_id" value="{{ i.id }}"> {{ i.chioce_text }} </label> </div> {% endfor %} <div class="form-group"> <input class="btn btn-primary" type="submit" value="submit"> </div> </form></div>{%endblock%} |
十二、配置result.html
(一)views.py
1 2 3 4 5 6 7 8 9 10 11 12 13 14 15 16 17 18 19 | from django.shortcuts import render, redirectfrom .models import Question, Chioce# Create your views here.def index(request): d = Question.objects.order_by('-pub_date') return render(request,'index.html',{'d':d})def a(request,question_id): c = Question.objects.get(id=question_id) return render(request,'a.html',{'id':c})def result(request,id): d = Question.objects.get(id=id) return render(request,'result.html',{'id':d})def vote(request,id): d = Question.objects.get(id=id) chioce_id = request.POST.get('chioce_id') chioce = d.chioce_set.get(id=chioce_id) chioce.votes += 1 chioce.save() return redirect('result',id) |
(二)配置resul.html
1 2 3 4 5 6 7 8 9 10 11 12 13 14 15 16 17 18 19 20 21 22 | {% extends 'bak.html'%}{% load static %}{% block title%}投票结果{%endblock%}{% block content%}<div> <h1 class="text-center">{{ id.id }}投票结果</h1> <table class="table table-striped table-hover"> <thead class="bg-primary"> <tr> <td colspan="2">{{ id.question_text }}</td> </tr> </thead> {% for i in id.chioce_set.all %} <tr> <td>{{ i.chioce_text }}</td> <td >{{ i.votes }}</td> </tr> {%endfor%} </table></div>{%endblock%} |


【推荐】国内首个AI IDE,深度理解中文开发场景,立即下载体验Trae
【推荐】编程新体验,更懂你的AI,立即体验豆包MarsCode编程助手
【推荐】抖音旗下AI助手豆包,你的智能百科全书,全免费不限次数
【推荐】轻量又高性能的 SSH 工具 IShell:AI 加持,快人一步
· 开发者必知的日志记录最佳实践
· SQL Server 2025 AI相关能力初探
· Linux系列:如何用 C#调用 C方法造成内存泄露
· AI与.NET技术实操系列(二):开始使用ML.NET
· 记一次.NET内存居高不下排查解决与启示
· 被坑几百块钱后,我竟然真的恢复了删除的微信聊天记录!
· 没有Manus邀请码?试试免邀请码的MGX或者开源的OpenManus吧
· 【自荐】一款简洁、开源的在线白板工具 Drawnix
· 园子的第一款AI主题卫衣上架——"HELLO! HOW CAN I ASSIST YOU TODAY
· Docker 太简单,K8s 太复杂?w7panel 让容器管理更轻松!