
springboot集成elasticsearch
一、elasticsearch简介:
ElasticSearch(ES) 是一个基于 Lucene 的搜索服务器,是一个分布式、可扩展、实时的搜索与数据分析引擎,它能从项目一开始就赋予你的数据以搜索、分析和探索的能力,基于 RESTful web 接口。ElasticSearch 是用 Java 开发 ,当前流行的企业级搜索引擎。设计用于云计算中,能够达到实时搜索,稳定,可靠,快速,安装使用方便。
二、elasticsearch应用场景
海量数据分析引擎
站内搜索引擎
数据仓库
三、版本
elasticsearch-6.6.2-windows-64 //elasticsearch: Windows版的服务器
kibana-6.6.2-windows-64 //类似于elasticsearch的图形化工具,可以方便的操作elasticsearch中的索引内容
springboot-1.5.9
org.elasticsearch 5.6.0 //pom.xml引入的elasticsearch 依赖包
org.elasticsearch.client 5.6.0 //若elasticsearch-windows-6.6.2,注意:这里引用的依赖包最低版本是5.6.0,否则报错。
jdk1.8
基于上一节的知识点(springboot集成swagger2开发的)
四、 springboot集成elasticsearch
1.本机下载安装elasticsearch
或 elasticsearch-6.6.2-windows-64 下载地址:
链接:https://pan.baidu.com/s/1hjG4gTt3Mtu4FFoqoFN8Sg 提取码:hmbr
下载后解压,即可使用
进入到bin下,双击elasticsearch.bat(打开ES),
测试是否安装成功,访问:http://localhost:9200
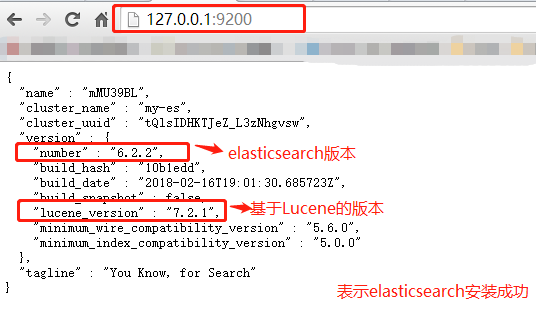
2.本机下载安装Kibana
类似于elasticsearch的图形化工具,可以方便的操作查看elasticsearch中的索引内容
<!-- elasticsearch -->
<dependency>
    <groupId>org.elasticsearch</groupId>
    <artifactId>elasticsearch</artifactId>
    <version>5.6.0</version>
</dependency>
<dependency>
    <groupId>org.elasticsearch.client</groupId>
    <artifactId>transport</artifactId>
    <version>5.6.0</version>       <!-- 修改完这里需要重启springboot,否则elasticsearch6.2.2Windows不识别新版本 -->
</dependency>
<!-- elasticsearch 5.x中需要log4j的一些依赖 -->
        <dependency>
            <groupId>org.apache.logging.log4j</groupId>
            <artifactId>log4j-api</artifactId>
            <version>2.7</version>
        </dependency>
        <dependency>
            <groupId>org.apache.logging.log4j</groupId>
            <artifactId>log4j-core</artifactId>
            <version>2.7</version>
        </dependency>
六、application.properties
可以把下面配置类中的参数ip、端口号和cluster.name 配置在application.properties里
七、创建配置类
package cn.xdf.springboot.config;

import org.elasticsearch.client.transport.TransportClient;
import org.elasticsearch.common.settings.Settings;
import org.elasticsearch.common.transport.InetSocketTransportAddress;
import org.elasticsearch.transport.client.PreBuiltTransportClient;
import org.springframework.context.annotation.Bean;
import org.springframework.context.annotation.Configuration;

import java.net.InetAddress;
import java.net.UnknownHostException;
@Configuration
public class ESConfig {
    @Bean
    public TransportClient getTransportClient() throws UnknownHostException {
        // ES默认TCP端口是9300
        InetSocketTransportAddress node = new InetSocketTransportAddress(InetAddress.getByName("127.0.0.1"), 9300);
        TransportClient client = null;
        try {
       //注意:需要修改安装的elasticsearch的配置文件/config/elasticsearch.yml的第17行的集群名对应自己这里“my-es”和第55行的ip对应自己这里的“127.0.0.1” ,并打开这两行注释。
            Settings settings = Settings.builder().put("cluster.name", "my-es").build();//集群名字:es需要对应elasticsearch.yml中cluster.name
            client = new PreBuiltTransportClient(settings);
            // 多个client多次new InetSocketTransportAddress,多次添加就行
            client.addTransportAddress(node);
        } catch (Exception e) {
            e.printStackTrace();
            System.out.println("elasticsearch TransportClient create error!!");
        }
            return client;

    }

}
八、测试类
package cn.xdf.springboot.controller;
import java.io.IOException;
import javax.validation.Valid;
import org.elasticsearch.action.delete.DeleteResponse;
import org.elasticsearch.action.get.GetResponse;
import org.elasticsearch.action.index.IndexResponse;
import org.elasticsearch.action.search.SearchResponse;
import org.elasticsearch.action.search.SearchType;
import org.elasticsearch.action.update.UpdateRequest;
import org.elasticsearch.action.update.UpdateResponse;
import org.elasticsearch.client.transport.TransportClient;
import org.elasticsearch.common.xcontent.XContentBuilder;
import org.elasticsearch.common.xcontent.XContentFactory;
import org.elasticsearch.index.query.BoolQueryBuilder;
import org.elasticsearch.index.query.QueryBuilders;
import org.elasticsearch.index.query.RangeQueryBuilder;
import org.slf4j.Logger;
import org.slf4j.LoggerFactory;
import org.springframework.beans.factory.annotation.Autowired;
import org.springframework.web.bind.annotation.DeleteMapping;
import org.springframework.web.bind.annotation.GetMapping;
import org.springframework.web.bind.annotation.PathVariable;
import org.springframework.web.bind.annotation.PostMapping;
import org.springframework.web.bind.annotation.PutMapping;
import org.springframework.web.bind.annotation.RequestBody;
import org.springframework.web.bind.annotation.RequestMapping;
import org.springframework.web.bind.annotation.RequestParam;
import org.springframework.web.bind.annotation.RestController;

import cn.xdf.springboot.pojo.Category;
import io.swagger.annotations.Api;
import io.swagger.annotations.ApiImplicitParam;
import io.swagger.annotations.ApiOperation;

@RestController
@RequestMapping("es")
@Api("ElasticsearchDemoController相关的api")
public class ElasticsearchDemoController {
    //操作 Elasticsearch 只需要注入 TransportClient 就可以了
    @Autowired
    private TransportClient client;

    private static final Logger logger= LoggerFactory.getLogger(ElasticsearchDemoController.class);

    //1.商品添加
    //@PutMapping("add") 添加方法--restful风格
    @PutMapping("add")
    @ApiOperation(value="商品索引新增")
    //@RequestParam 接收页面中的请求的参数
    public String addCategory(@RequestParam String name) throws IOException{
        XContentBuilder builder = XContentFactory.jsonBuilder()
                .startObject()
                .field("name", name)
                .endObject();
        IndexResponse response = client.prepareIndex("test_db", "product")//修改自己对应的“索引库”和“表”:test_db/product
                .setSource(builder)
                .get();
        System.out.println(response.getResult() + ", id=" + response.getId()); //输出创建结果,成功返回 CREATED
        return "添加索引成功!";
    }
    //2.商品修改
    //@PostMapping("update")  修改方法--restful风格
    @PostMapping("update")
    @ApiOperation(value = "商品索引修改", notes = "修改数据库中某个的商品信息")
    //@RequestBody 接收页面中的请求的参数对象(适用于post请求)
    //当入参为实体对象时,需要在方法上加@Valid或@Validated或者在参数前加@Valid或@Validated,或者在类上加@Validated
    public String updateCategory(@Valid @RequestBody  Category category) throws Exception {
        UpdateRequest request    = new UpdateRequest("test_db", "product", category.getId()+"");//int 转String
        XContentBuilder builder = XContentFactory.jsonBuilder()
                .startObject()
                .field("name", category.getName())
                .endObject();
        request.doc(builder);
        UpdateResponse response = client.update(request).get();
        System.out.println(response.getResult()); //输出修改结果,成功返回 UPDATED
        return "修改索引成功!";
    }
    //3.商品删除
    //@DeleteMapping("/delete/{id}") 删除方法--restful风格
    @DeleteMapping("/delete/{id}")
    @ApiOperation(value = "根据id删除商品索引", notes = "商品索引删除")
    @ApiImplicitParam(name = "id", value = "商品ID", paramType = "path", required = true, dataType = "Integer")
    public String deleteCategory(@PathVariable int id)throws Exception{  //@PathVariable 获取/delete/{id}中id
        DeleteResponse response = client.prepareDelete("test_db", "product",  id+"").get();
        System.out.println(response.getResult()); //输出删除结果,成功返回 DELETED
        return "删除索引成功!";
    }
    //4.根据ID查询商品信息
    //@GetMapping("")  查询方法--restful风格
    @GetMapping("/get/{id}")
    @ApiOperation(value = "根据id查询商品", notes = "查询数据库中某个的商品信息")
    @ApiImplicitParam(name = "id", value = "商品ID", paramType = "path", required = true, dataType = "Integer")
    public String getCategory(@PathVariable int id) { //@PathVariable 获取/get/{id}中id
        System.out.println("根据id查询:"+id);
        GetResponse response = client.prepareGet("test_db", "product",  id+"").get();
        System.out.println(response.getSource()); //输出查询结果
        return "查询索引成功!";
    }
    //5.分页查询
    //@GetMapping("")  查询方法--restful风格
    @GetMapping("/page")
    @ApiOperation(value="商品查询(分页)")
    public String pageCategory(@RequestParam(value="start",defaultValue="0")int start,@RequestParam(value = "size", defaultValue = "5") int size) throws Exception {
        SearchResponse response = client.prepareSearch("test_db")
                .setTypes("product")
                .setSearchType(SearchType.DFS_QUERY_THEN_FETCH)
                .setFrom(0)
                .setSize(10)
                .get();
        System.out.println(response); //输出复合查询结果
        return "查询索引成功!";
    }

}
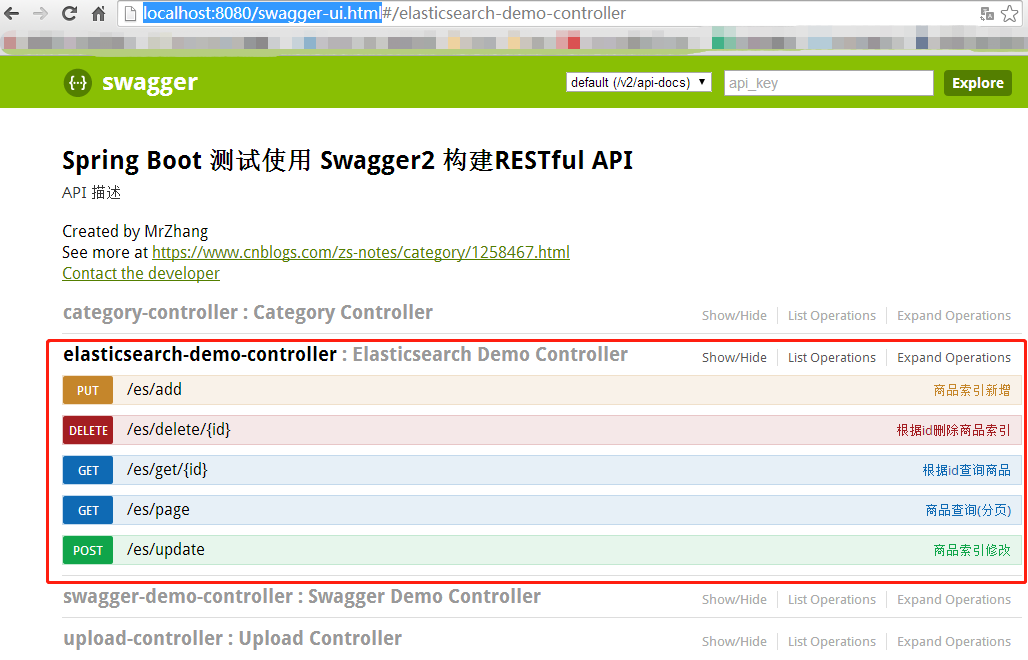
九、根据Swagger测试增删改查方法
测试地址:http://localhost:8080/swagger-ui.html
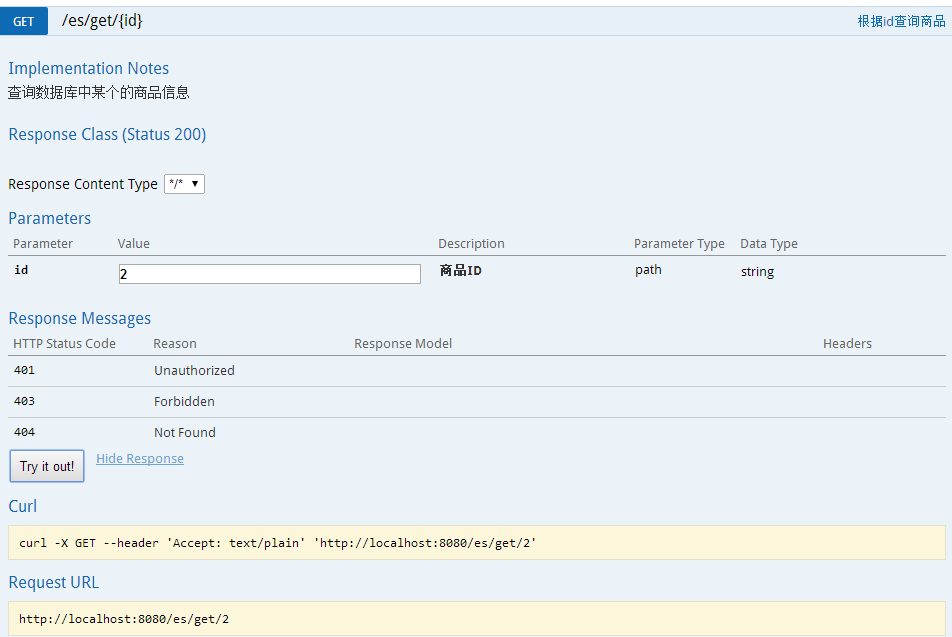
(注释,我这边方便测试 ,把实体类的id的 int类型改为string类型了,默认新增的id为一个字符串,如:PQYguWoBqFQiH90p4Nj1,方便查询新增的数据)
查询方法:
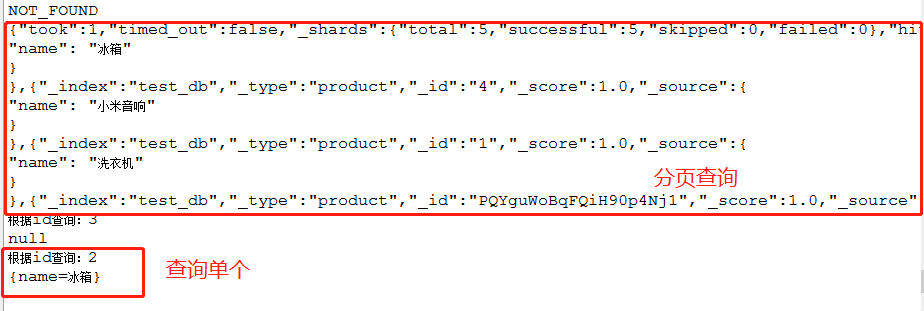
后台打印:
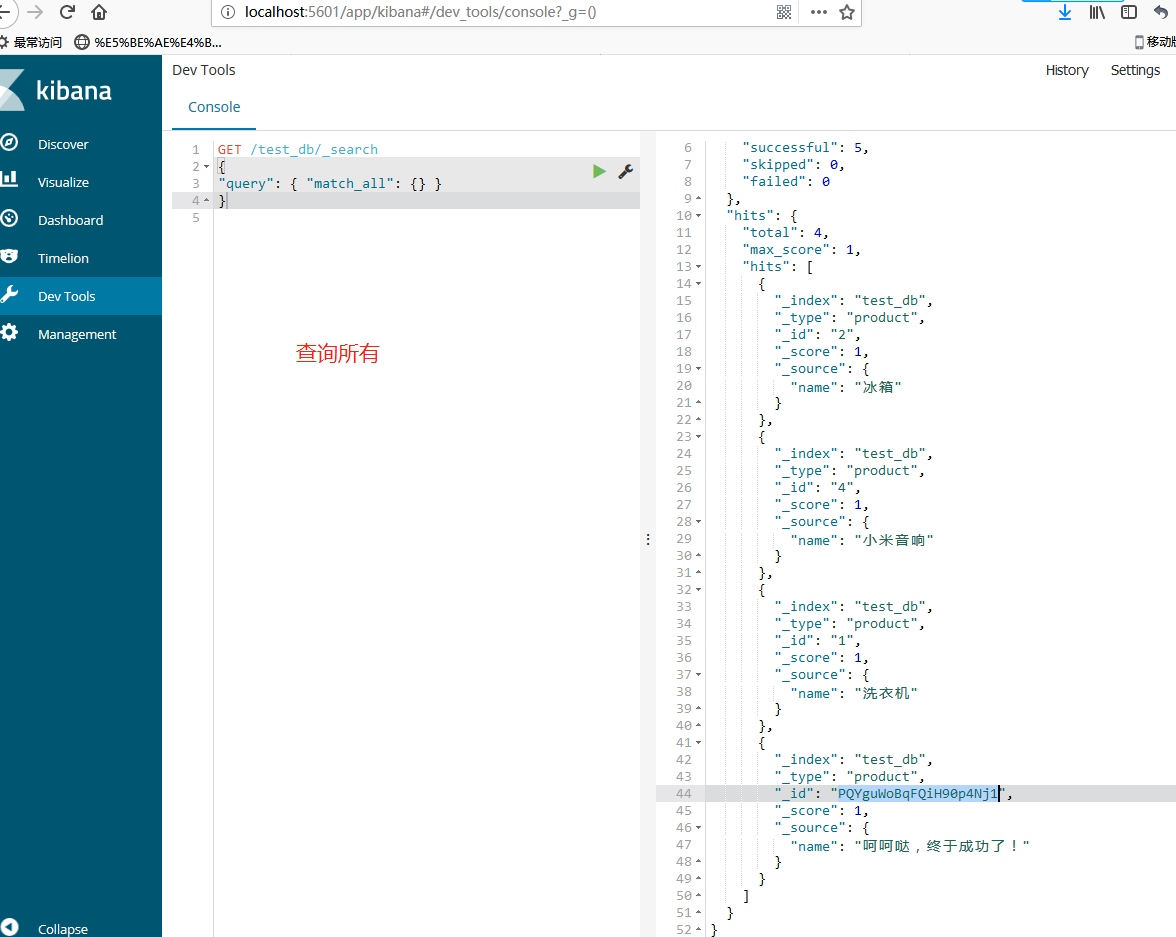
十、启动Kibana
D:\kibana-6.2.2-windows-x86_64\bin\kibana.bat
然后通过这个图形化工具查看刚才测试的索引数据信息
查询test_db所有的命令
GET /test_db/_search
{
"query": { "match_all": {} }
}
注:springboot整合ElasticSearch分为两种:
一种直接使用官方的集成工具(引用spring-boot-starter-data-elasticsearch依赖),然后通过hibernate JPA规范,dao层继承ElasticsearchRepository,controller依赖注入这个dao接口,就相当于对索引库操作了。
另一种是自己写Client连接。如本知识点。

 浙公网安备 33010602011771号