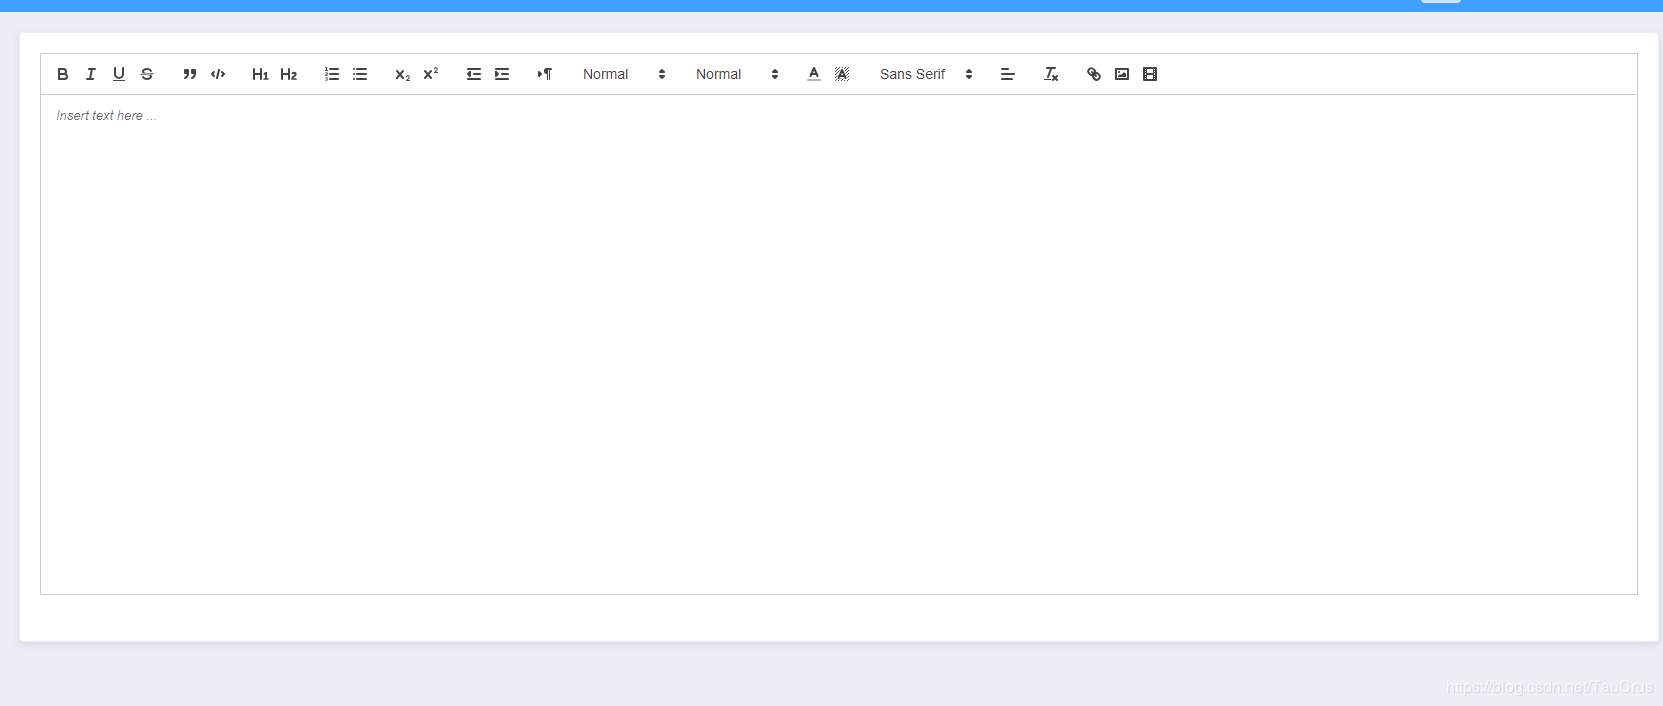
vue富文本编辑器vue-quill-editor使用总结(包含图片上传,拖拽,放大和缩小)
vue-quill-editor是vue很好的富文本编辑器,富文本的功能基本上都支持,样式是黑白色,简洁大方。
第一步下载 vue-quill-editor:
npm i vue-quill-editor -S
第二步,将vue-quill-editor引入到main.js:
import VueQuillEditor from 'vue-quill-editor'  //引入富文本编译器
import 'quill/dist/quill.core.css'
import 'quill/dist/quill.snow.css'
import 'quill/dist/quill.bubble.css'
Vue.use(VueQuillEditor);
第三步,就可以在组件里面使用了。
 1 //html
 2
 3 <div>
 4         <quill-editor  v-model="ruleForm.content"
 5                          :options="editorOption"
 6                          @blur="onEditorBlur($event)"
 7                          @focus="onEditorFocus($event)"
 8                          @change="onEditorChange($event)">
 9           </quill-editor>
10 </div>
//js

<script>
  import { quillEditor } from 'vue-quill-editor'
  import Quill from 'quill'  //引入编辑器
      export default {
       components: {quillEditor},
        data () {
          return {
            content: null,
            editorOption: {
              modules: {
                toolbar: [
                  ["bold", "italic", "underline", "strike"], // 加粗 斜体 下划线 删除线
                  ["blockquote", "code-block"], // 引用  代码块
                  [{ header: 1 }, { header: 2 }], // 1、2 级标题
                  [{ list: "ordered" }, { list: "bullet" }], // 有序、无序列表
                  [{ script: "sub" }, { script: "super" }], // 上标/下标
                  [{ indent: "-1" }, { indent: "+1" }], // 缩进
                  // [{'direction': 'rtl'}],                         // 文本方向
                  [{ size: ["small", false, "large", "huge"] }], // 字体大小
                  [{ header: [1, 2, 3, 4, 5, 6, false] }], // 标题
                  [{ color: [] }, { background: [] }], // 字体颜色、字体背景颜色
                  [{ font: [] }], // 字体种类
                  [{ align: [] }], // 对齐方式
                  ["clean"], // 清除文本格式
                  ["link", "image", "video"] // 链接、图片、视频
                ], //工具菜单栏配置
              },
              placeholder: '请在这里添加产品描述', //提示
              readyOnly: false, //是否只读
              theme: 'snow', //主题 snow/bubble
              syntax: true, //语法检测
            }
          }
        },
        methods: {
          // 失去焦点
          onEditorBlur(editor) {},
          // 获得焦点
          onEditorFocus(editor) {},
          // 开始
          onEditorReady(editor) {},
          // 值发生变化
          onEditorChange(editor) {
            this.content = editor.html;
            console.log(editor);
          },
        },
        computed: {
          editor() {
            return this.$refs.myQuillEditor.quill;
          }
        },
这样就可以使用富文本了。。如下图:

但是这样要是上传个图片,图片是不能放大,缩小和拖拽的,所以要想让图片放大,缩小可以拖拽,请继续往下看。。。。
实现图片拖拽,放大和缩小,需要下载 vue-quill-editor image依赖的功能插件。
npm i quill-image-drop-module -S

npm i quill-image-resize-module -S
然后在组件里引入使用:
 import { ImageDrop } from 'quill-image-drop-module'
 import ImageResize from 'quill-image-resize-module'
 Quill.register('modules/imageDrop', ImageDrop);
 Quill.register('modules/imageResize', ImageResize);
 editorOption: {
        modules:{
          imageDrop: true,      //图片拖拽
          imageResize:{          //放大缩小
            displaySize: true
          },
          toolbar: {
            container: toolbarOptions,  // 工具栏

            }
          },

        },
        theme:'snow'
      },
这样图片就可以放大缩小,和拖拽了。
富文本编辑器的图片上传,显示的地址是base64格式,如何图片上传过多的话就会特别减缓富文本的提交速度,特别慢而且会报错。
所以会选择将图片上传到服务器上,然后返回后台给的img链接,最后显示在富文本对应的位置。
富文本上传我用过两种方法:
方法一:给后台传的图片格式是formData格式,就是文件格式
将图片上传到服务器需要vue-quill-editor 的 image扩展插件,首先下载这个插件:
npm i quill-image-extend-module -S
然后将插件引入富文本组件中使用。
import {container, ImageExtend, QuillWatch} from 'quill-image-extend-module'
Quill.register('modules/ImageExtend', ImageExtend);

  editorOption:{
            modules:{
              toolbar: {
                container: toolbarOptions,  // 工具栏
                handlers: {
                  'image': function () {    //触发图片上传的时候返回的信息
                    QuillWatch.emit(this.quill.id)   //使用图片上传插件的统一写法
                  }
                }
              },
              imageResize: {    //图片放大缩小
                displaySize: true
              },
              ImageExtend: {   //使用的图片上传扩展插件
                name: 'img',   //传的参数名
                size: 2,  // 单位为M, 1M = 1024KB
                action: url,   //后台上传图片的接口地址
                headers: (xhr) => {  //请求头
                },
                response: (res) => {
                  console.log(res);
                  return res.data[0];   //返回的图片信息
                }
              },
            },
          },
方法二:由于后台强调图片上传的时候,需要给他传的 img参数 必须是base64格式的;所以我就只能放弃第一种方法,使用下面的这个方法。
这个方法需要结合element ui的图片上传插件一起使用。
//html
<div class="edit_container" style="margin-bottom: 20px">
      <!-- 图片上传组件辅助-->
      <el-upload
        class="avatar-uploader"
        :action="serverUrl"
        name="img"
        :before-upload="beforeUpload">
      </el-upload>
      <!--富文本编辑器组件-->
      <el-row v-loading="uillUpdateImg">
        <quill-editor
          v-model="content"
          ref="myQuillEditor"
          :options="editorOption"
        >
        </quill-editor>
      </el-row>
    </div>
 editorOption: {
        modules:{
          imageDrop: true,
          imageResize:{
            displaySize: true
          },
          toolbar: {
            container: toolbarOptions,  // 工具栏
            handlers: {
              'image': function (value) {
                if (value) {
                  // 触发input框选择图片文件
                  document.querySelector('.avatar-uploader input').click()
                } else {
                  this.quill.format('image', false);
                }
              }
            }
          },

        },
        theme:'snow'
      },
  // 上传图片前
      beforeUpload(file) {      //element 上传图片的方法
          console.log(file);
          var _this = this;
          // 获取富文本组件实例
          let quill = this.$refs.myQuillEditor.quill;
          var reader = new FileReader();
          reader.readAsDataURL(file);
          reader.onload = function(e) {
            var obj = {
                  imgData:e.target.result,  //给后台传的参数 base64格式的img参数
              };
            findList.uploadImage(qs.stringify(obj)).then(data => {
                  console.log(data,'上传的图片')
                  console.log(data.ResultObj);
               if(data.ResultCode==1){
                      // 获取光标所在位置
                      let length = quill.getSelection(true).index;
                      // 插入图片  res.info为服务器返回的图片地址
                      quill.insertEmbed(length, 'image', data.ResultObj);
                      // 调整光标到最后
                      quill.setSelection(length + 1)
                  }else{
                      this.$message({
                          message: '图片上传失败!',
                          type: 'error'
                      });
                  }
              });

          };
          return file;
      },


