

yum安装的nginx新增模块http_image_filter_module笔记
yum安装的nginx新增模块大概的思路
-
官方nginx.org 下载相同版本的nginx源码包
-
编译安装并指定需要的模块(第三方模块需要单独下载对应的包)
-
注意只编译make,不安装make install. 编译完成会在objs目录下生成可执行文件nginx
-
复制nginx 可执行文件 到cp objs/nginx /usr/sbin/
一、下载源码包
当前yum安装的nginx版本: nginx -v 1.16.0
当前nginx可执行文件:which nginx /usr/sbin/nginx ,最好先备份此文件
nginx.org 没有找到1.16.0 , 这里下载1.16.1源码包来代替
下载并解压到: /usr/local/nginx-1.16.1目录
开始编译前先备份:
备份源nginx cp /usr/sbin/nginx /usr/sbin/nginx.bak
备份配置文件 nginx cp -r /etc/nginx /etc/nginx.bak
二、配置编译的参数
查看nginx已经安装的模块 nginx -V
./configure --prefix=/etc/nginx --sbin-path=/usr/sbin/nginx --modules-path=/usr/lib64/nginx/modules --conf-path=/etc/nginx/nginx.conf --error-log-path=/var/log/nginx/error.log --http-log-path=/var/log/nginx/access.log --pid-path=/var/run/nginx.pid --lock-path=/var/run/nginx.lock --http-client-body-temp-path=/var/cache/nginx/client_temp --http-proxy-temp-path=/var/cache/nginx/proxy_temp --http-fastcgi-temp-path=/var/cache/nginx/fastcgi_temp --http-uwsgi-temp-path=/var/cache/nginx/uwsgi_temp --http-scgi-temp-path=/var/cache/nginx/scgi_temp --user=nginx --group=nginx --with-compat --with-file-aio --with-threads --with-http_addition_module --with-http_auth_request_module --with-http_dav_module --with-http_flv_module --with-http_gunzip_module --with-http_gzip_static_module --with-http_mp4_module --with-http_random_index_module --with-http_realip_module --with-http_secure_link_module --with-http_slice_module --with-http_ssl_module --with-http_stub_status_module --with-http_sub_module --with-http_v2_module --with-mail --with-mail_ssl_module --with-stream --with-stream_realip_module --with-stream_ssl_module --with-stream_ssl_preread_module --with-cc-opt='-O2 -g -pipe -Wall -Wp,-D_FORTIFY_SOURCE=2 -fexceptions -fstack-protector --param=ssp-buffer-size=4 -m64 -mtune=generic -fPIC' --with-ld-opt='-Wl,-z,relro -Wl,-z,now -pie'
在上面的命令里面加上 --with-http_image_filter_module=dynamic 开始执行编译,编译的时候依赖的模块没有安装导致错误,只需安装对应的模块即可。
我编译的时候有依赖的两个模块没有安装:
./configure: error: the HTTP rewrite module requires the PCRE library.
You can either disable the module by using --without-http_rewrite_module
option, or install the PCRE library into the system, or build the PCRE library
statically from the source with nginx by using --with-pcre=<path> option.
安装pcre-devel: yum install pcre-devel
./configure: error: the HTTP image filter module requires the GD library.
You can either do not enable the module or install the libraries.
安装 gd-devel : yum install gd-devel
总之缺什么就安装什么,网上很多文章已经介绍了依赖的所有的模块。
三、编译源码包
执行 make,切记不需要执行make install,此处只需要得到nginx重新编译的可执行文件,并不需要重新安装替换掉原来的nginx
执行完成会在 objs 目录下生成对应的可执行文件nginx
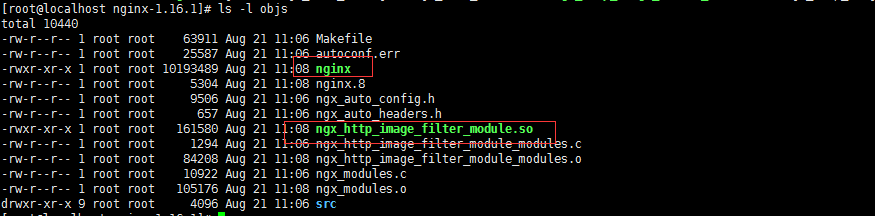
复制图片过滤模块: cp objs/ngx_http_image_filter_module.so /usr/lib64/nginx/modules/
覆盖nginx可执行文件: cp -rfp objs/nginx /usr/sbin/
四、nginx配置文件
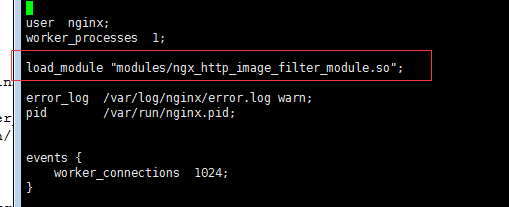
/etc/nginx/nginx.conf 动态加载模块 : load_module "modules/ngx_http_image_filter_module.so";
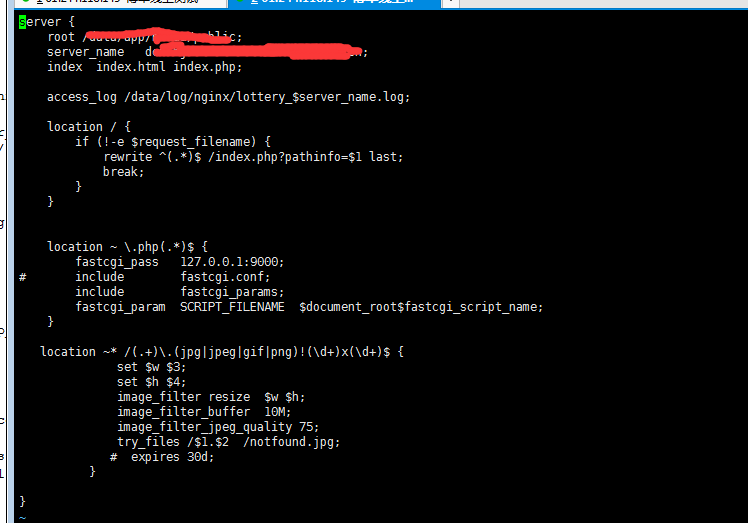
/etc/nginx/conf.d/test.conf 配置图片处理
location ~* /(.+)\.(jpg|jpeg|gif|png)!(\d+)x(\d+)$ {
              set $w $3;
              set $h $4;
              image_filter resize  $w $h;
              image_filter_buffer  10M;
              image_filter_jpeg_quality 75;
              try_files /$1.$2  /notfound.jpg;
             #  expires 30d;
          }
nginx -t 检查nginx配置语法是否OK、再重新启动nginx即可
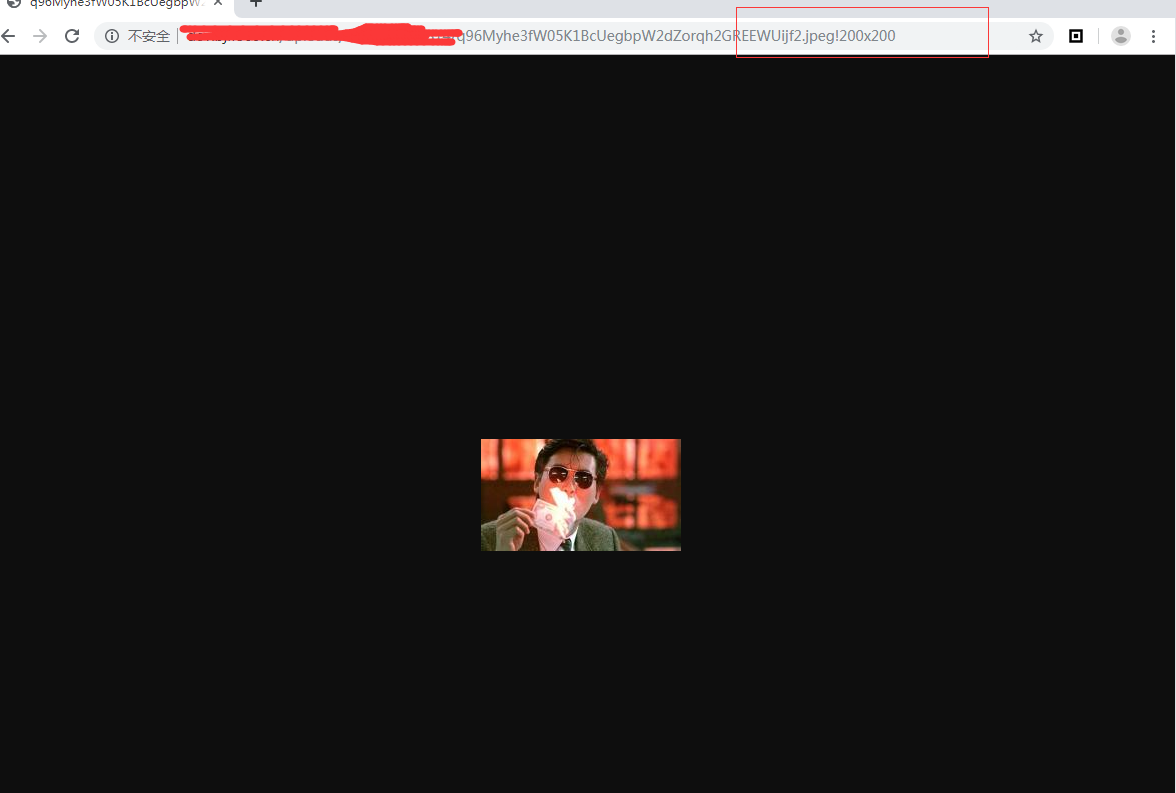
五、测试图片缩放
原图访问:

缩略图访问:
参考下面两篇就够了啊
https://blog.csdn.net/zzy5066/article/details/81136273
https://www.cnblogs.com/lixigang/articles/5130052.html
https://www.cnblogs.com/tinywan/p/6965467.html nginx加载动态模块


【推荐】国内首个AI IDE,深度理解中文开发场景,立即下载体验Trae
【推荐】编程新体验,更懂你的AI,立即体验豆包MarsCode编程助手
【推荐】抖音旗下AI助手豆包,你的智能百科全书,全免费不限次数
【推荐】轻量又高性能的 SSH 工具 IShell:AI 加持,快人一步
· SQL Server 2025 AI相关能力初探
· Linux系列:如何用 C#调用 C方法造成内存泄露
· AI与.NET技术实操系列(二):开始使用ML.NET
· 记一次.NET内存居高不下排查解决与启示
· 探究高空视频全景AR技术的实现原理
· 阿里最新开源QwQ-32B,效果媲美deepseek-r1满血版,部署成本又又又降低了!
· AI编程工具终极对决:字节Trae VS Cursor,谁才是开发者新宠?
· 开源Multi-agent AI智能体框架aevatar.ai,欢迎大家贡献代码
· Manus重磅发布:全球首款通用AI代理技术深度解析与实战指南
· 被坑几百块钱后,我竟然真的恢复了删除的微信聊天记录!