
红帽7 Squid部署代理服务
代理缓存服务
Squid 是 Linux 系统中最为流行的一款高性能代理服务软件,通常用作 Web 网站的前置缓存服务,能够代替用户向网站服务器请求页面数据并进行缓存。Squid 服务程序具有配置简单、效率高、功能丰富等特点,它能支持 HTTP、FTP、SSL等多种协议的数据缓存,可以基于访问控制列表(ACL)和访问权限列表(ARL)执行内容过滤与权限管理功能。
在使用 Squid 服务程序为用户提供缓存代理服务时,具有正向代理模式和反向代理模式,正向代理模式,是指让用户通过 Squid 服务程序获取网站页面等资源,以及基于访问控制列表(ACL)功能对用户访问网站行为进行限制,在具体的服务方式上又分为标准代理模式与透明代理模式。标准正向代理模式是把网站数据缓存到服务器本地,提高数据资源被再次访问时的效率,但是用户在上网时必须在浏览器等软件中填写代理服务器的 IP 地址与端口号信息,否则默认不使用代理服务。而透明正向代理模式的作用与标准正向代理模式基本相同,区别是用户不需要手动指定代理服务器的 IP 地址与端口号,所以这种代理服务对于用户来讲是相对透明的。
正向代理服务
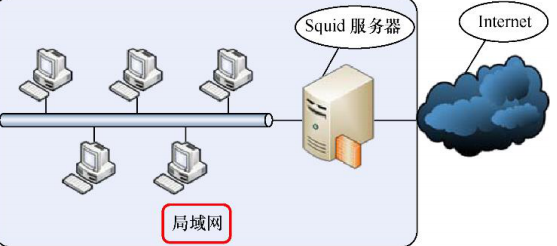
局域网内的主机如果想要访问外网,则必须要通过 Squid 服务器提供的代理才行,这样当 Squid 服务器接收到用户的指令后会向外部发出请求,然后将接收到的数据交还给发出指令的那个用户,从而实现了用户的代理上网需求。
反向代理模式
是指让多台节点主机反向缓存网站数据,从而加快用户访问速度。因为一般来讲,网站中会普遍加载大量的文字、图片等静态资源,而且它们相对来说都是比较稳定的数据信息,当用户发起网站页面中这些静态资源的访问请求时,我们可以使用 Squid 服务程序提供的反向代理模式来进行响应。而且,如果反向代理服务器中恰巧已经有了用户要访问的静态资源,则直接将缓存的这些静态资源发送给用户,这不仅可以加快用户的网站访问速度,还在一定程度上降低了网站服务器的负载压力。
当外网用户尝试访问某个网站时,实际请求是被 Squid 服务器所处理的。反向代理服务器会将缓存好的静态资源更快地交付给外网用户,从而加快了网站页面被用户访问的速度。并且由于网站页面数据中的静态资源请求已被 Squid 服务器处理,因此网站服务器负责动态数据查询就可以了,也进而降低了服务器机房中网站服务器的负载压力。

配置 Squid 服务程序
首先需要准备两台虚拟机,一台用作 Squid 服务器,另外一台用作 Squid 客户端,为了能够相互通信,需要将这两台虚拟机都设置为仅主机模式(Hostonly),然后关闭其
中一台虚拟机的电源,在添加一块新的网卡后开启电源,
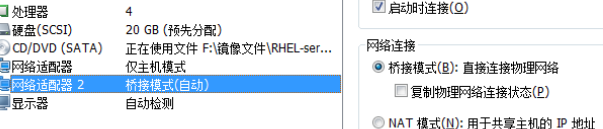
这块新添加的网卡设备必须选择为桥接模式,否则这两台虚拟机都无法访问外网
Squid服务器和客户端的操作系统和IP地址信息
| 主机名称 | 操作系统 | IP地址 |
| Squid服务器 | RHEL 7 | 外网卡:桥接DHCP模式 内网卡:192.168.10.10 |
| Squid客户端 | RHEL 7 | 192.168.10.20 |
这样一来,就有了一台既能访问内网,又能访问外网的虚拟机了。等下需要把 Squid 服务程序部署在这台虚拟机上,然后让另外一台原本只能访问内网的虚拟机(即
Squid 客户端)通过 Squid 服务器进行代理上网,从而使得 Squid 客户端也能访问外部网站。
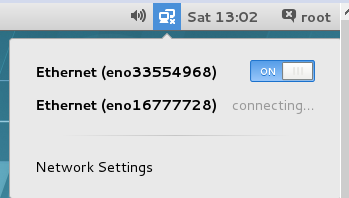
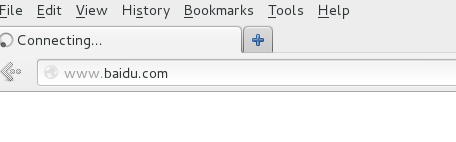
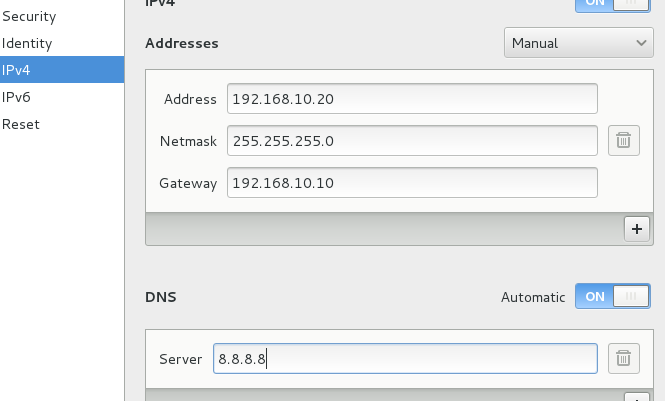
如果连接不上外网,如下图设置
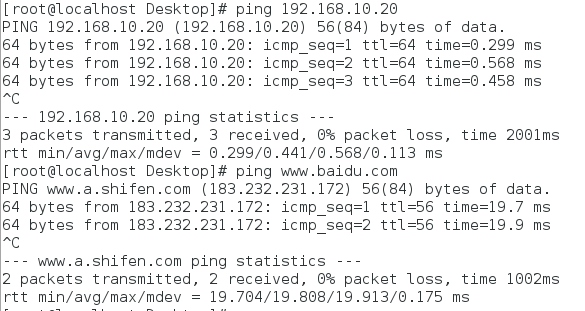
检查一下 Squid 服务器是否已经可以成功访问外部网络。可以 ping 一个外网域名进行测试
安装 Squid 服务程序
[root@localhost Desktop]# yum install squid
Loaded plugins: langpacks, product-id, subscription-manager
This system is not registered to Red Hat Subscription Management. You can use
subscription-manager to register.
rhel | 4.1 kB 00:00
Resolving Dependencies
--> Running transaction check
………………省略部分输出信息………………
Installed:
squid.x86_64 7:3.3.8-11.el7
Dependency Installed:
libecap.x86_64 0:0.2.0-8.el7
perl-Compress-Raw-Bzip2.x86_64 0:2.061-3.el7
perl-Compress-Raw-Zlib.x86_64 1:2.061-4.el7
perl-DBI.x86_64 0:1.627-4.el7
perl-Data-Dumper.x86_64 0:2.145-3.el7
perl-Digest.noarch 0:1.17-245.el7
perl-Digest-MD5.x86_64 0:2.52-3.el7
perl-IO-Compress.noarch 0:2.061-2.el7
perl-Net-Daemon.noarch 0:0.48-5.el7
perl-PlRPC.noarch 0:0.2020-14.el7
Complete!
常用的 Squid 服务程序配置参数以及作用
| 参数 | 作用 |
| http_port 3128 | 监听的端口号 |
| cache_mem 64M | 内存缓冲区的大小 |
| cache_dir ufs /var/spool/squid 2000 16 256 | 硬盘缓冲区的大小 |
| cache_effective_user squid | 设置缓存的有效用户 |
| cache_effective_group squid | 设置缓存的有效用户组 |
| dns_nameservers IP地址 | 一般不设置,而是用服务器默认的DNS地址 |
| cache_access_log /var/log/squid/access.log | 访问日志文件的保存路径 |
| cache_log /var/log/squid/cache.log | 缓存日志文件的保存路径 |
| visible_hostname test.com | 设置Squid服务器的名称 |
正向代理
标准正向代理
Squid 服务程序软件包在正确安装并启动后,默认就已经可以为用户提供标准正向代理模式服务了,而不再需要单独修改配置文件或者进行其他操作。
顺便清空一下防火墙
[root@localhost Desktop]# systemctl restart squid
[root@localhost Desktop]# systemctl enable squid
ln -s '/usr/lib/systemd/system/squid.service' '/etc/systemd/system/multi-user.target.wants/squid.service'
[root@localhost Desktop]# iptables -F
[root@localhost Desktop]# service iptables save
iptables: Saving firewall rules to /etc/sysconfig/iptables:[  OK  ]
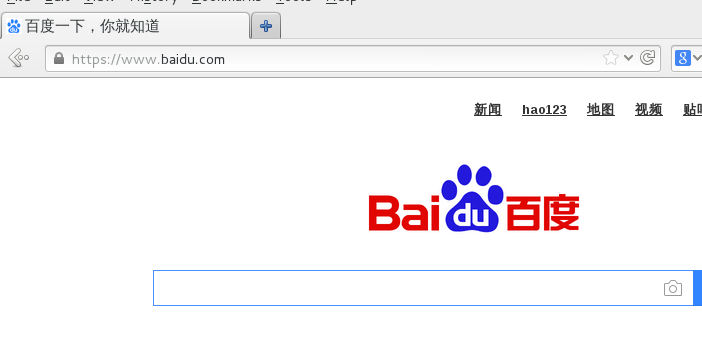
客户端原本是上不了网的
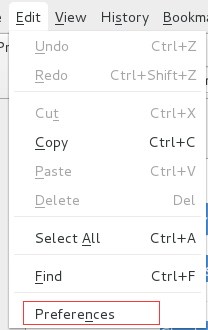
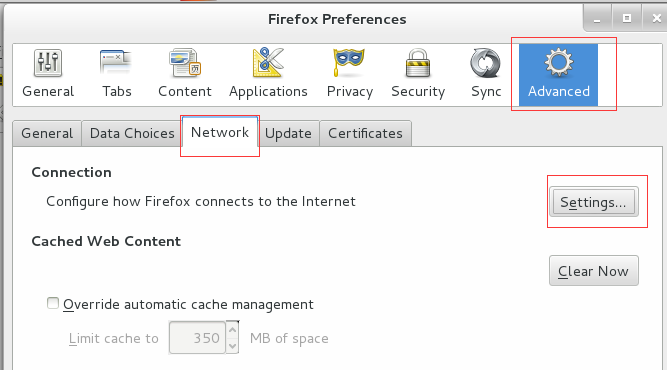
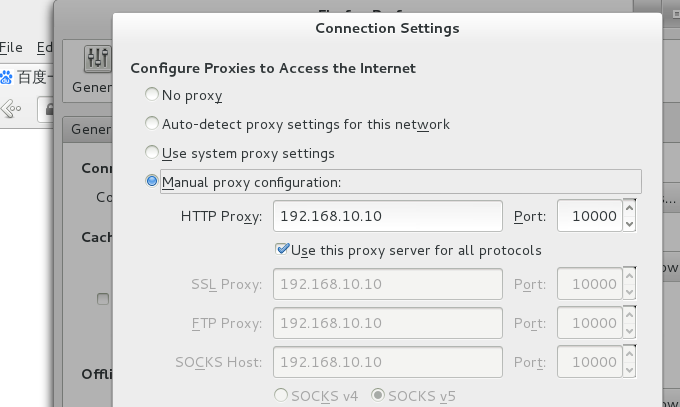
要想使用 Squid 服务程序提供的标准正向代理模式服务,就必须在浏览器中填写服务器的 IP 地址以及端口号信息。
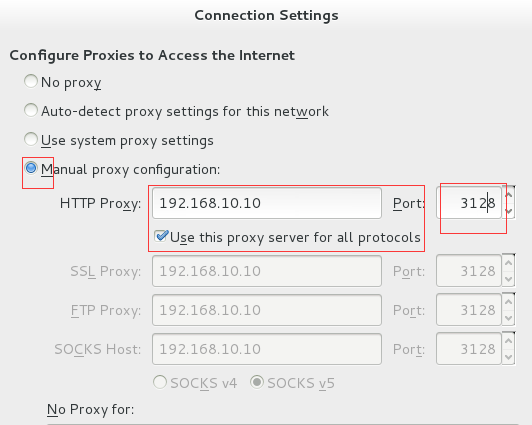
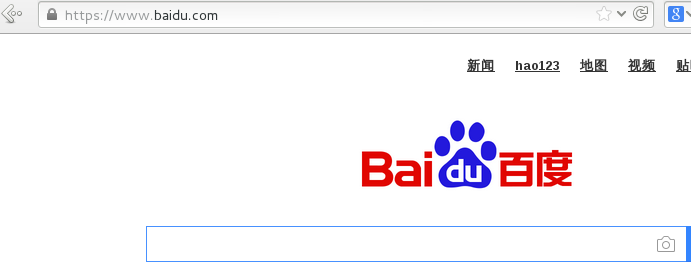
设置好后保存。再刷新网页
尝试把端口号修改成10000
[root@localhost Desktop]# vim /etc/squid/squid.conf
2 http_access allow localnet
 53 http_access allow localhost
 54
 55 # And finally deny all other access to this proxy
 56 http_access deny all
 57
 58 # Squid normally listens to port 3128
 59 http_port 10000
 60
 61 # Uncomment and adjust the following to add a disk cache directory.
 62 #cache_dir ufs /var/spool/squid 100 16 256
 63
 64 # Leave coredumps in the first
此时客户端不能上网了,把相应的端口号也改为10000即可
ACL 访问控制
Squid 服务程序的 ACL 是由多个策略规则组成的,它可以根据指定的策略规则来允许或限制访问请求,而且策略规则的匹配顺序与防火墙策略规则一样都是由上至下;在一旦形成
匹配之后,则立即执行相应操作并结束匹配过程。
1、只允许IP地址为192.168.10.30的客户端使用服务器上的Squid服务程序提供的代理服务,禁止其余所有的主机代理请求。
[root@localhost Desktop]# vim /etc/squid/squid.conf
23 acl Safe_ports port 591 # filemaker
24 acl Safe_ports port 777 # multiling http
25 acl CONNECT method CONNECT
26 acl client src 192.168.10.30
27 #
28 # Recommended minimum Access Permission configuration:
29 #
30 # Deny requests to certain unsafe ports
31 http_access allow client
32 http_access deny all
33 http_access deny !Safe_ports
34
35 # Deny CONNECT to other than secure
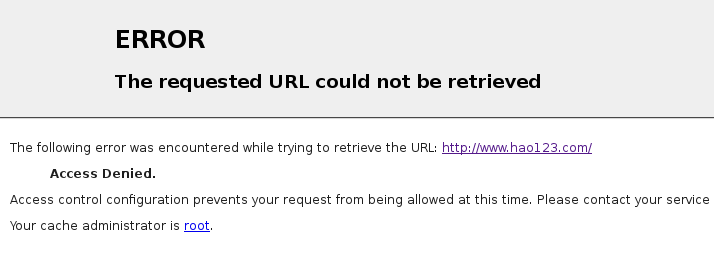
[root@localhost Desktop]# systemctl restart squid.service
再用客户端去访问。访问已被禁止
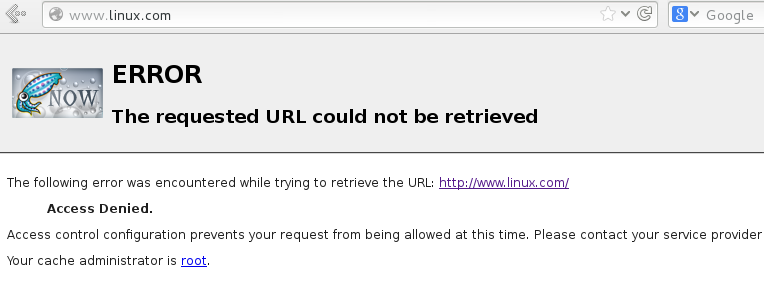
2、禁止所有客户端访问网址中包含linux关键词的网站
[root@localhost Desktop]# vim /etc/squid/squid.conf
 23 acl Safe_ports port 591         # filemaker
 24 acl Safe_ports port 777         # multiling http
 25 acl CONNECT method CONNECT
 26 acl deny_keyword url_regex -i linux
 27 #
 28 # Recommended minimum Access Permission configuration:
 29 #
 30 # Deny requests to certain unsafe ports
 31 http_access deny deny_keyword
 32 http_access deny !Safe_ports
 33
 34 # Deny CONNECT to other than secure SSL ports
 35 http_access deny CONNECT !SSL_ports
[root@localhost Desktop]# systemctl restart squid
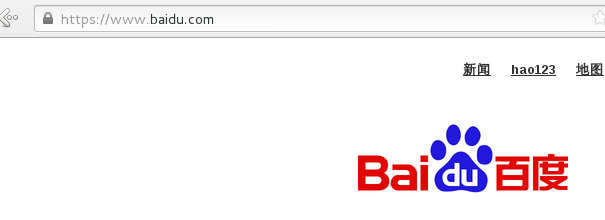
当客户端分别访问网址不带有 linux 关键词和带有 linux 关键词的网站时
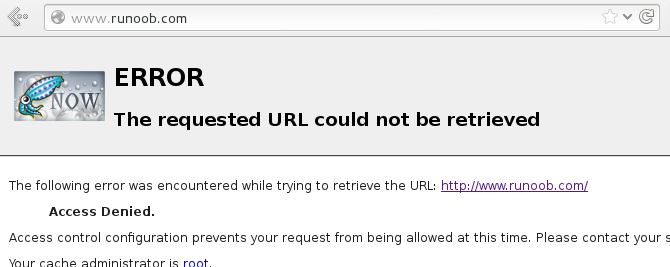
3、禁止所有客户端访问某个特定的网站。
[root@localhost Desktop]# vim /etc/squid/squid.conf
 23 acl Safe_ports port 591         # filemaker
 24 acl Safe_ports port 777         # multiling http
 25 acl CONNECT method CONNECT
 26 acl deny_url url_regex www.runoob.com
 27 #
 28 # Recommended minimum Access Permission configuration:
 29 #
 30 # Deny requests to certain unsafe ports
 31 http_access deny deny_url
 32 http_access deny !Safe_ports
 33
当前除了特定网址不能访问,其他的都可以
4、禁止下载带有某些后缀的文件,禁止所有用户访问.rar 或.avi等后缀文件的请求
 [root@localhost Desktop]# vim /etc/squid/squid.conf
 24 acl Safe_ports port 777 # multiling http
 25 acl CONNECT method CONNECT
 26 acl badfile urlpath_regex -i \.mp3$ \.rar$
 27 #
 28 # Recommended minimum Access Permission configuration:
 29 #
 30 # Deny requests to certain unsafe ports
 31 http_access deny badfile
 33 http_access deny !Safe_ports
 34
透明正向代理
“透明”二字指的是让用户在没有感知的情况下使用代理服务,这样的好处是一方面不需要用户手动配置代理服务器的信息,进而降低了代理服务的使用门槛;在透明代理模式中,用户无须在浏览器或其他软件中配置代理服务器地址、端口号等信息,而是由 DHCP 服务器将网络配置信息分配给客户端主机。这样只要用户打开浏览器便会自动使用代理服务了。
我们将客户端的网关指向服务端,DNS指向一个外网地址
要想让内网中的客户端主机能够访问外网,客户端主机首先要能获取到 DNS 地址解析服务的数据,这样才能在互联网中找到对应网站的 IP 地址。下面通过 iptables 命令实现 DNS 地址解析服务 53 端口的数据转发功能,并且允许 Squid 服务器转发 IPv4 数据包。sysctl -p 命令的作用是让转发参数立即生效。
[root@localhost Desktop]# iptables -F
[root@localhost Desktop]# iptables -t nat -A POSTROUTING -p udp --dport 53 -o eno33554968 -j MASQUERADE
[root@localhost Desktop]# echo "net.ipv4.ip_forward=1" >> /etc/sysctl.conf
[root@localhost Desktop]# sysctl -p
net.ipv4.ip_forward = 1
在回到客户端主机,再次 ping 某个外网地址。此时可以发现,虽然不能连通网站,但是此时已经能够获取到外网 DNS 服务的域名解析数据。

与配置 DNS 和 SNAT 技术转发相比,Squid 服务程序透明代理模式的配置过程就十分简单了,只需要在主配置文件中服务器端口号后面追加上 transparent 单词(意思为“透的”),然后把第 62 行的井号(#)注释符删除,设置缓存的保存路径就可以了。保存主配置文件并退出后再使用 squid -k parse 命令检查主配置文件是否有错误,以及使用 squid -z 命令对 Squid服务程序的透明代理技术进行初始化。
[root@localhost Desktop]# vim /etc/squid/squid.conf
 54 # And finally deny all other access to this proxy
 55 http_access deny all
 56
 57 # Squid normally listens to port 3128
 58 http_port 3128 transparent
 59
 60 # Uncomment and adjust the following to add a disk cache directory.
 61 cache_dir ufs /var/spool/squid 100 16 256
 62
 63 # Leave coredumps in the first cache dir
 64 coredump_dir /var/spool/squid


[root@localhost Desktop]# systemctl stop squid
[root@localhost Desktop]# squid -k parse
2018/11/17 16:43:52| Startup: Initializing Authentication Schemes ...
2018/11/17 16:43:52| Startup: Initialized Authentication Scheme 'basic'
2018/11/17 16:43:52| Startup: Initialized Authentication Scheme 'digest'
2018/11/17 16:43:52| Startup: Initialized Authentication Scheme 'negotiate'
2018/11/17 16:43:52| Startup: Initialized Authentication Scheme 'ntlm'
2018/11/17 16:43:52| Startup: Initialized Authentication.
2018/11/17 16:43:52| Processing Configuration File: /etc/squid/squid.conf (depth 0)
2018/11/17 16:43:52| Processing: acl localnet src 10.0.0.0/8    # RFC1918 possible internal network
2018/11/17 16:43:52| Processing: acl localnet src 172.16.0.0/12    # RFC1918 possible internal network
2018/11/17 16:43:52| Processing: acl localnet src 192.168.0.0/16    # RFC1918 possible internal network
2018/11/17 16:43:52| Processing: acl localnet src fc00::/7       # RFC 4193 local private network range
2018/11/17 16:43:52| Processing: acl localnet src fe80::/10      # RFC 4291 link-local (directly plugged) machines
2018/11/17 16:43:52| Processing: acl SSL_ports port 443
2018/11/17 16:43:52| Processing: acl Safe_ports port 80        # http
2018/11/17 16:43:52| Processing: acl Safe_ports port 21        # ftp
2018/11/17 16:43:52| Processing: acl Safe_ports port 443        # https
2018/11/17 16:43:52| Processing: acl Safe_ports port 70        # gopher
2018/11/17 16:43:52| Processing: acl Safe_ports port 210        # wais
2018/11/17 16:43:52| Processing: acl Safe_ports port 1025-65535    # unregistered ports
2018/11/17 16:43:52| Processing: acl Safe_ports port 280        # http-mgmt
2018/11/17 16:43:52| Processing: acl Safe_ports port 488        # gss-http
2018/11/17 16:43:52| Processing: acl Safe_ports port 591        # filemaker
2018/11/17 16:43:52| Processing: acl Safe_ports port 777        # multiling http
2018/11/17 16:43:52| Processing: acl CONNECT method CONNECT
2018/11/17 16:43:52| Processing: http_access deny !Safe_ports
2018/11/17 16:43:52| Processing: http_access deny CONNECT !SSL_ports
2018/11/17 16:43:52| Processing: http_access allow localhost manager
2018/11/17 16:43:52| Processing: http_access deny manager
2018/11/17 16:43:52| Processing: http_access allow localnet
2018/11/17 16:43:52| Processing: http_access allow localhost
2018/11/17 16:43:52| Processing: http_access deny all
2018/11/17 16:43:52| Processing: http_port 3128 transparent
2018/11/17 16:43:52| Starting Authentication on port [::]:3128
2018/11/17 16:43:52| Disabling Authentication on port [::]:3128 (interception enabled)
2018/11/17 16:43:52| Disabling IPv6 on port [::]:3128 (interception enabled)
2018/11/17 16:43:52| Processing: cache_dir ufs /var/spool/squid 100 16 256
2018/11/17 16:43:52| Processing: coredump_dir /var/spool/squid
2018/11/17 16:43:52| Processing: refresh_pattern ^ftp:        1440    20%    10080
2018/11/17 16:43:52| Processing: refresh_pattern ^gopher:    1440    0%    1440
2018/11/17 16:43:52| Processing: refresh_pattern -i (/cgi-bin/|\?) 0    0%    0
2018/11/17 16:43:52| Processing: refresh_pattern .        0    20%    4320
2018/11/17 16:43:52| Initializing https proxy context
[root@localhost Desktop]# squid -z
2018/11/17 16:44:00 kid1| Creating missing swap directories
2018/11/17 16:44:00 kid1| /var/spool/squid exists
2018/11/17 16:44:00 kid1| Making directories in /var/spool/squid/00
[root@localhost Desktop]# 2018/11/17 16:44:00 kid1| Making directories in /var/spool/squid/01
2018/11/17 16:44:00 kid1| Making directories in /var/spool/squid/02
2018/11/17 16:44:00 kid1| Making directories in /var/spool/squid/03
2018/11/17 16:44:00 kid1| Making directories in /var/spool/squid/04
2018/11/17 16:44:00 kid1| Making directories in /var/spool/squid/05
2018/11/17 16:44:00 kid1| Making directories in /var/spool/squid/06
2018/11/17 16:44:01 kid1| Making directories in /var/spool/squid/07
2018/11/17 16:44:01 kid1| Making directories in /var/spool/squid/08
2018/11/17 16:44:01 kid1| Making directories in /var/spool/squid/09
2018/11/17 16:44:01 kid1| Making directories in /var/spool/squid/0A
2018/11/17 16:44:01 kid1| Making directories in /var/spool/squid/0B
2018/11/17 16:44:01 kid1| Making directories in /var/spool/squid/0C
2018/11/17 16:44:01 kid1| Making directories in /var/spool/squid/0D
2018/11/17 16:44:01 kid1| Making directories in /var/spool/squid/0E
2018/11/17 16:44:01 kid1| Making directories in /var/spool/squid/0F
最后再重启下服务。
配置妥当并重启 Squid 服务程序且系统没有提示报错信息后,接下来就可以完成 SNAT数据转发功能了。它的原理其实很简单,就是使用 iptables 防火墙管理命令把所有客户端主机对网站 80 端口的请求转发至 Squid 服务器本地的 3128 端口上。SNAT 数据转发功能的具体配置参数如下
[root@localhost Desktop]# iptables -t nat -A PREROUTING -p tcp -m tcp --dport 80 -j REDIRECT --to-ports 3128
[root@localhost Desktop]# iptables -t nat -A POSTROUTING -s 192.168.10.0/24 -o eno33554968 -j SNAT --to 192.168.1.106
[root@localhost Desktop]# service iptables save
iptables: Saving firewall rules to /etc/sysconfig/iptables:[  OK  ]
这时客户端主机再刷新一下浏览器,就又能访问网络了

还有另一种简洁的配置透明代理的方法。
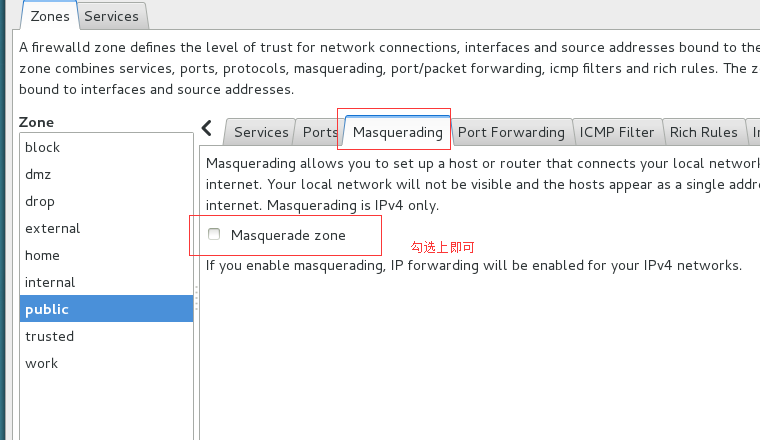
在配置好客户端的ip、网关、和外网DNS服务器地址后,只需在服务端打开 firewall-config 配置即可
[root@localhost Desktop]# firewall-config

 浙公网安备 33010602011771号