快速构建ceph可视化监控系统
前言
ceph的可视化方案很多,本篇介绍的是比较简单的一种方式,并且对包都进行了二次封装,所以能够在极短的时间内构建出一个可视化的监控系统
本系统组件如下:
- ceph-jewel版本
- ceph_exporter的jewel版本
- prometheus的2.3.2版本
- grafana的grafana-5.2.1版本
- Ceph grafana的插件- Clusterby Cristian Calin
适配的系统为centos7
资源如下:
http://static.zybuluo.com/zphj1987/jiwx305b8q1hwc5uulo0z7ft/ceph_exporter-2.0.0-1.x86_64.rpm
http://static.zybuluo.com/zphj1987/1nu2k4cpcery94q2re3u6s1t/ceph-cluster_rev1.json
http://static.zybuluo.com/zphj1987/7ro7up6r03kx52rkwy1qjuwm/prometheus-2.3.2-1.x86_64.rpm
http://mysrc.cn-bj.ufileos.com/grafana-5.2.1-1.x86_64.rpm
以上资源均可以直接用wget进行下载,然后直接安装
监控的架构介绍
通过ceph_exporter抓取的ceph相关的数据并且在本地监听端口9128端口
prometheus抓取ceph_exporter的9128的端口的数据存储在本地的/var/lib/prometheus/目录下面
grafana抓取prometheus的数据进行渲染成web页面
页面的模板就是使用的grafana的ceph模板插件
那么我们就根据上面的架构去一步步的把系统配置起来
配置监控系统
安装ceph_exporter
[root@lab101 install]# wget http://static.zybuluo.com/zphj1987/jiwx305b8q1hwc5uulo0z7ft/ceph_exporter-2.0.0-1.x86_64.rpm
[root@lab101 install]# rpm -qpl ceph_exporter-2.0.0-1.x86_64.rpm
/usr/bin/ceph_exporter
/usr/lib/systemd/system/ceph_exporter.service
[root@lab101 install]# rpm -ivh ceph_exporter-2.0.0-1.x86_64.rpm
Preparing...                          ################################# [100%]
Updating / installing...
   1:ceph_exporter-2:2.0.0-1          ################################# [100%]
[root@lab101 install]# systemctl start ceph_exporter
[root@lab101 install]# systemctl enable ceph_exporter
[root@lab101 install]# netstat -tunlp|grep 9128
tcp6       0      0 :::9128                 :::*                    LISTEN      35853/ceph_exporter
可以看到端口起来了就是安装成功了,这个ceph_exporter建议是安装在管理节点上,也就是能够执行出ceph -s的节点上面的
安装prometheus
[root@lab101 install]#  wget http://static.zybuluo.com/zphj1987/7ro7up6r03kx52rkwy1qjuwm/prometheus-2.3.2-1.x86_64.rpm
[root@lab101 install]# rpm -qpl prometheus-2.3.2-1.x86_64.rpm
/etc/ceph/prometheus.yml
/usr/bin/prometheus
/usr/lib/systemd/system/prometheus.service
[root@lab101 install]# rpm -ivh prometheus-2.3.2-1.x86_64.rpm
Preparing...                          ################################# [100%]
Updating / installing...
   1:prometheus-2:2.3.2-1             ################################# [100%]
[root@lab101 install]# systemctl start prometheus
[root@lab101 install]# netstat -tunlp|grep 9090
tcp6       0      0 :::9090                 :::*                    LISTEN      36163/prometheus
这个地方默认是认为prometheus和ceph_exporter在一台机器上面,所以配置文件的/etc/ceph/prometheus.yml里面的targets写的是127.0.0.1,根据需要修改成ceph_exporter的ip地址即可
prometheus的默认监听端口为9090,到这个时候直接去web 上面就可以看到prometheus的抓取的数据了
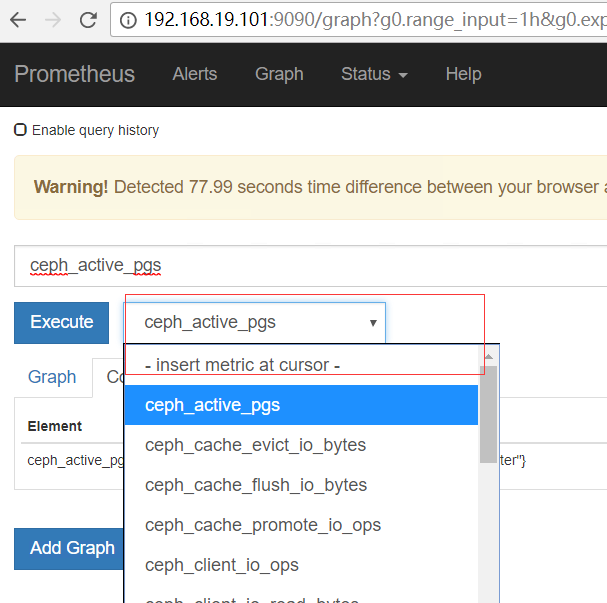
到这里是数据到prometheus的已经完成了,下面就去做跟grafana相关的配置了
安装grafana
[root@lab101 install]# wget http://mysrc.cn-bj.ufileos.com/grafana-5.2.1-1.x86_64.rpm
[root@lab101 install]# yum localinstall grafana-5.2.1-1.x86_64.rpm
[root@lab101 install]# systemctl start grafana-server.service
[root@lab101 install]# netstat -tunlp|grep gra
Proto Recv-Q Send-Q Local Address           Foreign Address         State       PID/Program name
tcp6       0      0 :::3000                 :::*                    LISTEN      36730/grafana-serve
grafana默认监听的3000的端口

默认登陆的用户名密码为admin admin,登陆成功后会强制修改密码
配置grafana
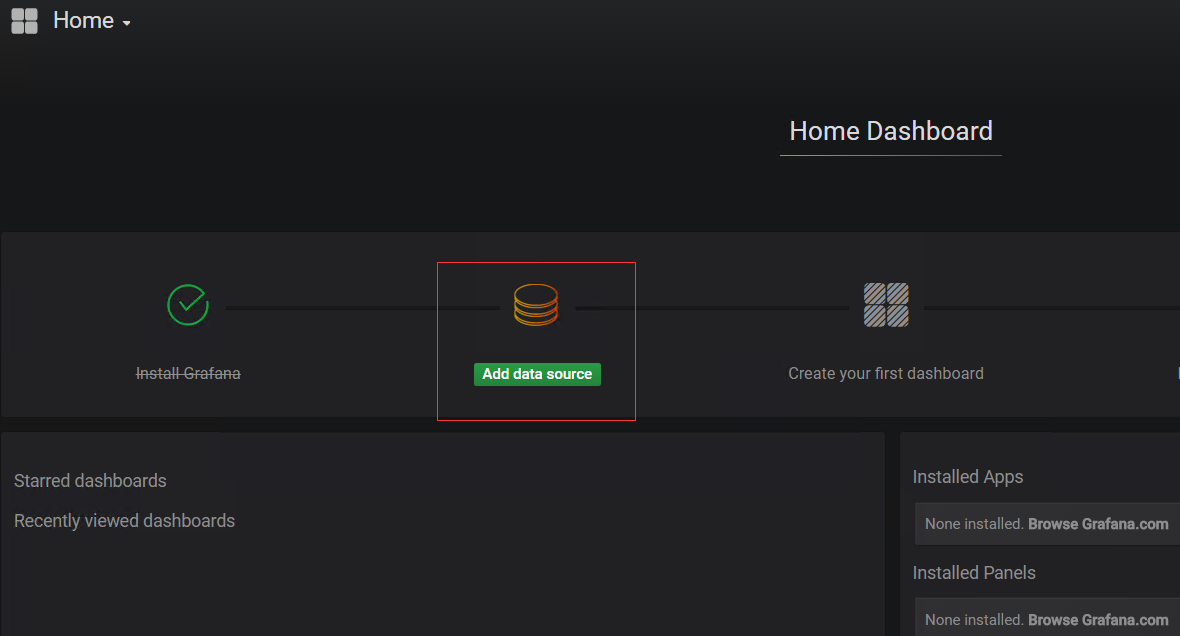
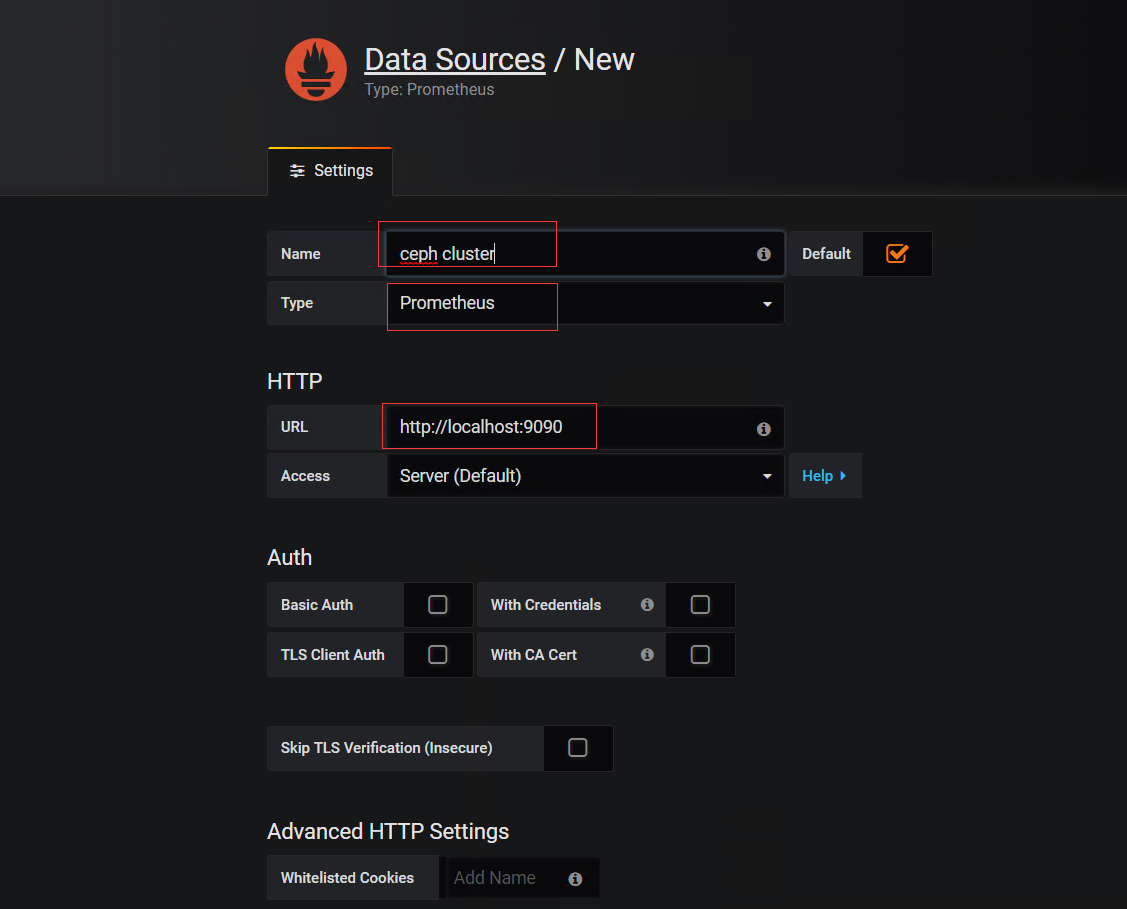
首先增加数据源
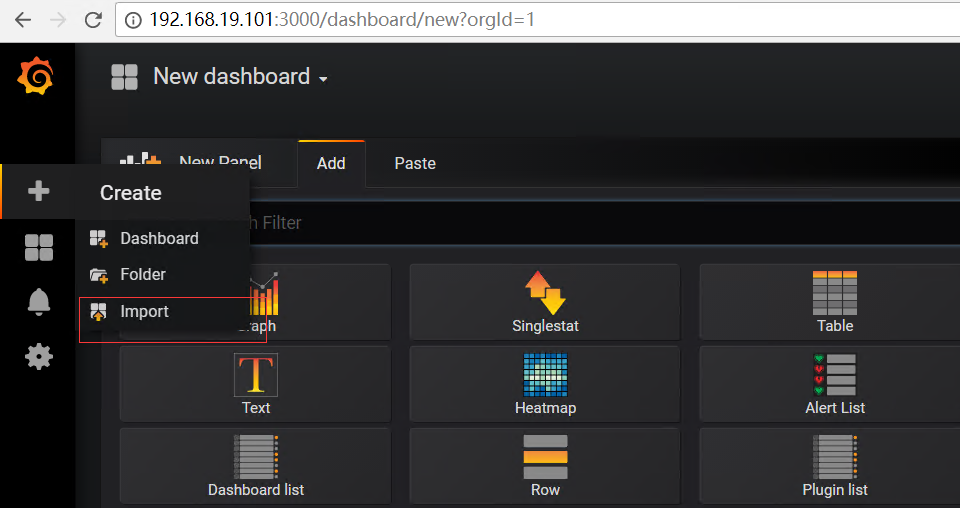
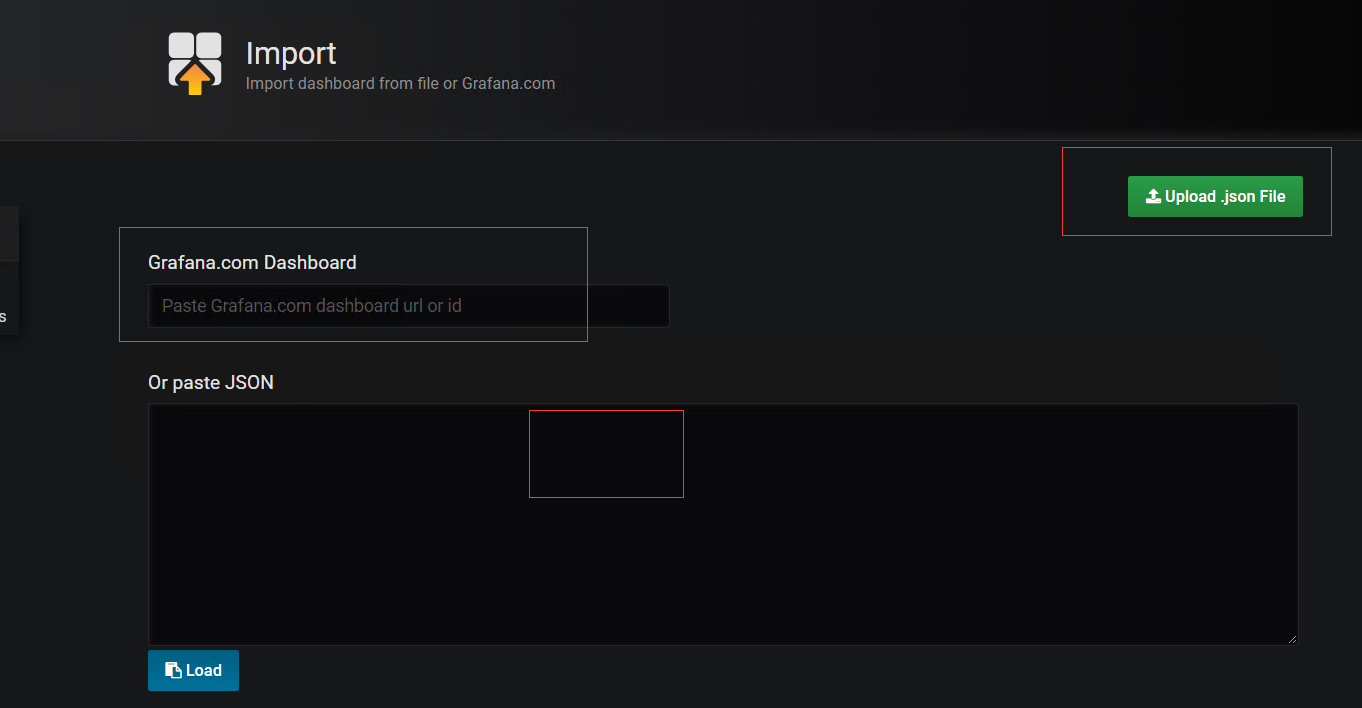
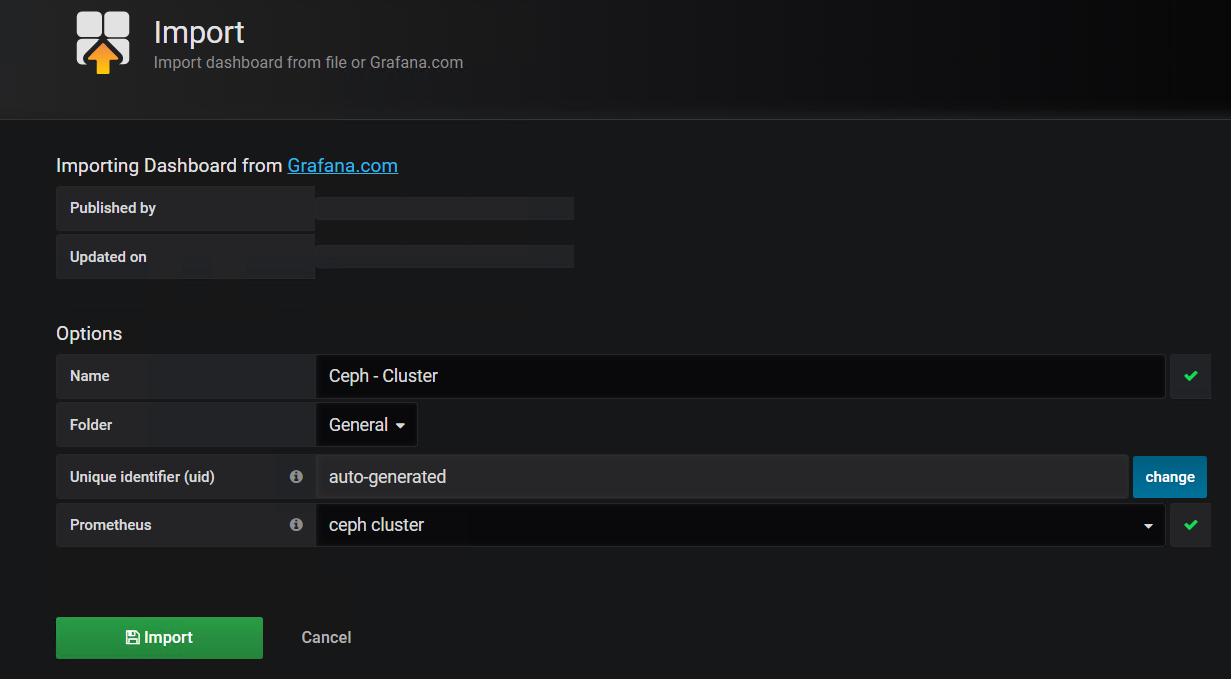
这里如果能上网就直接输入id 917 ,如果不能上网就把上面的ceph-cluster_rev1.json文件弄到本地去,导入进去即可
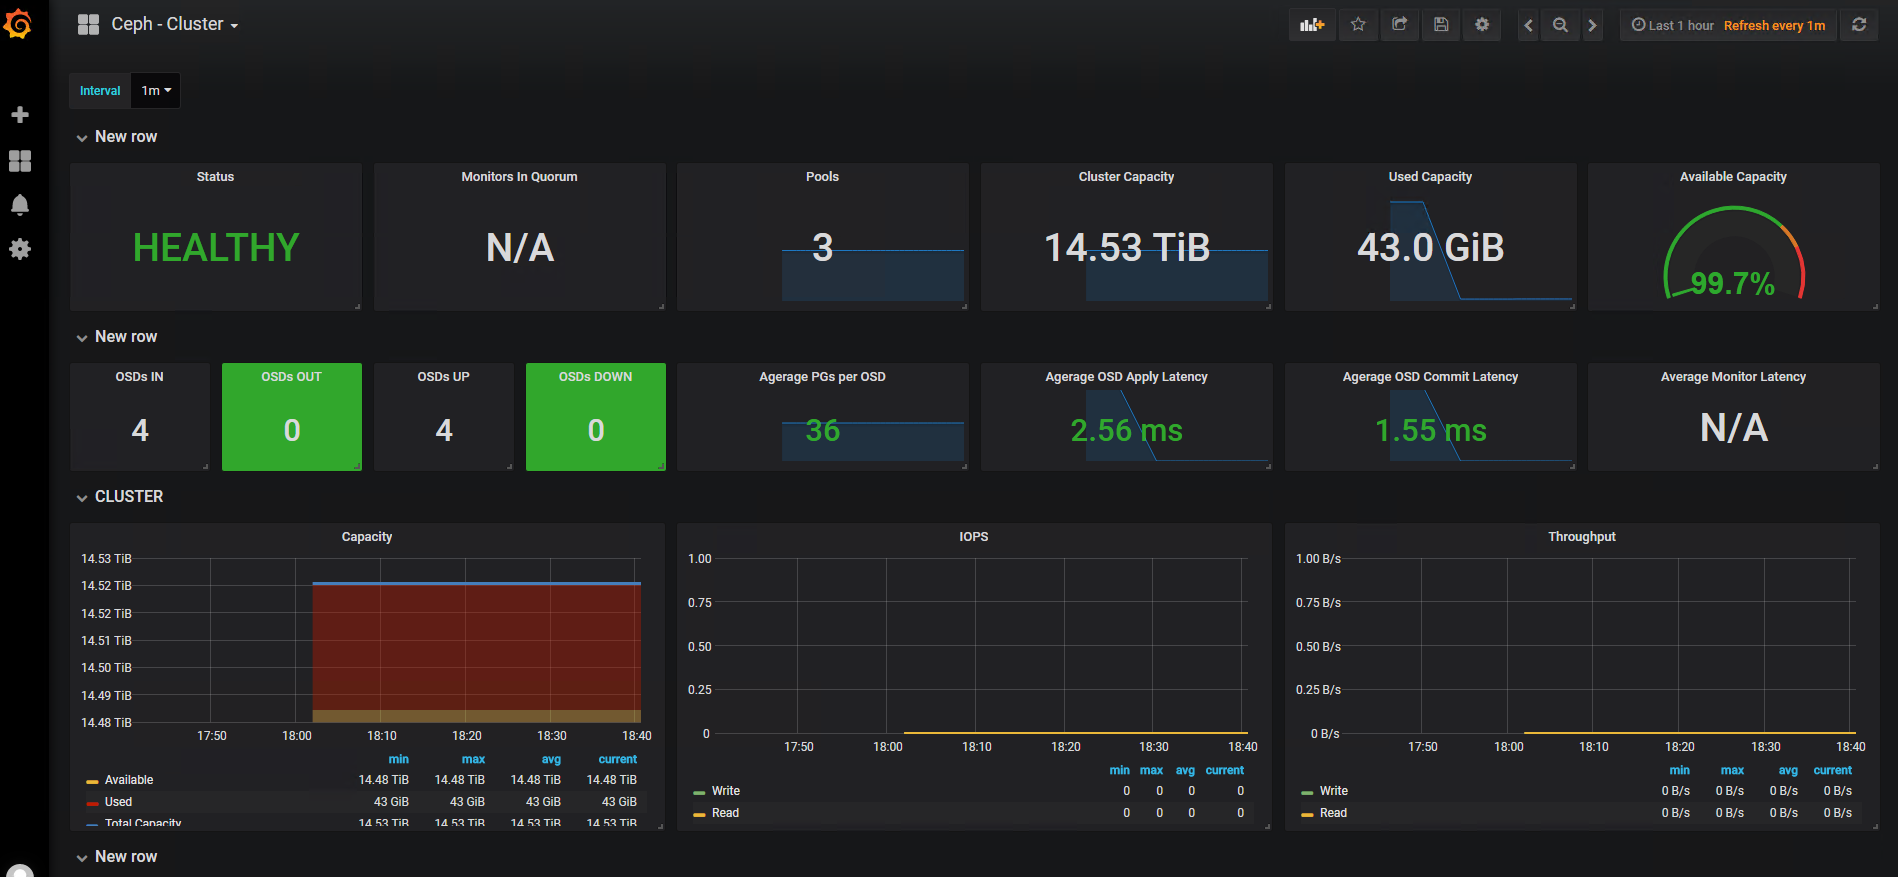
到这里就完成了配置了
总结
以上为了方便都把相关的软件做成了rpm包,从安装方便角度来看,grafana,ceph_exporter,还有prometheus都采用的是单二进制文件的方式,稍微组合一下大大的降低了部署难度,比如那个ceph_exporter需要用go进行编译,封好包以后就不需要这个过程,并且接口因为有版本的限制,所以这样直接对应版本安装也避免了出错
本篇的环境所述均为jewel适配版本
变更记录
| Why | Who | When |
|---|---|---|
| 创建 | 武汉-运维-磨渣 | 2018-07-17 |

