微信小程序的自定义组件
前言:挖掘微信小程序漏洞而学习准备的
知识点:微信小程序的自定义组件
自定义组件
开发者可以将页面内的功能模块抽象成自定义组件,以便在不同的页面中重复使用;也可以将复杂的页面拆分成多个低耦合的模块,有助于代码维护。自定义组件在使用时与基础组件非常相似。
创建自定义组件
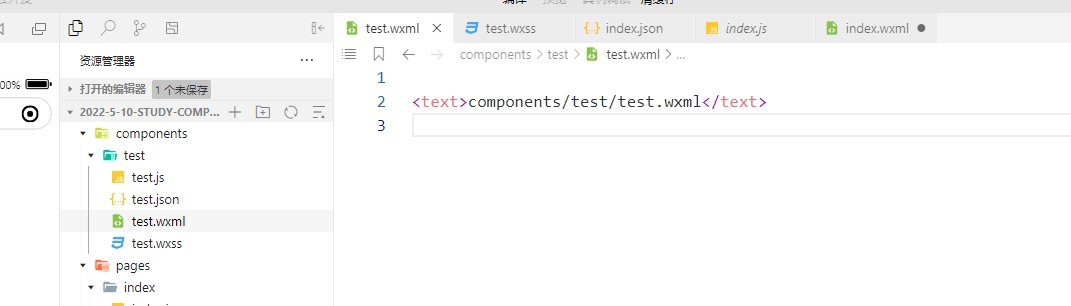
新建一个components目录,然后该目录创建一个test文件夹,然后再点击新建component即可
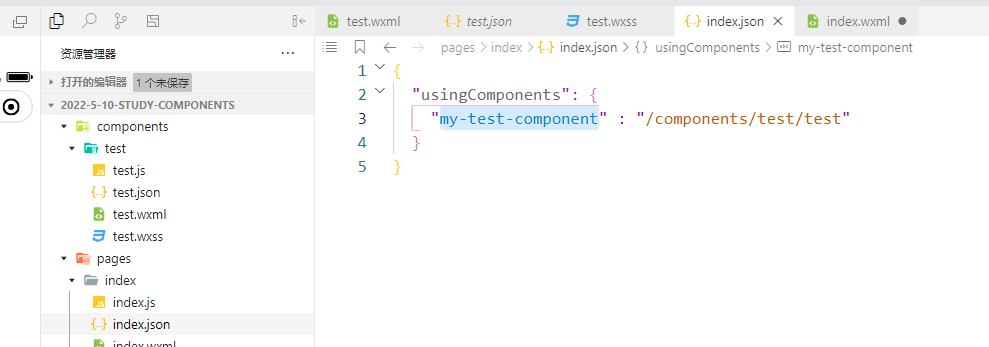
用到的组件在对面的页面的json文件中来进行引入,如下图所示
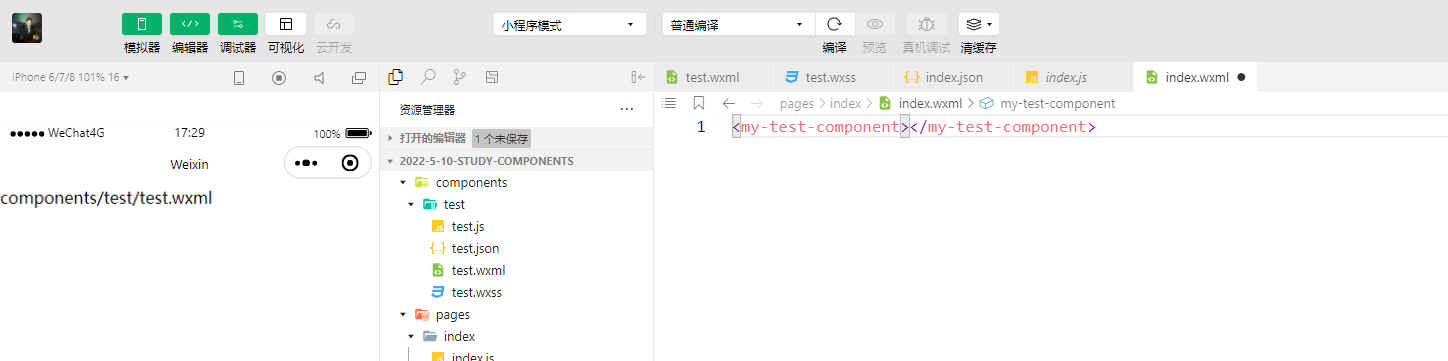
这里在index.wxml中使用当前所定义的组件,如下图所示
组件和页面的区别
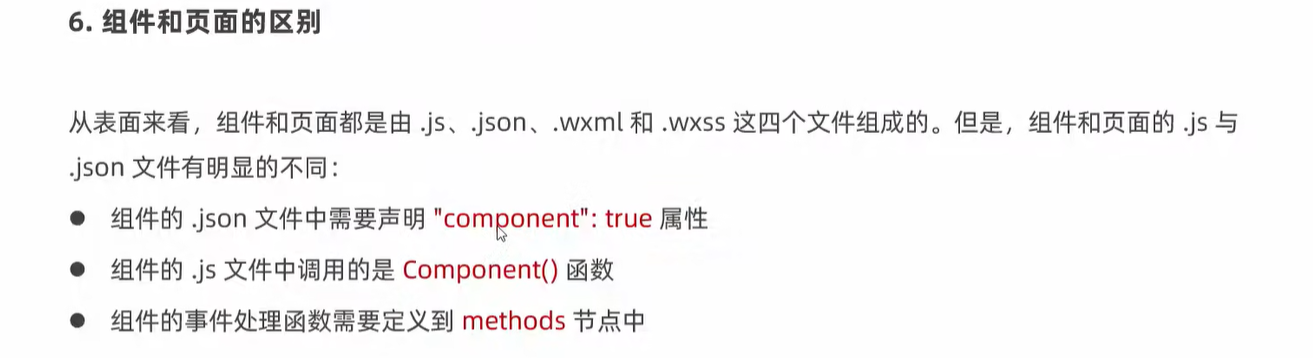
自定义属性properties
properties是组件对外的属性,用来接收外界传递到组件中的数据
  properties: {
    // 第一种方式
    // max : Number
    // 第二种方式
    max : {
      type: Number,
      value: 10
    }
  }
data
跟page页面的js文件中的数据字段中的定义是一样的,只是这个data字段是在自定义组件Component中的数据定义
  data: {
    count: 0
  }
methods
跟page页面的js文件中的函数定义是一样的,只是这个methods字段是在自定义组件Component中的函数定义
  methods: {
    addCount: function()
    {
      this.setData({
        count: this.data.count + 1
      })
      this._showToast()
    },

    _showToast: function()
    {
      wx.showToast({
        title: '当前count: ' + this.data.count,
        icon: 'none'
      })
    }
  }
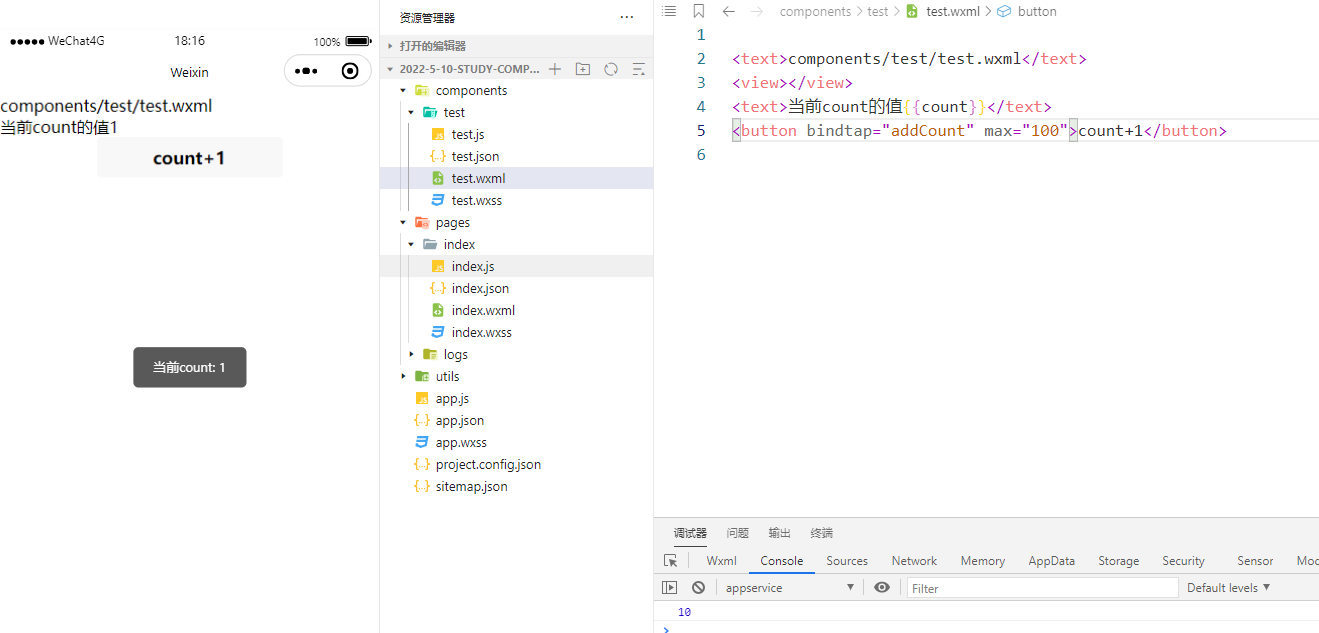
component中的test.wxml中的定义
<text>components/test/test.wxml</text>
<view></view>
<text>当前count的值{{count}}</text>
<button bindtap="addCount" max="100">count+1</button>
效果演示如下所示
自定义组件-数据监听器
数据监听器可以用于监听和响应任何属性和数据字段的变化
有时,在一些数据字段被 setData 设置时,需要执行一些操作。
例如, this.data.sum 永远是 this.data.numberA 与 this.data.numberB 的和。此时,可以使用数据监听器observers属性来进行实现
// components/test.js
Component({

  /**
   * 组件的属性列表
   */
  properties: {
  },

  /**
   * 组件的初始数据
   */
  data: {
    sum: 0,
    numberA: 0,
    numberB: 0
  },

  /**
   * 组件的方法列表
   */
  methods: {

    attached: function() {
      this.setData({
        numberA: 1,
        numberB: 2,
      })
      this._showToastNumber()
    },

    _showToastNumber: function()
    {
      wx.showToast({
        title: this.data.numberA + '+' + this.data.numberB + '=' + (this.data.numberA + this.data.numberB),
        icon: 'none'
      })
    }
  },

    observers: {
      'numberA, numberB': function(numberA, numberB) {
        // 在 numberA 或者 numberB 被设置时,执行这个函数
        this.setData({
          sum: numberA + numberB
        })
      }
    }
})
知识点:监听对象的属性也是一样的写法,对象.a, 对象.b: function(a,b ){...}
自定义组件纯数据字段
纯数据字段是一些不用于界面渲染的 data 字段,可以用于提升页面更新性能
组件数据中的纯数据字段
有些情况下,某些 data 中的字段(包括 setData 设置的字段)既不会展示在界面上,也不会传递给其他组件,仅仅在当前组件内部使用。
此时,可以指定这样的数据字段为“纯数据字段”,它们将仅仅被记录在 this.data 中,而不参与任何界面渲染过程,这样有助于提升页面更新性能。
指定"纯数据字段"的方法是在 Component 构造器的 options 定义段中指定 pureDataPattern 为一个正则表达式,字段名符合这个正则表达式的字段将成为纯数据字段
个人理解:纯数据字段单纯就是为了规范使用而存在的,跟私有变量的定义差不多,只能给内部来进行使用
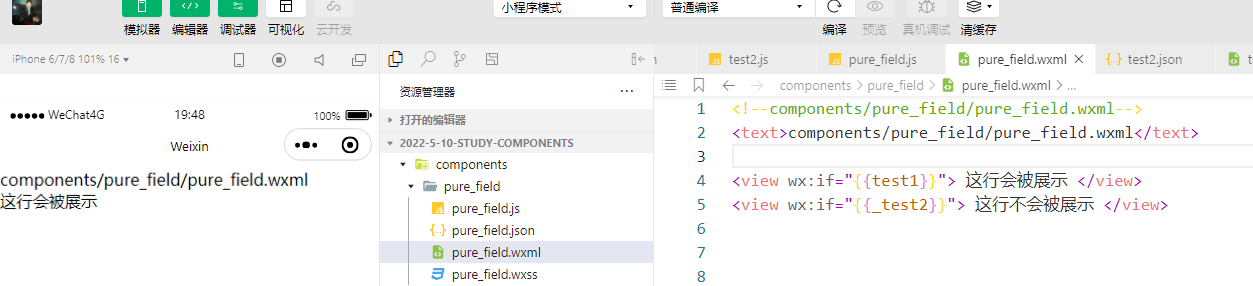
pure_field.wxml
<test2-component></test2-component>

<view wx:if="{{test1}}"> 这行会被展示 </view>
<view wx:if="{{_test2}}"> 这行不会被展示 </view>
test2.json
{
  "usingComponents": {
    "test2-component" : "/components/pure_field/pure_field"
  }
}
test2.wxml
<test2-component></test2-component>
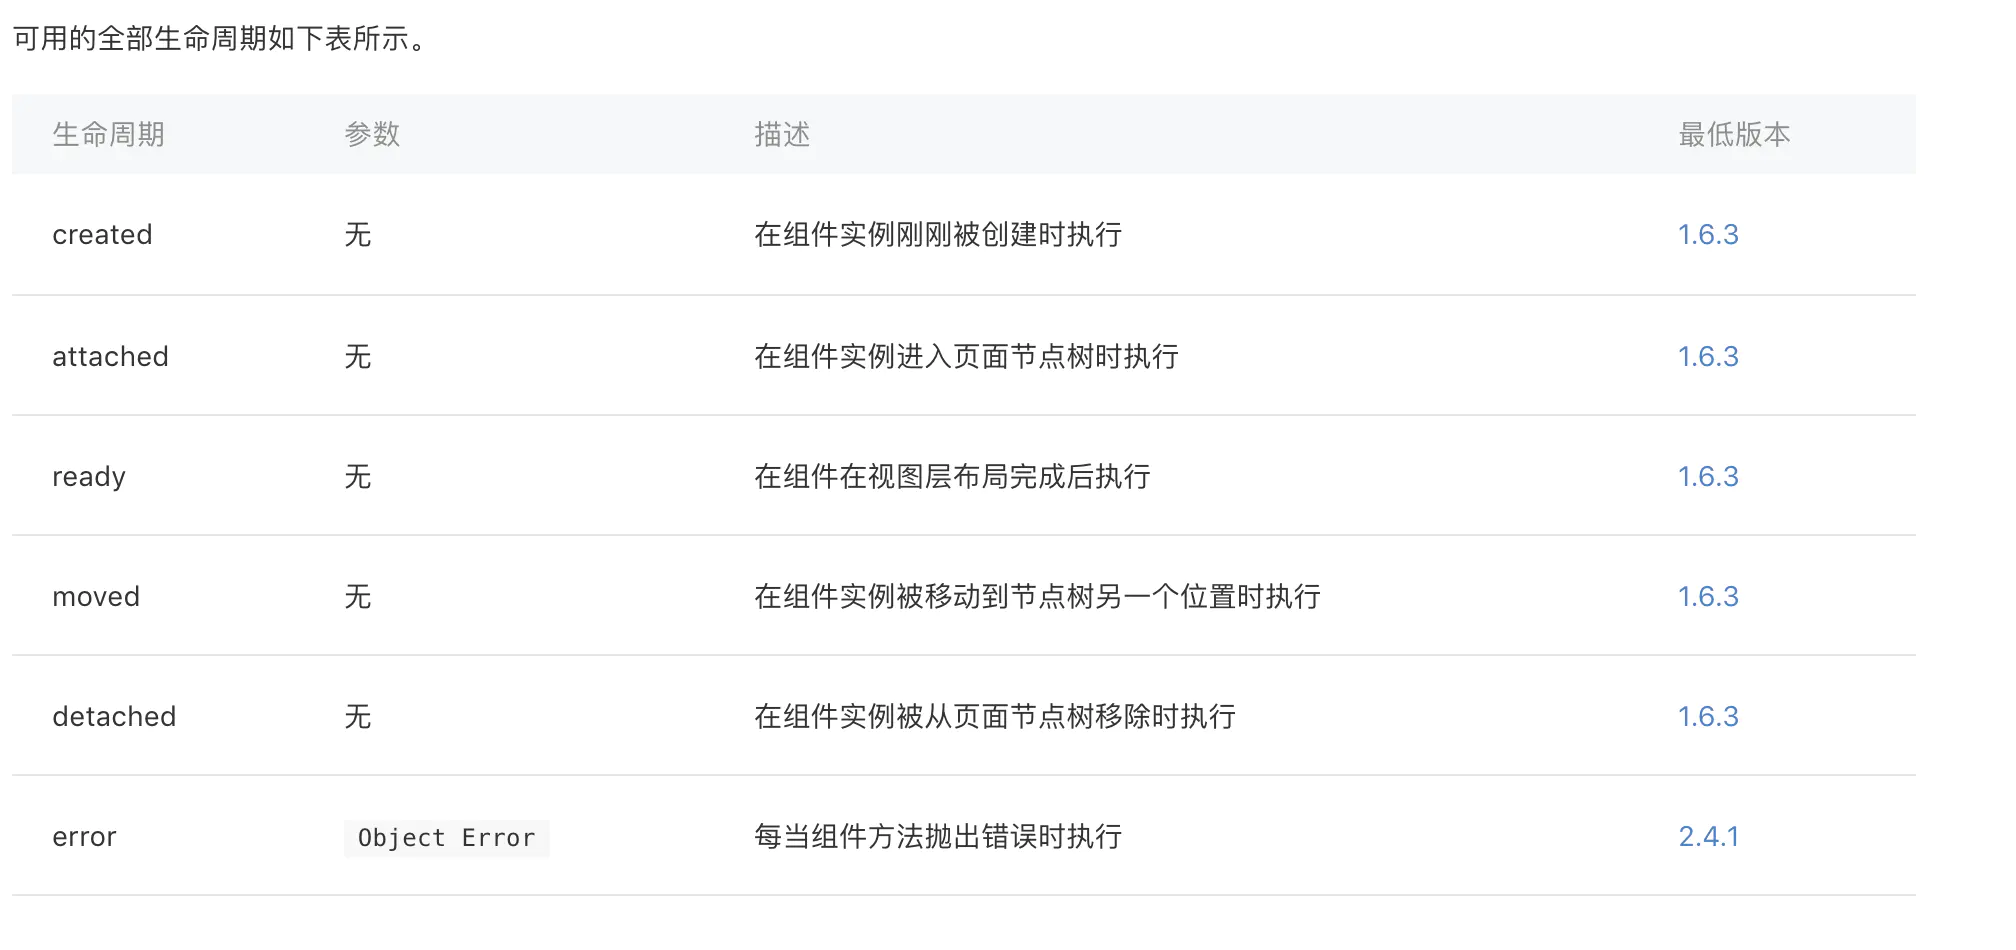
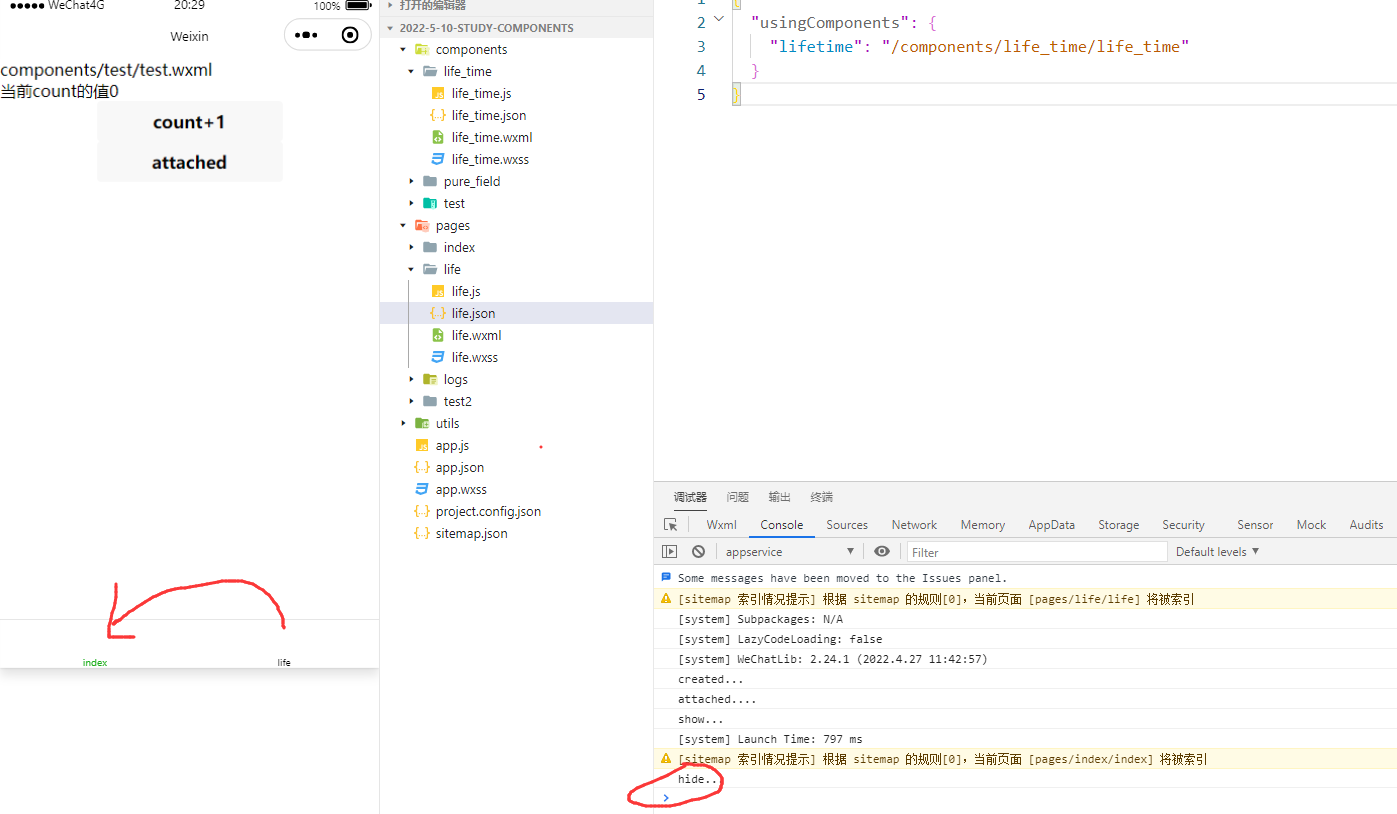
自定义组件的生命周期
https://developers.weixin.qq.com/miniprogram/dev/framework/custom-component/lifetimes.html
组件的生命周期,指的是组件自身的一些函数,这些函数在特殊的时间点或遇到一些特殊的框架事件时被自动触发。
其中,最重要的生命周期是 created、attached 和 detached ,包含一个组件实例生命流程的最主要时间点。
created:组件实例刚刚被创建好时, created 生命周期被触发。此时,组件数据 this.data 就是在 Component 构造器中定义的数据 data 。 此时还不能调用 setData 。 通常情况下,这个生命周期只应该用于给组件 this 添加一些自定义属性字段。
attached:在组件完全初始化完毕、进入页面节点树后, attached 生命周期被触发。此时, this.data 已被初始化为组件的当前值。这个生命周期很有用,绝大多数初始化工作可以在这个时机进行。
detached:在组件离开页面节点树后, detached 生命周期被触发。退出一个页面时,如果组件还在页面节点树中,则 detached 会被触发。
注意:组件在created的时候是不能调用setData的
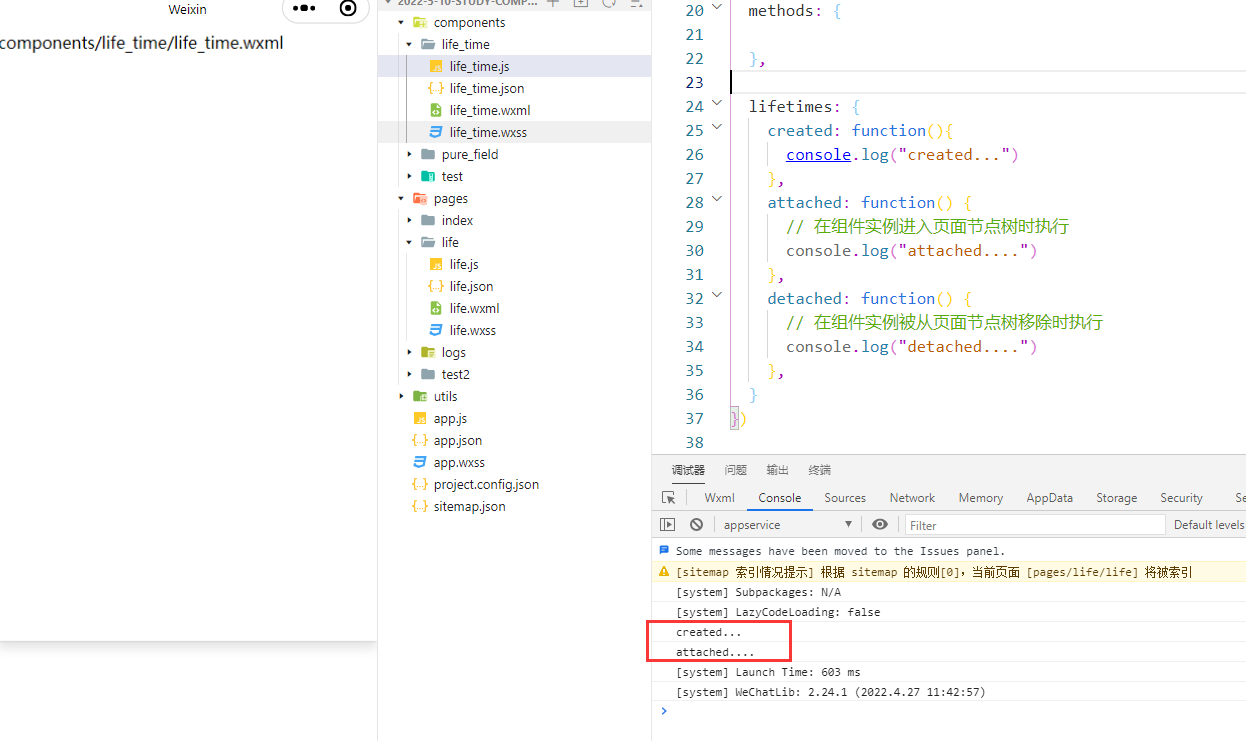
定义生命周期方法
Component({
  lifetimes: {
    created: function(){
      console.log("created...")
    },
    attached: function() {
      // 在组件实例进入页面节点树时执行
      console.log("attached....")
    },
    detached: function() {
      // 在组件实例被从页面节点树移除时执行
      console.log("detached....")
    },
  }
})
组件所在页面的生命周期
还有一些特殊的生命周期,它们并非与组件有很强的关联,但有时组件需要获知,以便组件内部处理。这样的生命周期称为"组件所在页面的生命周期"
  pageLifetimes: {
    show: function() {
      // 页面被展示
      console.log("show...")
    },
    hide: function() {
      // 页面被隐藏
      console.log("hide...")
    },
    resize: function(size) {
      // 页面尺寸变化
      console.log("resize...")
    }
  }

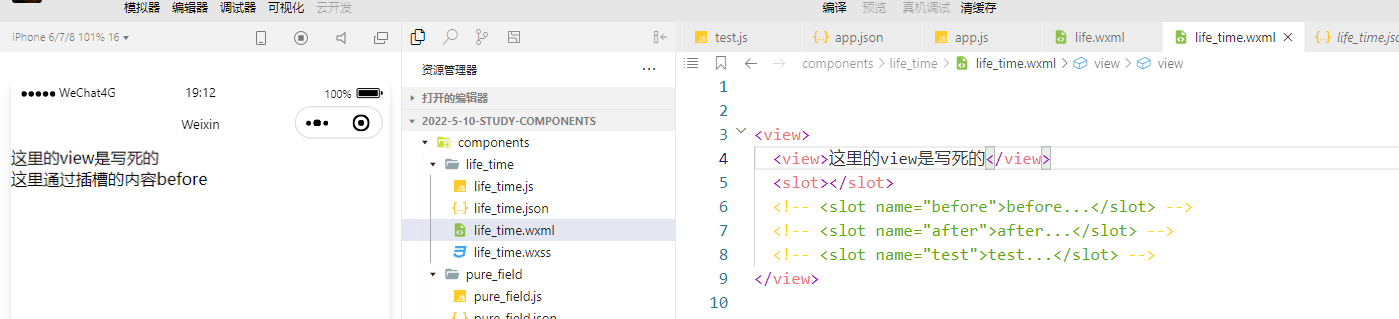
自定义组件的插槽
在组件中通过插槽来实现占位的作用
单个插槽的使用
组件.wxml
<view>
  <view>这里的view是写死的</view>
  <slot></slot>
</view>
page.wxml
<lifetime>
  <view>这里通过插槽的内容before</view>
</lifetime>
下面可以发现,在slot中作为占位符来展示
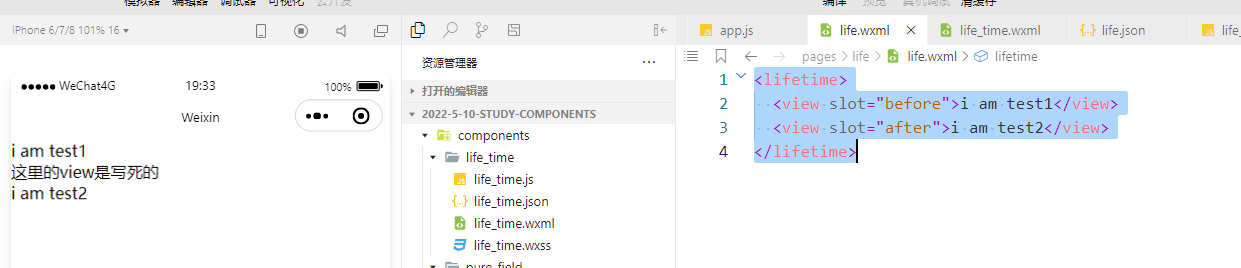
多个插槽的使用
一次性存在多个插槽的使用
一次性使用多个插槽的话需要先对组件进行相关的配置
  options: {
    multipleSlots: true
  },
component.wxml
<view>
  <slot name="before"></slot>
  <view>这里的view是写死的</view>
  <slot name="after"></slot>
</view>
page.wxml
<lifetime>
  <view slot="before">i am test1</view>
  <view slot="after">i am test2</view>
</lifetime>
父子组件之间的通信-三种方法
组件间的基本通信方式有以下几种
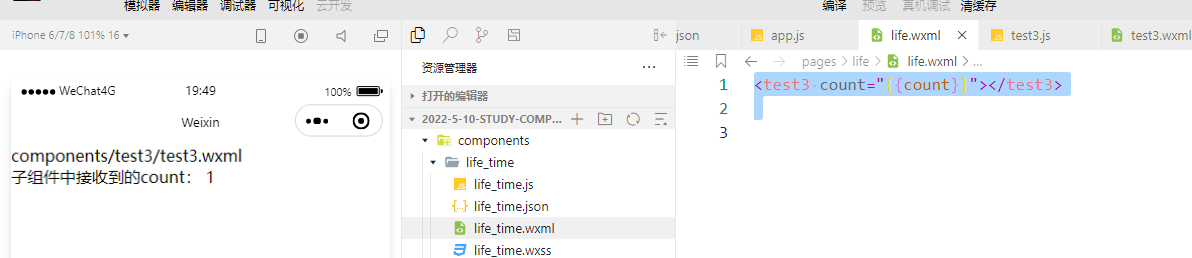
属性绑定
数据绑定:用于父组件向子组件的指定属性设置数据,仅能设置 JSON 兼容数据(自基础库版本 2.0.9 开始,还可以在数据中包含函数)。具体在 组件模板和样式 章节中介绍。
component.wxml
<!--components/test3/test3.wxml-->
<text>components/test3/test3.wxml</text>

<view>子组件中接收到的count: {{count}}</view>
component.js
  properties: {
    count: Number
  },
page.wxml
<test3 count="{{count}}"></test3>
page.js
  data: {
    count: 1
  },
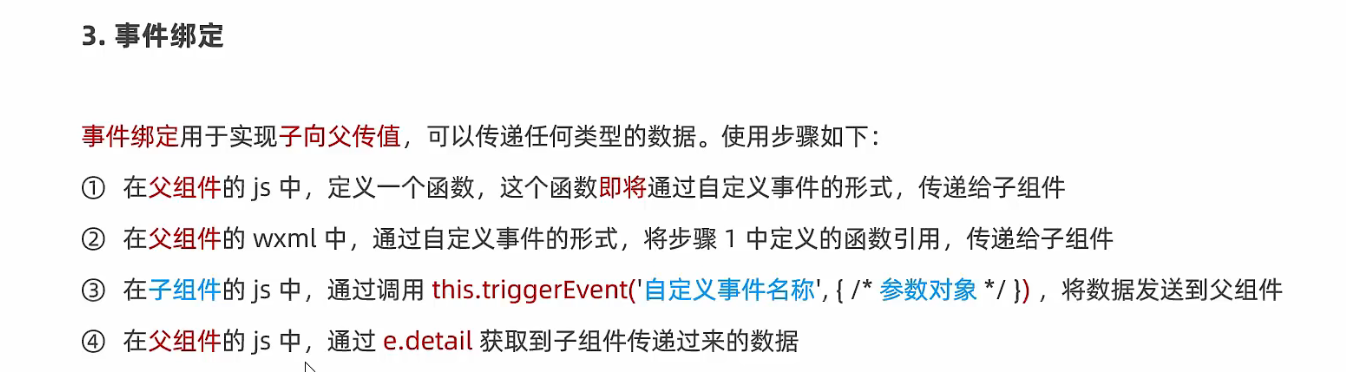
事件绑定
事件绑定:用于子组件向父组件传递数据,可以传递任意数据。
具体步骤分为四个流程,如下图所示
component.js
  properties: {
    count: Number
  },

  /**
   * 组件的方法列表
   */
  methods: {

    addCount: function()
    {
      this.setData({
        count: this.properties.count + 1
      })
      this.testTap()
    },

    testTap: function()
    {
      // triggerEvent 传递父组件
      this.triggerEvent("sync", {value: this.properties.count})
    }
  }
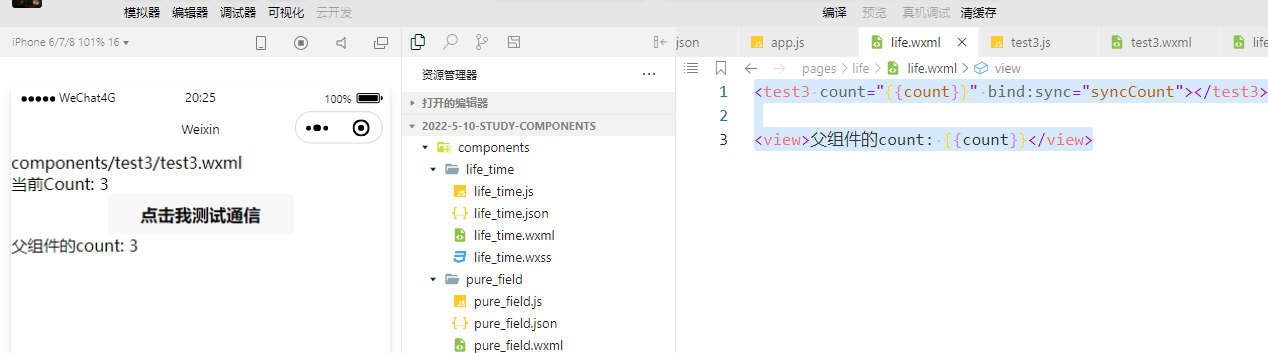
component.wxml
<view>当前Count: {{count}}</view>

<button bindtap="addCount">点击我测试通信</button>
page.wxml
<test3 count="{{count}}" bind:sync="syncCount"></test3>

<view>父组件的count: {{count}}</view>
page.js
  data: {
    count: 0
  },

  syncCount(e)
  {
    console.log("syncCount")
    this.setData({
      count: e.detail.value
    })
  },
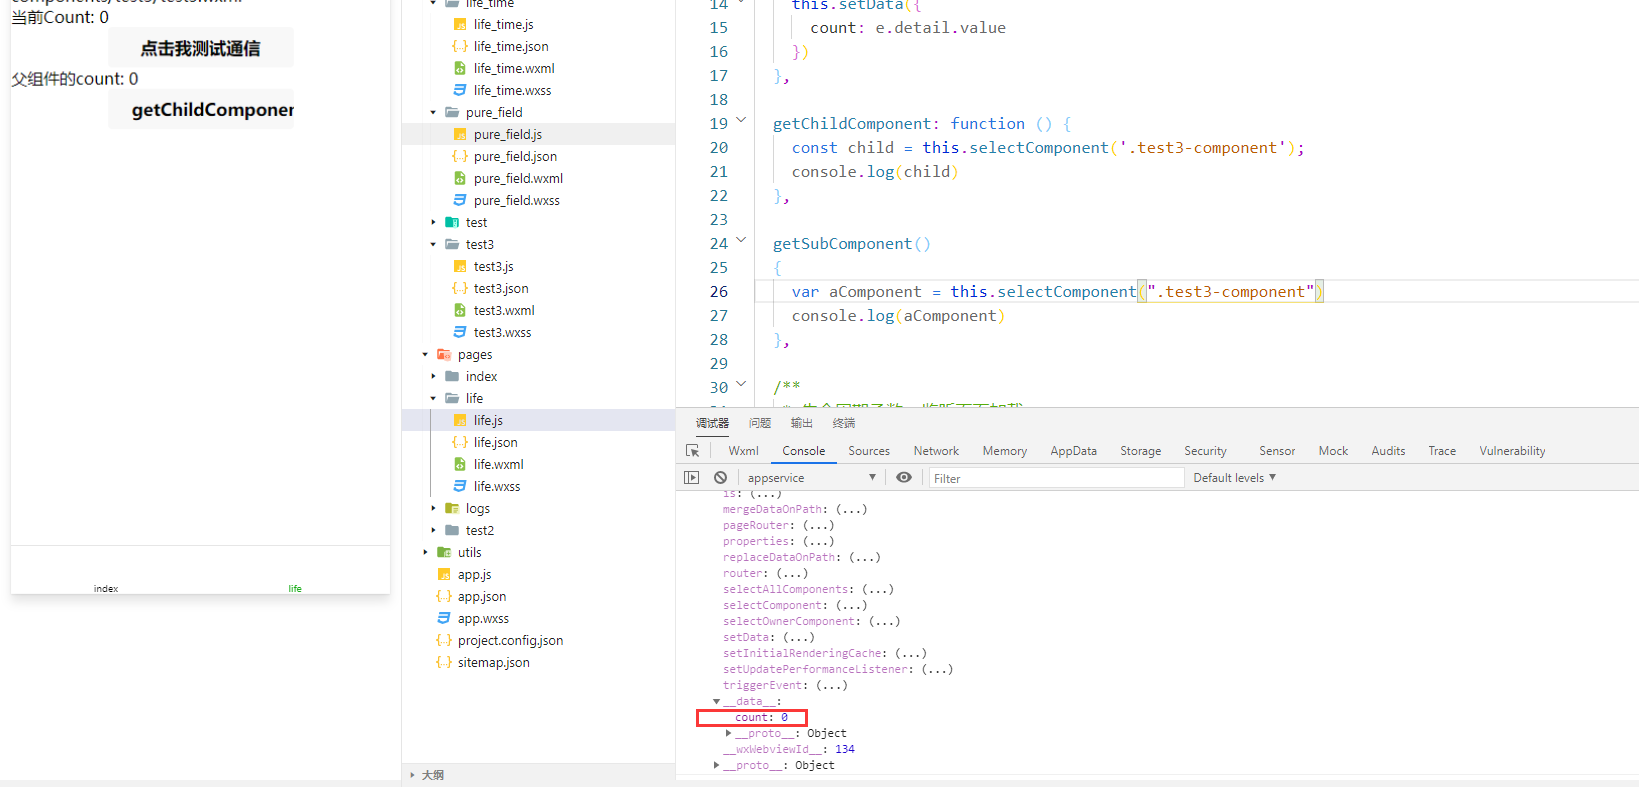
获取组件实例
可在父组件里调用 this.selectComponent ,获取子组件的实例对象。
调用时需要传入一个匹配选择器 selector,如:this.selectComponent(".my-component")
page.wxml
<test3 count="{{count}}" bind:sync="syncCount"  class="test3-component"></test3>
<button bindtap="getChildComponent">getChildComponent</button>
page.js
  getChildComponent: function () {
    const child = this.selectComponent('.test3-component');
    console.log(child)
  },
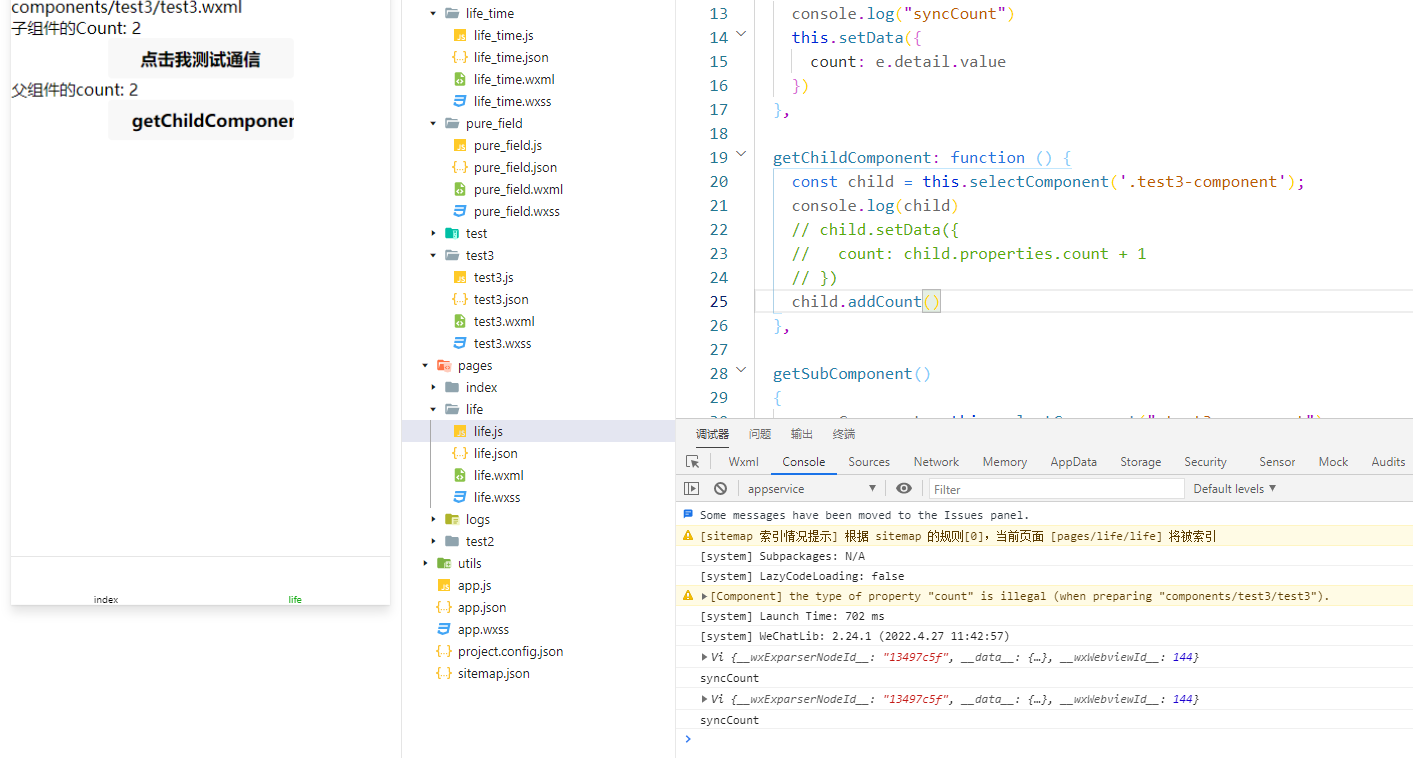
其中有子组件的setData的方法,这里可以在父组件中对子组件进行setData操作
  getChildComponent: function () {
    const child = this.selectComponent('.test3-component');
    console.log(child)
    child.setData({
      count: child.properties.count + 1
    })
  },

同样子组件的方法也可以进行调用
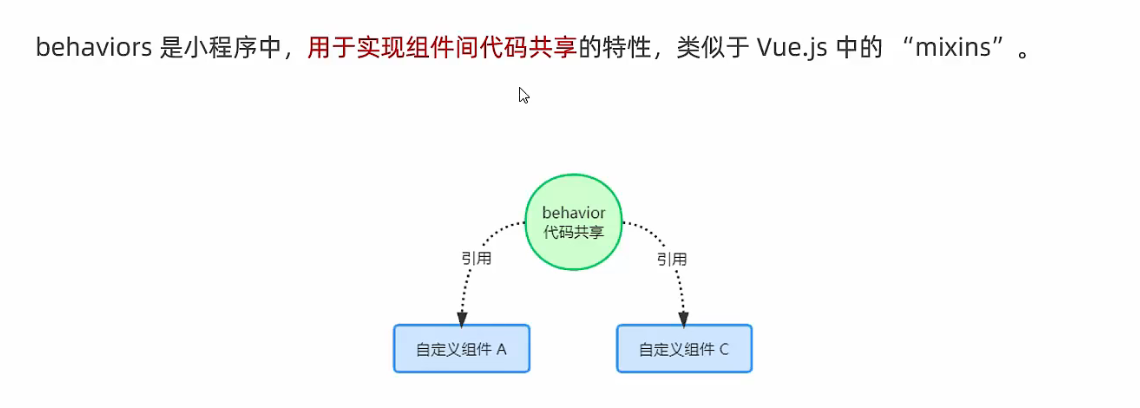
自定义组件behaviors
behaviors 是用于组件间代码共享的特性,类似于一些编程语言中的 “mixins” 或 “traits”。
每个 behavior 可以包含一组属性、数据、生命周期函数和方法。组件引用它时,它的属性、数据和方法会被合并到组件中,生命周期函数也会在对应时机被调用。 每个组件可以引用多个 behavior ,behavior 也可以引用其它 behavior
my_behavior.js
module.exports = Behavior({
  data: {
    behaviorCount: 100
  }
})
component.js
const my_behavior = require("../../behaviors/my_behavior")
Component({
  /**
   * 组件的属性列表
   */
  behaviors: [my_behavior]

}
component.wxml
<!--components/test4/test4.wxml-->
<text>components/test4/test4.wxml</text>
<view>在my_behavior中的behaviorCount: {{behaviorCount}}</view>

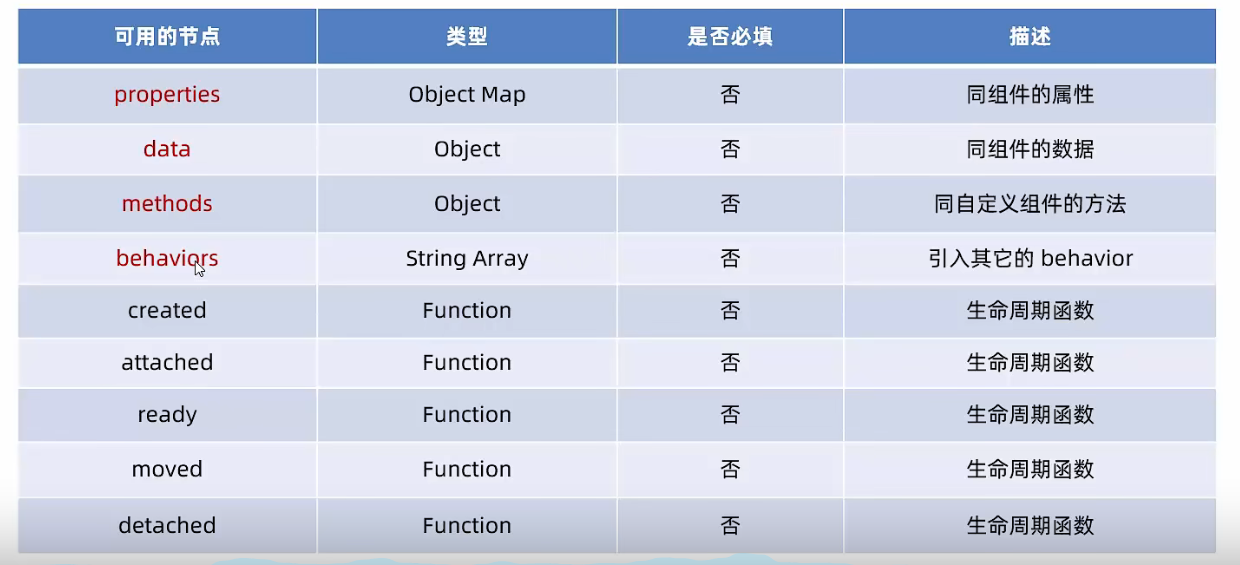
behaviors也有对应的节点属性,如下图所示
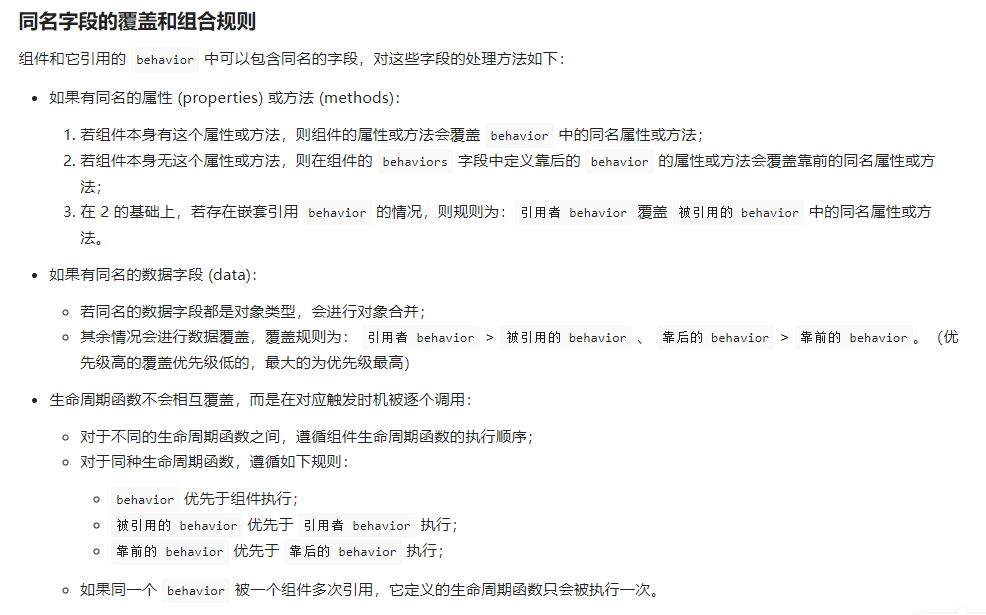
当behaviors中定义的data节点中的属性和component的data节点中的属性重名的时候,会有同名字段的覆盖和组合规则,有如下几种情况
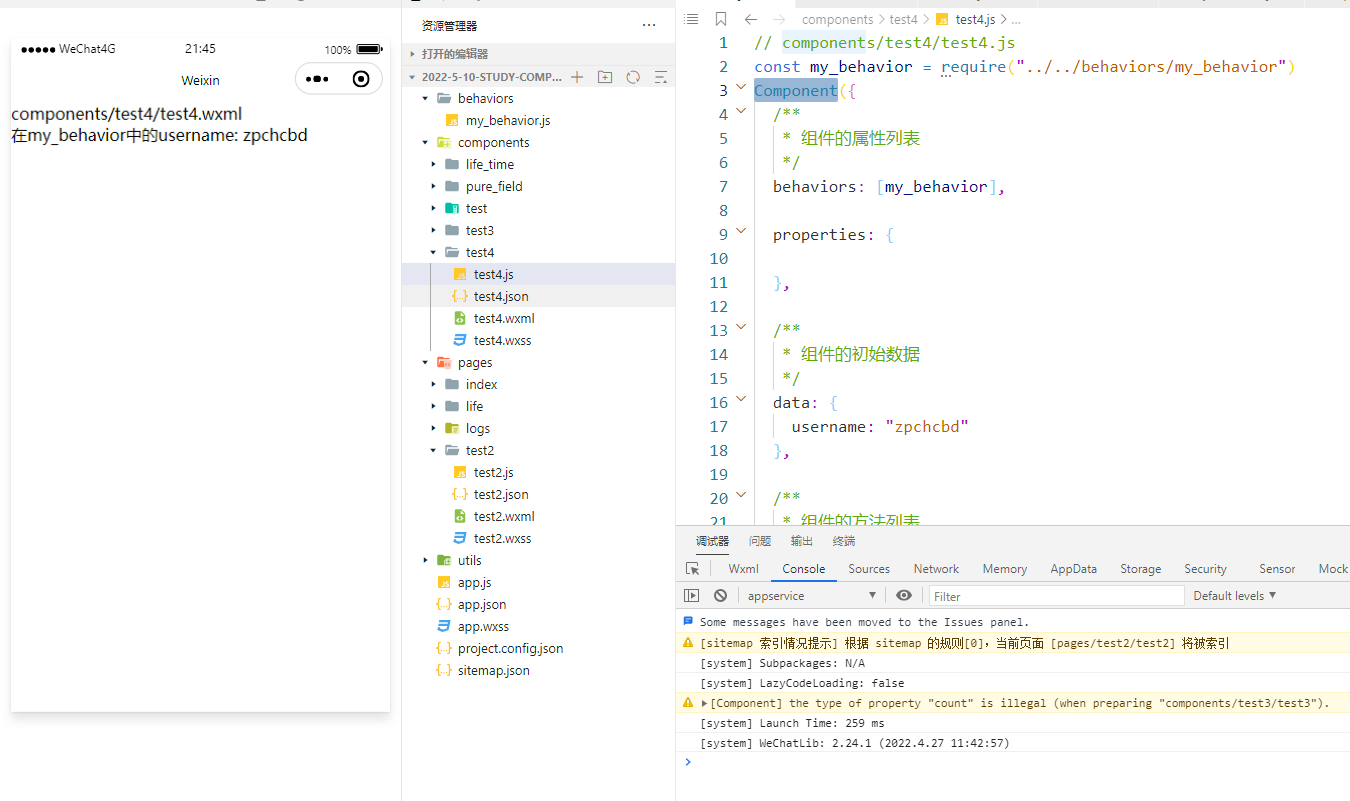
比如当前情况:
Behavior.js
module.exports = Behavior({
  data: {
    username: "a Behavior ...."
  }
})
Component.js
  behaviors: [my_behavior],

  properties: {
    username: "zpchcbd"
  },
其余情况会进行数据覆盖,覆盖规则为: 引用者 behavior > 被引用的 behavior 、 靠后的 behavior > 靠前的 behavior。(优先级高的覆盖优先级低的,最大的为优先级最高)
在这里Component优先级最高(饮用者behavior)

 浙公网安备 33010602011771号