反向代理缓存
前言
反向代理采用Nginx,当客户端向Nginx服务器发送请求时,Nginx转发给集群,当请求到达Nginx时可以加一层缓存,可存储动态页面,当缓存存在时Nginx直接将缓存返回给客户端,而不请求服务器,这样可以将一大部分请求拦截到直接返回缓存,使服务器压力降低。
环境准备
Nginx下载地址:http://nginx.org/en/download.html
应用程序
创建一个.net core 3.0 MVC程序


public class HomeController : Controller
{
      private readonly IConfiguration _iConfiguration;
      public HomeController( IConfiguration configuration)
      {
          this._iConfiguration = configuration;
      }
      public IActionResult Index()
      {
          ViewBag.Time = DateTime.Now.ToString("yyyy-MM-dd HH:mm:ss fff");
          ViewBag.InternalUrl = $"{base.Request.Scheme}://:{this._iConfiguration["port"]}";
          return View();
      }

}
public class testController : Controller
    {
        private readonly IConfiguration _iConfiguration;
        public testController(IConfiguration configuration)
        {
            this._iConfiguration = configuration;
        }
        public IActionResult Index()
        {
            ViewBag.Time = DateTime.Now.ToString("yyyy-MM-dd HH:mm:ss fff");
            ViewBag.Url = $"{base.Request.Scheme}://{base.Request.Host}";
            ViewBag.InternalUrl = $"{base.Request.Scheme}://:{this._iConfiguration["port"]}";
            return View();
        }
    }
将时间与端口作为标记,在页面上打印出来,接下来添加命令行支持,打开Program.Main(),添加命令行支持
public static void Main(string[] args)
        {
            new ConfigurationBuilder()
                .SetBasePath(Directory.GetCurrentDirectory())
                .AddCommandLine(args)
                .Build();
            CreateHostBuilder(args).Build().Run();
        }
 //core 2.x 使用
//public static IWebHost BuildWebHost(string[] args) =>
//        WebHost.CreateDefaultBuilder(args)
//            .UseConfiguration(new ConfigurationBuilder().AddCommandLine(args).Build())
//            .UseStartup<Startup>()
//            .Build();
接下来就可以用命令行启动项目了,进入bin/Debug/netcoreappx.x下cmd输入:
dotnet xxx.dll --urls=http://*:8878 --port=8878
成功后就能打开浏览器地址访问了~
Nginx反向代理
到这项目已经能顺利启动了,接下来配置Nginx反向代理服务器。
打开conf/nginx.config配置文件进行配置 先在http节点下include前配置(data文件夹要先创建,默认当前地址./为与nginx.exe同级目录,../data为nginx-1.18.0同级)
proxy_cache_path ../data/ levels=1:2 keys_zone=cache_one:500m inactive=1d max_size=1g;
然后配置下服务转发列表
upstream web
{
    server 127.0.0.1:8878;
    server 127.0.0.1:8879;
    server 127.0.0.1:8877;
}
最后在server节点下配置,这样就能转发给多个地址
location /
{
    #代理地址,自动转发到web列表
    proxy_pass  http://web;
}
在/test路由上使用缓存
location /test
{
    #使用上面的缓存地址
    proxy_cache cache_one;
    #缓存200 304 302请求1个小时
    proxy_cache_valid 200 304 302 1;
    proxy_pass  http://web;
    proxy_cache_key  $uri$is_args$args;
}
效果
现在先访问localhost:8080/home看看集群是否配置成功
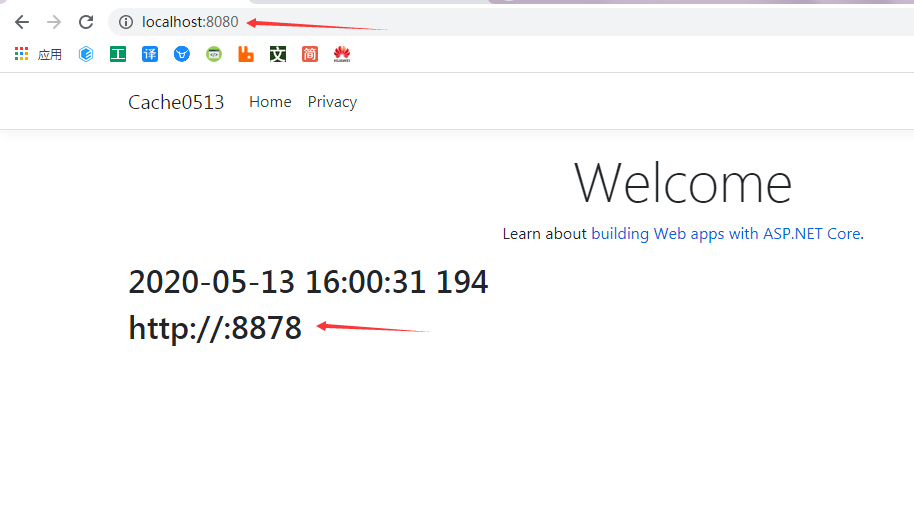
可以看到访问8080端口后转发到了8878应用程序,多刷几次看看

这样就配置好了,接下来就能测试nginx反向代理缓存,上面的nginx配置文件配置了/text路由的缓存

访问到/test路由后,多次刷新页面一直都没有改变,没错,动态页面被缓存了。当请求发送到8080端口nginx服务器后由nginx缓存了,第二次请求直接返回,并没有转发出去。去看看nginx缓存目录下存在的缓存文件。

如果把缓存删除掉就能重新访问到服务器。
附上nginx.config
#user  nobody;
worker_processes  1;

#error_log  logs/error.log;
#error_log  logs/error.log  notice;
#error_log  logs/error.log  info;

#pid        logs/nginx.pid;


events {
    worker_connections  1024;
}


http {
    #cache
    proxy_cache_path ../data/ levels=1:2 keys_zone=cache_one:500m inactive=1d max_size=1g;

    include       mime.types;
    default_type  application/octet-stream;

    #log_format  main  '$remote_addr - $remote_user [$time_local] "$request" '
    #                  '$status $body_bytes_sent "$http_referer" '
    #                  '"$http_user_agent" "$http_x_forwarded_for"';

    #access_log  logs/access.log  main;

    sendfile        on;
    #tcp_nopush     on;

    #keepalive_timeout  0;
    keepalive_timeout  65;

    #gzip  on;

    upstream web{
        server 127.0.0.1:8878;
    server 127.0.0.1:8879;
    server 127.0.0.1:8877;
    }

    server {
        listen       8080;
        server_name  localhost;

        #charset koi8-r;

        #access_log  logs/host.access.log  main;

        location / {
            proxy_pass  http://web;
        }
    location /test {
        proxy_cache cache_one;

            proxy_cache_valid 200 304 302 1m;
        proxy_pass  http://web;
        proxy_cache_key  $uri$is_args$args;
    }

        #error_page  404              /404.html;

        # redirect server error pages to the static page /50x.html
        #
        error_page   500 502 503 504  /50x.html;
        location = /50x.html {
            root   html;
        }

        # proxy the PHP scripts to Apache listening on 127.0.0.1:80
        #
        #location ~ \.php$ {
        #    proxy_pass   http://127.0.0.1;
        #}

        # pass the PHP scripts to FastCGI server listening on 127.0.0.1:9000
        #
        #location ~ \.php$ {
        #    root           html;
        #    fastcgi_pass   127.0.0.1:9000;
        #    fastcgi_index  index.php;
        #    fastcgi_param  SCRIPT_FILENAME  /scripts$fastcgi_script_name;
        #    include        fastcgi_params;
        #}

        # deny access to .htaccess files, if Apache's document root
        # concurs with nginx's one
        #
        #location ~ /\.ht {
        #    deny  all;
        #}
    }


    # another virtual host using mix of IP-, name-, and port-based configuration
    #
    #server {
    #    listen       8000;
    #    listen       somename:8080;
    #    server_name  somename  alias  another.alias;

    #    location / {
    #        root   html;
    #        index  index.html index.htm;
    #    }
    #}


    # HTTPS server
    #
    #server {
    #    listen       443 ssl;
    #    server_name  localhost;

    #    ssl_certificate      cert.pem;
    #    ssl_certificate_key  cert.key;

    #    ssl_session_cache    shared:SSL:1m;
    #    ssl_session_timeout  5m;

    #    ssl_ciphers  HIGH:!aNULL:!MD5;
    #    ssl_prefer_server_ciphers  on;

    #    location / {
    #        root   html;
    #        index  index.html index.htm;
    #    }
    #}

}


 浙公网安备 33010602011771号