kubernetes集群:nexus搭建docker私有仓库及使用
k8s集群已经搭建好。包括nginx-ingress也已经做好,nfs挂载已经做好。具体请见笔记:https://www.cnblogs.com/zoujiaojiao/p/12515917.html
环境说明:

下面看k8s集群中,搭建Nexus:
1. 创建yaml文件目录:
#mkdir /opt/nexus
2. 创建命名空间
vim repo-nexus-ns.yaml
apiVersion: v1
kind: Namespace
metadata:
   name: repo-nexus
   labels:
     name: repo-nexus
启用:kubectl apply -f repo-nexus-ns.yaml
3. 创建PV和PVC
cat >repo-nexus-data.yaml <<EOF
---
# pv

apiVersion: v1
kind: PersistentVolume
metadata:
  name: repo-nexus-pv
spec:
  capacity:
    storage: 50Gi
  accessModes:
    - ReadWriteMany
  nfs:
       server: 10.10.4.85
       path: "/data/repo-nexus"

---
# pvc

apiVersion: v1
kind: PersistentVolumeClaim
metadata:
  name: repo-nexus-pvc
  namespace: repo-nexus
spec:
  accessModes:
    - ReadWriteMany
  storageClassName: ""
  resources:
    requests:
      storage: 50Gi
EOF
在nfs服务器10.10.4.85上创建目录:# mkdir /data/repo-nexus/
启用:kubectl create -f repo-nexus-data.yaml
4.部署nexus。下面的文件是解决了所有问题后的最终版配置。
cat >repo-nexus.yaml <<EOF
---
# deployment

kind: Deployment
apiVersion: apps/v1
metadata:
  labels:
    app: repo-nexus
  name: repo-nexus
  namespace: repo-nexus
spec:
  replicas: 1
  selector:
    matchLabels:
      app: repo-nexus
  template:
    metadata:
      labels:
        app: repo-nexus
    spec:
      containers:
        - name: repo-nexus
          image: sonatype/nexus3:latest
          imagePullPolicy: IfNotPresent
          resources:
            limits:
              memory: "4Gi"
              cpu: "1000m"
            requests:
              memory: "2Gi"
              cpu: "500m"
          ports:
          - containerPort: 8081   #作为nexus服务端口
            protocol: TCP
          - containerPort: 6000   #作为docker私库的端口
            protocol: TCP
          volumeMounts:
          - name: repo-nexus-data
            mountPath: /nexus-data
      volumes:
        - name: repo-nexus-data
          persistentVolumeClaim:
            claimName: repo-nexus-pvc

---
# service

kind: Service
apiVersion: v1
metadata:
  labels:
    app: repo-nexus
  name: repo-nexus
  namespace: repo-nexus
spec:
  ports:
    - port: 8081
      targetPort: 8081
      name: repo-base
    - port: 6000
      targetPort: 6000
      name: repo-docker
  selector:
    app: repo-nexus

---
# ingress

apiVersion: extensions/v1beta1
kind: Ingress
metadata:
  annotations:
    nginx.ingress.kubernetes.io/proxy-body-size: "1024m"    #后面有做解释,上传文件大小限制,是遇到问题后添加的
    nginx.ingress.kubernetes.io/proxy-read-timeout: "600"
    nginx.ingress.kubernetes.io/proxy-send-timeout: "600"
    kubernetes.io/tls-acme: 'true'
  name: repo-nexus
  namespace: repo-nexus
spec:
  rules:
  - host: nexus.vonedao.com   #nexus私库
    http:
      paths:
      - path: /
        backend:
          serviceName: repo-nexus
          servicePort: 8081
  - host: docker.vonedao.com   #docker私库
    http:
      paths:
      - path: /
        backend:
          serviceName: repo-nexus
          servicePort: 6000
EOF
部署应用:kubectl apply -f repo-nexus.yaml
查看:
kubectl get svc,pod,ingress -n repo-nexus -o wide

访问:
由于是私网搭建,域名都是非正式的,需要在win机器hosts里指定ingress地址到该域名:

访问,第一次访问会要求你填入账户admin和密码,密码会在你挂载的文件中/data/repo-nexus/admin.password中。初次登录后,需要修改密码。
在nexus上创建docker仓库:
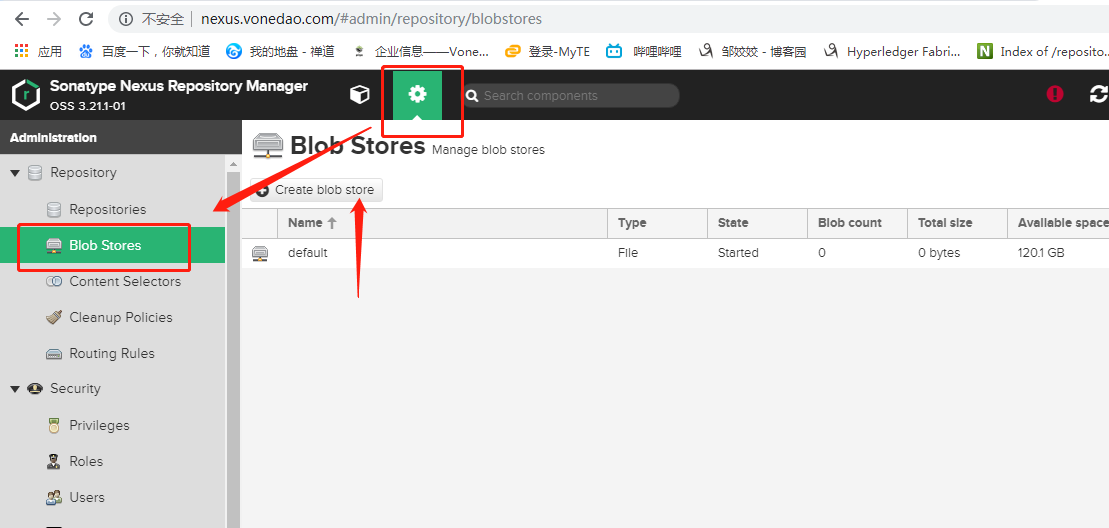
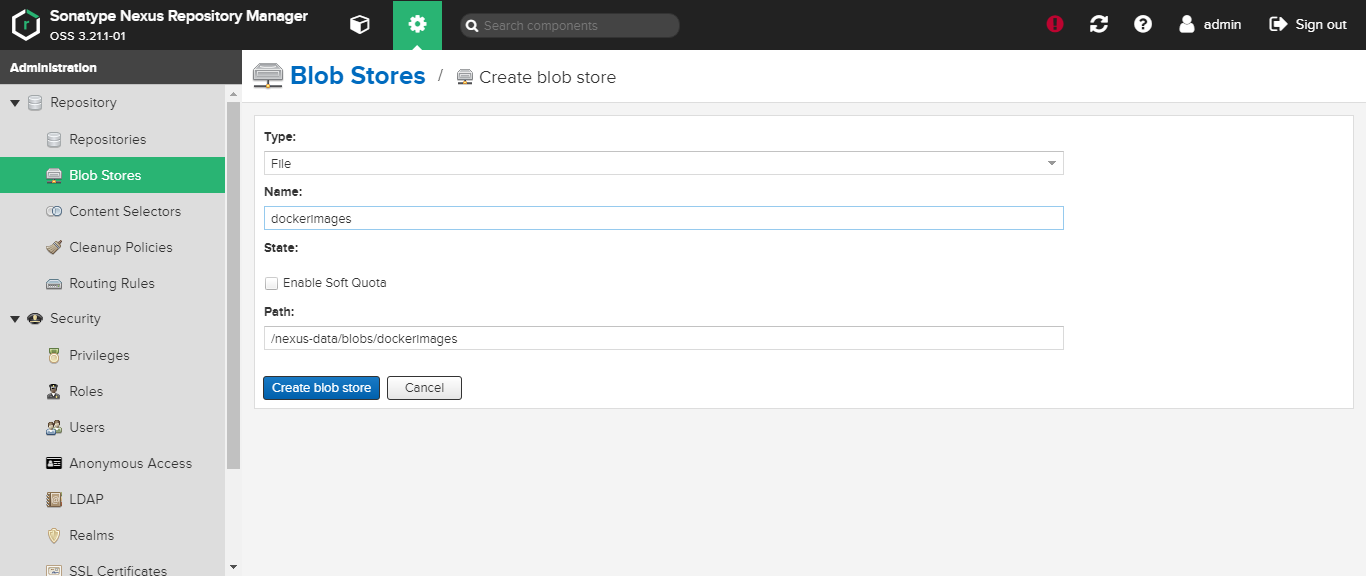
1. 添加Blob stores

添加Repositories:
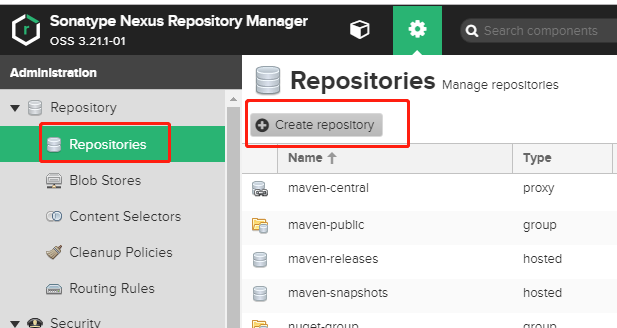
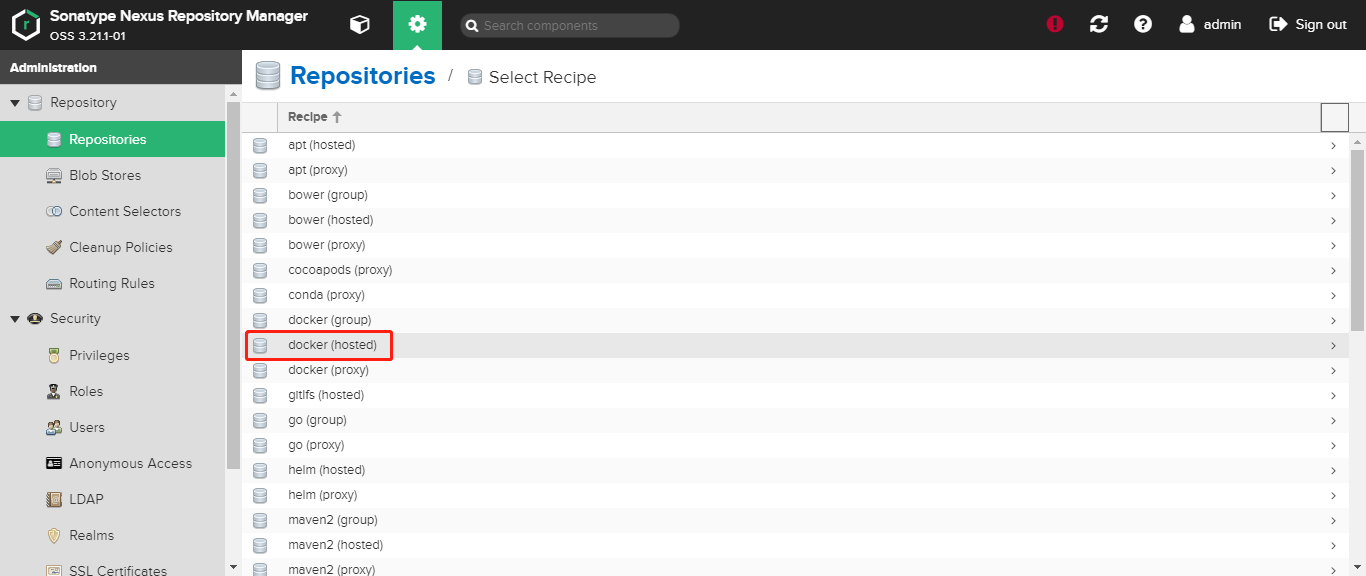
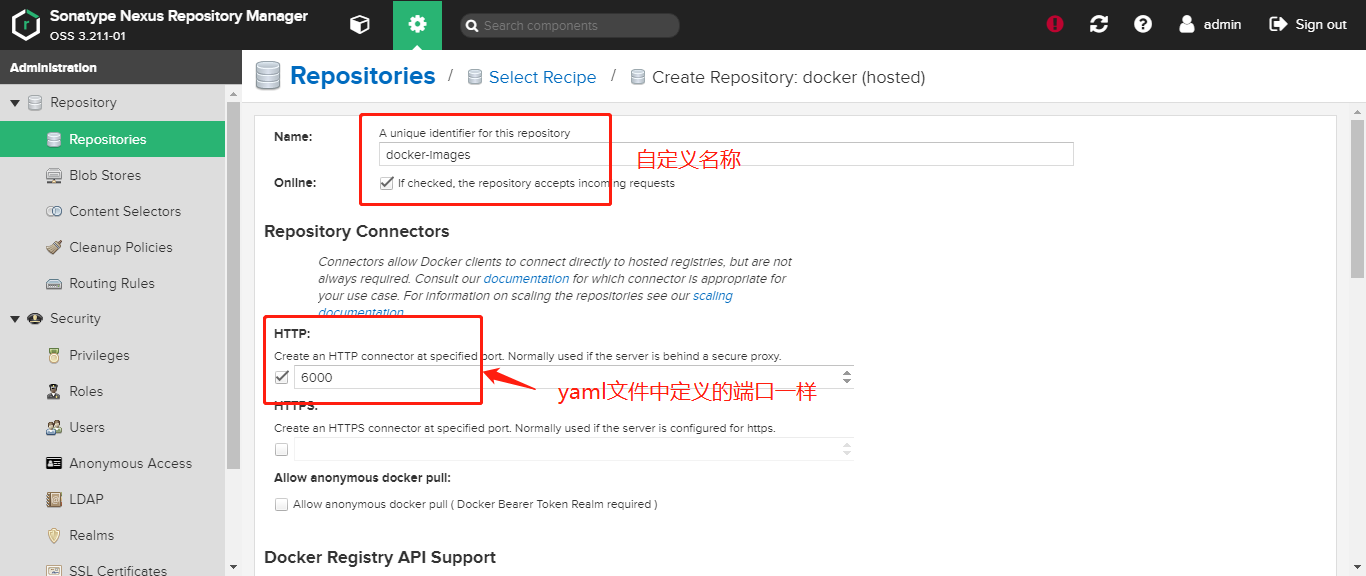
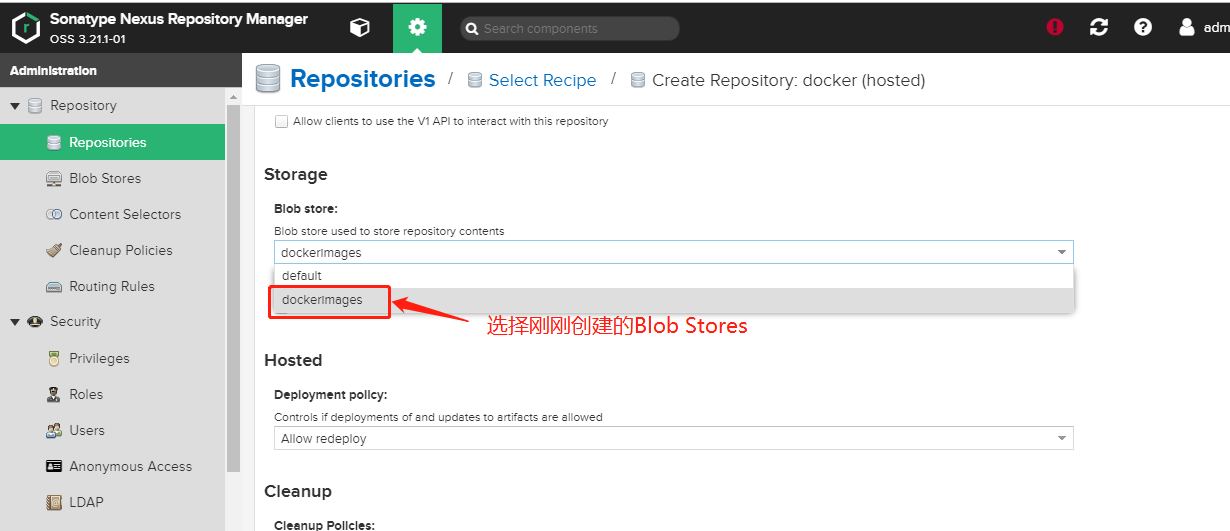

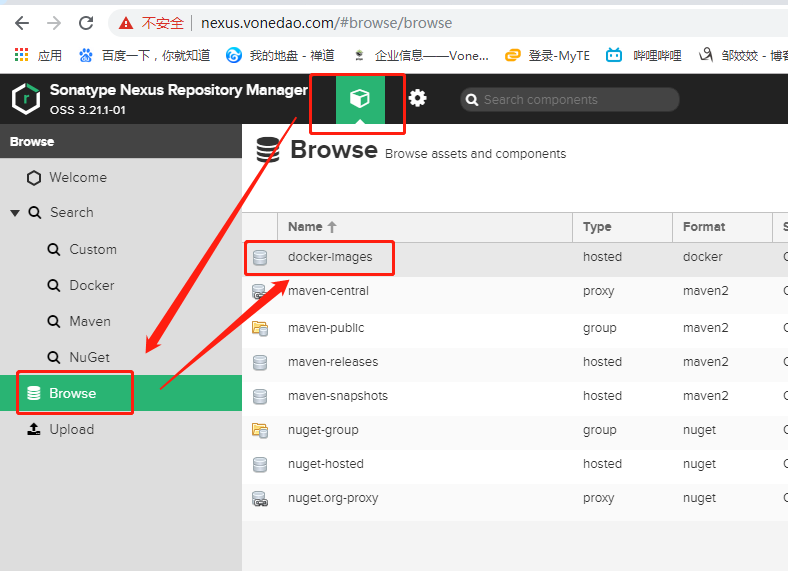
查看仓库:
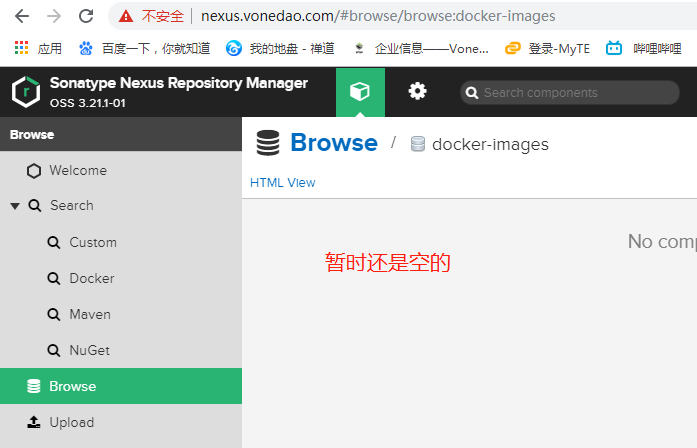
暂时为空的仓库:
给docker配置私库后,重启docker,然后登录:
# cat /etc/docker/daemon.json
{"registry-mirrors": ["http://295c6a59.m.daocloud.io"],"insecure-registries":["http://docker.vonedao.com"]}
# systemctl restart docker
输入admin 账户,和你修改过的密码。


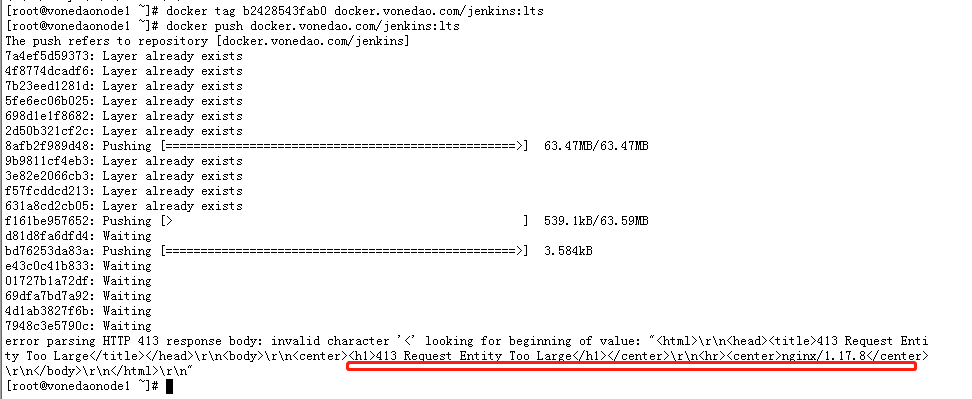
上传文件的大小超出了 Nginx 允许的最大值,如果没有配置的话,默认是1M;
修改repo-nexus.yaml:
# ingress

apiVersion: extensions/v1beta1
kind: Ingress
metadata:
  annotations:
    nginx.ingress.kubernetes.io/proxy-body-size: "1024m"
    nginx.ingress.kubernetes.io/proxy-read-timeout: "600"
    nginx.ingress.kubernetes.io/proxy-send-timeout: "600"
    kubernetes.io/tls-acme: 'true'
  name: repo-nexus
  namespace: repo-nexus
添加了下面几个配置:
  annotations:
   #客户端上传文件,最大大小
    nginx.ingress.kubernetes.io/proxy-body-size: "1024m"
   #后端服务器响应超时时间
    nginx.ingress.kubernetes.io/proxy-read-timeout: "600"
   #后端服务器回转数据超时时间
    nginx.ingress.kubernetes.io/proxy-send-timeout: "600"
更新nexus:
# kubectl apply -f repo-nexus.yaml


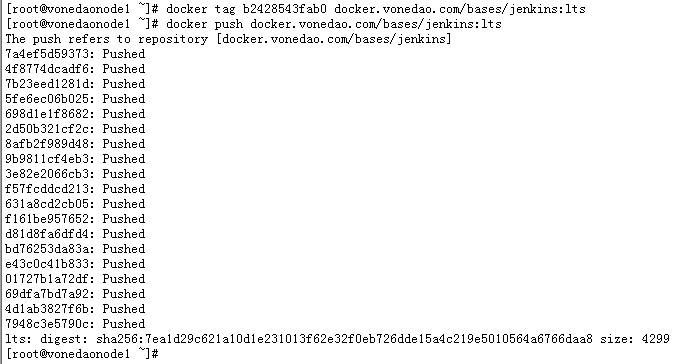
重新上传:
# docker tag b2428543fab0 docker.vonedao.com/bases/jenkins:lts
# docker push docker.vonedao.com/bases/jenkins:lts
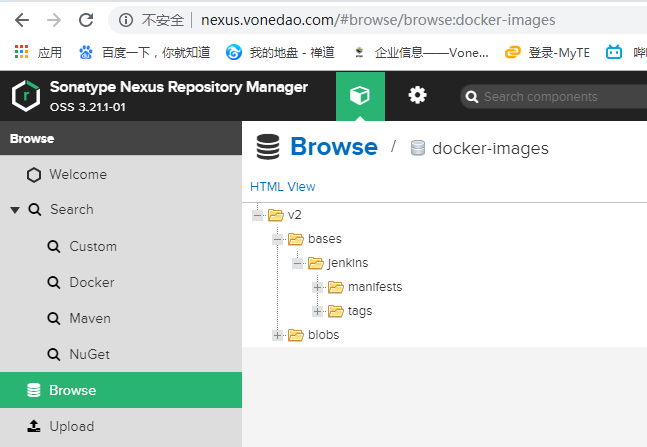
登录服务器检查:
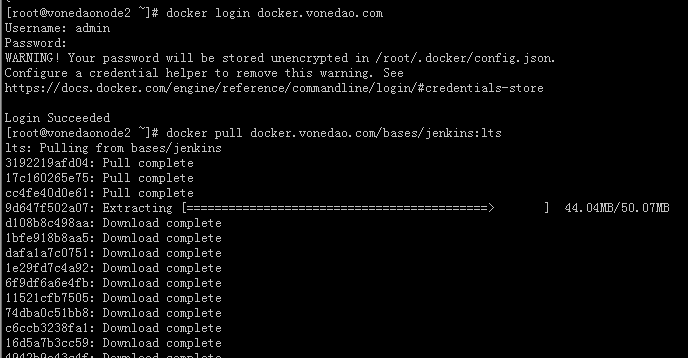
其他服务器配置仓库,重启docker:


使用Maven插件快捷打包发布远程Docker镜像
在使用使用Maven 插件docker-maven-plugin 打包推送镜像的时候报错:
Failed to execute goal io.fabric8:docker-maven-plugin:0.32.0:build
(default-cli) on project vonedao-auth: Unable to pull
'java:8-jre' from registry 'docker.vonedao.com' :
{"message":"Get http://docker.vonedao.com/v2/java/manifests/8-jre: no basic auth credentials"}
(Internal Server Error: 500) ->
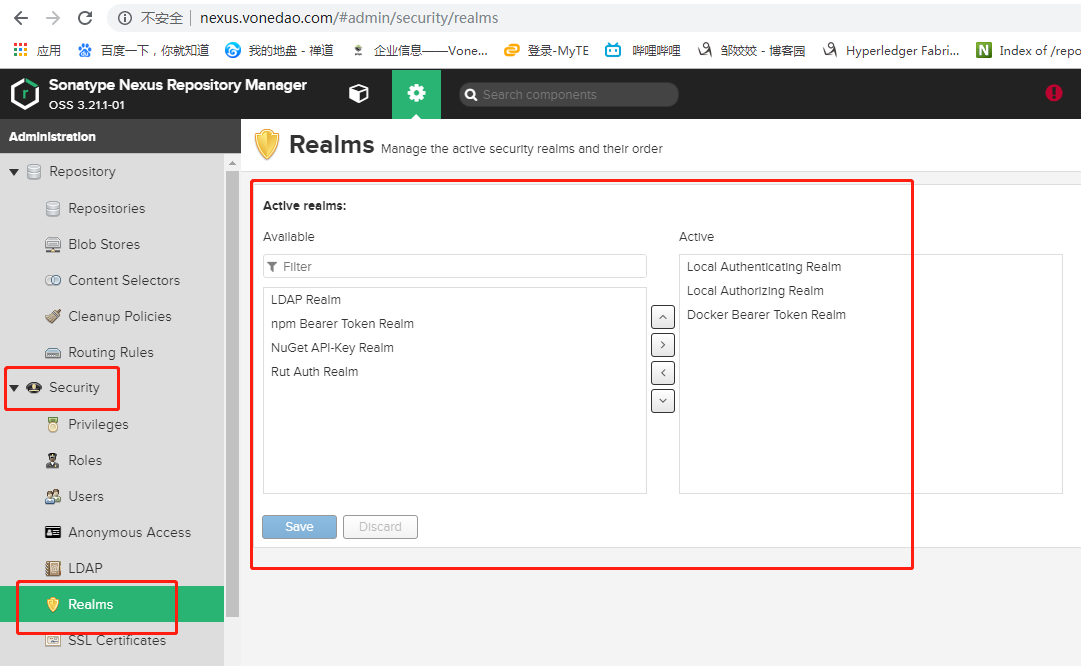
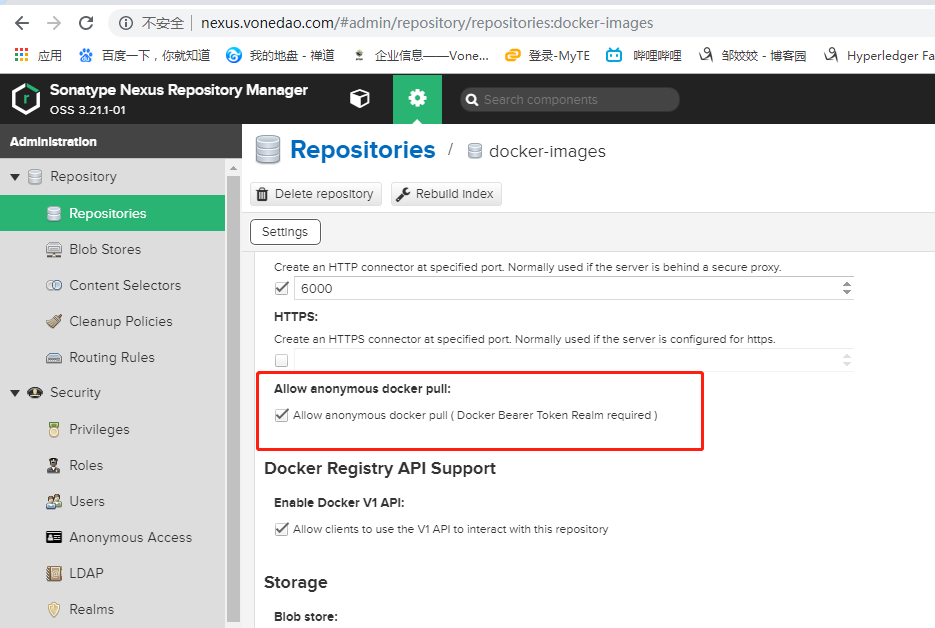
由于我们使用的是nexus,nexus做以下配置下:
