vs2015开发Windows服务

using System;
using System.Collections.Generic;
using System.ComponentModel;
using System.Data;
using System.Diagnostics;
using System.Linq;
using System.ServiceProcess;
using System.Text;

using System.IO;

namespace OrganizClientSocketService
{
    public partial class Service1 : ServiceBase
    {
        public Service1()
        {
            InitializeComponent();

            System.Timers.Timer timer = new System.Timers.Timer();
            timer.Elapsed += new System.Timers.ElapsedEventHandler(TimedEvent);
            timer.Interval = 5000;//每5秒执行一次
            timer.Enabled = true;
        }

        //定时执行事件
        private void TimedEvent(object sender, System.Timers.ElapsedEventArgs e)
        {
            //业务逻辑代码
        }

        protected override void OnStart(string[] args)
        {
            this.WriteLog("OnStart");
        }

        protected override void OnStop()
        {
            this.WriteLog("OnStop");
        }
        protected override void OnShutdown()
        {
            this.WriteLog("OnShutdown");
        }

        #region 记录日志
        /// <summary>
        /// 记录日志
        /// </summary>
        /// <param name="msg"></param>
        private void WriteLog(string msg)
        {

            //string path = @"C:\log.txt";

            //该日志文件会存在windows服务程序目录下
            string path = AppDomain.CurrentDomain.BaseDirectory + "\\log.txt";
            FileInfo file = new FileInfo(path);
            if (!file.Exists)
            {
                FileStream fs;
                fs = File.Create(path);
                fs.Close();
            }

            using (FileStream fs = new FileStream(path, FileMode.Append, FileAccess.Write))
            {
                using (StreamWriter sw = new StreamWriter(fs))
                {
                    sw.WriteLine(DateTime.Now.ToString() + "   " + msg);
                }
            }
        }
        #endregion
    }
}

5、编译生成,安装windows服务至Windows系统。
完成开发后,对整各项目进行编译生成。在windows服务开发文件夹“\bin\Debug”下,就是我们需要安装的服务,建议把里面的所有文件拷贝至系统里的某个目录进行安装。
我是把整个个文件夹里的文件拷贝到c:\WindowService文件夹下。然后打开目录C:\Windows\Microsoft.NET\Framework64\v4.0.30319,拷贝里面的InstallUtil.exe文件至c:\WindowService文件夹下)。
注意:我的系统是windows10,64位系统,我的服务也将安装至64位系统下,所以我是进入C:\Windows\Microsoft.NET\Framework64\v4.0.30319目录拷贝InstallUtil.exe文件。各位安装的时候,根据你安装的目标系统,来觉得是拷贝哪个framework哪个版本,具体是64位的还是32位的也由你系统决定。
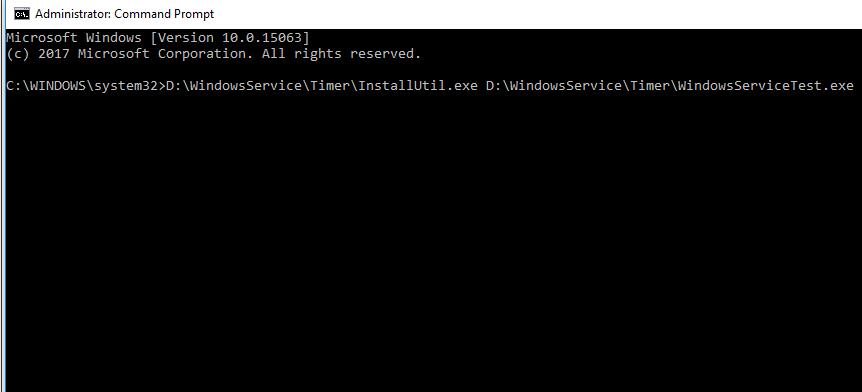
做好以上工作后就可以安装了,打开cmd就可执行安装了(一定要以管理员身份运行哟,要不然安装时会报“Windows服务安装异常:System.Security.SecurityException: 未找到源,但未能搜索某些或全部事件”)。
以下是安装命令、启动服务命令、停止服务命令、卸载服务命令:
安装命令:D:\WindowsService\Timer\InstallUtil.exe D:\WindowsService\Timer\WindowsServiceTest.exe
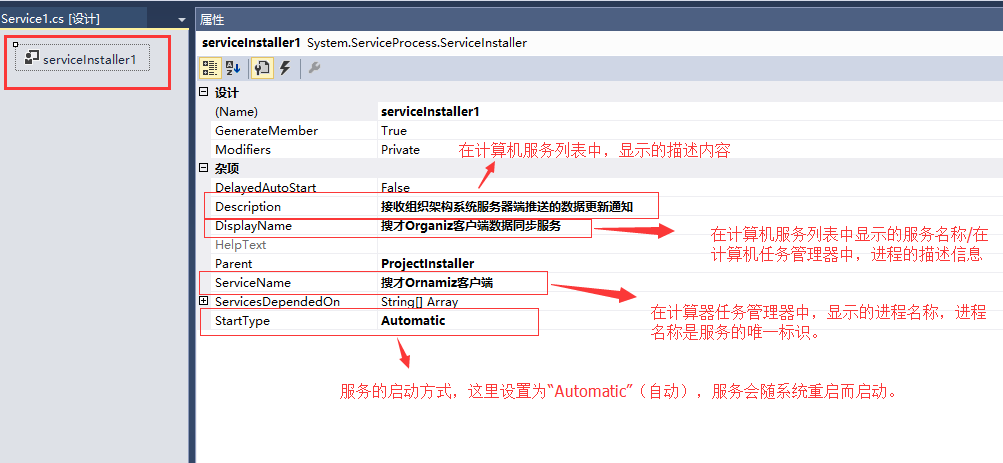
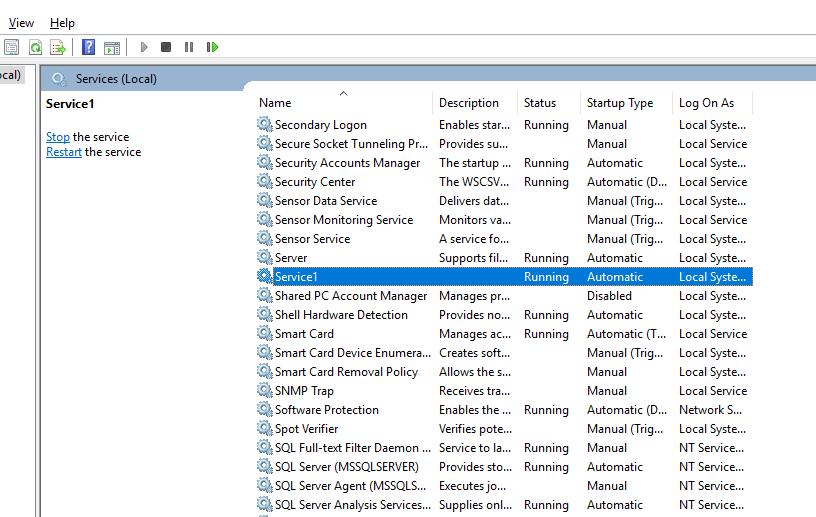
启动服务命令:net start 搜才Organiz客户端数据同步服务
关闭服务命令:net stop 搜才Organiz客户端数据同步服务
卸载服务命令:D:\WindowsService\Timer\InstallUtil.exe -u D:\WindowsService\Timer\WindowsServiceTest.exe
PS:
System.ComponentModel.Win32Exception: No mapping between account names and security IDs was done
解决方法:
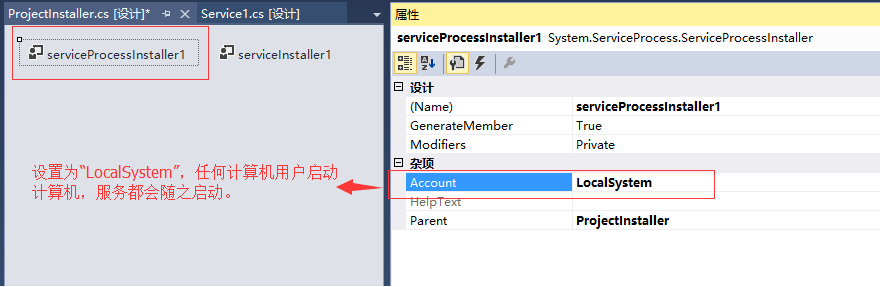
将serviceProcessInstaller1->Accout属性,设为:LocalSystem(默认是User)。
运行: Installuitl 程序名.exe ,安装成功。

 浙公网安备 33010602011771号